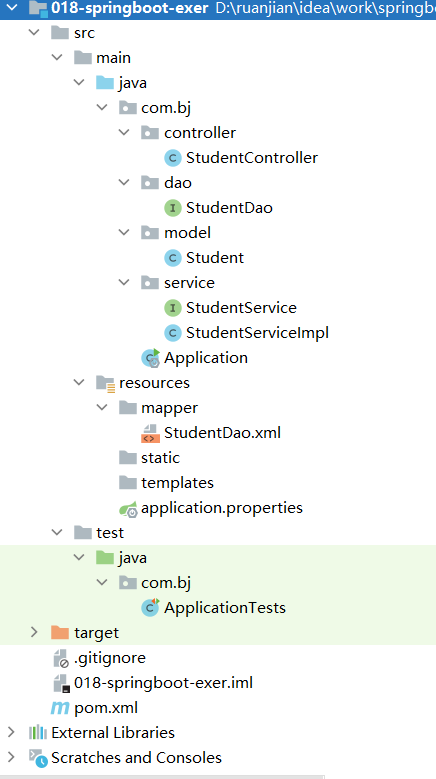
创建springboot项目超级详细

application.properties
#配置端口
server.port=8080

#配置连接数据库
spring.datasource.driver-class-name=com.mysql.cj.jdbc.Driver
spring.datasource.url=jdbc:mysql://localhost:3306/mysqldb
spring.datasource.username=root
spring.datasource.password=root

#指定mapper文件的位置
mybatis.mapper-locations=classpath:mapper/*.xml

#mybatis日志实现
mybatis.configuration.log-impl=org.apache.ibatis.logging.stdout.StdOutImpl
StudentController
@Controller
public class StudentController {


    @Resource
    private StudentService studentService;
    @RequestMapping("/student/query")
    @ResponseBody
    public String queryStudent(Integer id){


        Student student = studentService.queryStudent(id);
        return student.toString();

    }
}
service
public interface StudentService {


    Student queryStudent(Integer id);
}
@Service
public class StudentServiceImpl implements StudentService {


    @Resource
    StudentDao studentDao = null;
    @Override
    public Student queryStudent(Integer id) {


Student student 


 本文详述了创建SpringBoot项目的过程,包括配置application.properties,编写StudentController,设计service层,实现student模块,集成StudentDao及StudentDao.xml,管理pom.xml依赖,以及连接数据库的步骤。
 最低0.47元/天 解锁文章


 被折叠的 条评论
为什么被折叠?


