


转载自:http://blog.csdn.net/cai5/article/details/6565523。我优化了一下排版,增加了项目例子的下载。
本文讲的是一个S2SH框架的的人力资源管理小系统,包含最基本的增删改查(CRUD)功能,非常适合初学者学习。
项目的下载地址为:http://download.csdn.net/detail/stormwy/5807883
整个工程建完后的目录截图:
一、 准备工作
开发环境:tomcat5+jdk6+mysql5+eclipse:eclipse-jee-helios-SR1-win32.zip.
struts2+Spring2.0.6+Hibernate3.1。本示例通过对一个人力资源的系统,提供基本的增加、删除、修改、查询等功能。
lib包需要以下所示的这些包:
antlr-2.7.6.jar
commons-collections-3.2.jar
commons-dbcp.jar
commons-digester-2.0.jar
commons-fileupload-1.2.1.jar
commons-io-1.3.2.jar
commons-logging-1.0.4.jar
commons-pool.jar
dom4j-1.6.1.jar
freemarker-2.3.16.jar
hibernate3.jar
javassist-3.9.0.GA.jar
jta-1.1.jar
log4j-1.2.15.jar
mysql-connector-java-5.1.6-bin.jar(MySQL jar包)
ognl-3.0.jar
slf4j-api-1.5.8.jar
slf4j-log4j12-1.5.0.jar
spring.jar
struts2-core-2.2.1.jar
struts2-spring-plugin-2.2.1.jar
xwork-core-2.2.1.jar
二、建立数据库
create database stud ;
use stud ;
create table Employee(id int(11) not null auto_increment,name varchar(255) ,address varchar(255) ,phone varchar(255) ,primary key (id)) ;
三、建立数据化持久层
建立Hibernate逆向工程
1、建立实体类及books.hbm.xml映射文件。

Employee.java
package com.ex.model;

public class Employee {

	 private Long id ;
	 private String name ;
	 private String address ;
	 private String phone ;
	 public Long getId() {
	  return id;
	 }
	 public void setId(Long id) {
	  this.id = id;
	 }
	 public String getName() {
	  return name;
	 }
	 public void setName(String name) {
	  this.name = name;
	 }
	 public String getAddress() {
	  return address;
	 }
	 public void setAddress(String address) {
	  this.address = address;
	 }
	 public String getPhone() {
	  return phone;
	 }
	 public void setPhone(String phone) {
	  this.phone = phone;
	 }

	 public Employee(){

	 }

	 public Employee(Long id, String name, String address, String phone) {
	  super();
	  this.id = id;
	  this.name = name;
	  this.address = address;
	  this.phone = phone;
	 }
}
2、把实体类Employee的属性映射到Employee表,生成下面的 Employee.hbm.xml文件(com/ex/model/Employee.hbm.xml):
<?xml version="1.0" encoding="UTF-8"?>
<!DOCTYPE hibernate-mapping PUBLIC
        "-//Hibernate/Hibernate Mapping DTD 3.0//EN"
        "http://hibernate.sourceforge.net/hibernate-mapping-3.0.dtd">

<hibernate-mapping>

    <class name="com.ex.model.Employee" table="Employee" lazy="true">
     <id name="id" type="java.lang.Long" column="id">
      <generator class="native" />
     </id>
     <property name="name" type="java.lang.String">
      <column name="name" />
     </property>
  <property name="address" type="java.lang.String">
   <column name="address" />
  </property>
  <property name="phone" type="java.lang.String">
   <column name="phone" />
  </property>
    </class>
</hibernate-mapping>
四、建立DAO层
1、建立DAO的接口类: EmployeeDao
package com.ex.dao;

import java.util.List;

import com.ex.model.Employee;

public interface EmployeeDao {

 public void add(Employee employee) ;//添加新雇员
 public Employee getEmployee(Long id) ;//根据雇员ID得到雇员信息
 public List< Employee> getEmployees() ;//获取所有雇员信息
 public void delete(Long id ) ;//根据雇员ID,删除雇员
 public void saveOrUpdate(Employee employee) ;//修改或更新雇员信息
 public List< Employee> getEmployee(String name, String phone) ;//判断是否合法雇员

}
2、实现此接口的类文件, EmployeeDaoImpl
package com.ex.dao.impl;

import java.util.List;
import com.ex.dao.EmployeeDao;
import com.ex.model.Employee;
import org.hibernate.SessionFactory;
import org.springframework.orm.hibernate3.support.HibernateDaoSupport;

public class EmployeeDaoImpl extends HibernateDaoSupport implements EmployeeDao {

	private SessionFactory sessionFactory;

	public void setFactory(SessionFactory sessionFactory) {

		this.sessionFactory = sessionFactory;
	}

	public SessionFactory getFactory() {

		return this.sessionFactory;
	}

	public void add(Employee employee){

		this.getHibernateTemplate().save(employee);
	}

	public Employee getEmployee(Long id) {

		return (Employee) this.getHibernateTemplate().get(Employee.class, id);
	}

	@SuppressWarnings("unchecked")
	public List<Employee> getEmployees() {

		return this.getHibernateTemplate().find("from Employee order by id");
	}

	public void delete(Long id) {

		this.getHibernateTemplate().delete(this.getEmployee(id));
	}

	public void saveOrUpdate(Employee employee) {

		this.getHibernateTemplate().saveOrUpdate(employee);
	}

	@SuppressWarnings("unchecked")
	public List<Employee> getEmployee(String name, String phone) {

		Object values[] = { name, phone };
		System.out.println("查询的结果是:" + name + "   " + phone);
		return this.getHibernateTemplate().find(
				"from Employee e where e.name=? and e.phone=? order by id",
				values);

	}

}
五、 建立业务逻辑层
注明:在业务逻辑层需要认真思考每个业务逻辑所能用到的持久层对象和DAO。DAO层之上是业务逻辑层,DAO类可以有很多个,但业务逻辑类应该只有一个,可以在业务逻辑类中调用各个DAO类进行操作。
1、创建服务接口类 EmployeeManager
package com.ex.service;

import java.util.List;

import com.ex.model.Employee;

public interface EmployeeManager {

 public void addEmployee(Employee employee) ;
 public List< Employee> listEmployee() ;
 public void deleteEmployee(Long id) ;
 public void saveOrUpdate(Employee employee) ;
 public Employee getEmployee(Long id) ;
 public Employee getEmployee(String name, String phone) ;


}
2、实现此接口类: EmployeeManagerImpl:
package com.ex.service.impl;

import java.util.List;
import com.ex.dao.EmployeeDao;
import com.ex.model.Employee;
import com.ex.service.EmployeeManager;

public class EmployeeManagerImpl implements EmployeeManager {

 private EmployeeDao employeeDao ;

 public void setEmployeeDao(EmployeeDao employeeDao){

  this.employeeDao = employeeDao ;
 }
 public EmployeeDao getEmployeeDao(){

  return this.employeeDao ;
 }
 public void addEmployee(Employee employee) {

  this.employeeDao.add(employee) ;

 }

 public List<Employee> listEmployee() {

  return this.employeeDao.getEmployees() ;

 }

 public void deleteEmployee(Long id) {

  this.employeeDao.delete(id) ;

 }

 public void saveOrUpdate(Employee employee) {

  this.employeeDao.saveOrUpdate(employee) ;
 }

 public Employee getEmployee(Long id) {

  return  this.employeeDao.getEmployee(id) ;
 }

 public Employee getEmployee(String name, String phone) {

  List< Employee> list = this.employeeDao.getEmployee(name, phone) ;
  if (list != null && list.size() >0){
   return list.get( 0 ) ;
  }else{
   return null ;
  }
 }

}
六、 创建Action类: EmployeeAction.java:
package com.ex.action;

import java.util.List;

import com.ex.model.Employee;
import com.ex.service.EmployeeManager;
import com.opensymphony.xwork2.ActionSupport;

public class EmployeeAction extends ActionSupport {

 private static final long serialVersionUID = 1L;

 private EmployeeManager employeeManager;
 private List<Employee> employees;
 private Employee employee;
 private Long id;
 private Long[] ids;
 private String name;
 private String phone;

 public EmployeeManager getEmployeeManager() {
  return employeeManager;
 }

 public void setEmployeeManager(EmployeeManager employeeManager) {
  this.employeeManager = employeeManager;
 }

 public List<Employee> getEmployees() {
  return employees;
 }

 public void setEmployees(List<Employee> employees) {
  this.employees = employees;
 }

 public Employee getEmployee() {
  return employee;
 }

 public void setEmployee(Employee employee) {
  this.employee = employee;
 }

 public Long getId() {
  return id;
 }

 public void setId(Long id) {
  this.id = id;
 }

 public Long[] getIds() {
  return ids;
 }

 public void setIds(Long[] ids) {
  this.ids = ids;
 }

 public String getName() {
  return name;
 }

 public void setName(String name) {
  this.name = name;
 }

 public String getPhone() {
  return phone;
 }

 public void setPhone(String phone) {
  this.phone = phone;
 }

 // action
 public String add() {
  if (this.employeeManager.getEmployee(employee.getName(),
    employee.getPhone()) != null) {
   return INPUT;
  } else {
   this.employeeManager.addEmployee(employee);
   return SUCCESS;
  }

 }

 public String list() {
  this.employees = this.employeeManager.listEmployee();
  if (this.employees.size() > 0) {
   return SUCCESS;
  } else {
   return INPUT;
  }
 }

 public String delete() {
  if (null != this.id) {
   this.employeeManager.deleteEmployee(this.id);
  } else {
   if (ids.length > 0) {
    for (Long id : ids) {
     this.employeeManager.deleteEmployee(id);
    }
   }
  }
  if (this.employeeManager.listEmployee().size() > 0) {
   return SUCCESS;
  } else {
   return INPUT;
  }

 }

 public String saveOrUpdate() {

  this.employeeManager.saveOrUpdate(employee);
  return SUCCESS;

 }

 public String edit() {

  this.employee = this.employeeManager.getEmployee(id);
  return SUCCESS;

 }

 public String save() {
  Long id = this.employee.getId();
  employee = this.employeeManager.getEmployee(id);
  return SUCCESS;
 }

 public String update() {

  Long id = this.employee.getId();
  this.employeeManager.saveOrUpdate(employee);
  return SUCCESS;
 }

 public String login() {
  Employee emp = this.employeeManager.getEmployee(name, phone);
  List list = this.employeeManager.listEmployee();
  if (null != emp) {
   return SUCCESS;
  } else {
   if (list.size() > 0) {
    return INPUT;
   } else {
    return ERROR;
   }
  }

 }
}
七、 Web页面
1、 主页面:index.jsp,其代码如下
<%@ page language="java" import="java.util.*" pageEncoding="utf-8"%>
<%
String path = request.getContextPath();
String basePath = request.getScheme()+"://"+request.getServerName()+":"+request.getServerPort()+path+"/";
%>

<!DOCTYPE HTML PUBLIC "-//W3C//DTD HTML 4.01 Transitional//EN">
<html>
  <head>
    <base href="<%=basePath%>">

    <title>人力资源管理系统</title>
	<meta http-equiv="pragma" content="no-cache">
	<meta http-equiv="cache-control" content="no-cache">
	<meta http-equiv="expires" content="0">
	<meta http-equiv="keywords" content="keyword1,keyword2,keyword3">
	<meta http-equiv="description" content="This is my page">
	<!--
	<link rel="stylesheet" type="text/css" href="styles.css">
	-->
  </head>

  <body>
 <center>
 <h1>
  <font color="blue">
   人力资源管理系统
  </font>
 </h1>
 <a href="add.jsp">雇员登记</a>
 <a href="list.action">显示雇员列表</a>
 </center>
  </body>
</html>
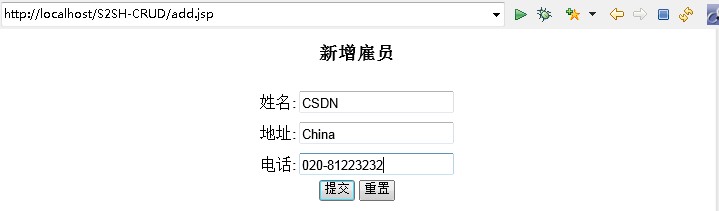
2、增加页面:add.jsp
<%@ page language="java" import="java.util.*" pageEncoding="utf-8"%>
<%@taglib prefix="s" uri="/struts-tags" %>
<%
String path = request.getContextPath();
String basePath = request.getScheme()+"://"+request.getServerName()+":"+request.getServerPort()+path+"/";
%>


<!DOCTYPE HTML PUBLIC "-//W3C//DTD HTML 4.01 Transitional//EN">
<html>
  <head>
    <base href="<%=basePath%>">

    <title>添加雇员</title>

	<meta http-equiv="pragma" content="no-cache">
	<meta http-equiv="cache-control" content="no-cache">
	<meta http-equiv="expires" content="0">
	<meta http-equiv="keywords" content="keyword1,keyword2,keyword3">
	<meta http-equiv="description" content="This is my page">
	<!--
	<link rel="stylesheet" type="text/css" href="styles.css">
	-->

  </head>

  <body>
	<center>
  <h3>新增雇员</h3>

  <s:form action="add">
   <table>
    <tr>
     <td>
      <s:textfield name="employee.name" label="姓名"/>
     </td>
    </tr>
    <tr>
     <td>
      <s:textfield name="employee.address" label="地址"/>
     </td>
    </tr>
    <tr>
     <td>
      <s:textfield name="employee.phone" label="电话"/>
     </td>
    </tr>
    <tr>
     <td align="center" colspan="2">
      <input type="submit" value="提交"/>
      <input type="reset" value="重置"/>
     </td>
    </tr>
   </table>
  </s:form>
 </center>
  </body>
</html>
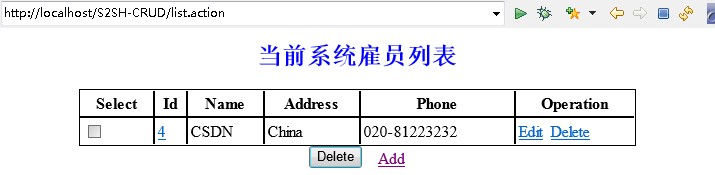
3、列表页面:list.jsp
<%@ page language="java" import="java.util.*" pageEncoding="utf-8"%>
<%@taglib prefix="s" uri="/struts-tags" %>
<%
String path = request.getContextPath();
String basePath = request.getScheme()+"://"+request.getServerName()+":"+request.getServerPort()+path+"/";
%>

<!DOCTYPE HTML PUBLIC "-//W3C//DTD HTML 4.01 Transitional//EN">
<html>
<head>
<meta http-equiv="Content-Type" content="text/html; charset=gbk">
<title>雇员列表</title>
<style type="text/css">
 table{
  border: 1px solid black ;
  border-collapse: collapse;
 }
 table thead tr th{
  border: 1px solid black ;
  padding: 3px ;
  backgroud-color: #cccddd;
 }
 table tbody tr td{
  border: 1px solid black ;
  padding: 3px ;
 }
</style>
</head>
<body>
<center>
 <h2>
  <font color="blue">当前系统雇员列表</font>
 </h2>
 <s:form action="delete" theme="simple">
  <table cellspacing="1" width="80%">
   <thead>
    <tr>
     <th>Select</th>
     <th>Id</th>
     <th>Name</th>
     <th>Address</th>
     <th>Phone</th>
     <th>Operation</th>
    </tr>
   </thead>
   <tbody>
    <s:iterator value="employees">
     <tr>
      <td>
       <input type="checkbox" name="ids" value='<s:property value="id" />' />
      </td>
      <td>
       <a href='<s:url action="edit"><s:param  name="id" value="id" /></s:url>'><s:property value="id" /></a>
      </td>
      <td><s:property value="name" /></td>
      <td><s:property value="address" /></td>
      <td><s:property value="phone" /></td>
      <td>
       <a href='<s:url action="edit"><s:param name="id" value="id" /></s:url>'>Edit</a>
       <a href='<s:url action="delete"><s:param name="id" value="id" /></s:url>'>Delete</a>
      </td>
     </tr>
    </s:iterator>
   </tbody>
  </table>
  <s:submit value="Delete" />

  <a href="add.jsp">Add</a>
 </s:form>
</center>
</body>
</html>
注明:
(1)、<s:property> :得到'value'的属性,如果value没提供,默认为堆栈顶端的元素。其相关的参数及使用如下表所示:
名称 必需 默认 类型 描述
default 否 String 如果属性是null则显示的default值
escape 否 true Booelean 是否escape HTML
value 否 栈顶 Object 要显示的值
id 否 Object/String 用来标识元素的id。在UI和表单中为HTML的id属性
(2)、<s:Iterator>:用于遍历集合(java.util.Collection)或枚举值(java.util.Iterator)。其相关的参数及使用如下表所示:
名称 必需 默认 类型 描述
status 否 String 如果设置此参数,一个IteratorStatus的实例将会压入每个遍历的堆栈
value 否 Object/String 要遍历的可枚举的(iteratable)数据源,或者将放入新列表(List)的对象
id 否 Object/String 用来标识元素的id。在UI和表单中为HTML的id属性
(3)、<s:param>:为其他标签提供参数,比如include标签和bean标签. 参数的name属性是可选的,如果提供,会调用Component的方法addParameter(String, Object), 如果不提供,则外层嵌套标签必须实现UnnamedParametric接口(如TextTag)。 value的提供有两种方式,通过value属性或者标签中间的text,不同之处我们看一下例子:
<param name="color">blue</param><!-- (A) -->
<param name="color" value="blue"/><!-- (B) -->
(A)参数值会以String的格式放入statck.
(B)该值会以java.lang.Object的格式放入statck.
4、 修改页面:update.jsp
<%@ page language="java" contentType="text/html; charset=gbk"
    pageEncoding="gbk"%>
<%@taglib prefix="s" uri="/struts-tags" %>
<!DOCTYPE html PUBLIC "-//W3C//DTD HTML 4.01 Transitional//EN" "http://www.w3.org/TR/html4/loose.dtd">
<html>
<head>
<meta http-equiv="Content-Type" content="text/html; charset=gbk">
<title>修改雇员信息</title>
</head>
<body>
 <center>
 <h3>
  <font color="blue">修改雇员信息</font>
 </h3>
 <s:form action="update" method="POST">
  <s:hidden name="employee.id" />
  <table>

   <tr><td><s:textfield name="employee.name" label="姓名" /></td></tr>
   <tr><td><s:textfield name="employee.address" label="地址" /></td></tr>
   <tr><td><s:textfield name="employee.phone" label="电话" /></td></tr>
   <tr>
    <td align="center" colspan="2">
     <s:submit value="提交" />
     <s:reset value="重置"/>
                </td>
            </tr>
  </table>

  </s:form>
 </center>
</body>
</html>
5、 登陆页面:login.jsp
<%@ page language="java" contentType="text/html; charset=gbk"
    pageEncoding="gbk"%>
<%@taglib prefix="s" uri="/struts-tags" %>
<!DOCTYPE html PUBLIC "-//W3C//DTD HTML 4.01 Transitional//EN" "http://www.w3.org/TR/html4/loose.dtd">
<html>
<head>
<meta http-equiv="Content-Type" content="text/html; charset=gbk">
<title>雇员登陆</title>
</head>
<body>

 <s:form action="login">
  <table>
   <tr>
    <td><s:textfield name="name" label="姓名" /></td>
   </tr>
   <tr>
    <td><s:textfield name="phone" label="电话" /></td>
   </tr>
   <tr>
    <td align="center" colspan="2">
     <s:submit value="登陆" />
     <s:reset value="重置"/>
    </td>
   </tr>
  </table>
 </s:form>

</body>
</html>
6 、 出错页面 :error.jsp
<%@ page language="java" contentType="text/html; charset=gbk"
    pageEncoding="gbk"%>
<!DOCTYPE html PUBLIC "-//W3C//DTD HTML 4.01 Transitional//EN" "http://www.w3.org/TR/html4/loose.dtd">
<html>
<head>
<meta http-equiv="Content-Type" content="text/html; charset=gbk">
<title>错误页面</title>
</head>
<body>

 <h3>
  <font color="red">错误显示页面...</font>
 </h3>
 <br />
 <br />
 系统将在5s后返回登录界面
 <%
  response.setHeader("Refresh", "5,URL=/ssh_demo4/login.jsp") ;
 %>
 <br />
 <br />
 <a href="/ssh_demo4/add.jsp">添加</a>
</body>
</html>
八、配置信息:
1、struts.xml
<?xml version="1.0" encoding="UTF-8"?>
<!DOCTYPE struts PUBLIC
    "-//Apache Software Foundation//DTD Struts Configuration 2.0//EN"
    "http://struts.apache.org/dtds/struts-2.0.dtd">
<struts>
 <package name="default" extends="struts-default">

	<action name="add" class="addBean" method="add">
		<result type="redirect">list.action</result>
		<result name="input">/add.jsp</result>
	</action>

	<action name="update" class="updateBean" method="update">
		<result type="redirect">list.action</result>
		<result name="input">/update.jsp</result>
		<result name="error">/error.jsp</result>
	</action>
	<action name="delete" class="deleteBean" method="delete">
		<result type="redirect">list.action</result>
		<result name="input">/add.jsp</result>
	</action>
	<action name="edit" class="editBean" method="edit">
		<result>/update.jsp</result>
	</action>
	<action name="list" class="listBean" method="list">
		<result name="success">/list.jsp</result>
		<result name="input">/add.jsp</result>
	</action>
	<action name="login" class="loginBean" method="login">
		<result name="success">/add.jsp</result>
		<result name="input">/login.jsp</result>
		<result name="error">/error.jsp</result>
	</action>
</package>
</struts>
2、 applicationContext.xml(/WEB-INF/applicationContext.xml)
<?xml version="1.0" encoding="UTF-8"?>
<!DOCTYPE beans PUBLIC "-//SPRING//DTD BEAN 2.0//EN" "http://www.springframework.org/dtd/spring-beans-2.0.dtd">

<beans>
   <bean id="dataSource" class="org.apache.commons.dbcp.BasicDataSource">
     <property name="driverClassName" value="org.gjt.mm.mysql.Driver" />
     <property name="url" value="jdbc:mysql://localhost:3306/test"/>
     <property name="username" value="root" />
     <property name="password" value="root" />
   </bean>
   <bean id="sessionFactory" class="org.springframework.orm.hibernate3.LocalSessionFactoryBean">
     <property name="dataSource" ref="dataSource" />
     <property name="hibernateProperties">
      <props>
       <prop key="hibernate.dialect">org.hibernate.dialect.MySQLDialect</prop>
       <prop key="hibernate.show_sql">true</prop>
      </props>
     </property>
     <property name="mappingResources">
      <list>
       <value>com/ex/model/Employee.hbm.xml</value>
      </list>
     </property>
   </bean>

 <bean id="employeeDao" class="com.ex.dao.impl.EmployeeDaoImpl">
  <property name="sessionFactory" ref="sessionFactory" />
 </bean>

 <bean id="employeeManager" class="com.ex.service.impl.EmployeeManagerImpl">
  <property name="employeeDao" ref="employeeDao" />
 </bean>

 <bean id="addBean" class="com.ex.action.EmployeeAction" scope="prototype">
  <property name="employeeManager" ref="employeeManager" />
 </bean>

 <bean id="editBean" class="com.ex.action.EmployeeAction" scope="prototype">
  <property name="employeeManager" ref="employeeManager" />
 </bean>

 <bean id="updateBean" class="com.ex.action.EmployeeAction" scope="prototype">
  <property name="employeeManager" ref="employeeManager" />
 </bean>

 <bean id="deleteBean" class="com.ex.action.EmployeeAction" scope="prototype">
  <property name="employeeManager" ref="employeeManager" />
 </bean>

 <bean id="saveOrUpdateBean" class="com.ex.action.EmployeeAction" scope="prototype">
  <property name="employeeManager" ref="employeeManager" />
 </bean>

 <bean id="listBean" class="com.ex.action.EmployeeAction" scope="prototype">
  <property name="employeeManager" ref="employeeManager" />
 </bean>

 <bean id="loginBean" class="com.ex.action.EmployeeAction" scope="prototype">
  <property name="employeeManager" ref="employeeManager" />
 </bean>

</beans>
3、web.xml
<?xml version="1.0" encoding="UTF-8"?>
<web-app version="2.4" xmlns="http://java.sun.com/xml/ns/j2ee"
	xmlns:xsi="http://www.w3.org/2001/XMLSchema-instance"
	xsi:schemaLocation="http://java.sun.com/xml/ns/j2ee
	http://java.sun.com/xml/ns/j2ee/web-app_2_4.xsd">
	<display-name>ssh_demo4</display-name>
	<welcome-file-list>
		<welcome-file>index.jsp</welcome-file>
	</welcome-file-list>
	<filter>
		<filter-name>struts2</filter-name>
		<filter-class>
			org.apache.struts2.dispatcher.ng.filter.StrutsPrepareAndExecuteFilter
		</filter-class>
	</filter>

	<filter-mapping>
		<filter-name>struts2</filter-name>
		<url-pattern>/*</url-pattern>
	</filter-mapping>
	<listener>
		<listener-class>
			org.springframework.web.context.ContextLoaderListener
		</listener-class>
	</listener>
</web-app>4、log4j.properties(src/log4j.properties)
log4j.rootLogger=info,A1
log4j.appender.A1=org.apache.log4j.DailyRollingFileAppender
log4j.appender.A1.Append=true
log4j.appender.A1.File=D/:/log4j.log
log4j.appender.A1.DatePattern = '.'yyyy-MM-dd'.log'
log4j.appender.A1.layout=org.apache.log4j.PatternLayout
log4j.appender.A1.layout.ConversionPattern=[%-5p] %d{yyyy-MM-dd HH/:mm/:ss} Method/:  %l%n%m%n
最后是项目运行效果图:

====================================================================================================================
===========================================================================================================


 3611
3611

 被折叠的 条评论
为什么被折叠?
被折叠的 条评论
为什么被折叠?
 到【灌水乐园】发言


