


视频课程地址:https://www.bilibili.com/video/av59056478
资金管理系统带权限(node/element/vue)
Node接口搭建
数据信息接口
在上一篇的基础上,增加一些数据请求接口
在models下新建一个Profile.js文件创建一个新的数据模型
Profile.js
const mongoose = require("mongoose");
const Schema = mongoose.Schema;

const ProfileSchema = new Schema({
    type:{type:String},
    describe:{type:String},
    income:{type:String,required:true},
    expend:{type:String,required:true},
    cash:{type:String,required:true},
    remark:{type:String},
    date:{type:Date,default:Date.now}
});
module.exports = Profile = mongoose.model('profile', ProfileSchema);
在server.js中增加profile的配置:
const users = require("./routes/api/users.js");
const profiles = require("./routes/api/profiles.js");
......
// 使用routes
app.use("/api/users", users);
app.use("/api/profiles", profiles);
在routes/api文件夹中新建profiles.js文件,用于编写Profile相关的接口,引入一些依赖,然然后写一个测试接口:
const express = require("express");
const router = express.Router();
const passport = require("passport");
const Profile = require("../../models/Profile.js");
// @route GET api/profiles/test
// @desc 返回请求的json数据
// @access public接口,如果要返回token的话则是私有接口
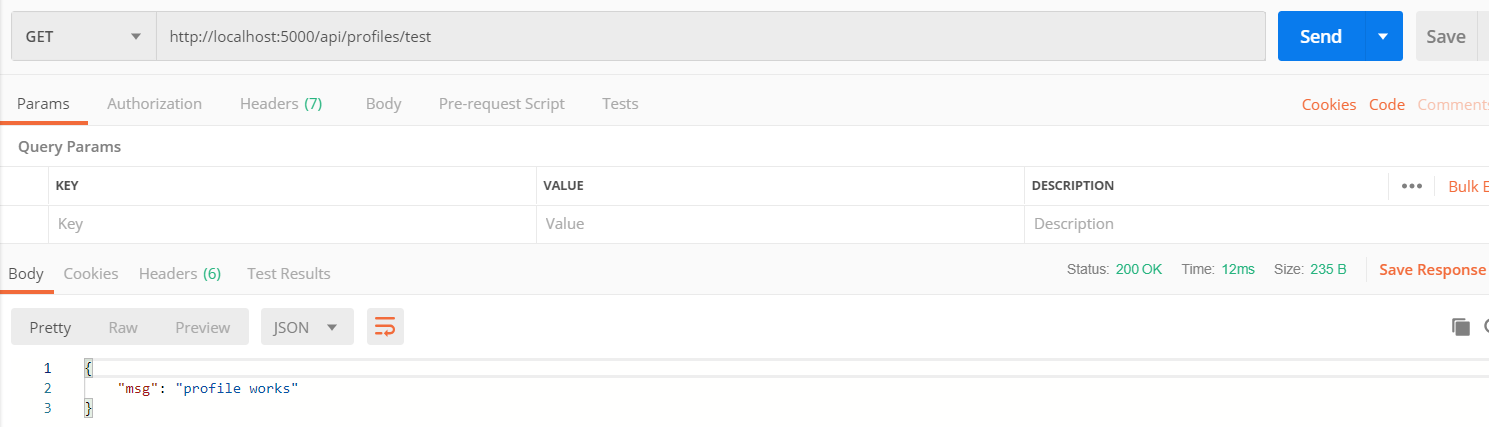
router.get('/test', (req, res)=>{
res.json({msg:'profile works'})
});
module.exports = router;使用postman测试
添加信息接口
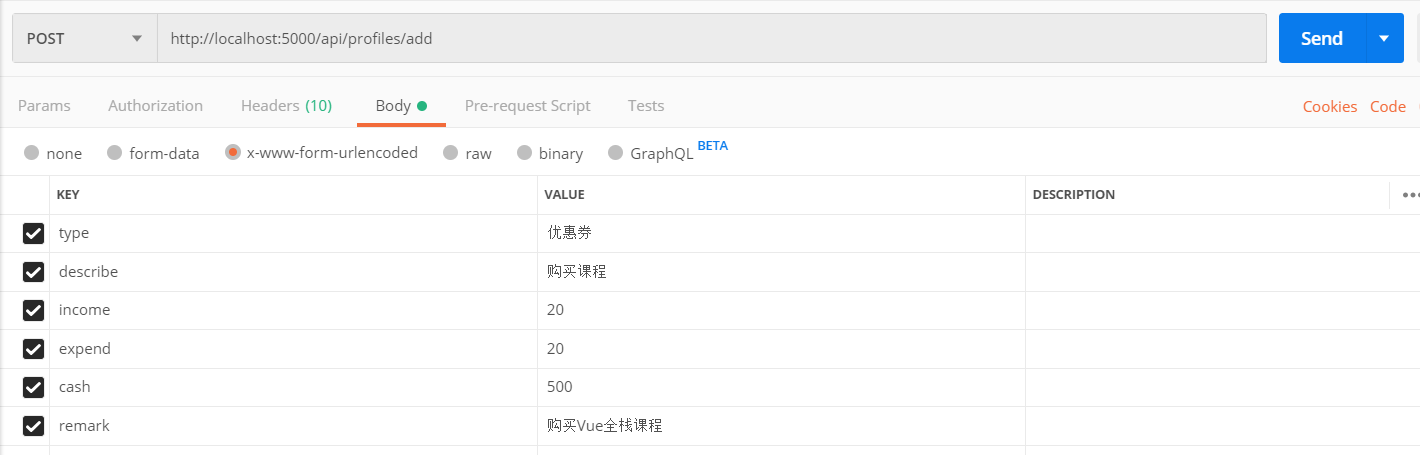
// @route POST api/profiles/add
// @desc 创建信息接口
// @access 私有接口
router.post('/add', passport.authenticate("jwt", {session:false}),
(req, res)=>{
const profileFields = {};
if(req.body.type){ profileFields.type = req.body.type; }
if(req.body.describe){ profileFields.describe = req.body.describe; }
if(req.body.income){ profileFields.income = req.body.income; }
if(req.body.expend){ profileFields.expend = req.body.expend; }
if(req.body.cash){ profileFields.cash = req.body.cash; }
if(req.body.remark){ profileFields.remark = req.body.remark; }
new Profile(profileFields).save().then(profile=>{
res.json(profile);
});
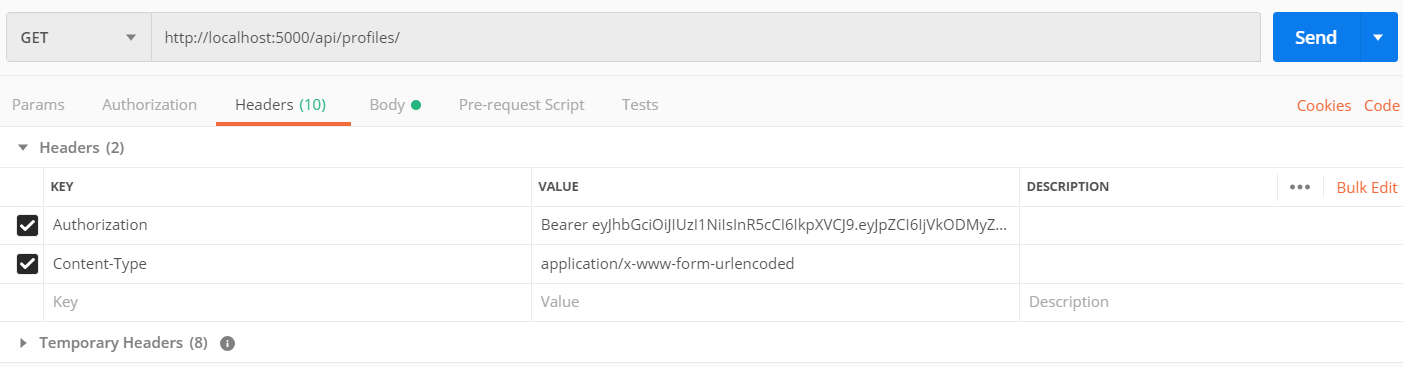
});先使用有效账户登录后复制返回的token填入headers中,然后在body中填入相关参数
在数据库中可以看到添加成功的信息:

获取所有信息接口
// @route  GET  api/profiles
// @desc   获取所有信息
// @access 公有接口
router.get('/', passport.authenticate("jwt", {session:false}),
  (req, res)=>{
      Profile.find().then(profile=>{
         if(!profile){
             return res.status(404).json("没有任何内容");
         }
         res.json(profile);
      }).catch(err => res.status(404).json(err));
});
测试:
获取单个信息接口
// @route  GET  api/profiles/:id
// @desc   获取单个信息
// @access 公有接口
router.get('/:id', passport.authenticate("jwt", {session:false}),
  (req, res)=>{
      Profile.findOne({_id:req.params.id}).then(profile=>{
         if(!profile){
            return res.status(404).json("没有任何内容");
         }
         res.json(profile);
      }).catch(err => res.status(404).json(err));
});
编辑信息接口
// @route  POST  api/profiles/edit
// @desc   编辑信息接口
// @access 私有接口
router.post('/edit/:id', passport.authenticate("jwt", {session:false}),
 (req, res)=>{
    const profileFields = {};
    if(req.body.type){ profileFields.type = req.body.type; }
    if(req.body.describe){ profileFields.describe = req.body.describe; }
    if(req.body.income){ profileFields.income = req.body.income; }
    if(req.body.expend){ profileFields.expend = req.body.expend; }
    if(req.body.cash){ profileFields.cash = req.body.cash; }
    if(req.body.remark){ profileFields.remark = req.body.remark; }
    Profile.findOneAndUpdate({_id:req.params.id},
                             {$set:profileFields},{new:true})
           .then(profile=>res.json(profile));
});
删除信息接口
// @route  delete  api/profiles/delete
// @desc   删除信息接口
// @access 私有接口
router.delete('/delete/:id', passport.authenticate("jwt", {session:false}),
   (req, res)=>{
       Profile.findOneAndRemove({_id:req.params.id})
              .then(profile=>{
                  profile.save().then(profile => res.json(profile));
            }).catch(err => res.status(404).json("删除失败"));
});


 342
342


 被折叠的 条评论
为什么被折叠?
被折叠的 条评论
为什么被折叠?
 到【灌水乐园】发言


