


BottomNavigationBar这个控件的使用之前已经写过,这里不再赘述,详情请参考BottomNavigationBar的使用。
下面直接上代码:
初始化及相关设置:
mBottomNavigationBar = (BottomNavigationBar) view.findViewById(R.id.bottom_navigation_bar);
mBottomNavigationBar.setBackgroundStyle(BottomNavigationBar.BACKGROUND_STYLE_STATIC);
mBottomNavigationBar.setMode(BottomNavigationBar.MODE_FIXED);
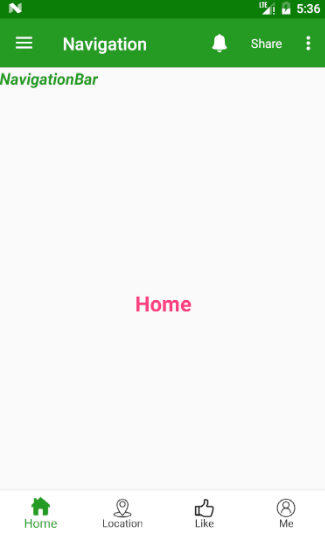
mBottomNavigationBar.addItem(new BottomNavigationItem(R.drawable.home_fill, getString(R.string.item_home)).setInactiveIconResource(R.drawable.home).setActiveColorResource(R.color.colorPrimary).setInActiveColorResource(R.color.black_1))
.addItem(new BottomNavigationItem(R.drawable.location_fill, getString(R.string.item_location)).setInactiveIconResource(R.drawable.location).setActiveColorResource(R.color.colorPrimary).setInActiveColorResource(R.color.black_1))
.addItem(new BottomNavigationItem(R.drawable.like_fill, getString(R.string.item_like)).setInactiveIconResource(R.drawable.like).setActiveColorResource(R.color.colorPrimary).setInActiveColorResource(R.color.black_1))
.addItem(new BottomNavigationItem(R.drawable.person_fill, getString(R.string.item_person)).setInactiveIconResource(R.drawable.person).setActiveColorResource(R.color.colorPrimary).setInActiveColorResource(R.color.black_1))
.setFirstSelectedPosition(0)
.initialise();
mBottomNavigationBar.setTabSelectedListener(this);
setDefaultFragment();Tab的切换:
    @Override
    public void onTabSelected(int position) {
        FragmentTransaction beginTransaction = getFragmentManager().beginTransaction();

        switch (position) {
            case 0:
                if (mHomeFragment == null) {
                    mHomeFragment = HomeFragment.newInstance(getString(R.string.item_home));
                }
                beginTransaction.replace(R.id.sub_content, mHomeFragment);
                break;
            case 1:
                if (mLocationFragment == null) {
                    mLocationFragment = LocationFragment.newInstance(getString(R.string.item_location));
                }
                beginTransaction.replace(R.id.sub_content, mLocationFragment);
                break;
            case 2:
                if (mLikeFragment == null) {
                    mLikeFragment = LikeFragment.newInstance(getString(R.string.item_like));
                }
                beginTransaction.replace(R.id.sub_content, mLikeFragment);
                break;
            case 3:
                if (mPersonFragment == null) {
                    mPersonFragment = PersonFragment.newInstance(getString(R.string.item_person));
                }
                beginTransaction.replace(R.id.sub_content, mPersonFragment);
        }
        beginTransaction.commit();

    }
说明:这几篇文章没有过多的文字叙述,因为这些东西也不是很难,而且都是常用的,相信很多人都了如指掌了,多说亦是废话,直接上代码看的反而更清楚。


 被折叠的 条评论
为什么被折叠?
被折叠的 条评论
为什么被折叠?
 到【灌水乐园】发言


