


4.4.7 权限校验扩展
4.4.7.1 @PreAuthorize注解中的其他方法
hasAuthority:检查调用者是否具有指定的权限;
 @RequestMapping("/hello")
 @PreAuthorize("hasAuthority('system:user:list')")
 public String hello(){

     return "hello Spring Security! !";
 }
hasAnyAuthority:检查调用者是否具有指定的任何一个权限;
 @RequestMapping("/ok")
 @PreAuthorize("hasAnyAuthority('system:user:list,system:role:list')")
 public String ok(){

     return "ok Spring Security! !";
 }
hasRole:检查调用者是否有指定的角色;
**hasRole要求有对应的角色才可以访问,但是它内部会把我们传入的参数拼接上 **ROLE_ 后再去比较。所以这种情况下要用户对应的权限也要有 ROLE_ 这个前缀才可以。
 @RequestMapping("/level1")
 @PreAuthorize("hasRole('admin')")
 public String level1(){
     return "level1 page";
 }
hasAnyRole:检查调用者是否具有指定的任何一个角色;
 @RequestMapping("/level2")
 @PreAuthorize("hasAnyRole('admin','common')")
 public String level2(){
     return "level2 page";
 }
4.4.7.2 权限校验源码分析
- 详见视频
4.4.7.3 自定义权限校验
我们也可以定义自己的权限校验方法,在@PreAuthorize注解中使用我们的方法。
 /**
  * 自定义权限校验方法
  * @author spikeCong
  * @date 2023/4/27
  **/
 @Component("my_ex")
 public class MyExpression {

     /**
      * 自定义 hasAuthority
      * @param authority 接口指定的访问权限限制
      * @return: boolean
      */
     public boolean hasAuthority(String authority){
         //获取当前用户的权限
         Authentication authentication = SecurityContextHolder.getContext().getAuthentication();
         LoginUser loginUser = (LoginUser) authentication.getPrincipal();
         List<String> permissions = loginUser.getPermissions();

         //判断集合中是否有authority
         return permissions.contains(authority);
     }
 }
使用SPEL表达式,引入自定义的权限校验
SPEL(Spring Expression Language)是 Spring 框架提供的一种表达式语言,用于在 Spring 应用程序中进行编程和配置时使用。
Spring Security 中的权限表达式:可以使用 SPEL 表达式定义在授权过程中使用的逻辑表达式
 @RequestMapping("/ok")
 @PreAuthorize("@my_ex.hasAuthority('system:role:list')")
 public String ok(){

     return "ok";
 }
4.4.7.4 基于配置的权限控制
- 在security配置类中,通过配置的方式对资源进行权限控制
 @RequestMapping("/yes")
 public String yes(){
     return "yes";
 }
    @Override
     protected void configure(HttpSecurity http) throws Exception {

         //关闭csrf
         http.csrf().disable();
         //允许跨域
         http.cors();

         http    //不会创建会话,每个请求都将被视为独立的请求。
                 .sessionManagement().sessionCreationPolicy(SessionCreationPolicy.STATELESS)
                 .and()
                 //定义请求授权规则
                 .authorizeRequests()
                 // 对于登录接口 允许匿名访问
                 .antMatchers("/user/login").anonymous()
                 //配置形式的权限控制
                 .antMatchers("/yes").hasAuthority("system/menu/index")
                 // 除上面外的所有请求全部需要鉴权认证
                 .anyRequest().authenticated();

         //将自定义认证过滤器,添加到过滤器链中
         http.addFilterBefore(jwtAuthenticationTokenFilter, UsernamePasswordAuthenticationFilter.class);

         //配置异常处理器
         http.exceptionHandling()
                 //配置认证失败处理器
                 .authenticationEntryPoint(authenticationEntryPoint)
                 //配置授权失败处理器
                 .accessDeniedHandler(accessDeniedHandler);
     }
4.4.7.5 角色加权限校验方式解析
(1) Role 和 Authority 的区别
用户拥有的权限,有以下两种表示
 roles("admin","common","test")
 authorities("system:user:list","system:role:list","system:menu:list");
给资源授予权限(角色或权限)
 @PreAuthorize("hasAuthority('system:user:list')")
 @PreAuthorize("hasAnyAuthority('system:user:list,system:role:list')")
 @PreAuthorize("hasRole('admin')")
 @PreAuthorize("hasAnyRole('admin','common')")
用户权限的保存方式
-
roles("admin","common","test"),增加”ROLE“前缀存放:- 【“ROLE_admin”,“ROLE_common”,"ROLE_test"】 表示拥有的权限。
- 一个角色表示的是多个权限,用户传入的角色不能以 ROLE开头,否则会报错。ROLE是自动加上的 如果我们保存的用户的角色:直接传入角色的名字,权限【
new SimpleGrantedAuthority(“ROLE“ + role)】保存即可
-
authorities (“USER”,”MANAGER”),原样存放:【"system:user:list","system:role:list"】表示拥有的权限。- 如果我们保存的是真正的权限;直接传入权限名字,权限【
new SimpleGrantedAuthority(permission)】保存
**无论是 Role 还是 Authority 都保存在 **
List<GrantedAuthority>,每个用户都拥有自己的权限集合
用户权限的验证方式
- 通过角色(权限)验证: 拥有任何一个角色都可以访问,验证时会自动增加”ROLE_“进行查找验证:【”ROLE_admin”,”ROLE_common”】
- **通过权限验证: ** 拥有任何一个权限都可以访问,验证时原样查找进行验证:【”system:role:list”】
(2) 结合角色进行权限控制
- 创建Role角色实体
 @Data
 @AllArgsConstructor
 @NoArgsConstructor
 @TableName(value = "sys_role")
 @JsonInclude(JsonInclude.Include.NON_NULL)
 public class Role implements Serializable {

     @TableId
     private Long roleId;


     /**
      * 角色名
      */
     private String roleName;

     /**
      * 角色权限字符串
      */
     private String roleKey;

     /**
      * 角色状态 0正常,1停用
      */
     private String status;

     /**
      * 删除标志 0存在,1删除
      */
     private String delFlag;

     private Long createBy;

     private Date createTime;

     private Long updateBy;

     private Date updateTime;

     private String remark;
 }
- RoleMapper
 public interface RoleMapper  extends BaseMapper<Role> {

     List<String> selectRolesByUserId(Long id);
 }
 <?xml version="1.0" encoding="UTF-8" ?>
 <!DOCTYPE mapper PUBLIC "-//mybatis.org//DTD Mapper 3.0//EN" "http://mybatis.org/dtd/mybatis-3-mapper.dtd">

 <mapper namespace="com.mashibing.springsecurity_example.mapper.RoleMapper">

     <select id="selectRolesByUserId" resultType="java.lang.String">
        SELECT
             sr.role_key
         FROM sys_user_role sur
         LEFT JOIN sys_role sr ON sur.role_id = sr.role_id
         WHERE sur.user_id = #{userid} AND sr.status = 0 AND sr.del_flag = 0
     </select>

 </mapper>
- UserServiceDetailsImpl
 @Data
 public class LoginUser implements UserDetails {

     private SysUser sysUser;

     public LoginUser() {
     }

     public LoginUser(SysUser sysUser) {
         this.sysUser = sysUser;
     }

     //存储权限信息集合
     private List<String> permissions;

     //存储角色信息集合
     private List<String> roles;


     public LoginUser(SysUser user, List<String> permissions) {
         this.sysUser = user;
         this.permissions = permissions;
     }


     public LoginUser(SysUser user, List<String> permissions, List<String> roles) {
         this.sysUser = user;
         this.permissions = permissions;
         this.roles = roles;
     }

     //避免出现异常
     @JSONField(serialize = false)
     private List<SimpleGrantedAuthority> authorities;


     /**
      *  用于获取用户被授予的权限,可以用于实现访问控制。
      */
     @Override
     public Collection<? extends GrantedAuthority> getAuthorities() {

         if(authorities != null){
             return authorities;
         }

         //1.8 语法
         authorities = permissions.stream()
                 .map(SimpleGrantedAuthority::new)
                 .collect(Collectors.toList());

         //处理角色信息
         authorities = roles.stream()
                 .map(role -> new SimpleGrantedAuthority("ROLE_" + role))
                 .collect(Collectors.toList());

         return authorities;
     }

 }
- Controller
 @RequestMapping("/level1")
 //当前用户是common角色,并且具有system:role:list或者system:user:list
 @PreAuthorize("hasRole('common') AND hasAnyAuthority('system:role:list','system:user:list')")
 public String level1(){
     return "level1 page";
 }

 @RequestMapping("/level2")
 //当前用户拥有admin或者common角色,或者具有system:role:list权限
 @PreAuthorize("hasAnyRole('admin','common') OR hasAuthority('system:role:list')")
 public String level2(){
     return "level2 page";
 }
- 测试一下
 @RequestMapping("/level1")
 //当前用户是common角色,并且具有system:role:list或者system:user:list
 @PreAuthorize("hasRole('admin') AND hasAnyAuthority('system:role:list','system:user:list')")
 public String level1(){
     return "level1 page";
 }

 @RequestMapping("/level2")
 //当前用户拥有admin或者common角色,或者具有system:role:list权限
 @PreAuthorize("hasAnyRole('admin','common') OR hasAuthority('system:role:list')")
 public String level2(){
     return "level2 page";
 }
4.4.8 认证方案扩展
我们首先创建一个新的项目,来进行接下来的案例演示,配置文件
 server:
   #服务器的HTTP端口
   port: 8888
 spring:
   datasource:
     url: jdbc:mysql://localhost:3306/test_security?characterEncoding=utf-8&serverTimezone=UTC
     username: root
     password: 123456
     driver-class-name: com.mysql.cj.jdbc.Driver
   thymeleaf:
     prefix: classpath:/templates/
     suffix: .html
     encoding: UTF-8
     mode: HTML
     cache: false
   security:
     user:
       name: test
       password: 123456
       roles: admin,user

 mybatis-plus:
   mapper-locations: classpath*:/mapper/**/*.xml
4.4.8.1 自定义认证
(1) 自定义资源权限规则
- 引入模板依赖
 <!--thymeleaf-->
 <dependency>
   <groupId>org.springframework.boot</groupId>
   <artifactId>spring-boot-starter-thymeleaf</artifactId>
 </dependency>
- 在 templates 中定义登录界面 login.html
 <!DOCTYPE html>
 <html lang="en" xmlns:th="http://www.thymeleaf.org">
 <head>
     <meta charset="UTF-8">
     <title>登录页面</title>
 </head>
     <body>
         <h1>用户登录</h1>
         <form method="post" th:action="@{/login}">
             用户名:<input name="username" type="text"/><br>
             密码:<input name="password" type="password"/><br>
             <input type="submit" value="登录"/>
         </form>
     </body>
 </html>
- 配置 Spring Security 配置类
 @Configuration
 public class WebSecurityConfigurer extends WebSecurityConfigurerAdapter {
     @Override
     protected void configure(HttpSecurity http) throws Exception {
         http.authorizeHttpRequests()    //开始配置授权,即允许哪些请求访问系统
                 .mvcMatchers("/login.html").permitAll()   //指定哪些请求路径允许访问
                 .mvcMatchers("/index").permitAll()      //指定哪些请求路径允许访问
                 .anyRequest().authenticated()  //除上述以外,指定其他所有请求都需要经过身份验证
                 .and()
                 .formLogin()    //配置表单登录
                 .loginPage("/login.html")      //登录页面
                 .loginProcessingUrl("/login")  //提交路径
                 .usernameParameter("username") //表单中用户名
                 .passwordParameter("password") //表单中密码
                 .successForwardUrl("/index")  //指定登录成功后要跳转的路径为 /index
                 //.defaultSuccessUrl("/index")   //redirect 重定向  注意:如果之前请求路径,会有优先跳转之前请求路径
                 .failureUrl("/login.html") //指定登录失败后要跳转的路径为 /login.htm
                 .and()
                 .csrf().disable();//这里先关闭 CSRF
     }
 }
说明
- permitAll() 代表放行该资源,该资源为公共资源 无需认证和授权可以直接访问
- anyRequest().authenticated() 代表所有请求,必须认证之后才能访问
- **formLogin() 代表开启表单认证 **
- successForwardUrl 、defaultSuccessUrl 这两个方法都可以实现成功之后跳转
- **successForwardUrl 默认使用 **
forward跳转注意:不会跳转到之前请求路径 - **defaultSuccessUrl 默认使用 **
redirect跳转注意:如果之前有请求路径,会优先跳转之前请求路径,可以传入第二个参数进行修改
- **successForwardUrl 默认使用 **
注意: 放行资源必须放在所有认证请求之前!
- 创建Controller
 @Controller
 public class LoginController {


     @RequestMapping("/ok")
     public String ok(){
         return "ok";
     }

     @RequestMapping("/login.html")
     public String login(){
         return "login";
     }
 }
(2) 自定义认证成功处理器
- 有时候页面跳转并不能满足我们,特别是在前后端分离开发中就不需要成功之后跳转页面。只需要给前端返回一个 JSON 通知登录成功还是失败与否。这个时候可以通过自定义
AuthenticationSucccessHandler实现
 public interface AuthenticationSuccessHandler {
 void onAuthenticationSuccess(HttpServletRequest request, HttpServletResponse response,
 Authentication authentication) throws IOException, ServletException;
 }
根据接口的描述信息,也可以得知登录成功会自动回调这个方法,进一步查看它的默认实现,你会发现successForwardUrl、defaultSuccessUrl也是由它的子类实现的
- 自定义 AuthenticationSuccessHandler 实现
@Component
public class AuthenticationSuccessHandlerImpl implements AuthenticationSuccessHandler {
@Override
public void onAuthenticationSuccess(HttpServletRequest request, HttpServletResponse response,
Authentication authentication) throws IOException, ServletException {
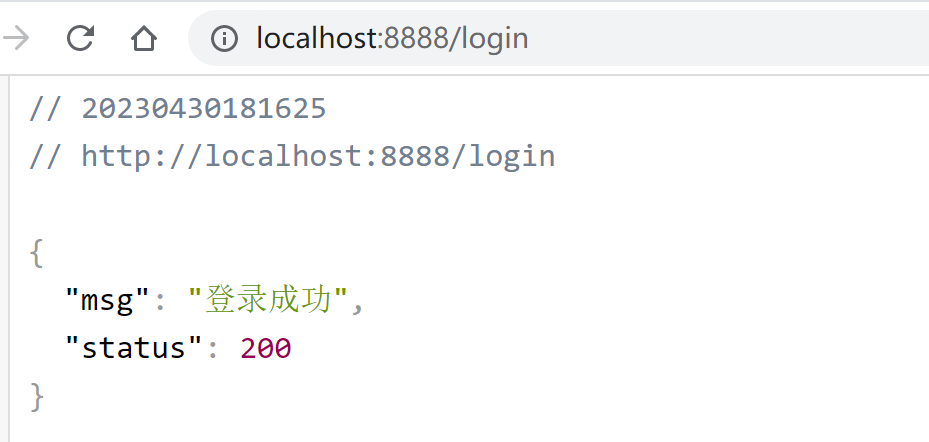
Map<String, Object> result = new HashMap<String, Object>();
result.put("msg", "登录成功");
result.put("status", 200);
response.setContentType("application/json;charset=UTF-8");
String s = new ObjectMapper().writeValueAsString(result);
response.getWriter().println(s);
}
}
- 配置 AuthenticationSuccessHandler
 @Configuration
 public class WebSecurityConfigurer extends WebSecurityConfigurerAdapter {

     @Autowired
     private AuthenticationSuccessHandler successHandler;

     @Override
     protected void configure(HttpSecurity http) throws Exception {
         http.authorizeHttpRequests()
       .and()
                 .formLogin()    //配置表单登录
                 .successHandler(successHandler)
                 .failureUrl("/login.html") //指定登录失败后要跳转的路径为 /login.htm
                 .and()
                 .csrf().disable();//这里先关闭 CSRF
     }
 }
- 测试一下

(3) 自定义认证失败处理器
- 和自定义登录成功处理一样,Spring Security 同样为前后端分离开发提供了登录失败的处理,这个类就是 AuthenticationFailureHandler,源码为:
 public interface AuthenticationFailureHandler {
 void onAuthenticationFailure(HttpServletRequest request, HttpServletResponse response,
 AuthenticationException exception) throws IOException, ServletException;

 }
根据接口的描述信息,也可以得知登录失败会自动回调这个方法,进一步查看它的默认实现,你会发现failureUrl、failureForwardUrl也是由它的子类实现的。
- 自定义 AuthenticationFailureHandler 实现
@Component
public class AuthenticationFailureHandlerImpl implements AuthenticationFailureHandler {
@Override
public void onAuthenticationFailure(HttpServletRequest request, HttpServletResponse response,
AuthenticationException exception) throws IOException, ServletException {
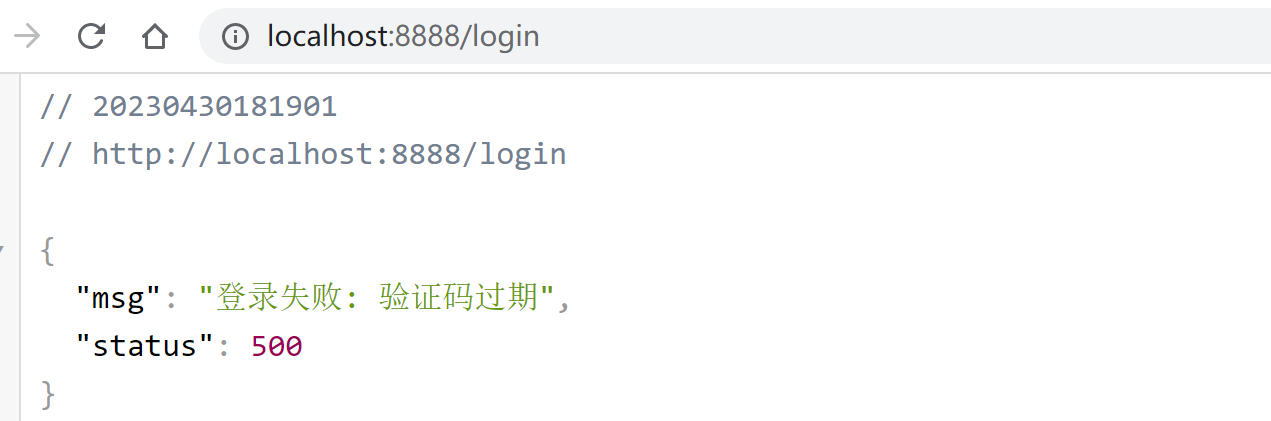
Map<String, Object> result = new HashMap<String, Object>();
result.put("msg", "登录失败: "+exception.getMessage());
result.put("status", 500);
response.setContentType("application/json;charset=UTF-8");
String s = new ObjectMapper().writeValueAsString(result);
response.getWriter().println(s);
}
}
- 配置 AuthenticationFailureHandler
 @Configuration
 public class WebSecurityConfigurer extends WebSecurityConfigurerAdapter {

     @Override
     protected void configure(HttpSecurity http) throws Exception {
         http.authorizeHttpRequests()
               //...
                 .and()
                 .formLogin()
                //..
                 .failureHandler(new MyAuthenticationFailureHandler())
                 .and()
                 .csrf().disable();//这里先关闭 CSRF
     }
 }
- 测试一下

(4) 自定义注销登录处理器
Spring Security 中也提供了默认的注销登录配置,在开发时也可以按照自己需求对注销进行个性化定制。
-
开启注销登录
默认开启@Configuration public class WebSecurityConfigurer extends WebSecurityConfigurerAdapter { @Override protected void configure(HttpSecurity http) throws Exception { http.authorizeHttpRequests() //... .and() .formLogin() //... .and() .logout() .logoutUrl("/logout") .invalidateHttpSession(true) .clearAuthentication(true) .logoutSuccessUrl("/login.html") .and() .csrf().disable();//这里先关闭 CSRF } }- 通过 logout() 方法开启注销配置
- **logoutUrl 指定退出登录请求地址,默认是 GET 请求,路径为 **
/logout - invalidateHttpSession 退出时是否是 session 失效,默认值为 true
- clearAuthentication 退出时是否清除认证信息,默认值为 true
- logoutSuccessUrl 退出登录时跳转地址
前后端分离注销登录配置
- 如果是前后端分离开发,注销成功之后就不需要页面跳转了,只需要将注销成功的信息返回前端即可,此时我们可以通过自定义 LogoutSuccessHandler 实现来返回注销之后信息:
@Component
public class LogoutSuccessHandlerImpl implements LogoutSuccessHandler {
@Override
public void onLogoutSuccess(HttpServletRequest request, HttpServletResponse response,
Authentication authentication) throws IOException, ServletException {
Map<String, Object> result = new HashMap<String, Object>();
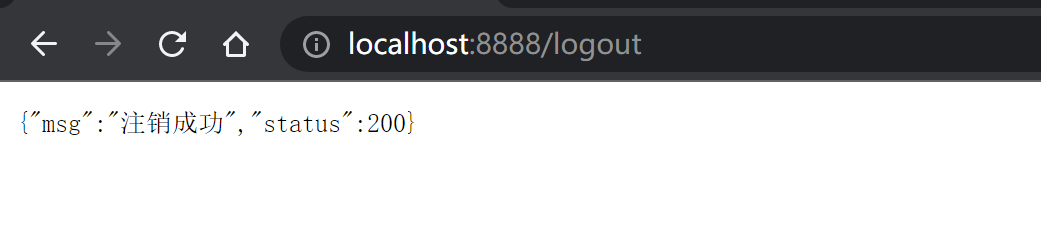
result.put("msg", "注销成功");
result.put("status", 200);
response.setContentType("application/json;charset=UTF-8");
String s = new ObjectMapper().writeValueAsString(result);
response.getWriter().println(s);
}
}
- 配置
 @Configuration
 public class WebSecurityConfigurer extends WebSecurityConfigurerAdapter {

     @Autowired
     private LogoutSuccessHandler logoutSuccessHandler;

     @Override
     protected void configure(HttpSecurity http) throws Exception {
         http.authorizeHttpRequests()    //开始配置授权,即允许哪些请求访问系统

                 .and()
                 .formLogin()    //配置表单登录
         //...
                 .and()
                 .logout()
 //                .logoutUrl("/logout")
                 .invalidateHttpSession(true)
                 .clearAuthentication(true)
 //                .logoutSuccessUrl("/login.html")
                 .logoutSuccessHandler(logoutSuccessHandler)
                 .and()
                 .csrf().disable();//这里先关闭 CSRF
     }
 }
- 测试
4.4.8.2 添加图形验证码
在用户登录时,一般通过表单的方式进行登录都会要求用户输入验证码,Spring Security默认没有实现图形验证码的功能,所以需要我们自己实现。
图形验证码一般是在用户名、密码认证之前进行验证的,所以需要在 UsernamePasswordAuthenticationFilter过滤器之前添加一个自定义过滤器 ImageCodeValidateFilter,用来校验用户输入的图形验证码是否正确。
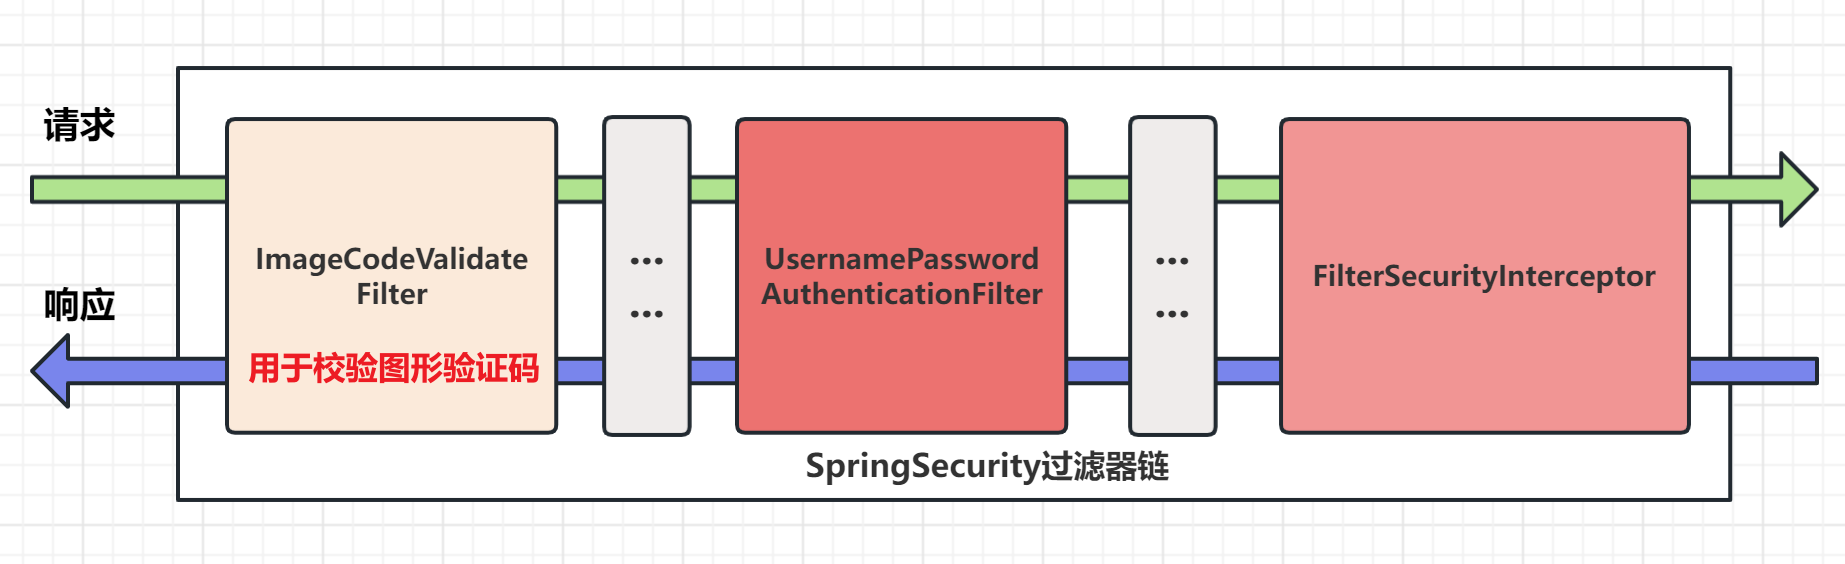
自定义的过滤器 ImageCodeValidateFilter 首先会判断请求是否为 POST 方式的登录表单提交请求,如果是就将其拦截进行图形验证码校验。如果验证错误,会抛出自定义异常类对象 ValidateCodeException,该异常类需要继承 AuthenticationException 类。在自定义过滤器中,我们需要手动捕获自定义异常类对象,并将捕获到自定义异常类对象交给自定义失败处理器进行处理。
(1) 传统web开发
Kaptcha 是谷歌提供的生成图形验证码的工具,参考地址为:https://github.com/penggle/kaptcha,依赖如下:
Kaptcha 是一个可高度配置的实用验证码生成工具,可自由配置的选项如:
- 验证码的字体
- 验证码字体的大小
- 验证码字体的字体颜色
- 验证码内容的范围(数字,字母,中文汉字!)
- 验证码图片的大小,边框,边框粗细,边框颜色
- 验证码的干扰线
- 验证码的样式(鱼眼样式、3D、普通模糊、…)
- 引入依赖
 <dependency>
   <groupId>com.github.penggle</groupId>
   <artifactId>kaptcha</artifactId>
   <version>2.3.2</version>
 </dependency>
- 添加验证码配置类
 @Configuration
 public class KaptchaConfig {

     @Bean
     public Producer kaptcha() {

         Properties properties = new Properties();
         // 是否有边框
         properties.setProperty(Constants.KAPTCHA_BORDER, "yes");
         // 边框颜色
         properties.setProperty(Constants.KAPTCHA_BORDER_COLOR, "192,192,192");
         // 验证码图片的宽和高
         properties.setProperty(Constants.KAPTCHA_IMAGE_WIDTH, "110");
         properties.setProperty(Constants.KAPTCHA_IMAGE_HEIGHT, "40");
         // 验证码颜色
         properties.setProperty(Constants.KAPTCHA_TEXTPRODUCER_FONT_COLOR, "0,0,0");
         // 验证码字体大小
         properties.setProperty(Constants.KAPTCHA_TEXTPRODUCER_FONT_SIZE, "32");
         // 验证码生成几个字符
         properties.setProperty(Constants.KAPTCHA_TEXTPRODUCER_CHAR_LENGTH, "4");
         // 验证码随机字符库
         properties.setProperty(Constants.KAPTCHA_TEXTPRODUCER_CHAR_STRING, "0123456789ABCDEFGHIJKLMNOPQRSTUVWXYAZ");
         // 验证码图片默认是有线条干扰的,我们设置成没有干扰
         properties.setProperty(Constants.KAPTCHA_NOISE_IMPL, "com.google.code.kaptcha.impl.NoNoise");

         Config config = new Config(properties);
         DefaultKaptcha defaultKaptcha = new DefaultKaptcha();
         defaultKaptcha.setConfig(config);

         return defaultKaptcha;
     }
 }
- 创建验证码实体类
 public class CheckCode implements Serializable {

     private String code; //验证字符
     private LocalDateTime expireTime; //过期时间

     public CheckCode(String code, int expireTime) {
         this.code = code;
         //返回指定的过期时间
         this.expireTime = LocalDateTime.now().plusSeconds(expireTime);
     }

     public CheckCode(String code) {
         //默认验证码 60秒后过期
         this(code,60);
     }

     //是否过期
     public boolean isExpired(){
         return this.expireTime.isBefore(LocalDateTime.now());
     }

     public String getCode() {
         return code;
     }
 }
- 创建生成验证码Controller
 @Controller
 public class KaptchaController {

     private final Producer producer;

     @Autowired
     public KaptchaController(Producer producer) {
         this.producer = producer;
     }

     @GetMapping("/code/image")
     public void getVerifyCode(HttpServletRequest request, HttpServletResponse response) throws IOException {

         //1.创建验证码文本
         String capText = producer.createText();

         //2.创建验证码图片
         BufferedImage bufferedImage = producer.createImage(capText);

         //3.将验证码文本放进 Session 中
         CheckCode code = new CheckCode(capText);
         request.getSession().setAttribute(Constants.KAPTCHA_SESSION_KEY, code);

         //4.将验证码图片返回,禁止验证码图片缓存
         response.setHeader("Cache-Control", "no-store");
         response.setHeader("Pragma", "no-cache");
         response.setDateHeader("Expires", 0);

         //5.设置ContentType
         response.setContentType("image/png");
         ImageIO.write(bufferedImage,"jpg",response.getOutputStream());
     }
 }
- 在 login.html 中添加验证码功能
 <!DOCTYPE html>
 <html lang="en" xmlns:th="http://www.thymeleaf.org">
 <head>
     <meta charset="UTF-8">
     <title>登录</title>
 </head>
     <body>
         <h3>表单登录</h3>

         <form method="post" th:action="@{/login}">
             <input type="text" name="username" placeholder="用户名"><br>

             <input type="password" name="password" placeholder="密码"><br>

             <input name="imageCode" type="text" placeholder="验证码"><br>

             <img th:onclick="this.src='/code/image?'+Math.random()" th:src="@{/code/image}" alt="验证码"/><br>
             <button type="submit">登录</button>
         </form>
     </body>
 </html>
- 更改安全配置类 SpringSecurityConfig,设置访问
/code/image不需要任何权限
 @Configuration
 public class WebSecurityConfigurer extends WebSecurityConfigurerAdapter {


     @Override
     protected void configure(HttpSecurity http) throws Exception {
         http.authorizeHttpRequests()    //开始配置授权,即允许哪些请求访问系统
                 .mvcMatchers("/login.html","/code/image").permitAll()   //指定哪些请求路径允许访问
                 .anyRequest().authenticated()  //除上述以外,指定其他所有请求都需要经过身份验证
                 .and()
                 .formLogin()    //配置表单登录
    //......
     }
 }
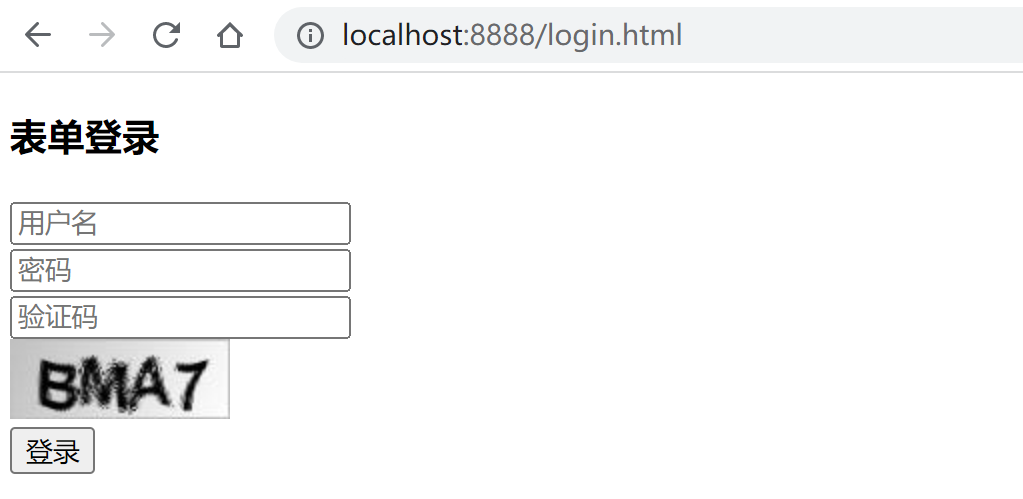
- 测试
访问 http://localhost:8888/login.html,出现图形验证的信息
- 创建自定义异常类
 /**
  * 自定义验证码错误异常
  * @author spikeCong
  * @date 2023/4/29
  **/
 public class KaptchaNotMatchException extends AuthenticationException {

     public KaptchaNotMatchException(String msg) {
         super(msg);
     }

     public KaptchaNotMatchException(String msg, Throwable cause) {
         super(msg, cause);
     }
 }
- 自定义图形验证码校验过滤器
 @Component
 public class KaptchaFilter extends OncePerRequestFilter {

     //前端输入的图形验证码参数
     private String codeParameter = "imageCode";

     //自定义认证失败处理器
     @Autowired
     private AuthenticationFailureHandler failureHandler;

     @Override
     protected void doFilterInternal(HttpServletRequest request, HttpServletResponse response,
                                     FilterChain filterChain) throws ServletException, IOException {

         //非post请求的表单提交不校验 图形验证码
         if (request.getMethod().equals("POST")) {

             try {
                 //校验图形验证码合法性
                 validate(request);
             } catch (KaptchaNotMatchException e) {
                 failureHandler.onAuthenticationFailure(request,response,e);
                 return;
             }
         }

         //放行进入下一个过滤器
         filterChain.doFilter(request,response);
     }

     //判断验证码合法性
     private void validate(HttpServletRequest request) throws KaptchaNotMatchException {

         //1.获取用户传入的图形验证码值
         String requestCode = request.getParameter(this.codeParameter);
         if(requestCode == null){
             requestCode = "";
         }
         requestCode = requestCode.trim();

         //2.获取session中的验证码值
         HttpSession session = request.getSession();
         CheckCode checkCode =(CheckCode) session.getAttribute(Constants.KAPTCHA_SESSION_KEY);
         if(checkCode != null){
             //清除验证码,不管成功与否,客户端应该在登录失败后 刷新验证码
             session.removeAttribute(Constants.KAPTCHA_SESSION_KEY);
         }

         // 校验出错,抛出异常
         if (StringUtils.isBlank(requestCode)) {
             throw new KaptchaNotMatchException("验证码的值不能为空");
         }

         if (checkCode == null) {
             throw new KaptchaNotMatchException("验证码不存在");
         }

         if (checkCode.isExpired()) {
             throw new KaptchaNotMatchException("验证码过期");
         }

         if (!requestCode.equalsIgnoreCase(checkCode.getCode())) {
             throw new KaptchaNotMatchException("验证码输入错误");
         }
     }
 }
- 更改安全配置类 SpringSecurityConfig,将自定义过滤器添加过滤器链中
 @Configuration
 public class WebSecurityConfigurer extends WebSecurityConfigurerAdapter {

     @Autowired
     private AuthenticationSuccessHandler successHandler;

     @Autowired
     private AuthenticationFailureHandler failureHandler;

     @Autowired
     private LogoutSuccessHandler logoutSuccessHandler;

     @Autowired
     private KaptchaFilter kaptchaFilter;

     /**
      * 定制基于 HTTP 请求的用户访问控制
      */
     @Override
     protected void configure(HttpSecurity http) throws Exception {
         //开启基于HTTP请求访问控制
         http.authorizeHttpRequests()
                 //开始配置授权,即允许哪些请求访问系统
                 .mvcMatchers("/login.html","/code/image").permitAll()
                 //除上述以外,指定其他所有请求都需要经过身份验证
                 .anyRequest().authenticated();

         //开启 form表单登录
         http.formLogin()
                 .loginPage("/login.html")      //登录页面(覆盖security的)
                 .loginProcessingUrl("/login")  //提交路径
                 .usernameParameter("username") //表单中用户名
                 .passwordParameter("password") //表单中密码
                 // 使用自定义的认证成功和失败处理器
                 .successHandler(successHandler)
                 .failureHandler(failureHandler);

        //开启登出配置
         http.logout()
                 .invalidateHttpSession(true)
                 .clearAuthentication(true)
                 .logoutSuccessHandler(logoutSuccessHandler);

         http.csrf().disable();//这里先关闭 CSRF

         //将自定义图形验证码校验过滤器,添加到UsernamePasswordAuthenticationFilter之前
         http.addFilterBefore(kaptchaFilter, UsernamePasswordAuthenticationFilter.class);
     }
 }
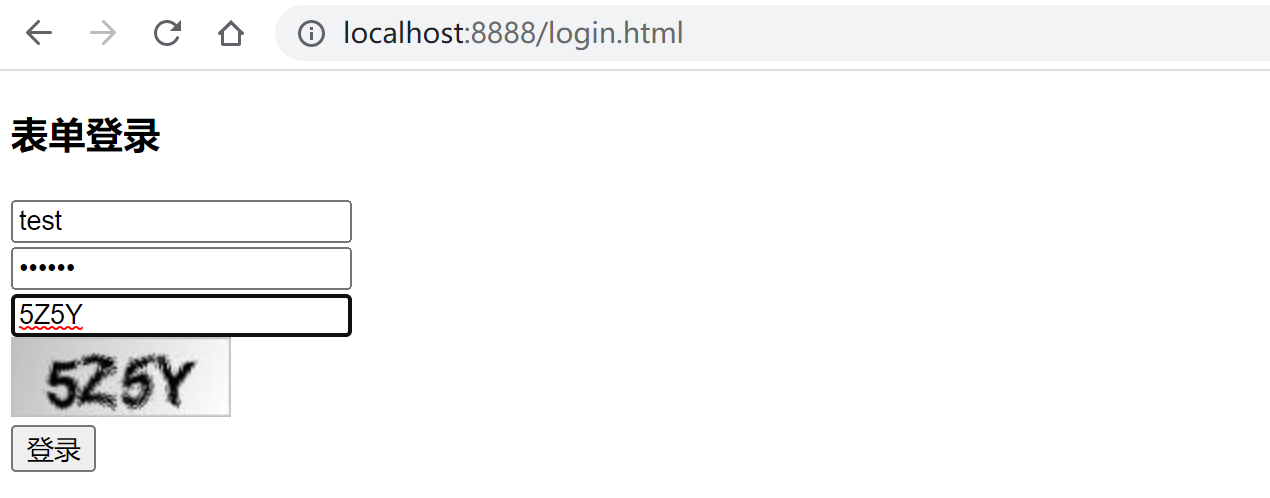
- 测试
访问 http://localhost:8888/login.html,出现图形验证的信息,输入 用户名密码及 正确验证码
访问 localhost:8080/login/page,等待 60 秒后,输入正确的用户名、密码和验证码:
(3) 前后端分离开发
图形验证码包含两部分:图片和文字验证码。
- 在JSP时代,图形验证码生成和验证是通过Session机制来实现的:后端生成图片和文字验证码,并将文字验证码放在session中,前端填写验证码后提交到后台,通过与session中的验证码比较来实现验证。
- 在前后端分离的项目中,登录使用的是Token验证,而不是Session。后台必须保证当前用户输入的验证码是用户开始请求页面时候的验证码,必须保证验证码的唯一性。
前后端分离开发方式保证验证码唯一性的解决思路
-
把生成的验证码放在全局的的缓存中,如redis,并设置一个过期时间。
-
前端验证时,需要把验证码的id也带上,供后端验证。
为每个验证码code分配一个主键codeId。后端接收到获取验证码请求, 生成验证码的同时,生成一个验证码唯一ID, 并且以此唯一ID 为Key 将其保存到redis. 然后响应给前端. 前端请求验证码code时,将codeId在前端生成并发送给后端;后端对code和codeId进行比较,完成验证。
-
后台在生成图片后使用Base64进行编码
Base64用于将二进制数据编码成ASCII字符 (图片、文件等都可转化为二进制数据)
1. 回到第一个 springsecurity项目, 先创建一个 CaptchaController
- **导入easy-captcha **https://gitee.com/ele-admin/EasyCaptcha
         <dependency>
             <groupId>com.github.whvcse</groupId>
             <artifactId>easy-captcha</artifactId>
             <version>1.6.2</version>
         </dependency>
 @RestController
 public class CaptchaController {


     @Autowired
     private RedisCache redisCache;

     /**
      * 生成验证码
      * @param response
      * @return: com.mashibing.springsecurity_example.common.ResponseResult
      */
     @GetMapping("/captchaImage")
     public ResponseResult getCode(HttpServletResponse response){
         SpecCaptcha specCaptcha = new SpecCaptcha(130, 48, 4);

         //生成验证码,及验证码唯一标识
         String uuid = UUID.randomUUID().toString().replaceAll("-", "");
         String key = Constants.CAPTCHA_CODE_KEY + uuid;
         String code = specCaptcha.text().toLowerCase();

         //保存到redis
         redisCache.setCacheObject(key,code,1000, TimeUnit.SECONDS);

         //创建map
         HashMap<String,Object> map = new HashMap<>();
         map.put("uuid",uuid);
         map.put("img",specCaptcha.toBase64());

         return new ResponseResult(200,"验证码获取成功",map);
     }
 }
2. 创建用户登录对象
 /**
  * 用户登录对象
  * @author spikeCong
  * @date 2023/4/30
  **/
 public class LoginBody {

     /**
      * 用户名
      */
     private String userName;

     /**
      * 用户密码
      */
     private String password;

     /**
      * 验证码
      */
     private String code;

     /**
      * 唯一标识
      */
     private String uuid = "";

     public String getUserName() {
         return userName;
     }

     public void setUserName(String userName) {
         this.userName = userName;
     }

     public String getPassword() {
         return password;
     }

     public void setPassword(String password) {
         this.password = password;
     }

     public String getCode() {
         return code;
     }

     public void setCode(String code) {
         this.code = code;
     }

     public String getUuid() {
         return uuid;
     }

     public void setUuid(String uuid) {
         this.uuid = uuid;
     }
 }
3. LoginController 中创建处理验证码的登录方法
 /**
      * 登录方法
      *
      * @param loginBody 登录信息
      * @return 结果
      */
 @PostMapping("/user/login")
 public ResponseResult login(@RequestBody LoginBody loginBody)
 {
     // 生成令牌
     String token = loginService.login(loginBody.getUserName(), loginBody.getPassword(), loginBody.getCode(),
                                       loginBody.getUuid());

     Map<String,Object> map = new HashMap<>();
     map.put("token",token);
     return new ResponseResult(200,"登录成功",map);
 }
4. LoginService中创建处理验证码的登录方法
 public interface LoginService {

     String login(String username, String password, String code, String uuid);
 }
 @Service
 public class LoginServiceImpl implements LoginService {

     @Autowired
     private AuthenticationManager authenticationManager;

     @Autowired
     private RedisCache redisCache;

     /**
      * 带验证码登录
      * @param username
      * @param password
      * @param code
      * @param uuid
      * @return: java.lang.String
      */
     @Override
     public String login(String username, String password, String code, String uuid) {

         //从redis中获取验证码
         String verifyKey = Constants.CAPTCHA_CODE_KEY + uuid;
         String captcha = redisCache.getCacheObject(verifyKey);
         redisCache.deleteObject(captcha);

         if (captcha == null || !code.equalsIgnoreCase(captcha)){
             throw new CaptchaNotMatchException("验证码错误!");
         }

         // 该方法会去调用UserDetailsServiceImpl.loadUserByUsername
         Authentication authentication = authenticationManager
                 .authenticate(new UsernamePasswordAuthenticationToken(username, password));


         //3.如果认证通过,使用userId生成一个JWT,并将其保存到 ResponseResult对象中返回
         //3.1 获取经过身份验证的用户的主体信息
         LoginUser loginUser = (LoginUser) authentication.getPrincipal();

         //3.2 获取到userID 生成JWT
         String userId = loginUser.getSysUser().getUserId().toString();
         String jwt = JwtUtil.createJWT(userId);

         //4.将用户信息存储在Redis中,在下一次请求时能够识别出用户,userid作为key
         redisCache.setCacheObject("login:"+userId,loginUser);

         //5.封装ResponseResult,并返回
         return jwt;
     }
 }
5.添加自定义异常
 public class CaptchaNotMatchException extends AuthenticationException {

     public CaptchaNotMatchException(String msg) {
         super(msg);
     }

     public CaptchaNotMatchException(String msg, Throwable cause) {
         super(msg, cause);
     }
 }
6.配置类中添加配置
 // 对于登录接口 允许匿名访问
 .mvcMatchers("/user/login","/captchaImage").anonymous()
通常 mvcMatcher 比 antMatcher 更安全:
antMatchers(“/secured”) 仅仅匹配 /secured
mvcMatchers(“/secured”) 匹配 /secured 之余还匹配 /secured/, /secured.html, /secured.xyz
因此 mvcMatcher 更加通用且容错性更高。
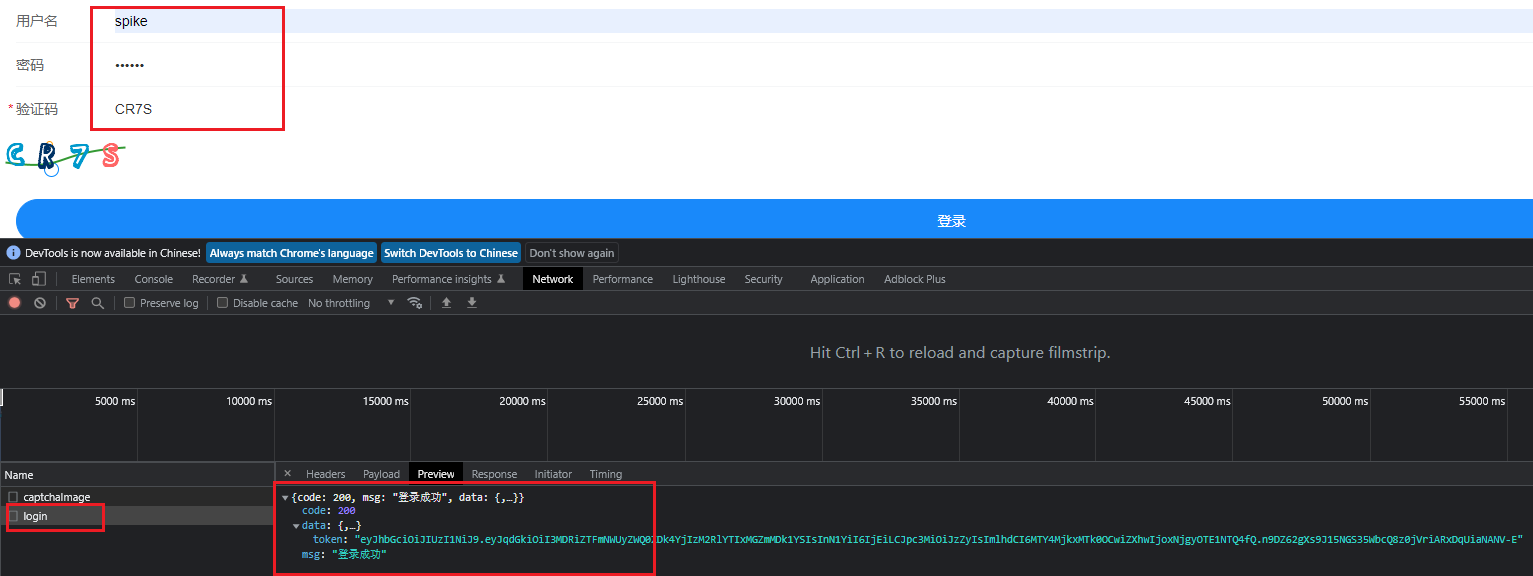
7.前后端联调测试
- VSCode导入前端项目, 导入带有验证码 security_demo_captcha项目

注意
node_modules我已经给大家下载好了, 就不需要执行npm install
- npm run serve 启动项目,即可看到生成的验证码

请求信息

输入正确的用户名密码,验证码 登录成功.


 1414
1414

 被折叠的 条评论
为什么被折叠?
被折叠的 条评论
为什么被折叠?
 到【灌水乐园】发言


