


这里写目录标题
Jsch
一、简介
JSch是SSH2的纯Java实现 。
JSch允许您连接到sshd服务器并使用端口转发,X11转发,文件传输等,并且您可以将其功能集成到您自己的Java程序中。JSch已获得BSD样式许可。
为什么用选择 Jsch?
最初,我们开发此产品的动机是让我们纯Java X服务器 WiredX的用户享受安全的X会话。因此,我们的工作主要针对实现X11转发的SSH2协议。但是,当然,我们现在也对添加其他功能(例如端口转发,文件传输,终端仿真等)感兴趣。
SSH2
不用说,SSH支持安全的远程登录,安全的文件传输以及安全的TCP / IP和X11转发。它可以自动加密,认证和压缩传输的数据。SSH协议有两个不兼容的版本:SSH1和SSH2。发明SSH2的目的是避免有关RSA的专利问题(RSA专利已过期),并解决SSH1所存在的某些数据完整性问题,还有其他一些技术原因。SSH2协议已在IETF Secure Shell工作组上进行了标准化, 有关SSH2协议的草案可从Web上获得。在开发JSch时,我们现在参考以下文档:
使用JSch的应用程序
- Ant(1.6或更高版本).
JSch已用于Ant的sshexec和scp任务。 - Eclipse(3.0).
我们的Eclipse-CVSSSH2插件已包含在Eclipse SDK 3.0中。该插件将允许您通过JSch获得ssh2对远程CVS存储库的访问。 - NetBeans 5.0(及更高版本)
- Jakarta Commons VFS
- Maven Wagon
- 适用于WebSphere软件的Rational Application Devloper
- HP Storage Essentials
- JIRA
- Trac WikiOutputStreamPlugin
二、Jsch的使用
API:http://epaul.github.io/jsch-documentation/javadoc/com/jcraft/jsch/JSch.html
1、连接到服务器
public class JSchDemo {

   private String ipAddress;   //主机ip
   private String username;   // 账号
   private String password;   // 密码
   private int port;  // 端口号

   Session session;

   public JSchDemo(String ipAddress, String username, String password, int port) {
      this.ipAddress = ipAddress;
      this.username = username;
      this.password = password;
      this.port = port;
   }

   /**
    *  连接到指定的ip
    */
   public void connect() {
      try {
         JSch jsch = new JSch();
         if (port < 0 || port > 65535){
            //连接服务器,如果端口号错误,采用默认端口
            session = jsch.getSession(username, ipAddress);
         }else {
            session = jsch.getSession(username, ipAddress, port);
         }
         //设置登录主机的密码
         session.setPassword(password);
         //如果服务器连接不上,则抛出异常
         if (session == null) {
            throw new Exception("session is null");
         }
         //设置首次登录跳过主机检查
         session.setConfig("StrictHostKeyChecking", "no");
         //设置登录超时时间
         session.connect(3000);
      } catch (Exception e) {
         log.error(e.getMessage(),e);
      }

   }
}

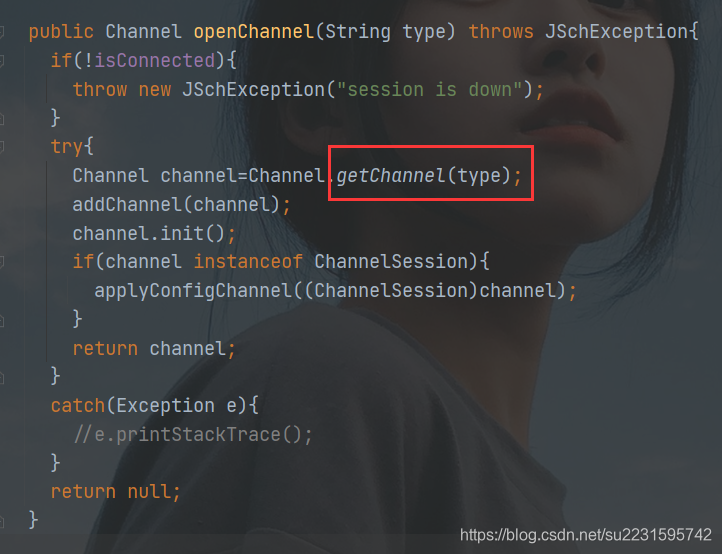
一个 Session 表示一个与SSH服务器的连接。一个 Session 可以包含多种多样的 Channel ,并且创建openChannel(java.lang.String)
一个 session 被一个 connect() 打开和被一个 disconnect() 关闭。
事实上一个 Session 实现 Runnable 接口 是一个实现细节。
关于Session的使用,创建连接后这个session是一直可用的,所以不需要关闭。由Session中open的Channel在使用后应该关闭。
2、执行命令
/**
 * 执行相关的命令(交互式)
 * @param command
 * @return
 */
public int execute(String command) {
    int returnCode = 0;
    ChannelShell channel = null;
    PrintWriter printWriter = null;
    BufferedReader input = null;
    stdout = new Vector<String>();
    try {
        //建立交互式通道
        channel = (ChannelShell) session.openChannel("shell");
        channel.connect();

        //获取输入
        InputStreamReader inputStreamReader = new InputStreamReader(channel.getInputStream());
        input = new BufferedReader(inputStreamReader);

        //输出
        printWriter = new PrintWriter(channel.getOutputStream());
        printWriter.println(command);
        printWriter.println("exit");
        printWriter.flush();
        log.info("The remote command is: ");
        String line;
        while ((line = input.readLine()) != null) {
            stdout.add(line);
            System.out.println(line);
        }
    } catch (Exception e) {
        log.error(e.getMessage(),e);
        return -1;
    }finally {
        IoUtil.close(printWriter);
        IoUtil.close(input);
        if (channel != null) {
            //关闭通道
            channel.disconnect();
        }
    }
    return returnCode;
}

public void close(){
    if (session != null) {
        session.disconnect();
    }
}
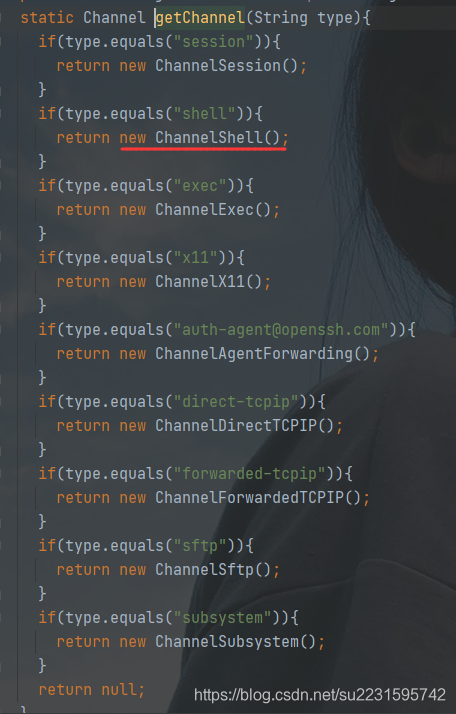
ChannelShell和ChannelExec区别?
参考:https://blog.csdn.net/u013066244/article/details/70911585
ChannelShell
对于ChannelShell,以输入流的形式,提供命令和输入这些命令,这就像在本地计算机上使用交互式shell(它通常用于:交互式使用)
ChannelExec
对于ChannelExec,在调用connect()方法之前这个命令提供了setCommand()方法,并且这些命令作为输入将以输入流的形式被发送出去。(通常,你只能有调用setCommand()方法一次,多次调用只有最后一次生效),但是你可以使用普通shell的分隔符(&,&&,|,||,; , \n, 复合命令)来提供多个命令。这就像在你本机上执行一个shell脚本一样(当然,如果一个命令本身就是个交互式shell,这样就像ChannelShell)
明显:使用命令通道更容易,因为您不需要处理命令提示符。
/**
 * 执行相关的命令(输入式)
 * @param command
 * @return
 */
 public int execute(String command) {
     int returnCode = 0;
     ChannelExec channel = null;
     PrintWriter printWriter = null;
     BufferedReader input = null;
     try {
         channel = (ChannelExec) session.openChannel("exec");
         channel.setCommand(command);
         InputStream in = channel.getInputStream();
         channel.connect();

         BufferedReader inputReader = new BufferedReader(new InputStreamReader(in, "GBK"));
         String inputLine;
         while ((inputLine = inputReader.readLine()) != null) {
             System.out.println(inputLine);
         }
         channel.disconnect();
         session.disconnect();
     } catch (Exception e) {
         log.error(e.getMessage(), e);
         return -1;
     } finally {
         IoUtil.close(printWriter);
         IoUtil.close(input);
         if (channel != null) {
             //关闭通道
             channel.disconnect();
         }
         if (session != null) {
             session.disconnect();
         }
     }
     return returnCode;
 }
3、利用JSch实现SFTP下载、上传文件
/**
 *	从SFTP服务器下载文件
*/
private static void sftp_put(Session session, String uploadFileName) throws Exception {
    Channel channel = null;
    try {
        //创建sftp通信通道
        channel = (Channel) session.openChannel("sftp");
        channel.connect(1000);
        ChannelSftp sftp = (ChannelSftp) channel;


        //进入服务器指定的文件夹
        sftp.cd("/root");

        //列出服务器指定的文件列表
        Vector v = sftp.ls("/");
        for(int i=0;i<v.size();i++){
            System.out.println(v.get(i));
        }

        //以下代码实现从本地上传一个文件到服务器,如果要实现下载,对换以下流就可以了
        OutputStream outstream = sftp.put(uploadFileName);
        InputStream instream = new FileInputStream(new File("C:\\aa.txt"));

        byte b[] = new byte[1024];
        int n;
        while ((n = instream.read(b)) != -1) {
            outstream.write(b, 0, n);
        }

        outstream.flush();
        outstream.close();
        instream.close();
    } catch (Exception e) {
        e.printStackTrace();
    } finally {
        session.disconnect();
        channel.disconnect();
    }
}

/*
     * 从SFTP服务器下载文件
     * @param ftpHost SFTP IP地址
     * @param ftpUserName SFTP 用户名
     * @param ftpPassword SFTP用户名密码
     * @param ftpPort SFTP端口
     * @param ftpPath SFTP服务器中文件所在路径 格式: ftptest/aa
     * @param localPath 下载到本地的位置 格式:H:/download
     * @param fileName 文件名称
     */
public static void downloadSftpFile(String ftpHost, String ftpUserName,
                                    String ftpPassword, int ftpPort, String ftpPath, String localPath,
                                    String fileName) throws JSchException {
    Session session = null;
    Channel channel = null;

    JSch jsch = new JSch();
    session = jsch.getSession(ftpUserName, ftpHost, ftpPort);
    session.setPassword(ftpPassword);
    session.setTimeout(100000);
    Properties config = new Properties();
    config.put("StrictHostKeyChecking", "no");
    session.setConfig(config);
    session.connect();

    channel = session.openChannel("sftp");
    channel.connect();
    ChannelSftp chSftp = (ChannelSftp) channel;

    String ftpFilePath = ftpPath + "/" + fileName;
    String localFilePath = localPath + File.separatorChar + fileName;

    try {
        chSftp.get(ftpFilePath, localFilePath);
    } catch (Exception e) {
        e.printStackTrace();
    } finally {
        chSftp.quit();
        channel.disconnect();
        session.disconnect();
    }

}
}
参考链接:https://blog.csdn.net/u013467442/article/details/69642148
三、Jsch的封装,sshxcute
面向 Java 开发与测试人员的远程执行 Linux/UNIX 系统上任务的框架 — sshxcute
JSch 是 SSH2 的一个纯 Java 实现。它可以连接到一个 sshd 服务器,使用端口转发,X11 转发,文件传输等等。但是这个类库毕竟偏向底层,上手与实际运行起来不太方便,sshxcute 框架正是基于 JSch 封装的,提供了更为便捷的 API 借口,更加灵活实用的功能,从而可以让开发与测试人员更加得心应手的使用。sshxcute 是一个框架,它允许工程师利用 Java 代码通过 SSH 连接远程执行 Linux/UNIX 系统上的命令或者脚本,这种方式不管是针对软件测试还是系统部署,都简化了自动化测试与系统环境部署的步骤。
框架源码:https://gitee.com/charkeyqk/sshxcute
最后一次更新在 2014-03-01
使用:https://www.ibm.com/developerworks/cn/opensource/os-sshxcute/#ibm-pcon
四、Hutool工具类
发现 hutool 对Jsch做了封装,使用起来更加简单方便,不需要自己再去实现了。
https://hutool.cn/docs/#/extra/Jsch%E5%B0%81%E8%A3%85/Jsch%E5%B7%A5%E5%85%B7-JschUtil
使用
引入jsch
<dependency>
    <groupId>com.jcraft</groupId>
    <artifactId>jsch</artifactId>
    <version>0.1.54</version>
</dependency>
说明 截止本文档撰写完毕,jsch的最新版为0.1.54,理论上应引入的版本应大于或等于此版本。
使用
ssh连接到远程主机
//新建会话,此会话用于ssh连接到跳板机(堡垒机),此处为10.1.1.1:22
Session session = JschUtil.getSession("10.1.1.1", 22, "test", "123456");
端口映射
//新建会话,此会话用于ssh连接到跳板机(堡垒机),此处为10.1.1.1:22
Session session = JschUtil.getSession("10.1.1.1", 22, "test", "123456");

// 将堡垒机保护的内网8080端口映射到localhost,我们就可以通过访问http://localhost:8080/访问内网服务了
JschUtil.bindPort(session, "172.20.12.123", 8080, 8080);
其它方法
generateLocalPort生成一个本地端口(从10001开始尝试,找到一个未被使用的本地端口)unBindPort解绑端口映射openAndBindPortToLocal快捷方法,将连接到跳板机和绑定远程主机端口到本地使用一个方法搞定close关闭SSH会话


 517
517

 被折叠的 条评论
为什么被折叠?
被折叠的 条评论
为什么被折叠?
 到【灌水乐园】发言


