


图片浏览在应用中是一种比较常用的功能,主要包括图片的放大、缩小、旋转、上下左右移动图片。LZ花了一天时间实现了一下这些功能,希望能够帮到阅读此博客的码农们。
先把前期工作准备一下,创建一个UWP项目。页面代码如下(PS:很简单就不啰嗦了,直接把代码贴出来):
<Page
    x:Class="PicViewer.MainPage"
    xmlns="http://schemas.microsoft.com/winfx/2006/xaml/presentation"
    xmlns:x="http://schemas.microsoft.com/winfx/2006/xaml"
    xmlns:local="using:PicViewer"
    xmlns:d="http://schemas.microsoft.com/expression/blend/2008"
    xmlns:mc="http://schemas.openxmlformats.org/markup-compatibility/2006"
    mc:Ignorable="d">

    <Grid Background="{ThemeResource ApplicationPageBackgroundThemeBrush}">
        <Grid.RowDefinitions>
            <RowDefinition />
            <RowDefinition Height="100"/>
        </Grid.RowDefinitions>
        <Grid x:Name="PicShow"  Grid.Row="0"  RightTapped="StackPanel_RightTapped" PointerPressed="StackPanel_PointerPressed" PointerReleased="PicShow_PointerReleased">
            <Image x:Name="PicImage"  Source="Assets/123.jpg" Margin="20" Stretch="Uniform" PointerMoved="Image_PointerMoved"  >
            </Image>
        </Grid>
        <StackPanel Grid.Row="1" Orientation="Horizontal" HorizontalAlignment="Center">
            <Button Content="放大" Click="BtnEnlarge_Click"></Button>
            <Button Content="缩小" Click="BtnNarrow_Click"></Button>
            <Button Content="顺时针90°" Click="BtnClockwise90_Click"></Button>
            <Button Content="逆时针90°" Click="BtnEastern90_Click"></Button>
            <RelativePanel Margin="20,0,0,0">
                <Button Content="上" x:Name="btnUp" RelativePanel.AlignHorizontalCenterWithPanel="True" Click="btnRmUp_Click"/>
                <StackPanel x:Name="btnLeftOrRight" Orientation="Horizontal" RelativePanel.Below="btnUp">
                    <Button Content="左" Click="btnRmLeft_Click"/>
                    <Button Content="右" Click="btnRmRight_Click"/>
                </StackPanel>
                <Button Content="下" x:Name="btnDown" Click="btnRmDown_Click" RelativePanel.Below="btnLeftOrRight" RelativePanel.AlignHorizontalCenterWithPanel="True"/>
            </RelativePanel>
        </StackPanel>
    </Grid>
</Page>
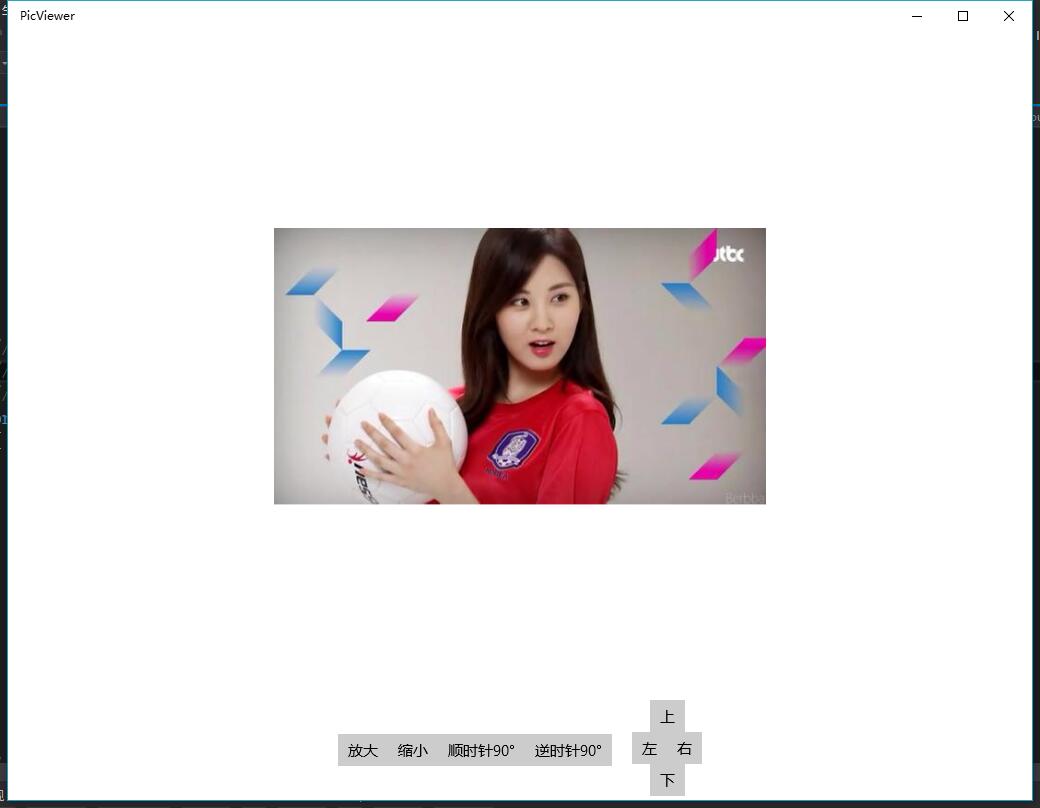
运行效果如下:

下面就一一实现各按钮的功能(PS:图片上的美女是少女时代的徐珠贤,怎么样很漂亮吧!!!嘿嘿)。
图片放大、缩小功能
图片的缩放需要用到ScaleTransform类,通过这个类可以将对象以某个中心点为基准进行放大与缩小的操作。CenterX和CenterY可以指定这个中心点。具体实现看一下代码。
图片放大源码
ScaleTransform temp = new ScaleTransform();
/// <summary>
/// 放大图片
/// </summary>
private void BtnEnlarge_Click(object sender, RoutedEventArgs e)
{
temp.CenterX = PicShow.ActualWidth / 2;
temp.CenterY = PicShow.ActualHeight / 2;
if (temp.ScaleX<6d)
{
temp.ScaleX += 0.5d;
}
if (temp.ScaleY < 6d)
{
temp.ScaleY += 0.5d;
}
PicShow.RenderTransform = temp;
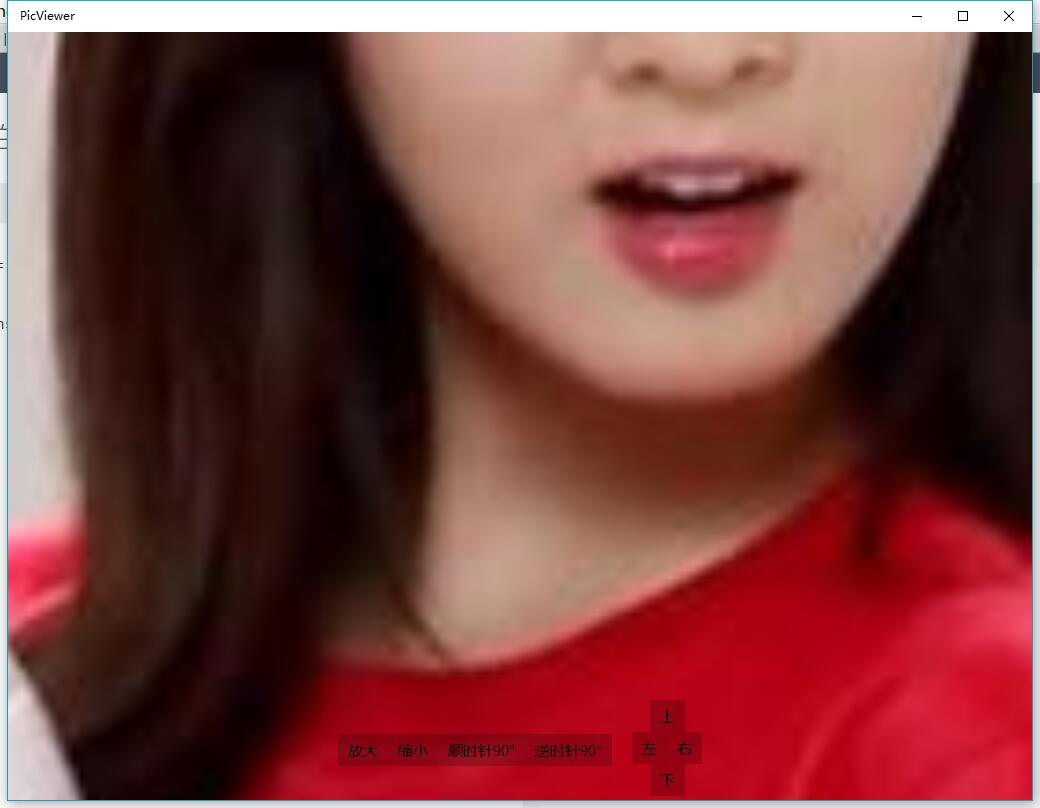
}图片放大实现效果
图片缩小源码
ScaleTransform temp = new ScaleTransform();
/// <summary>
/// 放大图片
/// </summary>
/// <summary>
/// 缩小图片
 /// </summary>
 private void BtnNarrow_Click(object sender, RoutedEventArgs e)
 {
     temp.CenterX = PicShow.ActualWidth / 2;
     temp.CenterY = PicShow.ActualHeight / 2;
     if (temp.ScaleX >0)
     {
         temp.ScaleX -= 0.5d;
     }
     if (temp.ScaleY > 0)
     {
         temp.ScaleY -= 0.5d;
     }
     PicShow.RenderTransform = temp;
 }
图片缩小实现效果
OK,图片放大缩小就实现了,很简单吧。下一篇将讲一下如何旋转图片。


 220
220

 被折叠的 条评论
为什么被折叠?
被折叠的 条评论
为什么被折叠?
 到【灌水乐园】发言


