


1. 为WDA这个APP申请bundleid,即应用id
Step1、使用苹果开发者账号登录 Apple Developer 网站。
Step2、进入 Certificates, Identifiers & Profiles
-
在左侧菜单选择 Certificates, Identifiers & Profiles(证书、标识符和配置文件)。
依次申请appid, certificate, profile.
证书申请两个包括develop和distribution证书,profile也申请两个包括develop和distribution
2. xcode里编译appium目录下的WebDriverAgent项目
Step1、找到WebDriverAgent项目路径
如果是brew安装的appium, appium下的webdriverAgent目录是
xusujuan@xusujuandeAir-2 local % find /opt/homebrew -name "WebDriverAgent.xcodeproj"
/opt/homebrew/lib/node_modules/appium-inspector/node_modules/appium/node_modules/appium-webdriveragent/WebDriverAgent.xcodeproj
Step2、配置bundle ID和 develop证书以及develop profile
Step3、运行WDA
为了脱离xcode软件运行WDA,可采用编译离线包或xcodebuild命令行的方式
编译安装WDA.app方式
使用iOS App Singer打包离线的WDA包, 要用上前面生成的certificate和profile
见 https://zhuanlan.zhihu.com/p/673319266
安装重新打包后的app报错及解决方法:
1、安装的WDA.ipa打开时会闪退
上面文章讲了怎么打包一个ipa文件,但有个步骤不对,压缩ipa文件时候,不应包含Payload那层,
直接将WebDriverAgentRunner-Runner.ipa文件放在iOS App Signer里重签名,不需要压缩个WDA.ipa
2、安装WDA时,有些手机会报错
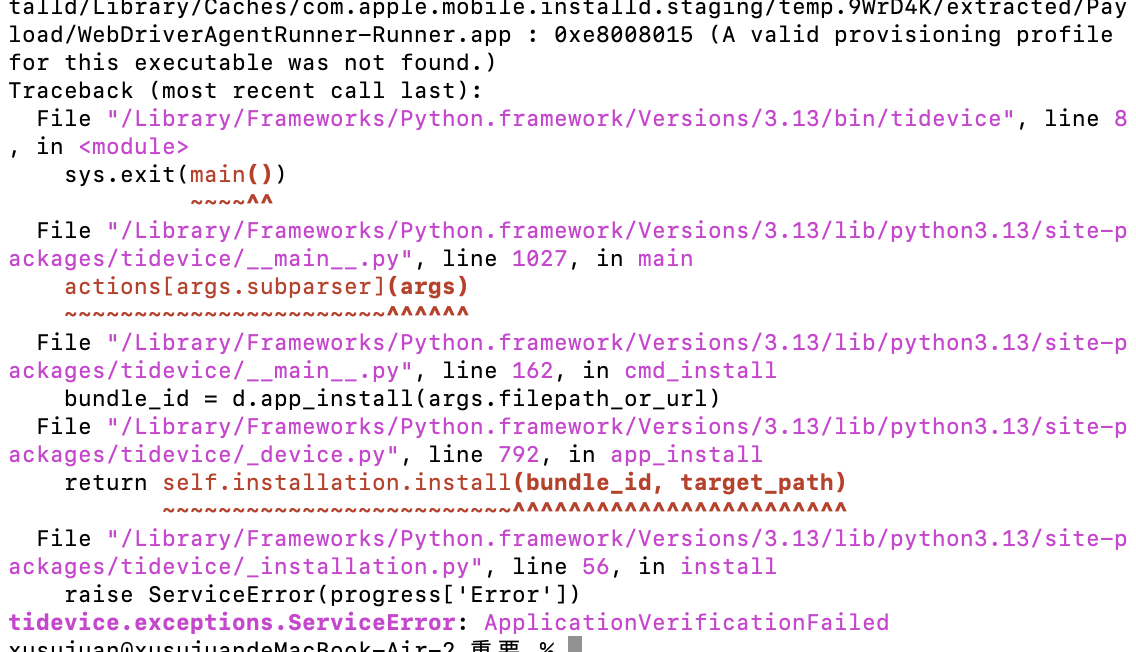
原因是重签名时用错了profile,要用分发的profile
也可以使用xcodebuild命令安装到设备上
xcodebuild -project WebDriverAgent.xcodeproj -scheme WebDriverAgentRunner -destination "id=00008120-001449382E42601E" test 能往设备上运行WDA
注意:在xcode UI 页面点击运行test和xcodebuild的test,区别在于UI页面是一个编译器,只支持往一个设备上运行WDA,而xcodebuild可以打开多个终端往多个设备上运行WDA,这样能在一个mac电脑上支持多设备自动化执行


 被折叠的 条评论
为什么被折叠?
被折叠的 条评论
为什么被折叠?
 到【灌水乐园】发言


