


Hi3531平台3G模块驱动调试,模块选用ZTE MU350。
1、修改内核配置:
make menuconfig
[*] Network device support  --->

      USB Network Adapters  --->

<*>   QMI WWAN driver for Qualcomm MSM based 3G and LTE modems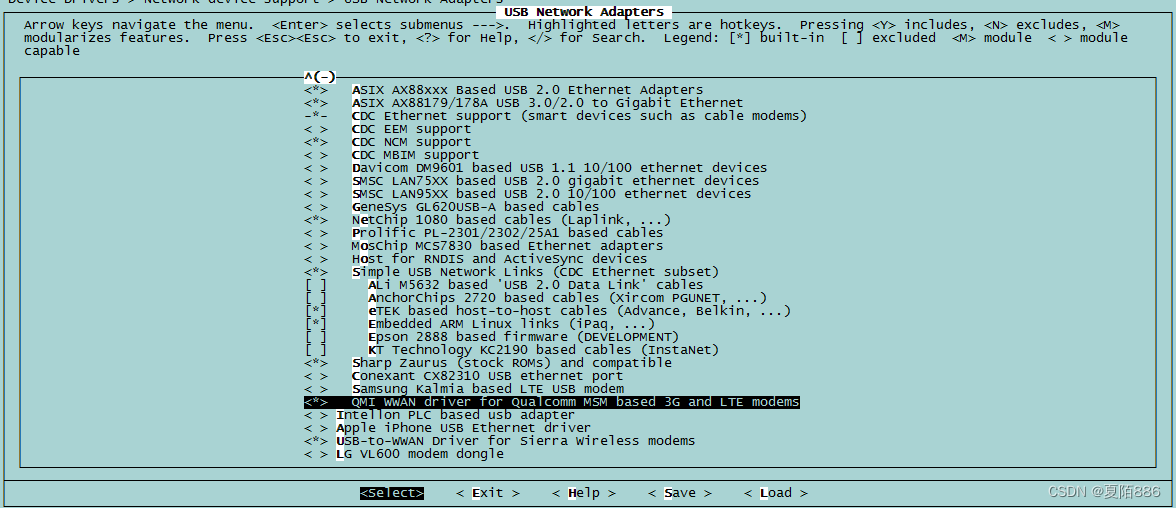
[*] Network device support  --->

<*>   PPP (point-to-point protocol) support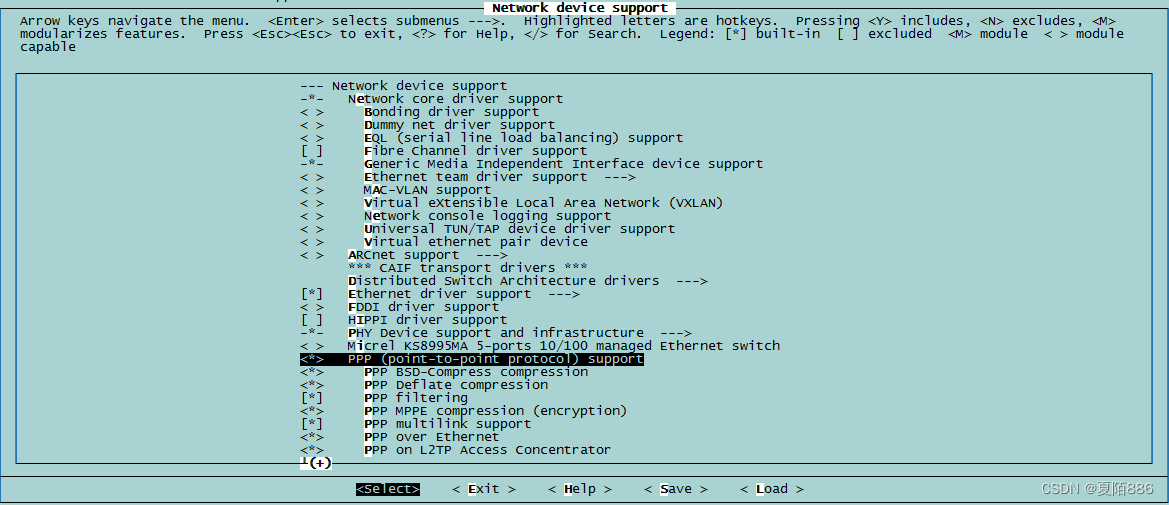
 [*] USB support  --->

<*>   USB Serial Converter support  --->

<*>   USB driver for GSM and CDMA modems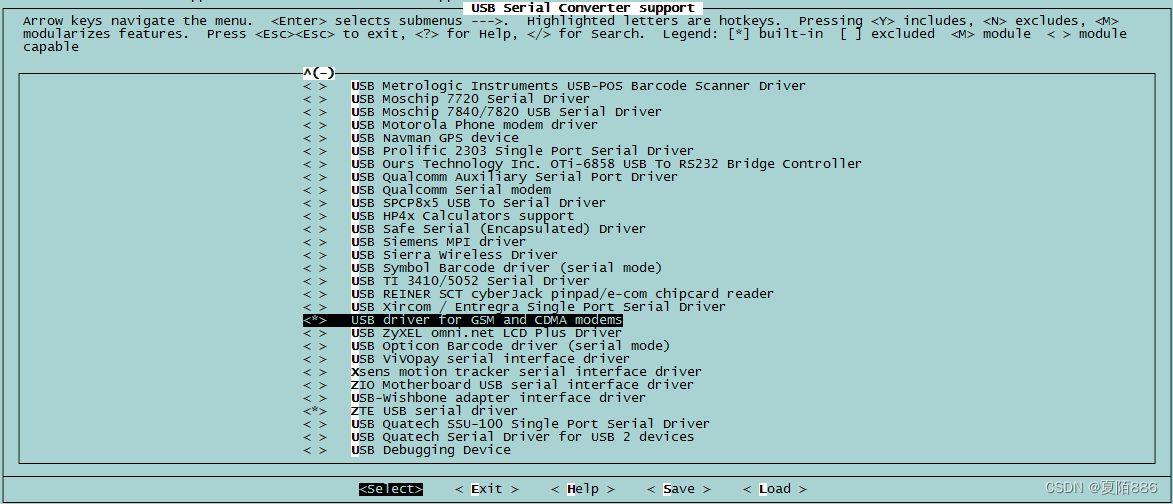
2、修改内核驱动源码:
修改option.c,增加
{ USB_DEVICE_AND_INTERFACE_INFO(ZTE_VENDOR_ID, 0x0003, 0xff, 0xff, 0xff)},
Hi3531源码中目前已有,不需修改。
3、编译并更新内核,插入ZTE MU350设备打印信息如下:
usb 3-1: new full-speed USB device number 4 using hiusb-xhci

usb 3-1: Device not responding to set address.

usb 3-1: Device not responding to set address.

usb 3-1: device not accepting address 4, error -71

usb 3-1: new full-speed USB device number 5 using hiusb-xhci

usb-storage 3-1:1.0: USB Mass Storage device detected

scsi4 : usb-storage 3-1:1.0

scsi 4:0:0:0: CD-ROM            ZTE Corp CD-ROM           0.01 PQ: 0 ANSI: 0

sr0: scsi3-mmc drive: 0x/24x pop-up

cdrom: Uniform CD-ROM driver Revision: 3.20
因无线网卡识别为CD-ROM模式,需切换无线网卡模式为modem
eject /dev/sr0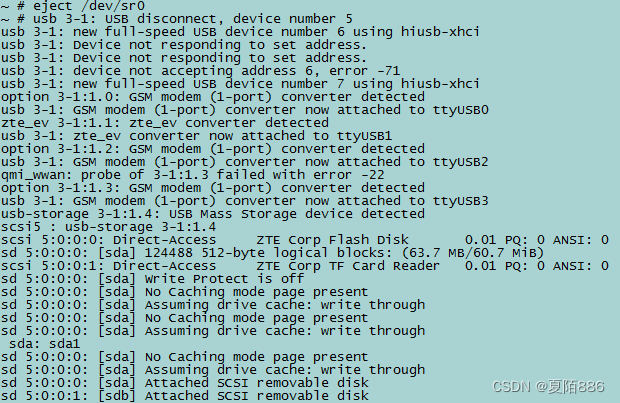
此时,通过 ls /dev 命令可以看到 ttyUSB0 ttyUSB1 ttyUSB2 ttyUSB3,即为usb无线网卡转换为串口的设备。
4、交叉编译ppp-2.4.7
将chat pppd拷贝至文件系统/sbin/
ppp目录拷贝至文件系统/etc/,根据需要修改脚本:

5、pppd拨号
pppd call tdscdma &
abort on (NO CARRIER)
abort on (ERROR)
abort on (NO DIALTONE)
abort on (BUSY)
abort on (NO ANSWER)
send (AT^M)
expect (OK)
^M
OK
-- got it
send (ATZ^M)
expect (OK)
^M
^M
OK
-- got it
send (ATE0V1^M)
expect (OK)
^M
^M
OK
-- got it
send (ATS0=0^M)
expect (OK)
^M
^M
OK
-- got it
send (AT+CGDCONT=1,\"IP\",\"cmnet\"^M)
expect (OK)
^M
^M
OK
-- got it
send (AT+CFUN=1^M)
expect (OK)
^M
^M
OK
-- got it
send (ATDT*99***1#^M)
expect (CONNECT)
^M
^M
CONNECT
-- got it
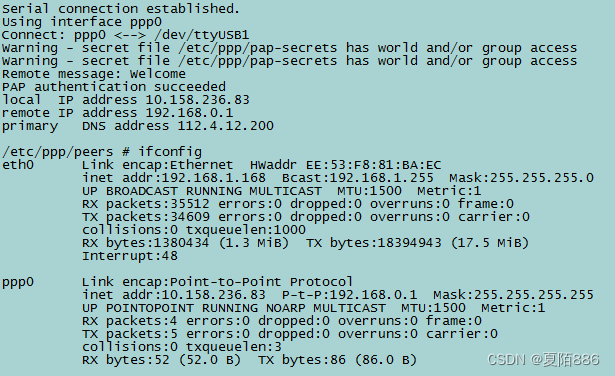
Serial connection established.
Using interface ppp0
Connect: ppp0 <--> /dev/ttyUSB1
Warning - secret file /etc/ppp/pap-secrets has world and/or group access
Warning - secret file /etc/ppp/pap-secrets has world and/or group access
Remote message: Welcome
PAP authentication succeeded
local IP address 10.158.236.83
remote IP address 192.168.0.1
primary DNS address 112.4.12.200拨号成功,获取到IP、网关、DNS
6、查看网卡信息
ifconfig查看多出ppp0网卡
7、将DNS加到/etc/resolv.conf中
/etc # touch resolv.conf

/etc # vi resolv.conf

nameserver 112.4.12.200
保存退出
8、ping测试
ping www.baidu.com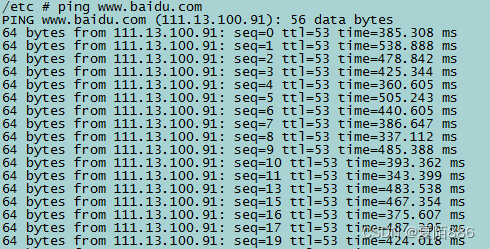


 952
952


 被折叠的 条评论
为什么被折叠?
被折叠的 条评论
为什么被折叠?
 到【灌水乐园】发言


