


【前言】
本文介绍了如何使用CMake来构建一个Hello World的C工程.
【CMake使用惯例流程】
使用过CMake构建项目的朋友都知道,CMake的使用有如下的“惯例”:
 1. 在项目根目录建立一个build目录:mkdir build && cd build.(该目录用于存储编译生成的相应文件)
 2. 进入build目录,编译源码生成Makefile
 3. 确定生成Makefile成功,执行make.(或者打开生成的工程文件,如Visual Studio项目文件或者是Xcode项目文件)
【目录结构】
下面我要建立一个Hello World也是按照这个过程来使用CMake构建。
整个项目目录结构如下
.
└── cmaketest
    ├── build
    ├── CMakeLists.txt
    └── hello.c
主要过程
第一步:新建hello.c
#include <stdio.h>
int main()
{
  printf("hello,this is my first using cmake project/n");
  return 0;
}
第二步:新建CMakeLists.txt
add_executable(hello hello.c)第三步:使用“惯例”方法来构建
在cmaketest下创建一个build目录
进入build目录,编译源码生成Makefile
cmake [选项] <源码路径>
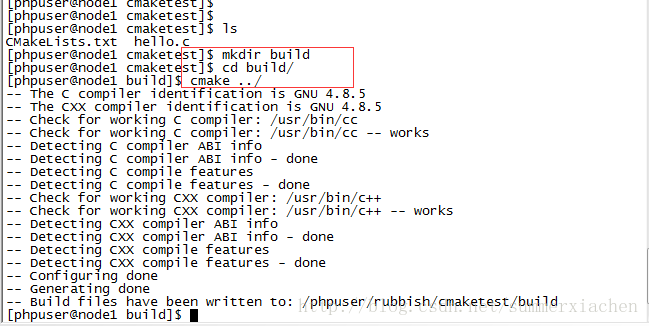
所以在build下执行
cmake ../[phpuser@node1 build]$ cmake ../ 输出如下: -- The C compiler identification is GNU 4.8.5 -- The CXX compiler identification is GNU 4.8.5 -- Check for working C compiler: /usr/bin/cc -- Check for working C compiler: /usr/bin/cc -- works -- Detecting C compiler ABI info -- Detecting C compiler ABI info - done -- Detecting C compile features -- Detecting C compile features - done -- Check for working CXX compiler: /usr/bin/c++ -- Check for working CXX compiler: /usr/bin/c++ -- works -- Detecting CXX compiler ABI info -- Detecting CXX compiler ABI info - done -- Detecting CXX compile features -- Detecting CXX compile features - done -- Configuring done -- Generating done -- Build files have been written to: /phpuser/rubbish/cmaketest/build此时查看build目录下内容:
[phpuser@node1 build]$ ll -a
总用量 28
drwxrwxr-x 3 phpuser phpuser    89 1月  30 15:10 .
drwxrwxr-x 3 phpuser phpuser    56 1月  30 15:10 ..
-rw-rw-r-- 1 phpuser phpuser 12617 1月  30 15:10 CMakeCache.txt
drwxrwxr-x 5 phpuser phpuser   303 1月  30 15:10 CMakeFiles
-rw-rw-r-- 1 phpuser phpuser  1504 1月  30 15:10 cmake_install.cmake
-rw-rw-r-- 1 phpuser phpuser  4748 1月  30 15:10 Makefile
可以看到生成的Makefile
执行
make[phpuser@node1 build]$ make Scanning dependencies of target hello [ 50%] Building C object CMakeFiles/hello.dir/hello.c.o [100%] Linking C executable hello [100%] Built target hello再次查看build目录下内容,可以看到生成的hello文件
[phpuser@node1 build]$ ll -a
总用量 40
drwxrwxr-x 3 phpuser phpuser   102 1月  30 15:20 .
drwxrwxr-x 3 phpuser phpuser    56 1月  30 15:10 ..
-rw-rw-r-- 1 phpuser phpuser 12617 1月  30 15:10 CMakeCache.txt
drwxrwxr-x 5 phpuser phpuser   303 1月  30 15:20 CMakeFiles
-rw-rw-r-- 1 phpuser phpuser  1504 1月  30 15:10 cmake_install.cmake
-rwxrwxr-x 1 phpuser phpuser  8520 1月  30 15:20 hello
-rw-rw-r-- 1 phpuser phpuser  4748 1月  30 15:10 Makefile
运行
./hello[phpuser@node1 build]$ ./hello hello,this is my first using cmake project

总结
以上就是使用CMake来构建一个Hello World C++项目的过程,可以看到相对于自己编写Makefile,使用CMake是简单很多的,仅需要在CMakeLists.txt加入一句:
add_executable(hello, hello.c)就搞定了。
CMakeLists.txt中可以配置很多参数,具体可以查阅


 554
554


 被折叠的 条评论
为什么被折叠?
被折叠的 条评论
为什么被折叠?
 到【灌水乐园】发言


