


一、python
1.1 安装Homebrew
使用brew安装的软件,不再需要sudo命令。终端输入:
/bin/bash -c "$(curl -fsSL https://cdn.jsdelivr.net/gh/ineo6/homebrew-install/install.sh)"
如果出现报错:
Error: Checksum mismatch.
Expected: 0cb1cc7af109437fe0e020c9f3b7b95c3c709b140bde9f991ad2c1433496dd42
Actual: 0aabe5d324282502909b37aa37a5d1ba9af094475440fee0d8a9910899fce0bd
Archive: /Users/用户/Library/Caches/Homebrew/portable-ruby-2.6.8.yosemite.bottle.tar.gz
To retry an incomplete download, remove the file above.
Error: Failed to install Homebrew Portable Ruby (and your system version is too old)!
则终端输入:
rm /Users/用户/Library/Caches/Homebrew/portable-ruby-2.6.8.yosemite.bottle.tar.gz
brew update --verbose
1.2 安装python3
终端输入:
brew install python3
检测安装成功
python3 -V
出现版本号即安装成功
pip3 -V
出现版本号即安装成功
注意:如之前安装过python3导致安装后输入python3未找到命令,可尝试brew link --overwrite python3重新链接
1.3 安装Nodejs
终端输入:
brew install node
检查是否安装成功
node -v
出现版本号即安装成功
1.4 安装cnpm
终端输入:
npm install -g cnpm --registry=https://registry.npm.taobao.org
如果报错:
Error: EACCES: permission denied, access '/usr/local/lib/node_modules'
则输入:
sudo npm install -g cnpm --registry=https://registry.npm.taobao.org
按enter键后再次输入管理员密码后按enter键
检查安装是否成功
cnpm -v
出现版本号即安装成功
以后使用cnpm 命令代替npm命令
二、appium
2.1 安装appium
cnpm install -g appium
如果报错:
(node:44214) UnhandledPromiseRejectionWarning: Error: EACCES: permission denied, mkdir '/usr/local/lib/node_modules/appium/node_modules/appium-chromedriver/2021103-44214-1njmqmy.8u6s'
则终端输入以下执行:
sudo npm install -g appium --unsafe-perm=true --allow-root
可输入appium -v查看appium版本
2.2 安装Carthage
brew install carthage
2.3 安装appium doctor
cnpm install -g appium-doctor
检查是否安装完成
appium-doctor --ios
2.4 安装Appium Client
pip3 install Appium-Python-Client
如果报错:
You are using pip version 21.2.4; however, version 21.3.1 is available.
You should consider upgrading via the '/usr/local/opt/python@3.9/bin/python3.9 -m pip install --upgrade pip' command.
则输入:
sudo pip3 install --upgrade pip
按下enter键后输入密码按下enter键
2.5 安装Appium Desktop
访问地址https://github.com/appium/appium-desktop/releases/tag/v1.22.0选择下载

三、ios
3.1 下载xcode
进入https://developer.apple.com/xcode/官网下载

下载完后终端输入:
xcode-select --install
如报错:
xcode-select: error: command line tools are already installed, use "Software Update" to install updates
则终端输入:
sudo rm -rf /library/Developer/CommandLineTools
code-select --install
按enter后弹出页面,点击安装

3.2 安装WebDriverAgent
用来查看页面,定位元素。
3.2.1 终端执行:
cd ~
git clone https://github.com/facebook/WebDriverAgent.git
cd WebDriverAgent
mkdir -p Resources/WebDriverAgent.bundle
./Scripts/bootstrap.sh  # 开始下载并编译 编译不应该报错
cd /usr/local/lib/node_modules/appium/node_modules/appium-xcuitest-driver/
rm -rf WebDriverAgent  # 把自带的删掉
ln -s ~/WebDriverAgent WebDriverAgent  # 用facebook的原版替换回去
3.2.2 签名设置:
进入Homebrew安装目录,点击WebDriverAgent.xcodeproj,更改WebDriverAgent 的BundleID改为个人名字或公司名字,改完后如还提示有错误,则在Build Settings的Product Bundle Identifier里再修改一下。再修改WebDriverAgentLib,WebDriverAgentRunner,IntergrationApp中的tem,bundleID等信息,编译时哪个报错就改哪个
3.2.3. 安装到虚拟机:
点击product->test选择虚拟机即可,可以看到手机桌面多出一个app是WebDriverAgentRunner
3.3 连接配置真机
前提:先使用数据线连接真机
3.3.1 xcode打开WebDriverAgent.xcodepro工程,点击product->test选择真机,手机桌面多出一个app是WebDriverAgentRunner,且出现Automation Running字样在屏幕
3.3.2 获取手机的udid以及app的bundleId
udid,即手机序列号,打开iTunes软件,点击序列号字母处。
bundleId,即app
在App Store中搜索app,右键复制链接. 比如:

https://apps.apple.com/cn/app/kindle/id405399194?mt=12. 拷贝数字在URL中id的后面, 比如405399194
打开浏览器 https://itunes.apple.com/lookup?id=405399194
下载1.txt. 打开1.txt文件,搜索bundleId例如:“bundleId”:“com.amazon.Kindle”

3.4 安装相关依赖
3.4.1 安装libimobiledevice和ideviceinstaller
brew install libimobiledevice --HEAD   #真机和iOS手机通讯使用
brew install ideviceinstaller   # 安装app使用
3.4.2 iOS10需要安装ios-deploy
sudo cnpm install -g ios-deploy --unsafe-prem=true
如果报错:
xcode-select: error: tool 'xcodebuild' requires Xcode, but active developer directory '/Library/Developer/CommandLineTools' is a command line tools instance
输入:
xcode-select --print-path
执行后结果如下:
/Library/Developer/CommandLineTools
再输入:
sudo xcode-select --switch /Applications/Xcode.app/Contents/Developer/
xcode-select --print-path
执行后结果如下:
/Applications/Xcode.app/Contents/Developer
再重新进行安装ios-deploy命令
sudo cnpm install -g ios-deploy --unsafe-prem=true
3.4.3 安装xpretty
gem install xcpretty
如果报错
You don't have write permissions for the /Library/Ruby/Gems/2.6.0 directory.
执行:
sudo gem install xcpretty
3.4.4 安装ios-webkit-debug-proxy
brew install ios-webkit-debug-proxy
四、IDE
推荐下载pycharm
4.1 配置pycharm
Pycharm—preferences—project:projects—python interpreter—-设置小图标—add—system interpreter—usr/bin/python3.9—ok—ok
4.2 配置执行文件

点击Add configuration

点击+选择对应的语言,python

填好信息,script path填写要执行的文件 apply后ok
4.3 安装插件
执行用例脚本的时候报错,缺什么即在终端执行pip3 install 什么
4.4 注意点
使用 pytest 编写用例,必须遵守以下规则:
测试文件名必须以 test_ 开头或者 _test 结尾(如:test_aduan.py)
测试方法必须以 test 开头。
测试类命名以 Test 开头。
实例:
打开appium Server GUI点击start session
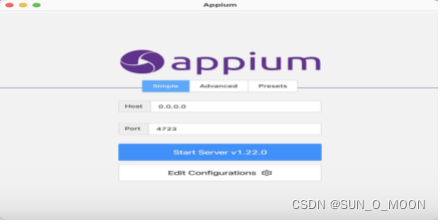](https://i-blog.csdnimg.cn/blog_migrate/75503cf16387f03bcbc99e8e7fd8744e.png)

点击搜索的按钮打开网址下载对应的appium inspector打开安装
填写对应的参数start session即可打开手机对应的app页面查看定位元素

下面就可以在pycharm中新建项目根据元素定位执行脚本啦~


 1183
1183

 被折叠的 条评论
为什么被折叠?
被折叠的 条评论
为什么被折叠?
 到【灌水乐园】发言


