


在这篇文章中简单的总结了一些UINavigationController导航栏视图控制器的简单用法
1.首先使用这个导航栏控制器,需要将另外一个控制器设置为这个导航栏控制器的根视图控制器
//Appdelegate.m//文件中
self.window = [[UIWindow alloc] initWithFrame:[UIScreen mainScreen].bounds];
[self.window makeKeyAndVisible];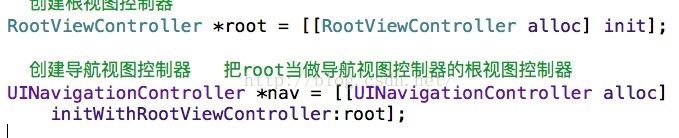
//RootViewController.m文件中写实现代码
//导航栏控制器一般分为两个部分 一个为UINavigationBar(导航栏) 一个为NavigationItem(导航标题栏)
<pre name="code" class="objc">//第一种 UINavigationBar
//设置导航栏样式
self.navigationController.navigationBar.barStyle = UIBarStyleDefault;//设置导航栏背景颜色
self.navigationController.navigationBar.backgroundColor = [UIColor yellowColor];//导航栏颜色
self.navigationController.navigationBar.barTintColor = [UIColor redColor];//导航栏元素颜色
self.navigationController.navigationBar.tintColor = [UIColor redColor];//导航栏是否隐藏 YES为隐藏 NO不隐藏
self.navigationController.navigationBarHidden = YES;//导航栏半透明效果 YES为开启 NO为关闭self.navigationController.navigitionBar.translucent = YES;//第二种 navigationItem 导航标题栏//导航栏标题 这两种设置导航栏标题的方式效果是一样的,但是它们俩有一个明显的区别就是 第一个写法会在修改导航栏标题的时候也会修改下面的标签栏self.title = @"我爱你";self.navigationItem.title = @"你最美";//更改标题视图 比如如下UISegmentedControl *seg = [[UISegmentedControl alloc] initWithItems:@[@"1", @"2"]]seg.frame = CGRcetMake(0,0, 100, 100);seg.selectSegmentIndex = 0;self.navigationItem.titleView = seg;//替换视图//在导航栏左边添加一个 和 多个按键 leftBarButtonItem leftBarButtonItems //在导航栏右边添加一个 和 多个按键 rightBarButtonItem rightBarButtonItems<pre name="code" class="objc">//1.系统的方法
self.navigationItem.leftBarButtonItem = [[UIBarButtonItem alloc] initWithBarButtonSystemItem:UIBarButtonSystemItemPlay target:self action:@selector(leftAction:)]; 创建的导航栏上面左边的按键
//2.使用自定义方法创建
self.navigationItem.rightBarButtonItem = [[UIBarButtonItem alloc] initWithImage:[[UIImage imageNamed:@"icon"] imageWithRenderingMode:UIImageRenderingModeAlwaysOriginal] style:UIBarButtonItemStylePlain target:self action:@selector(rightAction:)]; 创建导航栏上面右面的按键//页面跳转的方式
//第一种为通过导航栏控制器进行界面跳转
1.[self.navigationController pushViewController:second animated:YES]; second为你将要跳转的控制器的实例化对象 也叫入栈
2.[self.navigationController popViewControllerAnimated:YES]; 返回上一个界面,也叫出栈
3.[self.navigationController popToRootViewControllerAnimated:YES]; 直接跳回最开始的那一个界面
//第二种方式叫模态,直接通过控制器进行跳转
1.[self presentViewController:second animated:YES completion:^{
}]; 跳转到这个second对象的类的界面中
2.[self dismissViewControllerAnimated:YES completion:^{
}];返回上一级界面


 196
196


 被折叠的 条评论
为什么被折叠?
被折叠的 条评论
为什么被折叠?
 到【灌水乐园】发言


