


开发流程
1、创建持久化类和映射文件
2、创建hibernate的配置文件
3、写spring的配置文件,引入sessionFactory
4、测试sessionFactory
5、写dao层和service层的接口和类
6、把dao层和service层的类放入到spring容器中
7、在spring的配置文件中进行aop的配置
……
8、测试
1、创建Person持久化类和映射文件
Person持久化类
import java.io.Serializable;
public class Person implements Serializable{
    private int pid;
    private String name;
    private String description;

    public Person(){}

    public Person(String name,String description){
        this.name = name;
        this.description=description;
    }

    public int getPid() {
        return pid;
    }

    public void setPid(int pid) {
        this.pid = pid;
    }

    public String getName() {
        return name;
    }
    public void setName(String name) {
        this.name = name;
    }
    public String getDescription() {
        return description;
    }
    public void setDescription(String description) {
        this.description = description;
    }
}
映射文件Person.hbm.xml
<?xml version="1.0" encoding="utf-8"?>
<!DOCTYPE hibernate-mapping PUBLIC "-//Hibernate/Hibernate Mapping DTD 3.0//EN"
"http://hibernate.sourceforge.net/hibernate-mapping-3.0.dtd">
<hibernate-mapping>
    <!--
        class用来描述一个类
           name 类的全名
           table 该持久化类对应的表名   可以不写,默认值为类名
           catalog  数据库的名称
     -->
    <class name="com.zhiyou.domain.Person" table="person">
        <!--
            用来描述主键
              name 属性的名称
              column 属性的名称对应的表的字段   可以不写  默认值就是属性的名称
              length  属性的名称对应的表的字段的长度  如果不写,默认是最大的长度
         -->
        <id name="pid" column="pid" length="5">
            <!--
                主键的产生器
             -->
            <generator class="increment"></generator>
        </id>

        <property name="name" length="20" type="string"></property>

        <property name="description" length="50" type="java.lang.String"></property>
    </class>
</hibernate-mapping>
2、创建hibernate的配置文件
hibernate.cfg.xml文件
<?xml version='1.0' encoding='utf-8'?>
<!DOCTYPE hibernate-configuration PUBLIC
        "-//Hibernate/Hibernate Configuration DTD 3.0//EN"
        "http://hibernate.sourceforge.net/hibernate-configuration-3.0.dtd">
<hibernate-configuration>
    <!-- 一个sessionFactory代表数据库的一个连接 -->
<session-factory>
    <!-- 链接数据库的用户名 -->
    <property name="connection.username">root</property>
    <!-- 链接数据库的密码 -->
    <property name="connection.password">123456</property>
    <!-- 链接数据库的驱动 -->
    <property name="connection.driver_class">
        com.mysql.jdbc.Driver
    </property>
    <!-- 链接数据库的url -->
    <property name="connection.url">
        jdbc:mysql://localhost:3306/test
    </property>
    <!--
        方言
        告诉hibernate用什么样的数据库
    -->
    <property name="dialect">
        org.hibernate.dialect.MySQLDialect
    </property>
    <!--
        validate 加载hibernate时,验证数据库的结构  默认值
        update  加载hibernate时,检查数据库,如果表不存在,则创建,如果存在,则更新
        create  每次加载hiberante,都会创建表
        create-drop  每次加载hiberante,创建,卸载hiberante时,销毁
    -->
    <property name="hbm2ddl.auto">update</property>
    <property name="show_sql">true</property>
    <property name="format_sql">true</property>
    <mapping resource="com/zhiyou/domain/Person.hbm.xml" />

</session-factory>
</hibernate-configuration>
3、写dao层和service层的接口和类
Dao层接口
import com.zhiyou.domain.Person;

public interface PersonDao {
    public void savePerson(Person person);

}
Dao层实现
import org.springframework.orm.hibernate3.support.HibernateDaoSupport;
import com.zhiyou.dao.PersonDao;
import com.zhiyou.domain.Person;

public class PersonDaoImpl extends HibernateDaoSupport implements PersonDao {

    @Override
    public void savePerson(Person person) {
        // TODO Auto-generated method stub
        this.getHibernateTemplate().save(person);

    }

}
service层接口
import com.zhiyou.domain.Person;

public interface PersonService {
    public void  savePerson(Person person);

}
service层接口实现
import com.zhiyou.dao.PersonDao;
import com.zhiyou.domain.Person;
import com.zhiyou.service.PersonService;

public class PersonServiceImpl implements PersonService {
    private PersonDao personDao;

    public PersonDao getPersonDao() {
        return personDao;
    }

    public void setPersonDao(PersonDao personDao) {
        this.personDao = personDao;
    }
    public PersonServiceImpl() {
        // TODO Auto-generated constructor stub
    }
    public PersonServiceImpl(PersonDao personDao) {
        // TODO Auto-generated constructor stub
        this.personDao=personDao;
    }

    @Override
    public void savePerson(Person person) {
        // TODO Auto-generated method stub
        this.personDao.savePerson(person);

    }

}
4、写一个数据连接池jdbc.properties
jdbc.driverClassName=com.mysql.jdbc.Driver
jdbc.url=jdbc\:mysql\://localhost\:3306/test
jdbc.username=root
jdbc.password=123456
5、把dao层和service层的类放入到spring容器中,在spring的配置文件中进行aop的配置
写spring的配置文件applicationContext.xml
<?xml version="1.0" encoding="UTF-8"?>
<beans xmlns="http://www.springframework.org/schema/beans"
    xmlns:aop="http://www.springframework.org/schema/aop" xmlns:tx="http://www.springframework.org/schema/tx"
    xmlns:xsi="http://www.w3.org/2001/XMLSchema-instance"
    xsi:schemaLocation="http://www.springframework.org/schema/beans
           http://www.springframework.org/schema/beans/spring-beans-2.5.xsd
           http://www.springframework.org/schema/aop
           http://www.springframework.org/schema/aop/spring-aop-2.5.xsd
           http://www.springframework.org/schema/tx
           http://www.springframework.org/schema/tx/spring-tx-2.5.xsd">
    <!--
        引入properties配置文件
     -->
    <bean
        class="org.springframework.beans.factory.config.PropertyPlaceholderConfigurer">
        <property name="locations">
            <value>classpath:jdbc.properties</value>
        </property>
    </bean>
    <bean id="dataSource" destroy-method="close"
        class="org.apache.commons.dbcp.BasicDataSource">
        <property name="driverClassName" value="${jdbc.driverClassName}" />
        <property name="url" value="${jdbc.url}" />
        <property name="username" value="${jdbc.username}" />
        <property name="password" value="${jdbc.password}" />
    </bean>
    <bean id="sessionFactory1" class="org.springframework.orm.hibernate3.LocalSessionFactoryBean">
        <property name="configLocation">
            <value>classpath:hibernate.cfg.xml</value>
        </property>
    </bean>

    <bean id="sessionFactory2" class="org.springframework.orm.hibernate3.LocalSessionFactoryBean">
        <property name="dataSource" ref="dataSource" />
        <!--
            映射文件所在的路径
         -->
        <property name="mappingDirectoryLocations">
            <list>
                <!--
                    spring容器会去该包及子包下搜索所有的映射文件
                 -->
                <value>com/zhiyou/domain</value>
            </list>
        </property>
        <property name="hibernateProperties">
            <props>
                <prop key="hibernate.dialect">org.hibernate.dialect.MySQL5InnoDBDialect</prop>
                <prop key="hibernate.show_sql">true</prop>
                <prop key="hibernate.hbm2ddl.auto">update</prop>
            </props>
        </property>
    </bean>
    <bean id="personDao" class="com.zhiyou.dao.impl.PersonDaoImpl">
        <property name="sessionFactory">
          <ref bean="sessionFactory2"/>
        </property>
    </bean>
    <bean id="transactionManager" class="org.springframework.orm.hibernate3.HibernateTransactionManager">
        <property name="sessionFactory">
           <ref bean="sessionFactory2"/>
        </property>
    </bean>
    <tx:advice transaction-manager="transactionManager" id="tx"></tx:advice>
    <bean id="personService" class="com.zhiyou.service.impl.PersonServiceImpl">
        <property name="personDao">
           <ref bean="personDao"/>
        </property>
    </bean>
    <aop:config>
       <aop:pointcut expression="execution(* com.zhiyou.service.impl.PersonServiceImpl.*.*(..))" id="preform"/>
       <aop:advisor advice-ref="tx" pointcut-ref="preform"/>
    </aop:config>
    </beans>
6、测试
import org.junit.Test;
import org.springframework.context.ApplicationContext;
import org.springframework.context.support.ClassPathXmlApplicationContext;
import com.zhiyou.domain.Person;
import com.zhiyou.service.PersonService;
public class Hibernate_spring_Test {
@Test
public void test1()
{
ApplicationContext context=new ClassPathXmlApplicationContext("applicationContext.xml");
PersonService personService=(PersonService)context.getBean("personService");
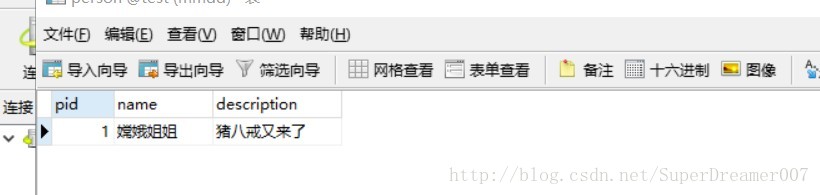
Person person=new Person();
person.setPid(8);
person.setName("嫦娥姐姐");
person.setDescription("猪八戒又来了");
personService.savePerson(person);
}
}


 5823
5823


 被折叠的 条评论
为什么被折叠?
被折叠的 条评论
为什么被折叠?
 到【灌水乐园】发言


