关于列表的创建,上一篇博文已经介绍,本文直接对列表行进行操作,下一篇介绍几种样式的列表:索引,标记和自定义的table
一、选中行
实现代理方法
2 | -(void)tableView:(UITableView *)tableView didSelectRowAtIndexPath:(NSIndexPath *)indexPath |
4 | NSLog(@"您点击了第%d分区第%d行",indexPath.section, indexPath.row); |
二、删除行
要对行进行操作,首先要实现代理方法
1 | - (BOOL)tableView:(UITableView *)tableView canEditRowAtIndexPath:(NSIndexPath *)indexPath |
先讲述单独删除一行数据,即左滑出现删除按钮,并删除行的操作,后文会介绍多选批量删除
图1 删除行

1. 可重置删除按钮的标题,默认为"delete"
2 | - (NSString *)tableView:(UITableView *)tableView titleForDeleteConfirmationButtonForRowAtIndexPath:(NSIndexPath *)indexPath |
2. 点击删除后
01 | - (void)tableView:(UITableView *)tableView commitEditingStyle:(UITableViewCellEditingStyle)editingStyle forRowAtIndexPath:(NSIndexPath *)indexPath |
05 | [self.dataArray removeObjectAtIndex:indexPath.row]; |
08 | [tableView deleteRowsAtIndexPaths:@[indexPath] withRowAnimation:UITableViewRowAnimationFade]; |
三、插入行
①这时我将插入行和删除行都以一个按钮动作来触发,点击后tableView进入编辑模式,先上效果图
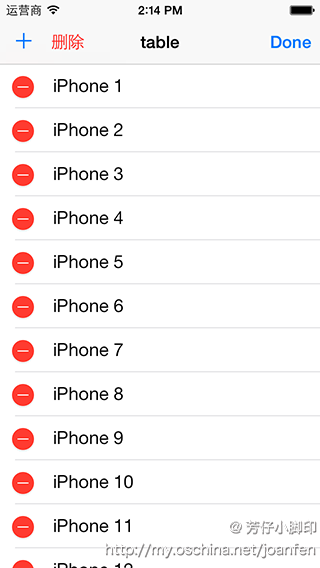
图2 进入添加行模式 图3 进入删除行模式

②在ViewDidLoad中添加代码,其中self.addButton和self.deleteBarButtonItem均在storyBoard中创建,下文中的按钮也是这种情况
1 | NSArray *leftBarButtons = [NSArray arrayWithObjects:self.addButton,self.deleteBarButtonItem, nil]; |
3 | self.navigationItem.leftBarButtonItems = leftBarButtons; |
③在@interface中声明一个变量
1 | UITableViewCellEditingStyle selectEditingStyle; |
④两个按钮的点击事件
02 | -(void) updateBarButtons |
04 | if (self.tableView.editing==YES) { |
05 | self.navigationItem.rightBarButtonItem = self.doneBarButtonItem; |
09 | - (IBAction)addButtonClicked:(id)sender { |
10 | selectEditingStyle = UITableViewCellEditingStyleInsert; |
12 | [self.tableView setEditing:YES animated:YES]; |
14 | [self updateBarButtons]; |
18 | - (IBAction)deleteButtonClicked:(id)sender { |
21 | selectEditingStyle = UITableViewCellEditingStyleDelete; |
23 | [self.tableView setEditing:YES animated:YES]; |
25 | [self updateBarButtons]; |
⑤实现相应的代理方法
02 | - (BOOL)tableView:(UITableView *)tableView canEditRowAtIndexPath:(NSIndexPath *)indexPath |
08 | -(UITableViewCellEditingStyle)tableView:(UITableView *)tableView editingStyleForRowAtIndexPath:(NSIndexPath *)indexPath |
10 | return selectEditingStyle; |
15 | - (void)tableView:(UITableView *)tableView commitEditingStyle:(UITableViewCellEditingStyle)editingStyle forRowAtIndexPath:(NSIndexPath *)indexPath |
18 | if (editingStyle==UITableViewCellEditingStyleDelete) { |
21 | [self.dataArray removeObjectAtIndex:indexPath.row]; |
23 | [tableView deleteRowsAtIndexPaths:@[indexPath] withRowAnimation:UITableViewRowAnimationFade]; |
26 | else if(editingStyle == UITableViewCellEditingStyleInsert){ |
29 | [self.dataArray insertObject:@"new iPhone" atIndex:indexPath.row]; |
32 | [self.tableView insertRowsAtIndexPaths:@[indexPath] withRowAnimation:UITableViewRowAnimationAutomatic ]; |
37 | - (IBAction)doneButtonClicked:(id)sender { |
39 | [self.tableView setEditing:NO animated:YES]; |
41 | [self updateBarButtons]; |
四、移动行
①效果图
图4 移动行

②在tableView进入编辑模式时,可以对行进行移动操作,通过方法
2 | - (BOOL)tableView:(UITableView *)tableView canMoveRowAtIndexPath:(NSIndexPath *)indexPath |
③设置行可移动,并完成移动行方法,改变数据源
2 | - (void)tableView:(UITableView *)tableView moveRowAtIndexPath:(NSIndexPath *)fromIndexPath toIndexPath:(NSIndexPath *)toIndexPath |
4 | id object = [self.dataArray objectAtIndex:fromIndexPath.row]; |
6 | [self.dataArray removeObjectAtIndex:fromIndexPath.row]; |
8 | [self.dataArray insertObject:object atIndex:toIndexPath.row]; |
五、批量删除行
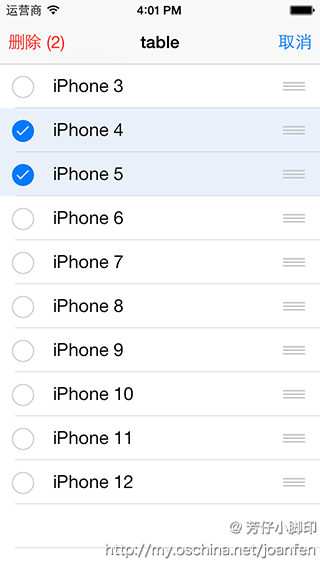
①即完成可以选择多个行之后批量删除,如图
图5 进入批量删除模式 图6 选中行准备删除

②在ViewDidLoad中添加代码
1 | self.navigationItem.rightBarButtonItem = self.editBarButtonItem; |
③现在需要达到,点击编辑按钮在右上角出现取消按钮,左上角出现删除按钮。并在选择时,能出现删除行的数量,修改updateBarButtons方法,并添加一个方法来根据条件修改删除按钮的标题
02 | -(void) updateBarButtons |
05 | if (self.tableView.allowsSelectionDuringEditing == YES) { |
07 | [self updateDeleteButtonTitle]; |
09 | self.navigationItem.leftBarButtonItems = nil; |
11 | self.navigationItem.leftBarButtonItem = self.multiDeleteBarButton; |
13 | self.navigationItem.rightBarButtonItem = self.cancelBarButtonItem; |
17 | if (self.tableView.editing==YES) { |
19 | self.navigationItem.rightBarButtonItem = self.doneBarButtonItem; |
22 | NSArray *leftBarButtons = [NSArray arrayWithObjects:self.addButton,self.deleteBarButtonItem, nil]; |
23 | self.navigationItem.leftBarButtonItems = leftBarButtons; |
25 | self.navigationItem.rightBarButtonItem = self.editBarButtonItem; |
02 | -(void)updateDeleteButtonTitle |
04 | NSArray *selectedRows = [self.tableView indexPathsForSelectedRows]; |
06 | BOOL allItemsAreSelected = selectedRows.count == self.dataArray.count; |
08 | BOOL noItemsAreSelected = selectedRows.count == 0; |
10 | if (allItemsAreSelected || noItemsAreSelected) |
12 | self.multiDeleteBarButton.title = @"删除全部"; |
16 | self.multiDeleteBarButton.title = [NSString stringWithFormat:@"删除 (%d)", selectedRows.count]; |
④在
1 | -(void)tableView:(UITableView *)tableView didSelectRowAtIndexPath:(NSIndexPath *)indexPath |
3 | - (void)tableView:(UITableView *)tableView didDeselectRowAtIndexPath:(NSIndexPath *)indexPath |
两个方法中调用updateDeleteButtonTitle方法
⑤点击编辑按钮时
2 | - (IBAction)editButtonClicked:(id)sender { |
3 | self.tableView.allowsMultipleSelectionDuringEditing = YES; |
5 | [self.tableView setEditing:YES animated:YES]; |
7 | [self updateBarButtons]; |
⑥点击删除多个按钮时
01 | - (IBAction)multiDeleteClicked:(id)sender { |
03 | NSArray *selectedRows = [self.tableView indexPathsForSelectedRows]; |
06 | BOOL deleteSpecificRows = selectedRows.count > 0; |
08 | if (deleteSpecificRows) |
11 | NSMutableIndexSet *indicesOfItemsToDelete = [NSMutableIndexSet new]; |
13 | for (NSIndexPath *selectionIndex in selectedRows) |
15 | [indicesOfItemsToDelete addIndex:selectionIndex.row]; |
18 | [self.dataArray removeObjectsAtIndexes:indicesOfItemsToDelete]; |
21 | [self.tableView deleteRowsAtIndexPaths:selectedRows withRowAnimation:UITableViewRowAnimationAutomatic]; |
26 | [self.dataArray removeAllObjects]; |
28 | [self.tableView reloadSections:[NSIndexSet indexSetWithIndex:0] withRowAnimation:UITableViewRowAnimationAutomatic]; |
31 | [self.tableView setEditing:NO animated:YES]; |
33 | self.tableView.allowsMultipleSelectionDuringEditing = NO; |
35 | [self updateBarButtons]; |
代码下载
http://www.oschina.net/action/code/download?code=33584&id=48435


 120
120

 被折叠的 条评论
为什么被折叠?
被折叠的 条评论
为什么被折叠?
 到【灌水乐园】发言


