


原文链接 http://www.woaitqs.cc/android/2016/07/28/android-plugin-get-apk-info.html
本文是 Android 系统学习系列文章中的第一章节的内容,介绍了 PackageManagerService 在启动时如何去加载已安装的应用,通过一个新的应用是如何在 PackageManagerService 的帮助下完成安装过程的。对此系列感兴趣的同学,可以收藏这个链接 Android 系统学习,也可以点击 RSS订阅 进行订阅。
接下来的分析,如果没有特别提及,是基于 SDK-23 版本进行的。
系统解析安装包过程
自行解析 Android APK 信息该如何入手呢?从这里入手的话,就得完整地知道系统是如何完成这个过程的,那么自然而然地就能想到通过 PackageManageService 入手进行分析,毕竟是掌管所有应用的大执行官。通过前面 Binder 系列的学习,我们了解到 PackageManageService 是将自己注入到 SystemManager 中去的,其后其他应用就可以通过 SystemServer 来访问 PackageManageService 了。
在 SystemServer 启动后,执行了 PackageManagerService 的 main 方法,后面的 isFirstBoot 方法是避免 PackageManangerService 被重复启动。
// Start the package manager.
Slog.i(TAG, "Package Manager");
mPackageManagerService = PackageManagerService.main(mSystemContext, installer,
        mFactoryTestMode != FactoryTest.FACTORY_TEST_OFF, mOnlyCore);
mFirstBoot = mPackageManagerService.isFirstBoot();
mPackageManager = mSystemContext.getPackageManager();
main 方法中,调用了构造函数,并将自己注入到 SystemServer 去,看起来大部分逻辑都在构造函数里,接着往下分析。
public static PackageManagerService main(Context context, Installer installer,
        boolean factoryTest, boolean onlyCore) {
    PackageManagerService m = new PackageManagerService(context, installer,
            factoryTest, onlyCore);
    ServiceManager.addService("package", m);
    return m;
}
构造函数相当复杂,这里只说明,对我们分析有用的东西。
// ... other code

// Collect vendor overlay packages.
// (Do this before scanning any apps.)
// For security and version matching reason, only consider
// overlay packages if they reside in VENDOR_OVERLAY_DIR.
File vendorOverlayDir = new File(VENDOR_OVERLAY_DIR);
scanDirLI(vendorOverlayDir, PackageParser.PARSE_IS_SYSTEM
        | PackageParser.PARSE_IS_SYSTEM_DIR, scanFlags | SCAN_TRUSTED_OVERLAY, 0);

// Find base frameworks (resource packages without code).
scanDirLI(frameworkDir, PackageParser.PARSE_IS_SYSTEM
        | PackageParser.PARSE_IS_SYSTEM_DIR
        | PackageParser.PARSE_IS_PRIVILEGED,
        scanFlags | SCAN_NO_DEX, 0);

// Collected privileged system packages.
final File privilegedAppDir = new File(Environment.getRootDirectory(), "priv-app");
scanDirLI(privilegedAppDir, PackageParser.PARSE_IS_SYSTEM
        | PackageParser.PARSE_IS_SYSTEM_DIR
        | PackageParser.PARSE_IS_PRIVILEGED, scanFlags, 0);

// Collect ordinary system packages.
final File systemAppDir = new File(Environment.getRootDirectory(), "app");
scanDirLI(systemAppDir, PackageParser.PARSE_IS_SYSTEM
        | PackageParser.PARSE_IS_SYSTEM_DIR, scanFlags, 0);

// Collect all vendor packages.
File vendorAppDir = new File("/vendor/app");
try {
    vendorAppDir = vendorAppDir.getCanonicalFile();
} catch (IOException e) {
    // failed to look up canonical path, continue with original one
}
scanDirLI(vendorAppDir, PackageParser.PARSE_IS_SYSTEM
        | PackageParser.PARSE_IS_SYSTEM_DIR, scanFlags, 0);

// Collect all OEM packages.
final File oemAppDir = new File(Environment.getOemDirectory(), "app");
scanDirLI(oemAppDir, PackageParser.PARSE_IS_SYSTEM
        | PackageParser.PARSE_IS_SYSTEM_DIR, scanFlags, 0);

// ... other code
如上代码,可以看到 PackageManagerService 在构造函数的时候,会扫描对应目录下的 APK,保证这些 APK 的信息被预先加载进来。我在 root 的手机下,在 /system/priv-app 目录下截图,这些就是系统高优先级加载的系统应用。

接下来看看 scanDirLI 这个函数,看看这里面进行了什么勾当。
private void scanDirLI(File dir, int parseFlags, int scanFlags, long currentTime) {
    final File[] files = dir.listFiles();

    // ...

    for (File file : files) {
        final boolean isPackage = (isApkFile(file) || file.isDirectory())
                && !PackageInstallerService.isStageName(file.getName());
        if (!isPackage) {
            // Ignore entries which are not packages
            continue;
        }
        try {
            scanPackageLI(file, parseFlags | PackageParser.PARSE_MUST_BE_APK,
                    scanFlags, currentTime, null);
        } catch (PackageManagerException e) {
            // ...
        }
    }
}
看起来,这里面只是做了对 APK 文件的过滤,并没有实际对于 APK 解析的代码,那么接着看看 scanPackageLI 的实现。
private PackageParser.Package scanPackageLI(File scanFile, int parseFlags, int scanFlags,
        long currentTime, UserHandle user) throws PackageManagerException {

    // ...

    final PackageParser.Package pkg;
    try {
        pkg = pp.parsePackage(scanFile, parseFlags);
    } catch (PackageParserException e) {
        throw PackageManagerException.from(e);
    }

    // ...

}
scanPackageLI 的实现也相对复杂,比如设计对供应商内置 APP 的更新逻辑等等,这里只关心是如何解析 APK 的,那么看看 parsePackage 是怎么实现的,我们能否通过 parsePackage 来达到我们自动解析 APK 的目的了?
parsePackage 方法,在不同 SDK 的版本里面实现各不一样,有兴趣的读者可以从这个链接 http://grepcode.com/search?query=packageParser 里面查看各个版本的实现,这里只看 SDK 23 版本的实现,这里针对 APK 目录和单一的 APK 文件分别进行处理。
public Package parsePackage(File packageFile, int flags) throws PackageParserException {
    if (packageFile.isDirectory()) {
        return parseClusterPackage(packageFile, flags);
    } else {
        return parseMonolithicPackage(packageFile, flags);
    }
}
接着看看 parseMonolithicPackage 的实现,前面的 mOnlyCoreApps 参数是对 Core APP 进行的处理,这边可以不看,主要看 parseBaseApk 方法的实现。
public Package parseMonolithicPackage(File apkFile, int flags) throws PackageParserException {
    if (mOnlyCoreApps) {
        final PackageLite lite = parseMonolithicPackageLite(apkFile, flags);
        if (!lite.coreApp) {
            throw new PackageParserException(INSTALL_PARSE_FAILED_MANIFEST_MALFORMED,
                    "Not a coreApp: " + apkFile);
        }
    }

    final AssetManager assets = new AssetManager();
    try {
        final Package pkg = parseBaseApk(apkFile, assets, flags);
        pkg.codePath = apkFile.getAbsolutePath();
        return pkg;
    } finally {
        IoUtils.closeQuietly(assets);
    }
}
在 parseBaseApk 中开始根据各个具体的节点(如 Application、Activity 等等),进行解析,最后得到整个 Package 的信息。
private Package parseBaseApk(Resources res, XmlResourceParser parser, int flags,
        String[] outError) throws XmlPullParserException, IOException {

        // ...

        if (tagName.equals("application")) {
            if (!parseBaseApplication(pkg, res, parser, attrs, flags, outError)) {
                return null;
            }
        } else if (tagName.equals("overlay")) {
          // ...
        } else if (tagName.equals("permission")) {
            if (parsePermission(pkg, res, parser, attrs, outError) == null) {
                return null;
            }
        }

        // ...
        return pkg;
}
这些得到的各种信息,最后都会存储在 PackageManagerService 中,这些信息就此保留下来,可用用来响应各种 IntentFilter ,等待启动命令。
经过上面的代码分析,可以看出,如果想要获取相应的包信息,可以调用 Package.parsePackage 方法来进行解析,这里唯一需要注意的地方在于这个方法的签名在不同 SDK 版本是不同的,需要针对不同版本做处理。
APK 包安装过程
我们知道怎么获取包信息了,但这还不够,我们在安装应用的时候,还弹出了一个安装界面,这个安装界面背后有什么逻辑了?这些逻辑应该也对我们实现加载插件很有帮助吧,我们来仔细地分析下。
实际在处理安装应用 Intent 的是 PackageInstallerActivity,但这个类厂商可以随意修改,这个类也并没有在 android.jar 中,这里就不做分析了。PackageInstallerActivity 在安装过程中,实际调用的是 ApplicationPackageManager 里面的代码。
private void installCommon(Uri packageURI,
        PackageInstallObserver observer, int flags, String installerPackageName,
        VerificationParams verificationParams, ContainerEncryptionParams encryptionParams) {
    if (!"file".equals(packageURI.getScheme())) {
        throw new UnsupportedOperationException("Only file:// URIs are supported");
    }
    if (encryptionParams != null) {
        throw new UnsupportedOperationException("ContainerEncryptionParams not supported");
    }

    final String originPath = packageURI.getPath();
    try {
        mPM.installPackage(originPath, observer.getBinder(), flags, installerPackageName,
                verificationParams, null);
    } catch (RemoteException ignored) {
    }
}
在 ApplicationPackageManager 中是通过 Binder 机制调用了 PackageManagerService 中的 installPackage 方法,让我们一探究竟。
@Override
public void installPackage(String originPath, IPackageInstallObserver2 observer,
        int installFlags, String installerPackageName, VerificationParams verificationParams,
        String packageAbiOverride) {
    installPackageAsUser(originPath, observer, installFlags, installerPackageName,
            verificationParams, packageAbiOverride, UserHandle.getCallingUserId());
}
接着调用了 installPackageAsUser 方法。
public void installPackageAsUser(String originPath, IPackageInstallObserver2 observer,
        int installFlags, String installerPackageName, VerificationParams verificationParams,
        String packageAbiOverride, int userId) {
          final File originFile = new File(originPath);

    // 权限校验

    final OriginInfo origin = OriginInfo.fromUntrustedFile(originFile);

    final Message msg = mHandler.obtainMessage(INIT_COPY);
    msg.obj = new InstallParams(origin, null, observer, installFlags, installerPackageName,
            null, verificationParams, user, packageAbiOverride, null);
    mHandler.sendMessage(msg);
}
原来是通过 Handler 方式发送消息的,那么看看 PackageHandler 是如何处理这个消息的。在接受到 INIT_COPY 消息后,将要安装的参数信息加入到 PendingInstalls 中去,如果是第一个安装,还需要发送 MCS_BOUND 消息,用于触发实际安装过程。
case INIT_COPY: {
    HandlerParams params = (HandlerParams) msg.obj;
    int idx = mPendingInstalls.size();
    if (DEBUG_INSTALL) Slog.i(TAG, "init_copy idx=" + idx + ": " + params);
    // If a bind was already initiated we dont really
    // need to do anything. The pending install
    // will be processed later on.
    if (!mBound) {
        // If this is the only one pending we might
        // have to bind to the service again.
        if (!connectToService()) {
            Slog.e(TAG, "Failed to bind to media container service");
            params.serviceError();
            return;
        } else {
            // Once we bind to the service, the first
            // pending request will be processed.
            mPendingInstalls.add(idx, params);
        }
    } else {
        mPendingInstalls.add(idx, params);
        // Already bound to the service. Just make
        // sure we trigger off processing the first request.
        if (idx == 0) {
            mHandler.sendEmptyMessage(MCS_BOUND);
        }
    }
    break;
}
在 MCS_BOUND 消息中取出第一个安装请求,并调用 startCopy 方法。
HandlerParams params = mPendingInstalls.get(0);
if (params != null) {
   if (params.startCopy()) {
     // ...
   }
   // ...
}
在 startCopy 中调用 handleStartCopy 方法,由于这个类,需要与 MCS (MediaContainerService) 进行通信,有可能发生异常,因而这里设置了重试机制。
if (++mRetries > MAX_RETRIES) {
    Slog.w(TAG, "Failed to invoke remote methods on default container service. Giving up");
    mHandler.sendEmptyMessage(MCS_GIVE_UP);
    handleServiceError();
    return false;
} else {
    handleStartCopy();
    res = true;
}
handleReturnCode();
接着看看 handleStartCopy 里面是如何进行的,为啥还有可能失败?
public void handleStartCopy() throws RemoteException {
// 安装在哪里?
final boolean onSd = (installFlags & PackageManager.INSTALL_EXTERNAL) != 0;
final boolean onInt = (installFlags & PackageManager.INSTALL_INTERNAL) != 0;
pkgLite = mContainerService.getMinimalPackageInfo(origin.resolvedPath, installFlags,
packageAbiOverride);
// 如果安装空间不够了,尝试释放一些空间
// 校验等逻辑
final InstallArgs args = createInstallArgs(this);
// ...
args.copyApk();
}
private InstallArgs createInstallArgs(InstallParams params) {
if (params.move != null) {
return new MoveInstallArgs(params);
} else if (installOnExternalAsec(params.installFlags) || params.isForwardLocked()) {
return new AsecInstallArgs(params);
} else {
return new FileInstallArgs(params);
}
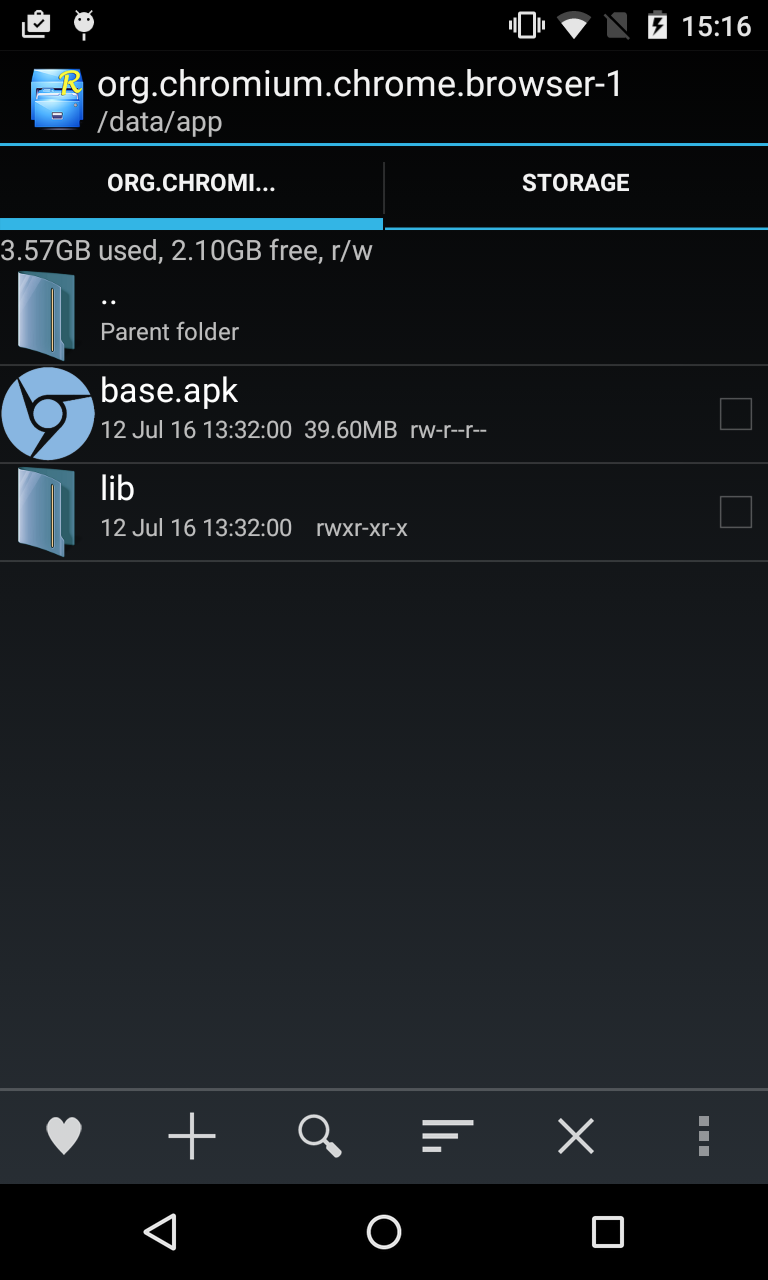
}看起来失败的可能性,大多来自于 Media 服务,空间不足,当时不能写等等都可能导致失败。在空间判断、校验通过后,根据不同的情况创建不同的 InstallArgs,这里只看 FileInstallArgs。copyApk 的主要任务是拷贝 APK 文件和对应的 lib 文件到 /data/app/{packageName} 目录下。
int copyApk(IMediaContainerService imcs, boolean temp) throws RemoteException {
  // ...
  final IParcelFileDescriptorFactory target = new IParcelFileDescriptorFactory.Stub() {
    @Override
    public ParcelFileDescriptor open(String name, int mode) throws RemoteException {
        if (!FileUtils.isValidExtFilename(name)) {
            throw new IllegalArgumentException("Invalid filename: " + name);
        }
        try {
            final File file = new File(codeFile, name);
            final FileDescriptor fd = Os.open(file.getAbsolutePath(),
                    O_RDWR | O_CREAT, 0644);
            Os.chmod(file.getAbsolutePath(), 0644);
            return new ParcelFileDescriptor(fd);
        } catch (ErrnoException e) {
            throw new RemoteException("Failed to open: " + e.getMessage());
        }
    }
  };
  ret = imcs.copyPackage(origin.file.getAbsolutePath(), target);
  // ...
  final File libraryRoot = new File(codeFile, LIB_DIR_NAME);
  NativeLibraryHelper.Handle handle = null;
  try {
      handle = NativeLibraryHelper.Handle.create(codeFile);
      ret = NativeLibraryHelper.copyNativeBinariesWithOverride(handle, libraryRoot,
              abiOverride);
  } catch (IOException e) {
      Slog.e(TAG, "Copying native libraries failed", e);
      ret = PackageManager.INSTALL_FAILED_INTERNAL_ERROR;
  } finally {
      IoUtils.closeQuietly(handle);
  }
}
在 handleStartCopy 后,就可以继续执行 handleReturnCode 后的代码。这部分会不会和前面 PackageManageService 在启动时候扫描系统 APK 的逻辑相同了?让我们拭目以待。
@Override
void handleReturnCode() {
    // If mArgs is null, then MCS couldn't be reached. When it
    // reconnects, it will try again to install. At that point, this
    // will succeed.
    if (mArgs != null) {
        processPendingInstall(mArgs, mRet);
    }
}
接着看 processPendingInstall 的实现。
if (res.returnCode == PackageManager.INSTALL_SUCCEEDED) {
    args.doPreInstall(res.returnCode);
    synchronized (mInstallLock) {
        installPackageLI(args, res);
    }
    args.doPostInstall(res.returnCode, res.uid);
}
installPackageLI 中会一些列复杂的逻辑,这里只看针对新安装包的逻辑。
if (replace) {
    replacePackageLI(pkg, parseFlags, scanFlags | SCAN_REPLACING, args.user,
            installerPackageName, volumeUuid, res);
} else {
    installNewPackageLI(pkg, parseFlags, scanFlags | SCAN_DELETE_DATA_ON_FAILURES,
            args.user, installerPackageName, volumeUuid, res);
}
在 installNewPackageLI 中会继续调用 scanPackageLI 方法,这和第一章节讲述的一直,这里就不再赘述了。
try {
    PackageParser.Package newPackage = scanPackageLI(pkg, parseFlags, scanFlags,
            System.currentTimeMillis(), user);

    updateSettingsLI(newPackage, installerPackageName, volumeUuid, null, null, res, user);
    // delete the partially installed application. the data directory will have to be
    // restored if it was already existing
    if (res.returnCode != PackageManager.INSTALL_SUCCEEDED) {
        // remove package from internal structures.  Note that we want deletePackageX to
        // delete the package data and cache directories that it created in
        // scanPackageLocked, unless those directories existed before we even tried to
        // install.
        deletePackageLI(pkgName, UserHandle.ALL, false, null, null,
                dataDirExists ? PackageManager.DELETE_KEEP_DATA : 0,
                        res.removedInfo, true);
    }

} catch (PackageManagerException e) {
    res.setError("Package couldn't be installed in " + pkg.codePath, e);
}
可能读者会想安装包的资源怎么处理的?总不会只处理 lib 文件和 dex 文件吧,这是前面一个疏漏的地方,在文末进行下简单的补充。
在 Packageparser 进行解析的时候,会通过 AssetMananger 进行资源的加载。
XmlResourceParser parser = null;
AssetManager assmgr = null;
Resources res = null;
boolean assetError = true;
try {
  assmgr = new AssetManager();
  int cookie = assmgr.addAssetPath(mArchiveSourcePath);
  if (cookie != 0) {
    res = new Resources(assmgr, metrics, null);
    assmgr.setConfiguration(0, 0, null, 0, 0, 0, 0, 0, 0, 0, 0, 0, 0, 0, 0, 0,
        Build.VERSION.RESOURCES_SDK_INT);
    parser = assmgr.openXmlResourceParser(cookie, ANDROID_MANIFEST_FILENAME);
    assetError = false;
  } else {
    VLog.w(TAG, "Failed adding asset path:" + mArchiveSourcePath);
  }
} catch (Exception e) {
  VLog.w(TAG, "Unable to read AndroidManifest.xml of " + mArchiveSourcePath, e);
}
文档信息
- 版权声明:自由转载-非商用-非衍生-保持署名(创意共享3.0许可证)
- 发表日期:2016年8月5日
- 社交媒体:weibo.com/woaitqs
- Feed订阅:www.woaitqs.cc/feed.xml


 5889
5889

 被折叠的 条评论
为什么被折叠?
被折叠的 条评论
为什么被折叠?
 到【灌水乐园】发言


