


文章目录
- 1. Why Spring?
- 2. IOC理论
- 2.1 IOC本质
- 3. Hello Spring
- 4. IOC创建对象的方式
- 5 spring 配置
- 6 DI依赖注入
- 7 Bean的作用域
- 8 自动装配 `autowire`
- 9 使用注解开发
- 10 代理模式
- 11 mybatis-Spring
1. Why Spring?
Spring makes programming Java quicker, easier, and safer for everybody. Spring’s focus on speed, simplicity, and productivity has made it the world’s most popular Java framework.
1.1 作者
第一版由 Rod Johnson 开发,并在2002年10月发布在 Expert One-on-One J2EE Design and Development 一书中。2003年6月,Spring Framework 第一次发布在 Apache 2.0 许可证下。2004年3月,发布了里程碑的版本1.0,2004年9月以及2005年3月,又发布了新的里程碑版本。2006年,Spring Framework 获得了 Jolt 生产力奖 和 JAX 创新奖。
Spring Framework创始人,著名作者。 Rod在悉尼大学不仅获得了计算机学位,同时还获得了音乐学位。更令人吃惊的是在回到软件开发领域之前,他还获得了音乐学的博士学位。 有着相当丰富的C/C++技术背景的Rod早在1996年就开始了对Java服务器端技术的研究。他是一个在保险、电子商务和金融行业有着丰富经验的技术顾问,同时也是JSR-154(Servlet2.4)和JDO2.0的规范专家、JCP的积极成员,是Java development community中的杰出人物。
1.2 导包和下载
官网地址 https://spring.io/
官网repo下载地址 https://repo.spring.io/release/org/springframework/spring/
GitHub 地址 https://github.com/spring-projects/spring-framework/releases
maven导包👇
<!-- https://mvnrepository.com/artifact/org.springframework/spring-webmvc -->
<dependency>
    <groupId>org.springframework</groupId>
    <artifactId>spring-webmvc</artifactId>
    <version>5.2.5.RELEASE</version>
</dependency>
<!-- https://mvnrepository.com/artifact/org.springframework/spring-jdbc -->
<dependency>
    <groupId>org.springframework</groupId>
    <artifactId>spring-jdbc</artifactId>
    <version>5.2.5.RELEASE</version>
</dependency>
1.3 spring 优点
- 简化开发,解耦,集成其它框架。
- 低侵入式设计,代码污染级别级别。
- Spring的DI机制降低了业务对象替换的复杂性,提高了软件之间的解耦。
- Spring AOP支持将一些通用的任务进行集中式的管理,例如:安全,事务,日志等,从而使代码能更好的复用。
- 控制反转 (IOC)面向切面编程(AOP)
spring是轻量级的**控制反转 (IOC)面向切面编程(AOP)**框架
1.4 spring 组成

组成 Spring 框架的每个模块(或组件)都可以单独存在,或者与其他一个或多个模块联合实现。每个模块的功能如下:
- 核心容器:核心容器提供 Spring 框架的基本功能。核心容器的主要组件是
BeanFactory,它是工厂模式的实现。BeanFactory使用控制反转 (IOC) 模式将应用程序的配置和依赖性规范与实际的应用程序代码分开。- Spring 上下文:Spring 上下文是一个配置文件,向 Spring 框架提供上下文信息。Spring 上下文包括企业服务,例如 JNDI、EJB、电子邮件、国际化、校验和调度功能。
- Spring AOP:通过配置管理特性,Spring AOP 模块直接将面向方面的编程功能集成到了 Spring 框架中。所以,可以很容易地使 Spring 框架管理的任何对象支持 AOP。Spring AOP 模块为基于 Spring 的应用程序中的对象提供了事务管理服务。通过使用 Spring AOP,不用依赖 EJB 组件,就可以将声明性事务管理集成到应用程序中。
- Spring DAO:JDBC DAO 抽象层提供了有意义的异常层次结构,可用该结构来管理异常处理和不同数据库供应商抛出的错误消息。异常层次结构简化了错误处理,并且极大地降低了需要编写的异常代码数量(例如打开和关闭连接)。Spring DAO 的面向 JDBC 的异常遵从通用的 DAO 异常层次结构。
- Spring ORM:Spring 框架插入了若干个 ORM 框架,从而提供了 ORM 的对象关系工具,其中包括 JDO、Hibernate 和 iBatis SQL Map。所有这些都遵从 Spring 的通用事务和 DAO 异常层次结构。
- Spring Web 模块:Web 上下文模块建立在应用程序上下文模块之上,为基于 Web 的应用程序提供了上下文。所以,Spring 框架支持与 Jakarta Struts 的集成。Web 模块还简化了处理多部分请求以及将请求参数绑定到域对象的工作。
- Spring MVC 框架:MVC 框架是一个全功能的构建 Web 应用程序的 MVC 实现。通过策略接口,MVC 框架变成为高度可配置的,MVC 容纳了大量视图技术,其中包括 JSP、Velocity、Tiles、iText 和 POI。
Spring 框架的功能可以用在任何 J2EE 服务器中,大多数功能也适用于不受管理的环境。Spring 的核心要点是:支持不绑定到特定 J2EE 服务的可重用业务和数据访问对象。毫无疑问,这样的对象可以在不同 J2EE 环境 (Web 或 EJB)、独立应用程序、测试环境之间重用。

2. IOC理论
IoC 全称为
InversionofControl,翻译为 “控制反转”,它还有一个别名为 DI(DependencyInjection),即依赖注入。
https://www.zhihu.com/question/23277575

https://blog.csdn.net/weixin_44823472/article/details/97787171
2.1 IOC本质
控制反转IoC(Inversion of Control),是一种设计思想,DI(依赖注入)是实现IoC的一种方法,也有人认为DI只是IoC的另一种说法。没有IoC的程序中 , 我们使用面向对象编程 , 对象的创建与对象间的依赖关系完全硬编码在程序中,对象的创建由程序自己控制,控制反转后将对象的创建转移给第三方,个人认为所谓控制反转就是:获得依赖对象的方式反转了。
版权声明:本文为CSDN博主「你的笑容灿烂了这个夏天」的原创文章,遵循CC 4.0 BY-SA版权协议,转载请附上原文出处链接及本声明。
原文链接:https://blog.csdn.net/weixin_44823472/article/details/97787171

3. Hello Spring
3.1 需要导入的包
3.2 面试题 IOC是什么?
一、IOC是什么?
IOC全称为“Inversion of Control”,即控制反转,不是一种技术,而是一种设计思想。在这种设计思想中,你设计好的对象交给容器管理,而不是在应用程序内部对对象进行管理。控制的含义是IOC容器控制了对象(也可以包括文件及其他外部资源);而反转的含义是IOC容器负责创建及注入依赖的对象,但在传统的应用程序中,我们需要在对象内部去创建(new)依赖的对象,这叫“正”,在这样的情况下,对象之间的耦合度就非常高。IOC更像是一种中介,帮助雇佣者和被雇佣者。我觉得支付工具如支付宝就像是淘宝体系中的一个IOC。到了现在 , 我们彻底不用再程序中去改动了 , 要实现不同的操作 , 只需要在xml配置文件中进行修改 , 所谓的IoC,一句话搞定 : 对象由Spring 来创建 , 管理 , 装配 !
Beans.xml
<?xml version="1.0" encoding="UTF-8"?>
<beans xmlns="http://www.springframework.org/schema/beans"
       xmlns:xsi="http://www.w3.org/2001/XMLSchema-instance"
       xsi:schemaLocation="http://www.springframework.org/schema/beans
        https://www.springframework.org/schema/beans/spring-beans.xsd">


    <bean id="user" class="org.suyuesheng.spring.pojo.User">
        <property name="id" value="1"/>
        <property name="name" value="0"/>
        <property name="pwd" value="0"/>
    </bean>

    <!--    id 是生成的对象名称  class是类-->
    <!--    name是类的属性名 value是类的属性的内容-->
    <!--    ref元素引用另一个 bean 定义的 name。-->
    <bean id="hello" class="org.suyuesheng.spring.pojo.Hello">
        <property name="str" value="Hello"/>
<!--        ref 指的是beans.xml里面曾经定义过这个类-->
        <property name="user" ref="user"/>
    </bean>

</beans>
java代码👇
package org.suyuesheng.spring.pojo;

import org.junit.Test;
import org.springframework.context.ApplicationContext;
import org.springframework.context.support.ClassPathXmlApplicationContext;

public class TestHello {
    @Test
    public void testHello(){
        /*
        * `ApplicationContext`是高级工厂的接口,
        * 能够维护不同 beans 及其依赖项的注册表。
        * 使用方法`T getBean(String name, Class requiredType)`,
        * 您可以检索 beans 的实例。*/
        //获取容器
        ApplicationContext classPathXmlApplicationContext = new ClassPathXmlApplicationContext("Beans.xml");
//        Hello hello = (Hello)classPathXmlApplicationContext.getBean("hello");
        //获取对象
        Hello hello = classPathXmlApplicationContext.getBean("hello", Hello.class);
        System.out.println(hello.getStr());
    }
}
ApplicationContext是高级工厂的接口,能够维护不同 beans 及其依赖项的注册表。使用方法T getBean(String name, Class requiredType),您可以检索 beans 的实例。👆
new ClassPathXmlApplicationContext(容器名称)来获取spring容器
注意,要想使用bean中的property标签,必须在类里声明set方法。
获取对象,默认获取的是无参构造对象
4. IOC创建对象的方式
https://docs.spring.io/spring/docs/5.2.6.RELEASE/spring-framework-reference/core.html#spring-core
4.1 官方文档中关于spring创造有参构造对象的解释👇
Constructor argument type matching
In the preceding scenario, the container can use type matching with simple types if you explicitly specify the type of the constructor argument by using the
typeattribute. as the following example shows:<bean id="exampleBean" class="examples.ExampleBean"> <constructor-arg type="int" value="7500000"/> <constructor-arg type="java.lang.String" value="42"/> </bean>Constructor argument index
You can use the
indexattribute to specify explicitly the index of constructor arguments, as the following example shows:<bean id="exampleBean" class="examples.ExampleBean"> <constructor-arg index="0" value="7500000"/> <constructor-arg index="1" value="42"/> </bean>In addition to resolving the ambiguity of multiple simple values, specifying an index resolves ambiguity where a constructor has two arguments of the same type.
The index is 0-based.
Constructor argument name
You can also use the constructor parameter name for value disambiguation, as the following example shows:
<bean id="exampleBean" class="examples.ExampleBean"> <constructor-arg name="years" value="7500000"/> <constructor-arg name="ultimateAnswer" value="42"/> </bean>
4.2 IOC容器创建有参和无参构造对象
-
默认创建无参构造对象,默认!!!
-
创建有参构造的三种方式
通过有参构造器创建对象(通过构造器进行依赖注入)无须setter方法
-
下标
Beans.xml里面这样配置👇
<bean id="user" class="org.suyuesheng.spring.pojo.User"> <constructor-arg index="0" value="12"/> <constructor-arg index="1" value="老张"/> <constructor-arg index="2" value="1233"/> </bean> -
类型
相当不建议这种,原因是如果参数里面存在相同类型的话,用这个就会比较麻烦
<bean id="exampleBean" class="examples.ExampleBean"> <constructor-arg type="int" value="7500000"/> <constructor-arg type="java.lang.String" value="42"/> </bean> -
名称
最建议这种👇
<bean id="user" class="org.suyuesheng.spring.pojo.User">
    <constructor-arg name="id" value="134"/>
    <constructor-arg name="name" value="老刘"/>
    <constructor-arg name="pwd" value="12324"/>
</bean>
-
5 spring 配置
5.1 别名
alias 给对象的名称取一个别名,可以用别名来生成对象
 <!--    id 是生成的对象名称  class是类-->
    <!--    name是类的属性名 value是类的属性的内容-->
    <!--    ref元素引用另一个 bean 定义的 name。-->
    <bean id="hello" class="org.suyuesheng.spring.pojo.Hello">
        <property name="str" value="Hello"/>
<!--        ref 指的是beans.xml里面曾经定义过这个类-->
        <property name="user" ref="user"/>
    </bean>

    <alias name="hello" alias="hello2"/>
用别名来获取对象👇
@Test
public void testAlias(){
    ApplicationContext applicationContext= new ClassPathXmlApplicationContext("Beans.xml");
    Hello hello = applicationContext.getBean("hello", Hello.class);
    //通过别名
    Hello hello2 = applicationContext.getBean("hello2", Hello.class);

    System.out.println("hello\n"+hello); //Hello{str='Hello', user=User{id=134, name='老刘', pwd='12324'}}
    System.out.println("hello2\n"+hello2); //Hello{str='Hello', user=User{id=134, name='老刘', pwd='12324'}}
}
取别名的另外一种方式,在bean标签的属性name里取,而且还能取好多个👇 推荐!!!
<bean id="hello" class="org.suyuesheng.spring.pojo.Hello" name="hello3,hello4,hello5">
    <property name="str" value="Hello"/>
    <!--        ref 指的是beans.xml里面曾经定义过这个类-->
    <property name="user" ref="user"/>
</bean>
5.2 bean的配置
<!--    id 是生成的对象名称  class是类-->
<!--    name是类的属性名 value是类的属性的内容-->
<!--    ref元素引用另一个 bean 定义的 name。-->
<!--    bean标签的name指定别名-->
<bean id="hello" class="org.suyuesheng.spring.pojo.Hello" name="hello3,hello4,hello5">
    <property name="str" value="Hello"/>
    <!--        ref 指的是beans.xml里面曾经定义过这个类-->
    <property name="user" ref="user"/>
</bean>
5.3 import
引入别的文件,那么获取对象的时候就可以从一个bean.xml那里生成spring容器了,这个容器也可以生成被导入的文件的bean
<import resource="beans2.xml"/>
6 DI依赖注入
依赖注入(DI)是一个 process,其中 objects 仅通过构造函数 arguments,工厂方法的 arguments 或 object 实例在构造之后设置的 properties 定义它们的依赖项(即,它们工作的其他 objects)或者从工厂方法返回。然后容器在创建 bean 时注入这些依赖项。这个 process 基本上是 bean 本身的逆(因此 name,控制反转),它通过使用 classes 或 Service Locator pattern 的直接构造来控制其依赖项的实例化或位置。
来源 https://www.docs4dev.com/docs/zh/spring-framework/5.1.3.RELEASE/reference/core.html#expressions
https://juejin.im/post/5aa89d076fb9a028c06a846c
6.1 构造器注入
请看 4.2.2 创建有参构造的三种方式 跳转到4.2.2
6.2 Setter注入[重点]
依赖注入
- 依赖 bean对象的创建依赖容器
- 注入 bean对象的所有属性由spring容器(IOC容器)注入
<bean id="student" class="org.suyuesheng.spring.s03.pojo.Stusent">
    <property name="age" value="19"/>
</bean>
环境搭建
- 复杂类型 address
package org.suyuesheng.spring.s03.pojo;

public class Address {
    private double xRay;
    private double yRay;

    public Address() {
    }

    public Address(double xRay, double yRay) {
        this.xRay = xRay;
        this.yRay = yRay;
    }

    public double getxRay() {
        return xRay;
    }

    public void setxRay(double xRay) {
        this.xRay = xRay;
    }

    public double getyRay() {
        return yRay;
    }

    public void setyRay(double yRay) {
        this.yRay = yRay;
    }

    @Override
    public String toString() {
        return "Address{" +
                "xRay=" + xRay +
                ", yRay=" + yRay +
                '}';
    }
}
- 对象 student
package org.suyuesheng.spring.s03.pojo;

import java.util.*;

public class Stusent {
    private int age;
    private Address address;
    private Map<String,String> studentMap;
    private List<String> stringList;
    private String[] strings;
    private Properties properties;
    private Set<String> stringSet;

    public Stusent() {
    }

    public Stusent(int age, Address address, Map<String, String> studentMap, List<String> stringList, String[] strings, Properties properties, Set<String> stringSet) {
        this.age = age;
        this.address = address;
        this.studentMap = studentMap;
        this.stringList = stringList;
        this.strings = strings;
        this.properties = properties;
        this.stringSet = stringSet;
    }

    public int getAge() {
        return age;
    }

    public void setAge(int age) {
        this.age = age;
    }

    public Address getAddress() {
        return address;
    }

    public void setAddress(Address address) {
        this.address = address;
    }

    public Map<String, String> getStudentMap() {
        return studentMap;
    }

    public void setStudentMap(Map<String, String> studentMap) {
        this.studentMap = studentMap;
    }

    public List<String> getStringList() {
        return stringList;
    }

    public void setStringList(List<String> stringList) {
        this.stringList = stringList;
    }

    public String[] getStrings() {
        return strings;
    }

    public void setStrings(String[] strings) {
        this.strings = strings;
    }

    public Properties getProperties() {
        return properties;
    }

    public void setProperties(Properties properties) {
        this.properties = properties;
    }

    public Set<String> getStringSet() {
        return stringSet;
    }

    public void setStringSet(Set<String> stringSet) {
        this.stringSet = stringSet;
    }

    @Override
    public String toString() {
        return "Stusent{" +
                "age=" + age +
                ", address=" + address +
                ", studentMap=" + studentMap +
                ", stringList=" + stringList +
                ", strings=" + Arrays.toString(strings) +
                ", properties=" + properties +
                ", stringSet=" + stringSet +
                '}';
    }
}
- 测试类 TestPojo
package org.suyuesheng.spring.so3.pojo;

import org.junit.Test;
import org.springframework.context.ApplicationContext;
import org.springframework.context.support.ClassPathXmlApplicationContext;
import org.suyuesheng.spring.s03.pojo.Stusent;

public class TestPojo {
    @Test
    public void testAdress() {
        ApplicationContext context = new ClassPathXmlApplicationContext("Beans.xml");
        Stusent student = context.getBean("student", Stusent.class);
        System.out.println(student);
    }
}
beans.xml配置
<?xml version="1.0" encoding="UTF-8"?>
<beans xmlns="http://www.springframework.org/schema/beans"
       xmlns:xsi="http://www.w3.org/2001/XMLSchema-instance"
       xsi:schemaLocation="http://www.springframework.org/schema/beans http://www.springframework.org/schema/beans/spring-beans.xsd">

    <bean id="student" class="org.suyuesheng.spring.s03.pojo.Stusent">
<!--        普通值注入-->
        <property name="age" value="19"/>
<!--        bean注入-->
        <property name="address" ref="address"/>
<!--        数组注入-->
        <property name="strings">
            <array>
                <value>你好</value>
                <value>haha</value>
                <value>呵呵呵</value>
                <value>或会后</value>
            </array>
        </property>
<!--        list注入-->
        <property name="stringList">
            <list>
                <value>hello</value>
                <value>nininini</value>
            </list>
        </property>
<!--        map注入-->
        <property name="studentMap">
            <map>
                <entry key="name" value="XioaMiHen"/>
                <entry key="age" value="14"/>
                <entry key="lastName" value="Xiao"/>
<!--                为home指定的值为null-->
                <entry key="home">
                    <null/>
                </entry>
            </map>
        </property>
<!--        set注入-->
        <property name="stringSet">
            <set>
                <value>hhset</value>
                <value>llset</value>
            </set>
        </property>
<!--        properties注入-->
        <property name="properties">
            <props>
                <prop key="adamin">root</prop>
                <prop key="pwd">dwef</prop>
            </props>
        </property>

    </bean>

    <bean id="address" class="org.suyuesheng.spring.s03.pojo.Address">
        <property name="xRay" value="12.5"/>
        <property name="yRay" value="14.6"/>
    </bean>
</beans>
6.3 p 命名注入和 c命名注入
并不适用于集合参数.list | set | map | props等
在通过构造方法或
set方法给bean注入关联项时通常是通过constructor-arg元素和property元素来定义的。在有了p命名空间和c命名空间时我们可以简单的把它们当做bean的一个属性来进行定义。
p命名注入需要在配置文件头部加上xmlns:p="http://www.springframework.org/schema/p"
c命名注入需要在配置文件头部加上xmlns:c="http://www.springframework.org/schema/c"
- p命名注入通过属性setter
- c命名注入,通过有参构造,要想使用c命名构造,必须要有有参构造函数
c\p:属性名称-ref来为属性指定bean,如c:address-ref="address"
配置👇
<?xml version="1.0" encoding="UTF-8"?>
<beans xmlns="http://www.springframework.org/schema/beans"
       xmlns:xsi="http://www.w3.org/2001/XMLSchema-instance"
       xmlns:p="http://www.springframework.org/schema/p"
       xmlns:c="http://www.springframework.org/schema/c"
       xsi:schemaLocation="http://www.springframework.org/schema/beans http://www.springframework.org/schema/beans/spring-beans.xsd">

    <import resource="Beans.xml"/>
<!--    p命名注入通过属性setter-->
    <bean id="user" class="org.suyuesheng.spring.s03.pojo.User" p:age="12" p:name="老刘" />
<!--    c命名注入,通过有参构造-->
    <bean id="userc" class="org.suyuesheng.spring.s03.pojo.UserC" c:age="14" c:name="kk" c:address-ref="address"/>
</beans>
测试👇
@Test
public void testPNamespace() {
    ApplicationContext context = new ClassPathXmlApplicationContext("UserBeans.xml");
    User user = context.getBean("user", User.class);
    System.out.println(user);
}
@Test
public void testCNameSpace(){
    ApplicationContext context = new ClassPathXmlApplicationContext("UserBeans.xml");
    UserC user = context.getBean("userc", UserC.class);
    System.out.println(user);
}
7 Bean的作用域
| Scope | Description |
|---|---|
| singleton | (Default) Scopes a single bean definition to a single object instance for each Spring IoC container. |
| prototype | Scopes a single bean definition to any number of object instances. |
| request | Scopes a single bean definition to the lifecycle of a single HTTP request. That is, each HTTP request has its own instance of a bean created off the back of a single bean definition. Only valid in the context of a web-aware Spring ApplicationContext. |
| session | Scopes a single bean definition to the lifecycle of an HTTP Session. Only valid in the context of a web-aware Spring ApplicationContext. |
| application | Scopes a single bean definition to the lifecycle of a ServletContext. Only valid in the context of a web-aware Spring ApplicationContext. |
| websocket | Scopes a single bean definition to the lifecycle of a WebSocket. Only valid in the context of a web-aware Spring ApplicationContext. |
7.1 配置方法
bean里面的一个属性 <bean id="user" class="org.suyuesheng.spring.s03.pojo.User" p:age="12" p:name="老刘" scope="singleton"/>
7.2 单例模式和原型模式
-
singleton 单例模式,类似构造函数私有化,生成的对象为同一个,默认就是单例模式
/** * 测试单例模式和多例模式 */ @Test public void testDD(){ ApplicationContext context = new ClassPathXmlApplicationContext("UserBeans.xml"); User user = context.getBean("user", User.class); User user1 = context.getBean("user", User.class); //单例模式是相等的 System.out.println(user==user1); //true } -
prototype 原型模式,生成的对象不同
/**
* 测试单例模式和多例模式
*/
@Test
public void testDD(){
    ApplicationContext context = new ClassPathXmlApplicationContext("UserBeans.xml");
    User user = context.getBean("user", User.class);
    User user1 = context.getBean("user", User.class);
    //原型模式是不相等的
    System.out.println(user==user1); //false
}
8 自动装配 autowire
| Mode | Explanation |
|---|---|
no | (Default) No autowiring. Bean references must be defined by ref elements. Changing the default setting is not recommended for larger deployments, because specifying collaborators explicitly gives greater control and clarity. To some extent, it documents the structure of a system. |
byName | Autowiring by property name. Spring looks for a bean with the same name as the property that needs to be autowired. For example, if a bean definition is set to autowire by name and it contains a master property (that is, it has a setMaster(..) method), Spring looks for a bean definition named master and uses it to set the property. |
byType | Lets a property be autowired if exactly one bean of the property type exists in the container. If more than one exists, a fatal exception is thrown, which indicates that you may not use byType autowiring for that bean. If there are no matching beans, nothing happens (the property is not set). |
constructor | Analogous to byType but applies to constructor arguments. If there is not exactly one bean of the constructor argument type in the container, a fatal error is raised. |
8.0 在bean中配置autowire属性
<bean id="address" class="org.suyuesheng.spring.sptu04.pojo.Address" p:address="jinan"/>

<bean id="user" class="org.suyuesheng.spring.sptu04.pojo.User" autowire="byName">
    <property name="age" value="12"/>
    <property name="name" value="ll"/>
</bean>
8.1 注解方式
https://blog.ahao.moe/posts/Spring_uses_@Autowired_in_three_ways.html
在Spring3.0之后,有效的自动装配策略分为
byType、byName、constructor三种方式。注解Autowired默认使用byType来自动装配,如果存在类型的多个实例就尝试使用byName匹配,如果通过byName也确定不了,可以通过Primary和Priority注解来确定。作者:清幽之地
链接:https://juejin.im/post/5c84b5285188257c5b477177
来源:掘金
著作权归作者所有。商业转载请联系作者获得授权,非商业转载请注明出处。
8.1.1 前言 配置的头部文件
头部必须加xmlns:context="http://www.springframework.org/schema/context"
xsi:schemaLocation要加
http://www.springframework.org/schema/context
https://www.springframework.org/schema/context/spring-context.xsd"
必须有<context:annotation-config/>标签
即👇
<?xml version="1.0" encoding="UTF-8"?>
<beans xmlns="http://www.springframework.org/schema/beans"
       xmlns:xsi="http://www.w3.org/2001/XMLSchema-instance"
       xmlns:context="http://www.springframework.org/schema/context"
       xmlns:p="http://www.springframework.org/schema/p"
       xsi:schemaLocation="http://www.springframework.org/schema/beans
        https://www.springframework.org/schema/beans/spring-beans.xsd
        http://www.springframework.org/schema/context
        https://www.springframework.org/schema/context/spring-context.xsd">

    <context:annotation-config/>
8.1.2 在属性中注解
可以在属性中使用 @Autowired 注释来除去 setter 方法。当时使用 为自动连接属性传递的时候,Spring 会将这些传递过来的值或者引用自动分配给那些属性。
即可以不用setter方法
Person类👇
package org.suyuesheng.spring.sptu04.pojo;

import org.springframework.beans.factory.annotation.Autowired;

public class Person {
    public Person() {
    }

    @Autowired
    private Address address;
    @Autowired
    private Phone phone;

    public Address getAddress() {
        return address;
    }

    public Phone getPhone() {
        return phone;
    }

    @Override
    public String toString() {
        return "Person{" +
                "address=" + address +
                ", phone=" + phone +
                '}';
    }
}
phone类👇
package org.suyuesheng.spring.sptu04.pojo;


public class Phone {
    public Phone() {
    }

    private String phoneBrand;

    public String getPhoneBrand() {
        return phoneBrand;
    }

    public void setPhoneBrand(String phoneBrand) {
        this.phoneBrand = phoneBrand;
    }

    @Override
    public String toString() {
        return "Phone{" +
                "phoneBrand='" + phoneBrand + '\'' +
                '}';
    }
}
address类👇
package org.suyuesheng.spring.sptu04.pojo;

public class Address {
    private String address;

    public Address() {
    }

    public Address(String address) {
        this.address = address;
    }

    public String getAddress() {
        return address;
    }

    public void setAddress(String address) {
        this.address = address;
    }

    @Override
    public String toString() {
        return "Address{" +
                "address='" + address + '\'' +
                '}';
    }
}
xml👇
<?xml version="1.0" encoding="UTF-8"?>
<beans xmlns="http://www.springframework.org/schema/beans"
       xmlns:xsi="http://www.w3.org/2001/XMLSchema-instance"
       xmlns:context="http://www.springframework.org/schema/context"
       xmlns:p="http://www.springframework.org/schema/p"
       xsi:schemaLocation="http://www.springframework.org/schema/beans
        https://www.springframework.org/schema/beans/spring-beans.xsd
        http://www.springframework.org/schema/context
        https://www.springframework.org/schema/context/spring-context.xsd">

    <context:annotation-config/>
    <import resource="Beans.xml"/>
    <bean id="person" class="org.suyuesheng.spring.sptu04.pojo.Person"/>

    <bean id="phone" class="org.suyuesheng.spring.sptu04.pojo.Phone" p:phoneBrand="iphone"/>
</beans>
8.1.3 在构造器中注解
可以不指定无参构造,可以没有setter方法
在构造函数中使用 @Autowired。一个构造函数 @Autowired 说明当创建 bean 时,即使在 XML 文件中没有使用 元素配置 bean ,构造函数也会被自动连接。
person类👇
package org.suyuesheng.spring.sptu04.pojo;

import org.springframework.beans.factory.annotation.Autowired;

public class Person {
    //可以不指定无参构造,可以没有setter方法
//    public Person() {
//    }
    @Autowired
    public Person(Address address, Phone phone) {
        this.address = address;
        this.phone = phone;
    }

    private Address address;

    private Phone phone;

    public Address getAddress() {
        return address;
    }

    public Phone getPhone() {
        return phone;
    }

    @Override
    public String toString() {
        return "Person{" +
                "address=" + address +
                ", phone=" + phone +
                '}';
    }
}
8.1.4 在setter里注解
在 XML 文件中的 setter 方法中使用 @Autowired 注释来除去 元素。当 Spring遇到一个在 setter 方法中使用的 @Autowired 注释,它会在方法中视图执行 byType 自动连接。
person类👇
package org.suyuesheng.spring.sptu04.pojo;

import org.springframework.beans.factory.annotation.Autowired;

public class Person {

    public Person() {
    }

    public Person(Address address, Phone phone) {
        this.address = address;
        this.phone = phone;
    }

    private Address address;

    private Phone phone;
    @Autowired
    public void setAddress(Address address) {
        this.address = address;
    }
    @Autowired
    public void setPhone(Phone phone) {
        this.phone = phone;
    }

    public Address getAddress() {
        return address;
    }

    public Phone getPhone() {
        return phone;
    }

    @Override
    public String toString() {
        return "Person{" +
                "address=" + address +
                ", phone=" + phone +
                '}';
    }
}
8.1.5 三种注入方式用谁?
如果注入的属性是
必选的属性,则通过构造器注入。
如果注入的属性是可选的属性,则通过setter方法注入。
至于field注入,不建议使用。来源 https://blog.ahao.moe/posts/Spring_uses_@Autowired_in_three_ways.html
8.1.6 @Autowired(required=false)注入注意的问题
https://blog.csdn.net/static_coder/article/details/79580981
@Autowired(required=true):当使用@Autowired注解的时候,其实默认就是@Autowired(required=true),表示注入的时候,该bean必须存在,否则就会注入失败。@Autowired(required=false):表示忽略当前要注入的bean,如果有直接注入,没有跳过,不会报错。
实例👇
person类👇
package org.suyuesheng.spring.sptu04.pojo;

import org.springframework.beans.factory.annotation.Autowired;

public class Person {

    public Person() {
    }

    public Person(Address address, Phone phone) {
        this.address = address;
        this.phone = phone;
    }
    @Autowired(required = false)
    private Address address;
    @Autowired(required = false)
    private Phone phone;


    public Address getAddress() {
        return address;
    }

    public Phone getPhone() {
        return phone;
    }

    @Override
    public String toString() {
        return "Person{" +
                "address=" + address +
                ", phone=" + phone +
                '}';
    }
}
没有定义address的bean,因为person类@Autowired(required = false),所以不会报错。
得到的person对象👇,address为null
Person{address=null, phone=Phone{phoneBrand='iphone'}}
8.1.6.1 @Autowired(required = false)构造器注入和其他注入方式的不同
采用构造器注入的话,只要有一个bean不存在,构造器里面所有的bean都为null
采用其他方式的话,如果bean不存在就会注入null,不影响其他的注入
8.2 当环境复杂时
当有多个bean,@autowired装配会出错的时候,比如下面这种情况👇
要注入id为address且类为Address的bean👇
@Autowired(required = false)
private Address address;
结果,有好多个bean,偏偏又都不符合条件👇
<bean id="address001" class="org.suyuesheng.spring.sptu04.pojo.Address" p:address="jinan"/>
<bean id="address221" class="org.suyuesheng.spring.sptu04.pojo.Address" p:address="jinan1"/>
<bean id="addressqew" class="org.suyuesheng.spring.sptu04.pojo.Address" p:address="jinan2"/>
<bean id="address21" class="org.suyuesheng.spring.sptu04.pojo.Address" p:address="jinan3"/>
这时有两个选择,一是@Qualifier,一是@Resource。
先说一下优先级的问题
当bean都不符合要求时,@Autowired先会byType去寻找,去找那个类符合要求的bean。如果有多个符合要求的bean就byName去寻找。
@Qualifier
用@Qualifier可以指定一个类符合要求的bean,比如👇
@Autowired(required = false)
@Qualifier(value = "address21")
private Address address;
@Qualifier要和@Autowired在一起
@Resource
可以用@Resource,来进行依赖注入,@Resource的包是javax.annotation,可以减少和spring的耦合。@Resource依赖注入的优先级是先byName再byType。@Resource不可以和@Autowired放到一起。当环境复杂的时候@Resource可以指定符合要求的类👇
@Resource(name = "address221")
private Address address;
@Resource不能进行构造器注入
@Autowired和@Resource的区别
https://my.oschina.net/yqz/blog/1608023
https://www.jianshu.com/p/49a0929a8cac
优先级和包不一样
@Autowired和@Qualifier的包都是org.springframework.beans.factory.annotation,也就是说,都属于spring框架。
@Resource的包是javax.annotation,可以减少和spring的耦合。
@Autowired与@Resource:
1、@Autowired与@Resource都可以用来装配bean. 都可以写在字段上,或写在setter方法上。2、
@Autowired默认按类型装配(这个注解是属业spring的),默认情况下必须要求依赖对象必须存在,如果要允许null值,可以设置它的required属性为false,如:
@Autowired(required=false),如果我们想使用名称装配可以结合@Qualifier注解进行使用,作者:wuxinliulei
链接:https://www.zhihu.com/question/39356740/answer/80926247
来源:知乎
著作权归作者所有。商业转载请联系作者获得授权,非商业转载请注明出处。
| name | package |
|---|---|
@Autowired | org.springframework.beans.factory.annotation |
@Qualifier | org.springframework.beans.factory.annotation |
@Resource | javax.annotation |
优先级👇
| 注解名称 | 优先级 |
|---|---|
@Autowired | byType >> byName |
@Resource | byName >> byType |
当@Qualifier或@Resource指定了bean后,以指定的bean为准
9 使用注解开发
9.1 头部
相较于往常,增加了两个上下文的命名空间,一个前缀
<?xml version="1.0" encoding="UTF-8"?>
<beans xmlns="http://www.springframework.org/schema/beans"
       xmlns:xsi="http://www.w3.org/2001/XMLSchema-instance"
       xmlns:context="http://www.springframework.org/schema/context"
       xmlns:p="http://www.springframework.org/schema/p"
       xsi:schemaLocation="http://www.springframework.org/schema/beans
        https://www.springframework.org/schema/beans/spring-beans.xsd
        http://www.springframework.org/schema/context
        https://www.springframework.org/schema/context/spring-context.xsd">
    <context:annotation-config/>
</beans>

要使用注解开发,必须要有这个包👇

@Component
用之前要先定义context的扫描,只有在扫描范围才能用
<context:component-scan base-package="org.suyuesheng.spring.sptu05.pojo"/>
将类用注解的方式加入到spring容器👇
//等价于<bean id="user" class="org.suyuesheng.spring.sptu05.pojo.User"/>
@Component
public class User
@Component后面跟括号,括号里面的值相当于bean的id
@Component的衍生
功能相同,对应不同的层
| Annotation | Meaning |
|---|---|
| @Component | generic stereotype for any Spring-managed component |
| @Repository | stereotype for persistence layer DAO层 |
| @Service | stereotype for service layer service层 |
| @Controller | stereotype for presentation layer (spring-mvc) Controller层 |
@Value
将属性注入,可以属性注入,也可以setter方法注入
如通过属性注入,可以不写setter方法
只能注入普通的数据类型,复杂的还得用配置文件
package org.suyuesheng.spring.sptu05.pojo;

import org.springframework.beans.factory.annotation.Value;
import org.springframework.stereotype.Component;

//等价于<bean id="user" class="org.suyuesheng.spring.sptu05.pojo.User"/>
@Component
public class User {
    @Value("12")
    private int age;
    @Value("老刘")
    private String name;

    public User() {
    }

    public int getAge() {
        return age;
    }

    public void setAge(int age) {
        this.age = age;
    }

    public String getName() {
        return name;
    }

    public void setName(String name) {
        this.name = name;
    }

    @Override
    public String toString() {
        return "User{" +
                "age=" + age +
                ", name='" + name + '\'' +
                '}';
    }
}
@Scope
使用注解设置作用域,查看Bean的作用域相关配置
开发时的选择(推荐)
-
xml用来管理bean,即将类加入到spring容器的工作由xml完成
-
注解负责属性的注入
-
使用过程中注意xml头部两个上下文的命名空间,一个前缀,开启注解配置,配置component扫描范围
<?xml version="1.0" encoding="UTF-8"?>
<beans xmlns="http://www.springframework.org/schema/beans"
       xmlns:xsi="http://www.w3.org/2001/XMLSchema-instance"
       xmlns:context="http://www.springframework.org/schema/context"
       xmlns:p="http://www.springframework.org/schema/p"
       xsi:schemaLocation="http://www.springframework.org/schema/beans
        https://www.springframework.org/schema/beans/spring-beans.xsd
        http://www.springframework.org/schema/context
        https://www.springframework.org/schema/context/spring-context.xsd">

    <context:component-scan base-package="org.suyuesheng.spring.sptu05"/>
    <context:annotation-config/>

</beans>
完全使用java的方式配置Spring
需要一个Configuration类,相当于Bean.xml
package org.suyuesheng.spring06.config;

import org.springframework.context.annotation.Bean;
import org.springframework.context.annotation.ComponentScan;
import org.springframework.context.annotation.Configuration;
import org.springframework.context.annotation.Import;
import org.suyuesheng.spring06.pojo.User;

//@Configuration注解,表明这是一个配置spring容器的类,相当于Beans.xml
@Configuration
//@ComponentScan 为@Component指定范围,如果不指定范围,默认是全部,相当于<context:component-scan base-package="扫描的包“/>标签
@ComponentScan("org.suyuesheng.spring06.pojo")
//相当于import标签
@Import(AppConfig2.class)
public class AppConfig {
    //@Bean相当于<bean>标签,默认bean的id是方法名,也可以指定别名通过name={}。指定别名后,方法名就不好使了。方法的返回值相当于bean标签的class
    @Bean({"user","User","getUser"})
    public User getUser(){
        return new User();
    }
}
类的配置👇
package org.suyuesheng.spring06.pojo;

import org.springframework.beans.factory.annotation.Value;
import org.springframework.stereotype.Component;

//@Component,将该类交由spring容器
@Component
public class User {

    //将属性注入,相当于在bean.xml里面配置依赖注入
    @Value("20")
    private int age;
    @Value("老款")
    private String name;

    public User() {
    }

    public User(int age, String name) {
        this.age = age;
        this.name = name;
    }

    public int getAge() {
        return age;
    }

    public void setAge(int age) {
        this.age = age;
    }

    public String getName() {
        return name;
    }

    public void setName(String name) {
        this.name = name;
    }

    @Override
    public String toString() {
        return "User{" +
                "age=" + age +
                ", name='" + name + '\'' +
                '}';
    }
}
获取注解的spring容器的context需要AnnotationConfigApplicationContext类👇
@Test
public void testOne() {
    //获取注解的spring容器的context
    ApplicationContext context = new AnnotationConfigApplicationContext(AppConfig.class);
    User getUser = context.getBean("getUser", User.class);
    System.out.println(getUser);
    //Perpp的来源是@Component("Perpp")
    Person person = context.getBean("Perpp", Person.class);
    System.out.println(person);
}
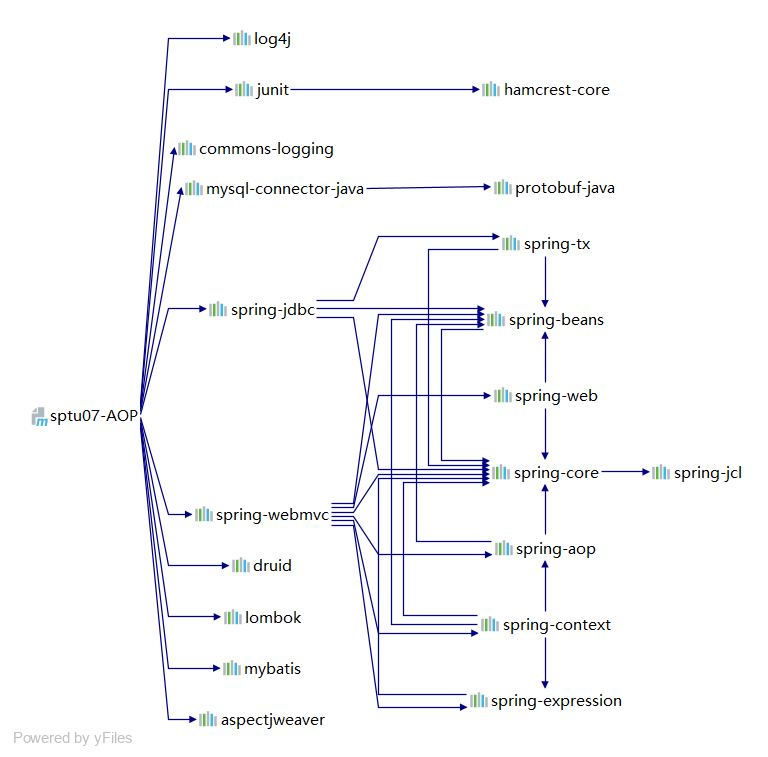
10 代理模式
10.1 静态代理设计模式
这个太基础,是java的基础内容,就只放个链接,https://segmentfault.com/a/1190000011291179#item-1
10.2 动态代理
动态代理利用了JDK API,动态地在内存中构建代理对象,从而实现对目标对象的代理功能。动态代理又被称为JDK代理或接口代理。
静态代理与动态代理的区别主要在:
- 静态代理在编译时就已经实现,编译完成后代理类是一个实际的class文件
- 动态代理是在运行时动态生成的,即编译完成后没有实际的class文件,而是在运行时动态生成类字节码,并加载到JVM中
特点:
动态代理对象不需要实现接口,但是要求目标对象必须实现接口,否则不能使用动态代理。
https://www.sogeisetsugo.tk/myBlog/%E4%BB%A3%E7%90%86%E8%AE%BE%E8%AE%A1%E6%A8%A1%E5%BC%8F

10.3 AOP
使用aop需导包
<!-- https://mvnrepository.com/artifact/org.aspectj/aspectjweaver -->
<dependency>
    <groupId>org.aspectj</groupId>
    <artifactId>aspectjweaver</artifactId>
    <version>1.9.4</version>
</dependency>
10.3.1 什么是 AOP
什么是 AOP
AOP(Aspect-Oriented Programming), 即 面向切面编程, 它与 OOP( Object-Oriented Programming, 面向对象编程) 相辅相成, 提供了与 OOP 不同的抽象软件结构的视角.
在 OOP 中, 我们以类(class)作为我们的基本单元, 而 AOP 中的基本单元是 Aspect(切面)
10.3.2 连接点和切入点区别
JoinPoints:这些基本上是实际业务逻辑中的位置,您希望在其中插入一些必需的功能,但这些功能不是实际业务逻辑的一部分。 JoinPint的一些示例包括:方法调用,方法正常返回,方法引发异常,实例化对象,引用对象等。
切入点:切入点类似于正则表达式,用于标识连接点。 Pontcuts使用"切入点表达语言"表示。切入点是执行流程中需要应用横切关注点的点。 Joinpoint和Pointcut之间是有区别的。连接点更通用,表示任何我们可以"选择"引入交叉关注点的控制流,而切入点则标识了"我们希望"引入交叉关注点的此类连接点。
https://www.codenong.com/15447397/
10.3.3 AOP的术语
AOP的术语
嗯,AOP搞了好几个术语出来~~两本书都有讲解这些术语,我会尽量让大家看得明白的:
连接点(Join point):
- 能够被拦截的地方:Spring AOP是基于动态代理的,所以是方法拦截的。每个成员方法都可以称之为连接点~
切点(Poincut):
- 具体定位的连接点:上面也说了,每个方法都可以称之为连接点,我们具体定位到某一个方法就成为切点。
增强/通知(Advice):
表示添加到切点的一段
逻辑代码
,并定位连接点的
方位信息
。
- 简单来说就定义了是干什么的,具体是在哪干
- Spring AOP提供了5种Advice类型给我们:前置、后置、返回、异常、环绕给我们使用!
织入(Weaving):
- 将
增强/通知添加到目标类的具体连接点上的过程。引入/引介(Introduction):
引入/引介允许我们向现有的类添加新方法或属性。是一种特殊的增强!切面(Aspect):
- 切面由切点和
增强/通知组成,它既包括了横切逻辑的定义、也包括了连接点的定义。在《Spring 实战 (第4版)》给出的总结是这样子的:
通知/增强包含了需要用于多个应用对象的横切行为;连接点是程序执行过程中能够应用通知的所有点;切点定义了通知/增强被应用的具体位置。其中关键的是切点定义了哪些连接点会得到通知/增强。
总的来说:
- 这些术语可能翻译过来不太好理解,但对我们正常使用AOP的话影响并没有那么大~~看多了就知道它是什么意思了。
作者:Java3y
链接:https://juejin.im/post/5b06bf2df265da0de2574ee1
来源:掘金
著作权归作者所有。商业转载请联系作者获得授权,非商业转载请注明出处。
10.3.4 advice 的类型
advice 的类型
- before advice, 在 join point 前被执行的 advice. 虽然 before advice 是在 join point 前被执行, 但是它并不能够阻止 join point 的执行, 除非发生了异常(即我们在 before advice 代码中, 不能人为地决定是否继续执行 join point 中的代码)
- after return advice, 在一个 join point 正常返回后执行的 advice
- after throwing advice, 当一个 join point 抛出异常后执行的 advice
- after(final) advice, 无论一个 join point 是正常退出还是发生了异常, 都会被执行的 advice.
- around advice, 在 join point 前和 joint point 退出后都执行的 advice. 这个是最常用的 advice.
10.3.5 通过xml配置aop的两种方式
10.3.5.0 xml头部👇
需要增加aop的约束和命名空间
<?xml version="1.0" encoding="UTF-8"?>
<beans xmlns="http://www.springframework.org/schema/beans"
       xmlns:xsi="http://www.w3.org/2001/XMLSchema-instance"
       xmlns:context="http://www.springframework.org/schema/context"
       xmlns:p="http://www.springframework.org/schema/p"
       xmlns:aop="http://www.springframework.org/schema/aop"
       xsi:schemaLocation="http://www.springframework.org/schema/beans
        https://www.springframework.org/schema/beans/spring-beans.xsd
        http://www.springframework.org/schema/context
        https://www.springframework.org/schema/context/spring-context.xsd
        http://www.springframework.org/schema/aop
        https://www.springframework.org/schema/aop/spring-aop.xsd">


    <context:annotation-config/>
</beans>
10.3.5.1 通过默认aop:advisor来配置
10.3.5.1.1先定义一个接口和一个目标对象的类
接口👇
package org.suyuesheng.spring.sptu07.service;

public interface IUser {
    void add();
    void delete();
    void update();
    void change();
}
目标对象的类,实现接口
package org.suyuesheng.spring.sptu07.service;

public class UserImpl implements IUser {

    @Override
    public void add() {
        System.out.println("目标类UserImpl覆写的add方法");
    }

    @Override
    public void delete() {
        System.out.println("目标类UserImpl覆写的delete方法");
    }

    @Override
    public void update() {
        System.out.println("目标类UserImpl覆写的update方法");

    }

    @Override
    public void change() {
        System.out.println("目标类UserImpl覆写的change方法");

    }
}
10.3.5.1.2 定义前置增强类和返回增强类
这两个类需要实现相应的接口,接口名称可以参考[advice 的类型](#advice 的类型)(仅仅参考哦!!!)
前置增强👇
package org.suyuesheng.spring.sptu07.log;

import org.springframework.aop.MethodBeforeAdvice;

import java.lang.reflect.Method;

public class BLog implements MethodBeforeAdvice {
    @Override
    public void before(Method method, Object[] objects, Object target) throws Throwable {
        System.out.println(target.getClass().getName()+"."+method.getName());
    }
}
后置返回增强👇
package org.suyuesheng.spring.sptu07.log;

import org.springframework.aop.AfterReturningAdvice;

import java.lang.reflect.Method;

public class ALog implements AfterReturningAdvice {
    @Override
    public void afterReturning(Object returnValue, Method method, Object[] objects, Object target) throws Throwable {
        System.out.println(target.getClass().getName()+"."+method.getName());
        if(returnValue!=null){
            System.out.println(returnValue.getClass().getName());
        }
    }
}
10.3.5.1.3 在xml中通过aop标签配置 重点!!
<?xml version="1.0" encoding="UTF-8"?>
<beans xmlns="http://www.springframework.org/schema/beans"
       xmlns:xsi="http://www.w3.org/2001/XMLSchema-instance"
       xmlns:context="http://www.springframework.org/schema/context"
       xmlns:p="http://www.springframework.org/schema/p"
       xmlns:aop="http://www.springframework.org/schema/aop"
       xsi:schemaLocation="http://www.springframework.org/schema/beans
        https://www.springframework.org/schema/beans/spring-beans.xsd
        http://www.springframework.org/schema/context
        https://www.springframework.org/schema/context/spring-context.xsd
        http://www.springframework.org/schema/aop
        https://www.springframework.org/schema/aop/spring-aop.xsd">


    <context:annotation-config/>

    <bean id="user" class="org.suyuesheng.spring.sptu07.service.UserImpl"/>
    <bean id="afterLog" class="org.suyuesheng.spring.sptu07.log.ALog"/>
    <bean id="beforeLog" class="org.suyuesheng.spring.sptu07.log.BLog"/>

    <aop:config>
<!--        配置切入点-->
        <aop:pointcut id="pointcut" expression="execution(* org.suyuesheng.spring.sptu07.service.UserImpl.*(..))"/>
<!--        配置环绕增强-->
        <aop:advisor advice-ref="afterLog" pointcut-ref="pointcut"/>
        <aop:advisor advice-ref="beforeLog" pointcut-ref="pointcut"/>
    </aop:config>
</beans>
10.3.5.2 通过自定义切面来配置
10.3.5.2.1 接口和实现接口的类
package org.suyuesheng.spring.sptu07.service;

public interface IPerson {
    void add();
    void delete();
    void update();
    void change();

}
package org.suyuesheng.spring.sptu07.service;

public class PersonImpl implements IPerson {
    @Override
    public void add() {
        System.out.println("add");
    }

    @Override
    public void delete() {
        System.out.println("delete");
    }

    @Override
    public void update() {
        System.out.println("update");
    }

    @Override
    public void change() {
        System.out.println("change");
    }
}
10.3.5.2.2 自定义切面类
切面(Aspect):
- 切面由切点和
增强/通知组成,它既包括了横切逻辑的定义、也包括了连接点的定义。
该类无须实现特殊接口
package org.suyuesheng.spring.sptu07.log;

public class PersonLog {
    public void methodBefore(){
        System.out.println("方法执行之前");

    }
    public void afterMethod(){
        System.out.println("方法执行之后");
    }
}
10.3.5.2.3 xml里面自定义切面配置 重点!!!
看第二种方式👇
<?xml version="1.0" encoding="UTF-8"?>
<beans xmlns="http://www.springframework.org/schema/beans"
       xmlns:xsi="http://www.w3.org/2001/XMLSchema-instance"
       xmlns:context="http://www.springframework.org/schema/context"
       xmlns:p="http://www.springframework.org/schema/p"
       xmlns:aop="http://www.springframework.org/schema/aop"
       xsi:schemaLocation="http://www.springframework.org/schema/beans
        https://www.springframework.org/schema/beans/spring-beans.xsd
        http://www.springframework.org/schema/context
        https://www.springframework.org/schema/context/spring-context.xsd
        http://www.springframework.org/schema/aop
        https://www.springframework.org/schema/aop/spring-aop.xsd">

    <context:annotation-config/>
<!--    第一种方式-->
    <bean id="user" class="org.suyuesheng.spring.sptu07.service.UserImpl"/>
    <bean id="afterLog" class="org.suyuesheng.spring.sptu07.log.ALog"/>
    <bean id="beforeLog" class="org.suyuesheng.spring.sptu07.log.BLog"/>

    <aop:config>
<!--        配置切入点-->
        <aop:pointcut id="pointcut" expression="execution(* org.suyuesheng.spring.sptu07.service.UserImpl.*(..))"/>
<!--        配置环绕增强-->
        <aop:advisor advice-ref="afterLog" pointcut-ref="pointcut"/>
        <aop:advisor advice-ref="beforeLog" pointcut-ref="pointcut"/>
    </aop:config>

<!--    第二种方式-->
    <bean id="person" class="org.suyuesheng.spring.sptu07.service.PersonImpl"/>
    <bean id="personLog" class="org.suyuesheng.spring.sptu07.log.PersonLog"/>

    <aop:config>
<!--        自定义切面-->
<!--        ref 指定切面类-->
        <aop:aspect ref="personLog" >
            <aop:pointcut id="bpl" expression="execution(* org.suyuesheng.spring.sptu07.service.PersonImpl.*(..))"/>
<!--            ref指定切入点-->
            <aop:before method="methodBefore" pointcut-ref="bpl"/>
            <aop:after method="afterMethod" pointcut-ref="bpl"/>
        </aop:aspect>
    </aop:config>
<!--第三种方式-->
<!--    自动代理,使用了这个标签,才可以使用aop开发-->
    <aop:aspectj-autoproxy/>
    <bean id="phone" class="org.suyuesheng.spring.sptu07.service.PhoneImpl"/>
    <bean id="AnnoLog" class="org.suyuesheng.spring.sptu07.log.AnnotationLog"/>
</beans>
10.3.6 使用注解配置aop
要想使用注解,必须在Beans.xml里面开启aop注解👇
<aop:aspectj-autoproxy/>
@Aspect
使用该注解的类会变成一个切面
@Before、@After、@AfterReturning、@Around
这是配置增强的注解,后面括号的参数如"execution(* org.suyuesheng.spring.sptu07.service.PhoneImpl.*(..))"叫切点标志符(designator)
切点标志符(designator)
AspectJ5 的切点表达式由标志符(designator)和操作参数组成. 如 "execution( greetTo(…))" 的切点表达式, execution 就是 标志符, 而圆括号里的 greetTo(…) 就是操作参数
execution
匹配 join point 的执行, 例如 “execution(* hello(…))” 表示匹配所有目标类中的 hello() 方法. 这个是最基本的 pointcut 标志符.
within
匹配特定包下的所有 join point, 例如
within(com.xys.*)表示 com.xys 包中的所有连接点, 即包中的所有类的所有方法. 而within(com.xys.service.*Service)表示在 com.xys.service 包中所有以 Service 结尾的类的所有的连接点.this 与 target
this 的作用是匹配一个 bean, 这个 bean(Spring AOP proxy) 是一个给定类型的实例(instance of). 而 target 匹配的是一个目标对象(target object, 即需要织入 advice 的原始的类), 此对象是一个给定类型的实例(instance of).
bean
匹配 bean 名字为指定值的 bean 下的所有方法, 例如:
bean(*Service) // 匹配名字后缀为 Service 的 bean 下的所有方法
bean(myService) // 匹配名字为 myService 的 bean 下的所有方法
args
匹配参数满足要求的的方法.
来源 https://segmentfault.com/a/1190000007469968#item-3-6
注解配置aop的代码👇
package org.suyuesheng.spring.sptu07.log;


import org.aspectj.lang.ProceedingJoinPoint;
import org.aspectj.lang.annotation.*;

//使用 @Aspect 让该类变成一个切面
@Aspect
public class AnnotationLog {

    @Before("execution(* org.suyuesheng.spring.sptu07.service.PhoneImpl.*(..))")
    public void before(){
        System.out.println("前置增强");
    }
    @After("execution(* org.suyuesheng.spring.sptu07.service.PhoneImpl.*(..))")
    public void after(){
        System.out.println("后置增强");
    }
    @Around("execution(* org.suyuesheng.spring.sptu07.service.PhoneImpl.*(..))")
    public Object around(ProceedingJoinPoint point) throws Throwable {

        System.out.println("环绕前");
        Object proceed = point.proceed();
        System.out.println("环绕后");
        System.out.println(point.getSignature().toString());
        return proceed;

    }
    @AfterReturning("execution(* org.suyuesheng.spring.sptu07.service.PhoneImpl.*(..))")
    public void afterReturn(){
        System.out.println("返回增强");
    }
}
@Pointcut
配置切入点
在Spring 2.0中,Pointcut的定义包括两个部分:Pointcut表示式(expression)和Pointcut签名(signature)
//Pointcut表示式
@Pointcut("execution(* com.savage.aop.MessageSender.*(..))")
//Point签名
private void log(){}
然后要使用所定义的Pointcut时,可以指定Pointcut签名
如下:@Before("log()")这种使用方式等同于以下方式,直接定义execution表达式使用
@Before("execution(* com.savage.aop.MessageSender.*(..))")来源 https://www.cnblogs.com/liaojie970/p/7883687.html
10.3.7 几个增强的先后顺序
环绕前
前置增强
add方法被执行
环绕后
后置增强
返回增强
报错:java.lang.ClassCastException: com.sun.proxy.$Proxy17 cannot be cast to
原因是获得实例的时候设置的返回值不是接口,用了aop,返回值就得是接口。因为动态代理的是接口
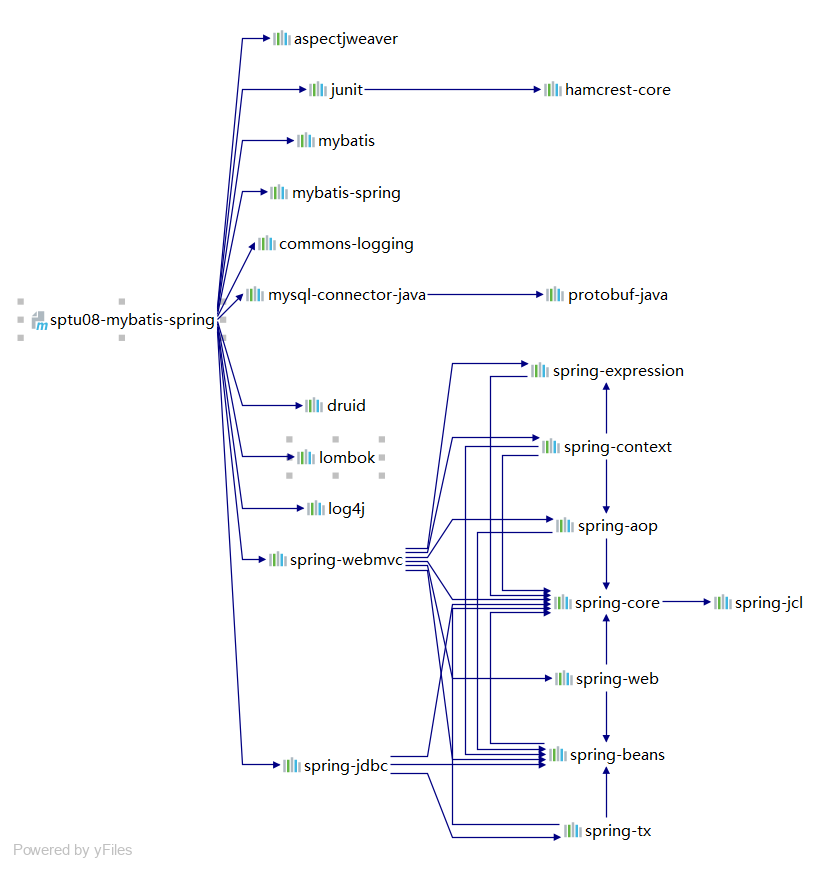
11 mybatis-Spring
http://mybatis.org/spring/zh/index.html
mybatis笔记
https://www.cnblogs.com/sogeisetsu/p/12779674.html
导包
相比之前,额外导入了
<dependency>
    <groupId>org.mybatis</groupId>
    <artifactId>mybatis-spring</artifactId>
    <version>2.0.4</version>
</dependency>
这样,就有如下的包
Beans.xml
Beans.xml里面配置上sqlsession,sqlsessionfactory,mapper等原先需要在使用的时候new出来的东西
<?xml version="1.0" encoding="UTF-8"?>
<beans xmlns="http://www.springframework.org/schema/beans"
xmlns:xsi="http://www.w3.org/2001/XMLSchema-instance"
xmlns:context="http://www.springframework.org/schema/context"
xmlns:p="http://www.springframework.org/schema/p"
xsi:schemaLocation="http://www.springframework.org/schema/beans
https://www.springframework.org/schema/beans/spring-beans.xsd
http://www.springframework.org/schema/context
https://www.springframework.org/schema/context/spring-context.xsd">
<context:annotation-config/>
<context:component-scan base-package="org.suyuesheng.spring.mybatis"/>
<!-- 配置dataSource-->
<!-- 相当于配置mybatis.config.xml里面的datasourse标签-->
<bean id="dataSource" class="org.springframework.jdbc.datasource.DriverManagerDataSource">
<property name="driverClassName" value="com.mysql.cj.jdbc.Driver"/>
<property name="url" value="jdbc:mysql://localhost:3307/mybatisstudy?characterEncoding=utf-8&useUnicode=true"/>
<property name="username" value="root"/>
<property name="password" value="15990904343"/>
</bean>
<!-- 配置sqlSessionFactory-->
<bean id="sqlSessionFactory" class="org.mybatis.spring.SqlSessionFactoryBean">
<!-- 相当于<datasouse>-->
<property name="dataSource" ref="dataSource" />
<!-- 指定配置mybatis.config.xml的位置,这样可以相互补充,比如在sqlSessionFactory的bean里可以配置typealise,也可以在mybatis.config.xml配置-->
<property name="configLocation" value="classpath:mybatis.config.xml"/>
<!-- 相当于<mappers><mapper resource=org/suyuesheng/spring/mybatis/mapper/*.xml/></mappers>-->
<!-- 指定mapper.xml的位置-->
<property name="mapperLocations" value="classpath:org/suyuesheng/spring/mybatis/mapper/*.xml"/>
</bean>
<bean id="user" class="org.suyuesheng.spring.mybatis.pojo.User"/>
<!-- 配置sqlsession-->
<!-- SqlSessionTemplate是一个代理类,内部它会为每次请求创建线程安全的sqlsession,并与Spring进行集成,在方法执行完毕之后会自动关闭。-->
<!-- 配置好的SqlSession将自动完成commit,并在执行完sql之后自动close。-->
<bean id="sqlsession" class="org.mybatis.spring.SqlSessionTemplate" scope="prototype">
<!-- 只能通过构造器注入,因为没有setter方法-->
<constructor-arg index="0" ref="sqlSessionFactory"/>
</bean>
<!-- 配置mapper-->
<bean id="userMapper" class="org.mybatis.spring.mapper.MapperFactoryBean">
<property name="mapperInterface" value="org.suyuesheng.spring.mybatis.mapper.UserMapper"/>
<property name="sqlSessionFactory" ref="sqlSessionFactory"/>
</bean>
</beans>
配置mapper的三个方法
<!--    法一:配置mapper-->
<bean id="userMapper" class="org.mybatis.spring.mapper.MapperFactoryBean">
    <property name="mapperInterface" value="org.suyuesheng.spring.mybatis.mapper.UserMapper"/>
    <property name="sqlSessionFactory" ref="sqlSessionFactory"/>
</bean>

<!--    获取mapper的其他方法-->
<!--   法二:使用实现mapper接口的方法来获取mapper -->
<bean id="userMapper1" class="org.suyuesheng.spring.mybatis.mapper.UserMapperImpl">
    <property name="sqlSession" ref="sqlsession"/>
</bean>
<!--    法三:借助SqlSessionDaoSupport,即userMapperImpl2继承了SqlSessionDaoSupport-->
<bean id="userMapperImpl2" class="org.suyuesheng.spring.mybatis.mapper.UserMapperImpl2">
    <property name="sqlSessionFactory" ref="sqlSessionFactory"/>
</bean>
-
先说法一,最省劲,配置MapperFactoryBean,指定mapperInterface(mapper接口)即可,无须生成接口的实现类再导入spring容器
-
法二:最费劲,要整个mapper接口的实现类,然后实现类里面指定一个sqlsession的属性,SqlSessionTemplate是一个代理类,内部它会为每次请求创建线程安全的sqlsession,并与Spring进行集成,在方法执行完毕之后会自动关闭。
package org.suyuesheng.spring.mybatis.mapper; import org.apache.ibatis.session.SqlSession; import org.suyuesheng.spring.mybatis.pojo.User; import java.util.List; public class UserMapperImpl implements UserMapper { private SqlSession sqlSession; public void setSqlSession(SqlSession sqlSession) { this.sqlSession = sqlSession; } @Override public List<User> findAll() { return sqlSession.getMapper(UserMapper.class).findAll(); } } -
法三,接口的实现类要继承SqlSessionDaoSupport
SqlSessionDaoSupport
SqlSessionDaoSupport是一个抽象的支持类,用来为你提供SqlSession。调用getSqlSession()方法你会得到一个SqlSessionTemplate,之后可以用于执行 SQL 方法,就像下面这样:public class UserDaoImpl extends SqlSessionDaoSupport implements UserDao { public User getUser(String userId) { return getSqlSession().selectOne("org.mybatis.spring.sample.mapper.UserMapper.getUser", userId); } }在这个类里面,通常更倾向于使用
MapperFactoryBean,因为它不需要额外的代码。但是,如果你需要在 DAO 中做其它非 MyBatis 的工作或需要一个非抽象的实现类,那么这个类就很有用了。SqlSessionDaoSupport需要通过属性设置一个sqlSessionFactory或SqlSessionTemplate。如果两个属性都被设置了,那么SqlSessionFactory将被忽略。假设类
UserMapperImpl是SqlSessionDaoSupport的子类,可以编写如下的 Spring 配置来执行设置:<bean id="userDao" class="org.mybatis.spring.sample.dao.UserDaoImpl"> <property name="sqlSessionFactory" ref="sqlSessionFactory" /> </bean>package org.suyuesheng.spring.mybatis.mapper; import org.mybatis.spring.support.SqlSessionDaoSupport; import org.suyuesheng.spring.mybatis.pojo.User; import java.util.List; public class UserMapperImpl2 extends SqlSessionDaoSupport implements UserMapper { @Override public List<User> findAll() { return getSqlSession().getMapper(UserMapper.class).findAll(); } }
事务
这样的话,如果一个事务出错,不会对数据库造成损伤
<?xml version="1.0" encoding="UTF-8"?>
<beans xmlns="http://www.springframework.org/schema/beans"
       xmlns:xsi="http://www.w3.org/2001/XMLSchema-instance"
       xmlns:context="http://www.springframework.org/schema/context"
       xmlns:p="http://www.springframework.org/schema/p"
       xmlns:tx="http://www.springframework.org/schema/tx" xmlns:aop="http://www.springframework.org/schema/aop"
       xsi:schemaLocation="http://www.springframework.org/schema/beans
        https://www.springframework.org/schema/beans/spring-beans.xsd
        http://www.springframework.org/schema/context
        https://www.springframework.org/schema/context/spring-context.xsd
        http://www.springframework.org/schema/tx
        http://www.springframework.org/schema/tx/spring-tx.xsd
        http://www.springframework.org/schema/aop
        https://www.springframework.org/schema/aop/spring-aop.xsd">

    <context:annotation-config/>
    <import resource="MybatisDaoBeans.xml"/>
    <bean id="user" class="org.suyuesheng.smybatis.event.pojo.User">
    </bean>
    <bean id="userService" class="org.suyuesheng.smybatis.event.service.UserService">
        <property name="sqlSessionFactory" ref="sqlSessionFactory"/>
        <property name="user" ref="user"/>
    </bean>
<!--    事务管理器-->
    <bean id="transactionManager" class="org.springframework.jdbc.datasource.DataSourceTransactionManager">
        <constructor-arg ref="dataSource" />
    </bean>
<!--    配置事务增强-->
    <tx:advice transaction-manager="transactionManager" id="txAdvice">
        <tx:attributes>
            <tx:method name="findAll" propagation="REQUIRED"/>
            <tx:method name="*" propagation="REQUIRED"/>
        </tx:attributes>
    </tx:advice>
    <aop:config proxy-target-class="true">
<!--        配置切入点-->
        <aop:pointcut id="txPonitCut" expression="execution(* org.suyuesheng.smybatis.event..*(..)) and !execution(* org.suyuesheng.smybatis.event.TestEv.*(..))"/>
        <aop:advisor advice-ref="txAdvice" pointcut-ref="txPonitCut"/>
    </aop:config>
</beans>


 被折叠的 条评论
为什么被折叠?
被折叠的 条评论
为什么被折叠?
 到【灌水乐园】发言


