


Mybatis09-自定义映射resultMap
1、准备工作
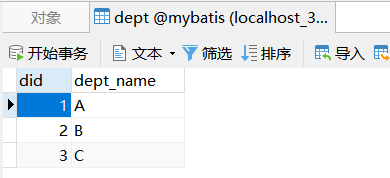
1.1、创建emp和dept表并添加测试数据
DROP TABLE IF EXISTS `dept`;
CREATE TABLE `dept`  (
  `did` int(0) NOT NULL AUTO_INCREMENT,
  `dept_name` varchar(255) CHARACTER SET utf8 COLLATE utf8_general_ci NULL DEFAULT NULL,
  PRIMARY KEY (`did`) USING BTREE
) ENGINE = InnoDB CHARACTER SET = utf8 COLLATE = utf8_general_ci ROW_FORMAT = Dynamic;
INSERT INTO `dept` VALUES (1, 'A');
INSERT INTO `dept` VALUES (2, 'B');
INSERT INTO `dept` VALUES (3, 'C');
DROP TABLE IF EXISTS `emp`;
CREATE TABLE `emp`  (
  `eid` int(0) NOT NULL AUTO_INCREMENT,
  `emp_name` varchar(255) CHARACTER SET utf8 COLLATE utf8_general_ci NULL DEFAULT NULL,
  `age` int(0) NULL DEFAULT NULL,
  `sex` char(1) CHARACTER SET utf8 COLLATE utf8_general_ci NULL DEFAULT NULL,
  `email` varchar(255) CHARACTER SET utf8 COLLATE utf8_general_ci NULL DEFAULT NULL,
  `did` int(0) NULL DEFAULT NULL,
  PRIMARY KEY (`eid`) USING BTREE
) ENGINE = InnoDB CHARACTER SET = utf8 COLLATE = utf8_general_ci ROW_FORMAT = Dynamic;
INSERT INTO `emp` VALUES (1, '张三', 23, '男', '123@qq.com', 1);
INSERT INTO `emp` VALUES (2, '李四', 32, '男', '123@qq.com', 2);
INSERT INTO `emp` VALUES (3, '王五', 12, '男', '123@qq.com', 3);
INSERT INTO `emp` VALUES (4, '赵六', 34, '女', '123@qq.com', 2);
INSERT INTO `emp` VALUES (5, '田七', 28, '男', '123@qq.com', 3);
可视化工具创建


1.2、创建新的模块工程并配置好Mybatis环境
目录结构:

1.3、创建Emp和Dept实体类
- Emp
public class Emp {

    private Integer eid;

    private String empName;

    private Integer age;

    private String sex;

    private String email;

    private Dept dept;

    public Emp() {

    }

    public Emp(Integer eid, String empName, Integer age, String sex, String email) {
        this.eid = eid;
        this.empName = empName;
        this.age = age;
        this.sex = sex;
        this.email = email;
    }

    @Override
    public String toString() {
        return "Emp{" +
                "eid=" + eid +
                ", empName='" + empName + '\'' +
                ", age=" + age +
                ", sex='" + sex + '\'' +
                ", email='" + email + '\'' +
                ", dept=" + dept +
                '}';
    }

    public Dept getDept() {
        return dept;
    }

    public void setDept(Dept dept) {
        this.dept = dept;
    }

    public Integer getEid() {
        return eid;
    }

    public void setEid(Integer eid) {
        this.eid = eid;
    }

    public String getEmpName() {
        return empName;
    }

    public void setEmpName(String empName) {
        this.empName = empName;
    }

    public Integer getAge() {
        return age;
    }

    public void setAge(Integer age) {
        this.age = age;
    }

    public String getSex() {
        return sex;
    }

    public void setSex(String sex) {
        this.sex = sex;
    }

    public String getEmail() {
        return email;
    }

    public void setEmail(String email) {
        this.email = email;
    }
}
- Dept
public class Dept {

    private Integer did;

    private String deptName;

    private List<Emp> emps;

    public Dept() {

    }

    public Dept(Integer did, String deptName) {
        this.did = did;
        this.deptName = deptName;
    }

    @Override
    public String toString() {
        return "Dept{" +
                "did=" + did +
                ", deptName='" + deptName + '\'' +
                ", emps=" + emps +
                '}';
    }

    public List<Emp> getEmps() {
        return emps;
    }

    public void setEmps(List<Emp> emps) {
        this.emps = emps;
    }

    public Integer getDid() {
        return did;
    }

    public void setDid(Integer did) {
        this.did = did;
    }

    public String getDeptName() {
        return deptName;
    }

    public void setDeptName(String deptName) {
        this.deptName = deptName;
    }

}
1.4、创建Mapper接口及其对应的映射文件

1.5、小结
解决字段名和属性名不一致的情况:
   a>为字段起别名,保持和属性名的一致
   b>设置全局配置,将_自动映射为驼峰
   <setting name="mapUnderscoreToCamelCase" value="true"/>
   c>通过resultMap设置自定义的映射关系
   <resultMap id="empResultMap" type="Emp">
	  <id property="eid" column="eid" />
	  <result property="empName" column="emp_name" />
	  <result property="age" column="age" />
	  <result property="sex" column="sex" />
	  <result property="email" column="email" />
  </resultMap>
2、resultMap处理字段和属性的映射关系
2.1、Mapper接口中的方法
/**
 * 查询所有员工信息
 */
List<Emp> getAllEmp();
2.2、Mapper接口对应的映射文件
- Mybatis核心配置文件中需要进行添加的配置
若字段名和实体类中的属性名不一致,但是字段名符合数据库的规则(使用_),实体类中的属性名符合Java的规则(使用驼峰)
此时也可通过以下两种方式处理字段名和实体类中的属性的映射关系
a>可以通过为字段起别名的方式,保证和实体类中的属性名保持一致
b>可以在MyBatis的核心配置文件中设置一个全局配置信息mapUnderscoreToCamelCase,可
以在查询表中数据时,自动将_类型的字段名转换为驼峰
例如:字段名user_name,设置了mapUnderscoreToCamelCase,此时字段名就会转换为userName
<!-- 设置Mybatis的全局配置 -->
<settings>
    <!-- 将_自动映射为驼峰,emp_name:empName -->
    <setting name="mapUnderscoreToCamelCase" value="true"/>
</settings>
- Mapper接口对应的映射文件
<!--
    resultMap:设置自定义映射关系
    属性:
        id:唯一标识,不能重复
        type:设置映射关系中实体类类型
        子标签:
            id:设置主键的映射关系
            result:设置普通字段的映射关系
            属性:
                property:设置映射关系中的实体类属性名,必须是type属性所设置的实体类类型中的属性名
                column:设置映射关系中的表中字段名,必须是sql语句查询出的字段名

-->
<resultMap id="empResultMap" type="Emp">
    <id property="eid" column="eid" />
    <result property="empName" column="emp_name" />
    <result property="age" column="age" />
    <result property="sex" column="sex" />
    <result property="email" column="email" />
</resultMap>

<!-- List<Emp> getAllEmp(); -->
<select id="getAllEmp" resultMap="empResultMap">
    select * from mybatis.emp
</select>

<select id="getAllEmpOld" resultType="Emp">
    <!-- select eid, emp_name empName, age, sex, email from mybatis.emp -->
    select * from mybatis.emp
</select>
2.3、测试方法以及运行结果
- 测试方法
@Test
public void testGetAllEmp() {
    SqlSession sqlSession = SqlSessionUtils.getSqlSession();
    EmpMapper mapper = sqlSession.getMapper(EmpMapper.class);
    List<Emp> list = mapper.getAllEmp();
    list.forEach(System.out :: println);
}
- 运行结果

3、多对一映射处理
a、通过级联属性赋值的方式处理
mapper接口中的方法
/**
 * 查询员工以及员工所对应的部门信息
 */
Emp getEmpAndDept(@Param("eid") Integer eid);
mapper接口对应的映射文件
<!-- 处理多对一映射关系方式一:级联属性赋值 -->
<resultMap id="empAndDeptResultMapOne" type="Emp">
    <id property="eid" column="eid" />
    <result property="empName" column="emp_name" />
    <result property="age" column="age" />
    <result property="sex" column="sex" />
    <result property="email" column="email" />
    <result property="dept.did" column="did" />
    <result property="dept.deptName" column="dept_name" />
</resultMap>
<!-- Emp getEmpAndDept(@Param("eid") Integer eid); -->
<select id="getEmpAndDept" resultMap="empAndDeptResultMapOne">
    select * from mybatis.emp left join dept on emp.did = dept.did where eid = #{eid}
</select>
测试方法及其运行结果
- 测试方法
@Test
public void testGetEmpAndDept() {
    SqlSession sqlSession = SqlSessionUtils.getSqlSession();
    EmpMapper mapper = sqlSession.getMapper(EmpMapper.class);
    Emp emp = mapper.getEmpAndDept(1);
    System.out.println(emp);
}
- 运行结果

b、通过使用association来处理
mapper接口中的方法
/**
 * 查询员工以及员工所对应的部门信息
 */
Emp getEmpAndDept(@Param("eid") Integer eid);
mapper接口对应的映射文件
<!-- 处理多对一映射关系方式二:association -->
<resultMap id="empAndDeptResultMapTwo" type="Emp">
    <id property="eid" column="eid" />
    <result property="empName" column="emp_name" />
    <result property="age" column="age" />
    <result property="sex" column="sex" />
    <result property="email" column="email" />
    <!--
        association:处理多对一的映射关系
        property:需要处理多对一映射关系的属性名
        JavaType:该属性对应的实体类型
     -->
    <association property="dept" javaType="Dept">
        <id property="did" column="did" />
        <result property="deptName" column="dept_name" />
    </association>
</resultMap>
<!-- Emp getEmpAndDept(@Param("eid") Integer eid); -->
<select id="getEmpAndDept" resultMap="empAndDeptResultMapTwo">
    select * from mybatis.emp left join dept on emp.did = dept.did where eid = #{eid}
</select>
测试方法及其运行结果
- 测试方法
@Test
public void testGetEmpAndDept() {
    SqlSession sqlSession = SqlSessionUtils.getSqlSession();
    EmpMapper mapper = sqlSession.getMapper(EmpMapper.class);
    Emp emp = mapper.getEmpAndDept(1);
    System.out.println(emp);
}
- 运行结果
c、使用分步查询以及association来处理
mapper接口中的方法
- EmpMapper
/**
 * 通过分步查询员工及其员工所对应的部门信息
 * 分步查询第一步:查询员工信息
 */
Emp getEmpAndDeptByStepOne(@Param("eid") Integer eid);
- DeptMapper
/**
 * 通过分步查询员工及其员工所对应的部门信息
 * 分步查询第二步:根据did查询员工所对应的部门信息
 */
Dept getEmpAndDeptByStepTwo(@Param("did") Integer did);
mapper接口对应的映射文件
- EmpMapper.xml
<resultMap id="empAndDeptByStepResultMap" type="Emp">
    <id property="eid" column="eid" />
    <result property="empName" column="emp_name" />
    <result property="age" column="age" />
    <result property="sex" column="sex" />
    <result property="email" column="email" />
    <!--
        select:设置分步查询的sql的唯一标识(namespace.SQLId或mapper接口的全类名、方法名)
        column:设置分步查询的条件
        fetchType:当开启了全局的延迟加载之后,可通过此属性手动控制延迟加载的效果
        fetchType="lazy|eager":lazy表示延迟加载,eager表示立即加载
    -->
    <association property="dept"
                 select="com.sweet.mybatis.mapper.DeptMapper.getEmpAndDeptByStepTwo"
                 column="did"
                 fetchType="eager">
    </association>
</resultMap>
<!-- Emp getEmpAndDeptByStepOne(@Param("eid") Integer eid); -->
<select id="getEmpAndDeptByStepOne" resultMap="empAndDeptByStepResultMap">
    select * from mybatis.emp where eid = #{eid}
</select>
- DeptMapper.xml
<!-- Dept getEmpAndDeptByStepTwo(@Param("did") Integer did); -->
<select id="getEmpAndDeptByStepTwo" resultType="Dept">
    select * from mybatis.dept where did = #{did}
</select>
测试方法及其运行结果
- 测试方法
@Test
public void testGetEmpAndDeptByStep() {
    SqlSession sqlSession = SqlSessionUtils.getSqlSession();
    EmpMapper mapper = sqlSession.getMapper(EmpMapper.class);
    Emp emp = mapper.getEmpAndDeptByStepOne(1);
    System.out.println(emp.getEmpName());
    System.out.println("++++++++++");
    System.out.println(emp.getDept());
}
- 运行结果

4、一对多映射处理
a、使用collection来处理
mapper接口中的方法
/**
 * 获取部门以及部门中所有的员工信息
 */
Dept getDeptAndEmp(@Param("did") Integer did);
mapper接口对应的映射文件
<resultMap id="deptAndEmpResultMap" type="Dept">
    <id property="did" column="did" />
    <result property="deptName" column="dept_name" />
    <!--
        collection:处理一对多的映射关系
        ofType:表示该属性所对应集合中存储数据的类型
    -->
    <collection property="emps" ofType="Emp">
        <id property="eid" column="eid" />
        <result property="empName" column="emp_name" />
        <result property="age" column="age" />
        <result property="sex" column="sex" />
        <result property="email" column="email" />
    </collection>
</resultMap>
<!-- Dept getDeptAndEmp(@Param("did") Integer did); -->
<select id="getDeptAndEmp" resultMap="deptAndEmpResultMap">
    select * from mybatis.dept left join emp on dept.did = emp.did where dept.did = #{did}
</select>
测试方法及其运行结果
- 测试方法
@Test
public void testGetDeptAndEmp() {
    SqlSession sqlSession = SqlSessionUtils.getSqlSession();
    DeptMapper mapper = sqlSession.getMapper(DeptMapper.class);
    Dept dept = mapper.getDeptAndEmp(3);
    System.out.println(dept);
}
- 运行结果

b、使用分步查询以及collection来处理
mapper接口中的方法
- DeptMapper
/**
 * 通过分步查询查询部门以及部门中所有的员工信息
 * 分步查询第一步:查询部门信息
 */
Dept getDeptAndEmpByStepOne(@Param("did") Integer did);
- EmpMapper
/**
 * 通过分步查询查询部门以及部门中所有的员工信息
 * 分步查询第二步:根据did查询员工信息
 */
List<Emp> getDeptAndEmpByStepTwo(@Param("did") Integer did);
mapper接口对应的映射文件
- DeptMapper.xml
<resultMap id="deptAndEmpByStepResultMap" type="Dept">
    <id property="did" column="did" />
    <result property="deptName" column="dept_name" />
    <collection property="emps"
                select="com.sweet.mybatis.mapper.EmpMapper.getDeptAndEmpByStepTwo"
                column="did" fetchType="eager">
    </collection>
</resultMap>
<!-- Dept getDeptAndEmpByStepOne(@Param("did") Integer did); -->
<select id="getDeptAndEmpByStepOne" resultMap="deptAndEmpByStepResultMap">
    select * from mybatis.dept where did = #{did}
</select>
- EmpMapper.xml
<!-- List<Emp> getDeptAndEmpByStepTwo(@Param("did") Integer did); -->
<select id="getDeptAndEmpByStepTwo" resultType="Emp">
    select * from mybatis.emp where did = #{did}
</select>
测试方法及其运行结果
- 测试方法
@Test
public void testGetDeptAndEmpByStep() {
    SqlSession sqlSession = SqlSessionUtils.getSqlSession();
    DeptMapper mapper = sqlSession.getMapper(DeptMapper.class);
    Dept dept = mapper.getDeptAndEmpByStepOne(3);
    System.out.println(dept.getDeptName());
}
- 运行结果

5、分步查询以及开启延迟加载的好处
分步查询的优点:可以实现延迟加载,但是必须在核心配置文件中设置全局配置信息:
lazyLoadingEnabled:延迟加载的全局开关。当开启时,所有关联对象都会延迟加载
aggressiveLazyLoading:当开启时,任何方法的调用都会加载该对象的所有属性。 否则,每个
属性会按需加载
此时就可以实现按需加载,获取的数据是什么,就只会执行相应的sql。此时可通过association和
collection中的fetchType属性设置当前的分步查询是否使用延迟加载,fetchType=“lazy(延迟加
载)|eager(立即加载)”


 1386
1386


 被折叠的 条评论
为什么被折叠?
被折叠的 条评论
为什么被折叠?
 到【灌水乐园】发言


