


目录
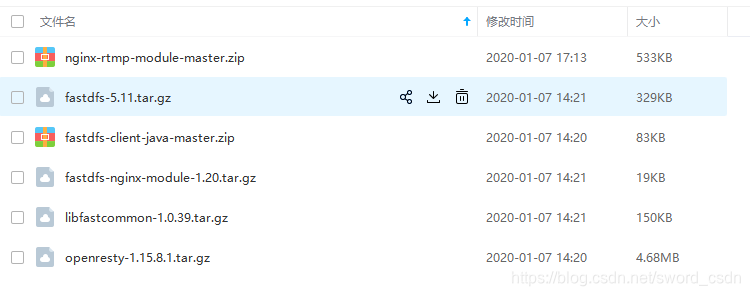
软件列表
fdfs在Ubuntu上安装会有问题,所以系统环境是Centos7
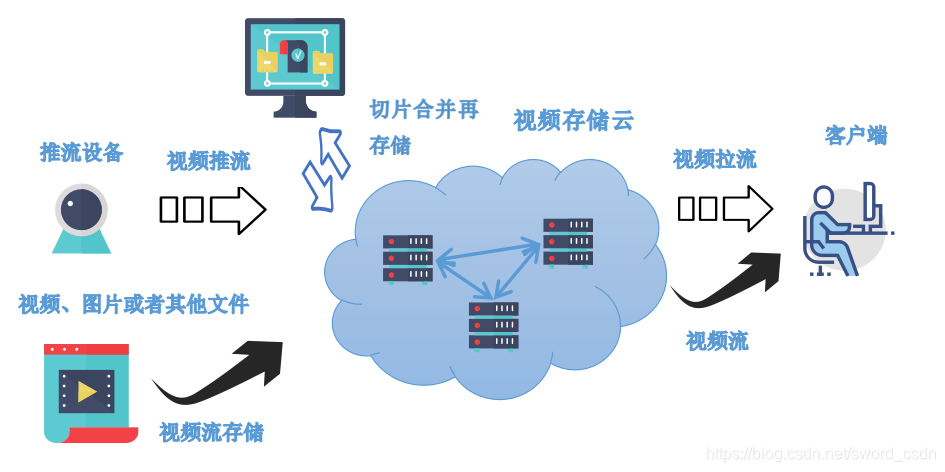
整体架构
FDFS安装
安装编译工具
[root@localhost sword]# yum install -y gcc gcc-c++
[root@localhost sword]# yum -y groupinstall 'Development Tools'
[root@localhost sword]# yum -y install libevent //如果是centos的界面版,可能不需要安装libevent
安装libfastcommon
libfastcommon包含了FastDFS运行所需要的一些基础库。解压libfastcommon-1.0.39.tar.gz
[root@localhost DS]# cd libfastcommon-1.0.39
[root@localhost libfastcommon-1.0.39]# ./make.sh
[root@localhost libfastcommon-1.0.39]# ./make.sh install
安装完成后在/usr/lib64/内可以找到libfastcommon.so文件
[root@localhost libfastcommon-1.0.39]# ll /usr/lib64 | grep fastcommon
-rwxr-xr-x.  1 root root   957648 Jan  7 14:18 libfastcommon.so
同时,由于fdfs会引用/usr/lib/,所以在/usr/lib/内也可以找到libfastcommon.so的软链接
[root@localhost libfastcommon-1.0.39]# ll /usr/lib | grep fastcommon
lrwxrwxrwx.  1 root root    27 Jan  7 14:18 libfastcommon.so -> /usr/lib64/libfastcommon.so
安装fdfs
[root@localhost DS]# tar -xvf fastdfs-5.11.tar.gz
[root@localhost DS]# cd fastdfs-5.11
[root@localhost fastdfs-5.11]# ./make.sh
[root@localhost fastdfs-5.11]# ./make.sh install
将安装目录下的conf下的俩文件拷贝到/etc/fdfs/下
[root@localhost conf]# cp http.conf /etc/fdfs/
[root@localhost conf]# cp mime.types /etc/fdfs/
修改/etc/fdfs/下三个文件的文件名
[root@localhost fdfs]# cp client.conf.sample client.conf
[root@localhost fdfs]# cp storage.conf.sample storage.conf
[root@localhost fdfs]# cp tracker.conf.sample tracker.conf
配置fdfs_tracker服务
修改/etc/fdfs/tracker.conf的内容
//tracker服务启动后产生的数据/日志存放路径,不是上传的图片,视频等外部数据的存放路径
base_path=/home/sword/Desktop/DS/fdfs/
http.server_port=80
启动并查看fdfs_tracker的服务是否启动
[root@localhost fdfs]# /usr/bin/fdfs_trackerd /etc/fdfs/tracker.conf start
[root@localhost fdfs]# ps -e|grep fdfs
 94441 ?        00:00:00 fdfs_trackerd
查看端口号
[root@localhost fdfs]# netstat -tulnp |grep fdfs
tcp        0      0 0.0.0.0:22122           0.0.0.0:*               LISTEN      94441/fdfs_trackerd
正常启动之后,根据tracker.conf中base_path的路径,会出现data和log两个文件夹
配置fdfs_storage服务
修改/etc/fdfs/storage.conf的内容
//storage服务启动后产生的数据/日志存放路径,不是上传的图片,视频等外部数据的存放路径
//如果store_path不指定,则使用base_path指定的路径存放外部数据
base_path=/home/sword/Desktop/DS/fdfs
store_path0=/home/sword/Desktop/DS/fdfs_storage
//对应上面用netstat查出来tracker服务的端口号
tracker_server=192.168.217.144:22122
启动并查看fdfs_storage是否启动成功
[root@localhost fdfs]# /usr/bin/fdfs_storaged /etc/fdfs/storage.conf start
[root@localhost fdfs]# ps -e|grep fdfs
 94441 ?        00:00:00 fdfs_trackerd
103485 ?        00:00:01 fdfs_storaged
启动成功后,/home/sword/Desktop/DS/fdfs_storage/data下会有256个1级目录,每级目录下又有256个2级子目录,总共65536个文件,新写的文件会以hash的方式被路由到其中某个子目录下,然后将文件数据直接作为一个本地文件存储到该目录中。
查看storage是否已经在tracker中注册
[root@localhost fdfs]# /usr/bin/fdfs_monitor /etc/fdfs/storage.conf
[2020-01-07 15:25:25] DEBUG - base_path=/home/sword/Desktop/DS/fdfs, connect_timeout=30, network_timeout=60, tracker                                                                                     _server_count=1, anti_steal_token=0, anti_steal_secret_key length=0, use_connection_pool=0, g_connection_pool_max_id                                                                                     le_time=3600s, use_storage_id=0, storage server id count: 0

server_count=1, server_index=0

tracker server is 192.168.217.144:22122

group count: 1

Group 1:
group name = group1
disk total space = 18506 MB
disk free space = 18291 MB
trunk free space = 0 MB
storage server count = 1
active server count = 1
storage server port = 23000
storage HTTP port = 88
store path count = 1
subdir count per path = 256
current write server index = 0
current trunk file id = 0

        Storage 1:
                id = 192.168.217.144
                ip_addr = 192.168.217.144 (localhost.localdomain)  ACTIVE
                http domain =
                version = 5.11
                join time = 2020-01-07 15:22:21
                up time = 2020-01-07 15:22:21
                total storage = 18506 MB
                free storage = 18291 MB
                upload priority = 10
                store_path_count = 1
                subdir_count_per_path = 256
                storage_port = 23000
                storage_http_port = 88
                current_write_path = 0
                source storage id =
                if_trunk_server = 0
                connection.alloc_count = 256
                connection.current_count = 0
                connection.max_count = 0
                total_upload_count = 0
                success_upload_count = 0
                total_append_count = 0
                success_append_count = 0
                total_modify_count = 0
                success_modify_count = 0
                total_truncate_count = 0
                success_truncate_count = 0
                total_set_meta_count = 0
                success_set_meta_count = 0
                total_delete_count = 0
                success_delete_count = 0
                total_download_count = 0
                success_download_count = 0
                total_get_meta_count = 0
                success_get_meta_count = 0
                total_create_link_count = 0
                success_create_link_count = 0
                total_delete_link_count = 0
                success_delete_link_count = 0
                total_upload_bytes = 0
                success_upload_bytes = 0
                total_append_bytes = 0
                success_append_bytes = 0
                total_modify_bytes = 0
                success_modify_bytes = 0
                stotal_download_bytes = 0
                success_download_bytes = 0
                total_sync_in_bytes = 0
                success_sync_in_bytes = 0
                total_sync_out_bytes = 0
                success_sync_out_bytes = 0
                total_file_open_count = 0
                success_file_open_count = 0
                total_file_read_count = 0
                success_file_read_count = 0
                total_file_write_count = 0
                success_file_write_count = 0
                last_heart_beat_time = 2020-01-07 15:25:22
                last_source_update = 1970-01-01 08:00:00
                last_sync_update = 1970-01-01 08:00:00
                last_synced_timestamp = 1970-01-01 08:00:00
使用FastDFS自带工具测试
修改/etc/fdfs/client.conf
base_path=/home/sword/Desktop/DS/fdfs
tracker_server=192.168.217.144:22122
[root@localhost DS]# /usr/bin/fdfs_test /etc/fdfs/client.conf upload tmp/1.jpg
This is FastDFS client test program v5.11

Copyright (C) 2008, Happy Fish / YuQing

FastDFS may be copied only under the terms of the GNU General
Public License V3, which may be found in the FastDFS source kit.
Please visit the FastDFS Home Page http://www.csource.org/
for more detail.

[2020-01-07 15:45:57] DEBUG - base_path=/home/sword/Desktop/DS/fdfs, connect_timeout=30, network_timeout=60, tr                                                                  acker_server_count=1, anti_steal_token=0, anti_steal_secret_key length=0, use_connection_pool=0, g_connection_p                                                                  ool_max_idle_time=3600s, use_storage_id=0, storage server id count: 0

tracker_query_storage_store_list_without_group:
        server 1. group_name=, ip_addr=192.168.217.144, port=23000

group_name=group1, ip_addr=192.168.217.144, port=23000
storage_upload_by_filename
group_name=group1, remote_filename=M00/00/00/wKjZkF4UNzWAImSNAATOo69xqbE950.jpg
source ip address: 192.168.217.144
file timestamp=2020-01-07 15:45:57
file size=315043
file crc32=2943461809
example file url: http://192.168.217.144/group1/M00/00/00/wKjZkF4UNzWAImSNAATOo69xqbE950.jpg
storage_upload_slave_by_filename
group_name=group1, remote_filename=M00/00/00/wKjZkF4UNzWAImSNAATOo69xqbE950_big.jpg
source ip address: 192.168.217.144
file timestamp=2020-01-07 15:45:57
file size=315043
file crc32=2943461809
example file url: http://192.168.217.144/group1/M00/00/00/wKjZkF4UNzWAImSNAATOo69xqbE950_big.jpg
openresty安装
首先安装下列依赖
yum install pcre-devel openssl-devel curl postgresql-devel
openresty和fdfs
openresty的安装要考虑两个问题,一个是要支持fdfs,一个要支持ffmpeg的推流功能。首先对于fdfs的支持,需要用到fastdfs-nginx-module,这个模块将在后面和rmtp模块一起在openresty的编译过程中加入。fdfs和fastdfs-nginx-module的版本对应关系是
FastDFS Version 5.11对应的fastdfs-nginx-module的Version 1.20
FastDFS Version 5.10对应的fastdfs-nginx-module的Version 1.19
[root@localhost DS]# tar -xvf fastdfs-nginx-module-1.20.tar.gz
修改解压目录下的/src/config文件
把如下这两行的内容:
ngx_module_incs="/usr/local/include"
CORE_INCS="$CORE_INCS /usr/local/include"
换成:
ngx_module_incs="/usr/include/fastdfs /usr/include/fastcommon/"
CORE_INCS="$CORE_INCS /usr/include/fastdfs /usr/include/fastcommon/"
将该文件夹下的mod_fastdfs.conf拷贝到/etc/fdfs/下,并修改
base_path=/home/sword/Desktop/DS/fdfs
url_have_group_name = true
tracker_server=192.168.217.144:22122
[group1]
group_name=group1
storage_server_port=23000
store_path_count=1
store_path0=/home/sword/Desktop/DS/fdfs_storage
openresty和ffmpeg的安装
安装openresty并添加rtmp支持
解压nginx-rtmp-module-master.zip,此时目录结构是

使用以下命令编译并且安装openresty
[root@localhost openresty-1.15.8.1]# ./configure --prefix=/home/sword/Desktop/DS/openresty_LJ --with-luajit --with-http_ssl_module --without-http_redis2_module --with-http_iconv_module --with-http_postgres_module --add-module=/home/sword/Desktop/DS/fastdfs-nginx-module-1.20/src --add-module=/home/sword/Desktop/DS/nginx-rtmp-module-master
[root@localhost openresty-1.15.8.1]# gmake
[root@localhost openresty-1.15.8.1]# gmake install
安装ffmpeg
其实推流软件有很多,应根据具体场景来选择,此处选择已经编译好的ffmpeg.exe(基于windows操作系统)
测试
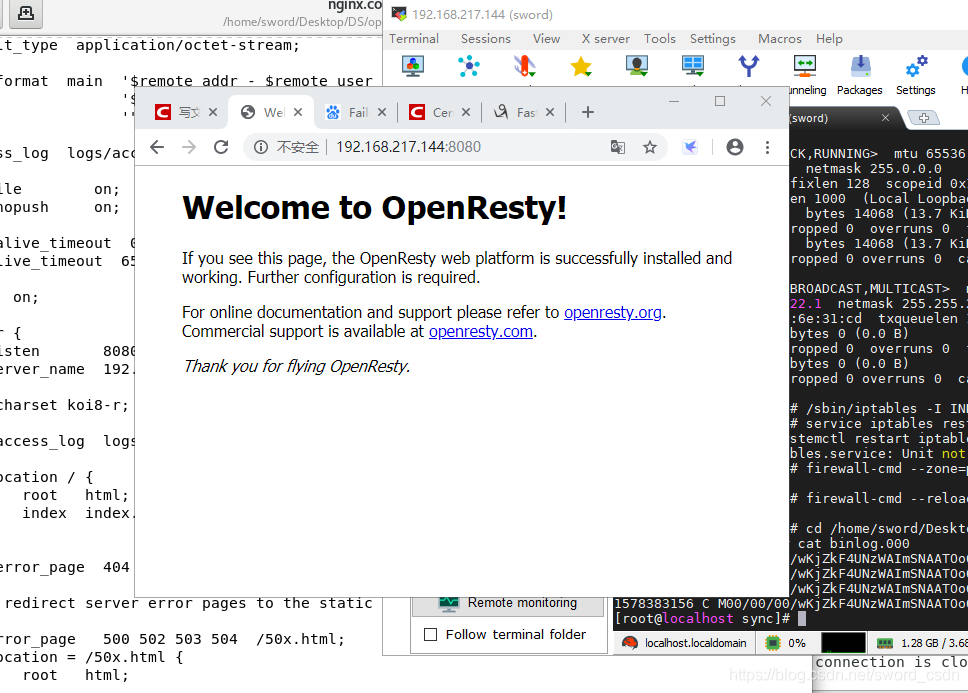
测试openresty是否安装成功
进入到openresty中nginx的conf文件夹,修改里面的nginx.conf
//用户使用openresty访问fdfs时,如果这里不设置为root用户,openresty无法访问fdfs的文件
user  root;
.......
server {
        listen       8080;
        server_name  192.168.217.144;
        #charset koi8-r;
        #access_log  logs/host.access.log  main;

        location / {
            root   html;
            index  index.html index.htm;
        }
.......
使用http://192.168.217.144:8080/访问openresty的主页,如果出现无法访问的情况,使用下面命令添加端口,后来发现在使用Python操作fdfs时,发现了还有22122,23000,1935这几个端口没有对外开放
[root@localhost sword]# firewall-cmd --zone=public --add-port=8080/tcp --permanent
[root@localhost sword]# firewall-cmd --reload
最后测试结果
测试openresty能否访问fdfs
定位到/home/sword/Desktop/DS/fdfs/data/sync/使用下面的命令,可以看到已经存在在fdfs上的资源。
[root@localhost sync]# cat binlog.000
1578383157 C M00/00/00/wKjZkF4UNzWAImSNAATOo69xqbE950.jpg
1578383156 C M00/00/00/wKjZkF4UNzWAImSNAATOo69xqbE950.jpg-m
1578383157 C M00/00/00/wKjZkF4UNzWAImSNAATOo69xqbE950_big.jpg
1578383156 C M00/00/00/wKjZkF4UNzWAImSNAATOo69xqbE950_big.jpg-m
然后修改openresty的nginx.conf文件,添加location如下:
		# group1为nginx 服务FastDFS的分组名称,M00是FastDFS自动生成编号,对应store_path0=/home/fdfs_storage,
    	# 如果FastDFS定义store_path1,这里就是M01
    	# 后期可以考虑使用正则表达式进行匹配
    	location /group1/M00/ {
        	root /home/sword/Desktop/DS/fdfs_storage/data;
        	ngx_fastdfs_module;
		}
重启openresty
[root@localhost sbin]# ./nginx -s reload
ngx_http_fastdfs_set pid=22640
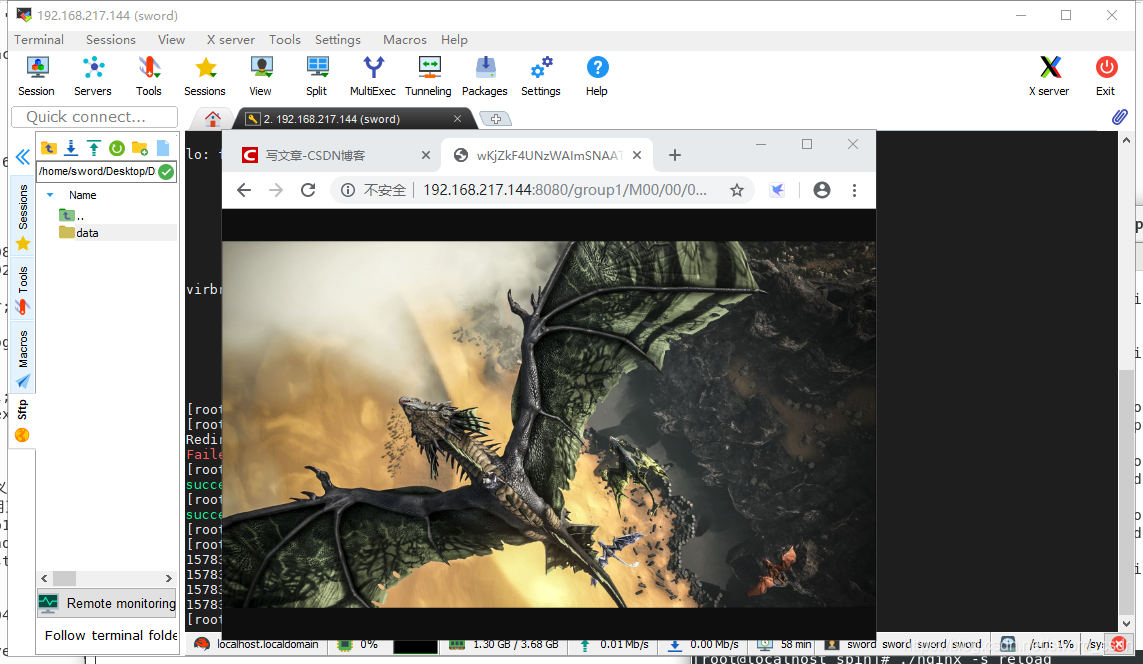
在浏览器访问http://192.168.217.144:8080/group1/M00/00/00/wKjZkF4UNzWAImSNAATOo69xqbE950.jpg得到结果:
测试openresty是否支持推流
在nginx.conf中添加下列代码,并重启openresty
...
rtmp{
	server{
		listen 1935;
		application myapp{
			live on;
		}
		application hls{
			live on;
			hls on;
			hls_path /home/sword/Desktop/DS/openresty_LJ/nginx/html/hls;
			hls_fragment 10s;
		}
	}
}
...
location /hls{
		types{
			application/vnd.apple.mpegurl m3u8;
			video/mp2t ts;
		}
}
使用以下命令实现推流
E:\PycharmProject\FDFSOperator>ffmpeg -re -i 1.mp4 -c copy -f flv rtmp://192.168.217.144/hls/cctv
[flv @ 000002101eaecb40] Failed to update header with correct duration.6.1kbits/s speed=   1x
[flv @ 000002101eaecb40] Failed to update header with correct filesize.
frame= 2864 fps= 24 q=-1.0 Lsize=   65442kB time=00:01:59.20 bitrate=4497.2kbits/s speed=   1x
video:63559kB audio:1743kB subtitle:0kB other streams:0kB global headers:0kB muxing overhead: 0.214493%
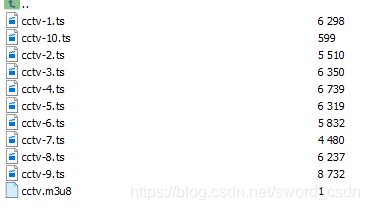
推流过程中,在/home/sword/Desktop/DS/openresty_LJ/nginx/html/hls路径下会出现m3u8和ts文件
推流过程中可以使用以下命令进行播放
E:\PycharmProject\FDFSOperator>ffplay http://192.168.217.144:8080/hls/cctv.m3u8
[http @ 000001ac4f2e27c0] Opening 'http://192.168.217.144:8080/hls/cctv-3.ts' for reading
[hls @ 000001ac4f2dd2c0] Skip ('#EXT-X-VERSION:3')sq=    0B f=0/0
[http @ 000001ac4f2e5080] Opening 'http://192.168.217.144:8080/hls/cctv-4.ts' for reading
[http @ 000001ac4f2e27c0] Opening 'http://192.168.217.144:8080/hls/cctv-5.ts' for reading
[http @ 000001ac5a1f0a80] Opening 'http://192.168.217.144:8080/hls/cctv.m3u8' for reading
[hls @ 000001ac4f2dd2c0] Skip ('#EXT-X-VERSION:3')
[http @ 000001ac4f2e5080] Opening 'http://192.168.217.144:8080/hls/cctv-6.ts' for reading
[http @ 000001ac5a1f0a80] Opening 'http://192.168.217.144:8080/hls/cctv.m3u8' for reading
[hls @ 000001ac4f2dd2c0] Skip ('#EXT-X-VERSION:3')
[http @ 000001ac4f2e27c0] Opening 'http://192.168.217.144:8080/hls/cctv-7.ts' for reading
[http @ 000001ac4f2e5080] Opening 'http://192.168.217.144:8080/hls/cctv-8.ts' for reading
并且会出现视频画面(不方便放出)
推流产生的视频片段
1、推流产生的视频片段,只能在推流进行的时候访问,一旦推流过程终止,视频将无法访问。
2、推流产生的视频片段(.ts文件)本身并不存储在fdfs中,而是存放在openresty的访问目录下,要想对它们进行分布式存储,可以另外编写视频处理程序将它们进行合并,然后存储在fdfs中,合并后的视频可以在没有推流的过程中播放
程序操作FDFS
Python
from fdfs_client.client import *
import time

class FDFSClient:
    def __init__(self,config_file_path="client.conf"):
        self.config_file_path = config_file_path
        self.tracker = get_tracker_conf(self.config_file_path)
        self.client = Fdfs_client(self.tracker)

    #上传文件字节
    def upload_file_by_buffer(self,file_path=""):
        with open(file_path,"rb") as f:
            ret = self.client.upload_by_buffer(f.read())
            print(ret)
            return ret
    #上传文件
    def upload_file(self,file_path=""):
        ret = self.client.upload_by_filename(file_path)
        print(ret)
        return ret
    #下载文件字节,是不是可以实现以流的方式播放,有待验证
    def download_file_by_buffer(self,local_file="",remote_file_id=b"",offset=0,down_bytes=1024):
        ret = self.client.download_to_buffer(remote_file_id,offset=offset,down_bytes=down_bytes)
        with open(local_file,"wb") as f:
            f.write(ret["Content"])

    def download_file(self,local_file="",remote_file_id=b"",offset=0,down_bytes=1024):
        ret = self.client.download_to_file(local_file,remote_file_id)

    def delete_file(self,remote_file_id):
        ret = self.client.delete_file(remote_file_id)
        print(ret)


if __name__=="__main__":
    fdfsClient = FDFSClient()
    #ret = fdfsClient.upload_file("1.MP4")
    #ret = fdfsClient.upload_file_by_buffer("1.MP4")
    #remote_file_id = ret["Remote file_id"]
    #fdfsClient.download_file_by_buffer("test.MP4",remote_file_id=b'group1/M00/00/00/wKjZkF4TXKiAPiXhBx77kEARHrg3654480')
    fdfsClient.download_file("test.MP4",remote_file_id=b'group1/M00/00/00/wKjZkF4TZLiAY9ReBx77kEARHrg163.MP4')
    #fdfsClient.delete_file(b'group1/M00/00/00/wKjZkF4TXKiAPiXhBx77kEARHrg3654480')


 被折叠的 条评论
为什么被折叠?
被折叠的 条评论
为什么被折叠?
 到【灌水乐园】发言


