


http://blog.csdn.net/caovae/article/details/7716014
在JNI的c文件中如果用到了#include <utils/Log.h>
然后用NDK 编译的时候会提示error: utils/Log.h: No such file or directory
如果想要他的LOG功能的话
1-----修改Android.mk文件配置,添加如下语句
LOCAL_LDLIBS += -L$(SYSROOT)/usr/lib -llog
2-----在.c文件中修改为如下语句
#include<android/log.h>
3-----使用方法
#define LOG_TAG "debug"
#define LOGI(fmt, args...) __android_log_print(ANDROID_LOG_INFO, LOG_TAG, fmt, ##args)
#define LOGD(fmt, args...) __android_log_print(ANDROID_LOG_DEBUG, LOG_TAG, fmt, ##args)
#define LOGE(fmt, args...) __android_log_print(ANDROID_LOG_ERROR, LOG_TAG, fmt, ##args)
4----打印语句
LOGI("test log!!!!")
LOGI("the string is: %s \n",buff);
5----错误输出到日志
LOGI(strerror(errno))
-----------------------------------------
自己的总结:
添加#include "cutils/logd.h"
定义TAG,如:#define TAG "errorlog"
直接调用__android_log_print(ANDROID_LOG_ERROR,TAG,"print content");函数打印log信息。
1.1.1. android系统log和Logcat使用
Android系统中log是分等级的,有如下等级:
* V — Verbose (lowest priority)详细信息,最低优先级,对应代码为Log.v()
* D — Debug 调试信息,对应代码为Log.d()
* I — Info 信息,对应代码为Log.i()
* W — Warning 警告信息,对应代码为Log.w()
* E — Error 错误信息,对应代码为Log.e()
* F — Fatal 致命错误信息,对应代码为Log.f()
* S — Silent (highest priority, on which nothing is ever printed) 最高优先级,什么也不打印,实际没有对应到代码中,此等级什么也不会打印。
在代码中应严格区分log的优先级,比如只是调试用的log就只能用Log.d(),如果执行某个打开设备的命令返回错误,应该用Log.e(),分配内存返回错误应该用Log.f()。
分等级的好处是,在遇到bug时,通过过滤log等级为e级,将只会打印出e级和f级的错误log,而不会打印w/i/d/v级别的信息,从而容易获取关键的错误信息,而不至于被其他调试信息所淹没。
Log Tag标签
Tag标签的作用是提供logcat打印log信息的范围过滤,比如可以一个文件一个tag,或者逻辑功能相同的多个文件,可以用同一个tag标签,在小范围的调试中,通过过滤tag,可以减少打印出来的log信息。在代码中一般是Log.d/v/i/w/e/f系列命令的第一个参数。Logcat的详细使用技巧参见:http://www.ophonesdn.com/article/show/44。
---------------------------------------------------------------------------------------------------------
android 中打 Log 的一些技巧
在 android 平台上搞开发工作,会经常用到一些 Log 输出调试信息。
众所周知,android 中有五种类型的 Log , v, d, i, w, e 这里就不再赘 述 (如果对这些不了解的朋友,推荐看 android_Tutor 的博文http://blog.csdn.net/Android_Tutor/article/details/5081713 , 上面讲的很详细)
本文主要讲一下如何统一控制 Log 的输出和关闭。
一般我们会在 debug 的版本中输出 log,而在 release 版本的产品中关闭 log 的输出。这一点是如何做到的呢,下面来看代码。
在你当前工作的工程中建一个新的类文件 Log.java 。这个类文件放在当前工作的包中,(也可以单独建一个包来放这个类文件)
在下面的类文件中,我们把 android中原始的10个 log 函数重新包了一层。定义了一个常量 DEBUG ,当 DEBUG 为 true 时才输出 Log 信息
- package com.android.gallery3d.util;
- public class Log {
- private static final boolean DEBUG = true;
- public static void v(String tag, String msg) {
- if(DEBUG) {
- android.util.Log.v(tag, msg);
- }
- }
- public static void v(String tag, String msg, Throwable tr) {
- if(DEBUG) {
- android.util.Log.v(tag, msg, tr);
- }
- }
- public static void d(String tag, String msg) {
- if(DEBUG) {
- android.util.Log.d(tag, msg);
- }
- }
- public static void d(String tag, String msg, Throwable tr) {
- if(DEBUG) {
- android.util.Log.d(tag, msg, tr);
- }
- }
- public static void i(String tag, String msg) {
- if(DEBUG) {
- android.util.Log.i(tag, msg);
- }
- }
- public static void i(String tag, String msg, Throwable tr) {
- if(DEBUG) {
- android.util.Log.i(tag, msg, tr);
- }
- }
- public static void w(String tag, String msg) {
- if(DEBUG) {
- android.util.Log.w(tag, msg);
- }
- }
- public static void w(String tag, String msg, Throwable tr) {
- if(DEBUG) {
- android.util.Log.w(tag, msg, tr);
- }
- }
- public static void w(String tag, Throwable tr) {
- if(DEBUG) {
- android.util.Log.w(tag, tr);
- }
- }
- public static void e(String tag, String msg) {
- if(DEBUG) {
- android.util.Log.e(tag, msg);
- }
- }
- public static void e(String tag, String msg, Throwable tr) {
- if(DEBUG) {
- android.util.Log.e(tag, msg, tr);
- }
- }
- }
package com.android.gallery3d.util;

public class Log {
	private static final boolean DEBUG = true;

	public static void v(String tag, String msg) {
    	if(DEBUG) {
    		android.util.Log.v(tag, msg);
    	}
    }
    public static void v(String tag, String msg, Throwable tr) {
        if(DEBUG) {
        	android.util.Log.v(tag, msg, tr);
        }
    }
    public static void d(String tag, String msg) {
        if(DEBUG) {
        	android.util.Log.d(tag, msg);
        }
    }
    public static void d(String tag, String msg, Throwable tr) {
        if(DEBUG) {
        	android.util.Log.d(tag, msg, tr);
        }
    }
    public static void i(String tag, String msg) {
        if(DEBUG) {
        	android.util.Log.i(tag, msg);
        }
    }
    public static void i(String tag, String msg, Throwable tr) {
        if(DEBUG) {
        	android.util.Log.i(tag, msg, tr);
        }
    }
    public static void w(String tag, String msg) {
        if(DEBUG) {
        	android.util.Log.w(tag, msg);
        }
    }
    public static void w(String tag, String msg, Throwable tr) {
        if(DEBUG) {
        	android.util.Log.w(tag, msg, tr);
        }
    }
    public static void w(String tag, Throwable tr) {
        if(DEBUG) {
        	android.util.Log.w(tag, tr);
        }
    }
    public static void e(String tag, String msg) {
        if(DEBUG) {
        	android.util.Log.e(tag, msg);
        }
    }
    public static void e(String tag, String msg, Throwable tr) {
        if(DEBUG) {
        	android.util.Log.e(tag, msg, tr);
        }
    }
}
而当前的包中可以使用 Log.v, Log.i, Log.w, Log.e, Log.d 来打 Log。
在其它的包中要打Log 也很简单,只要import 該类名就可以了。以上面的类文件为例,只要在其它包的类文件中 import com.android.gallery3d.util.Log;
就可以使用原来的 Log 函数来打 Log 了。
在Release 版本的软件上将 DEBUG 置为 false 即可关闭 Log 输出了。
http://blog.csdn.net/fulinwsuafcie/article/details/7575166
浅谈Android系统开发中LOG的使用
在程序开发过程中,LOG是广泛使用的用来记录程序执行过程的机制,它既可以用于程序调试,也可以用于产品运营中的事件记录。在Android系统中,提供了简单、便利的LOG机制,开发人员可以方便地使用。在这一篇文章中,我们简单介绍在Android内核空间和用户空间中LOG的使用和查看方法。
一. 内核开发时LOG的使用。Android内核是基于Linux Kerne 2.36的,因此,Linux Kernel的LOG机制同样适合于Android内核,它就是有名的printk,与C语言的printf齐名。与printf类似,printk提供格式化输入功能,同时,它也具有所有LOG机制的特点--提供日志级别过虑功能。printk提供了8种日志级别(<linux/kernel.h>):
- #define KERN_EMERG "<0>" /* system is unusable */
- #define KERN_ALERT "<1>" /* action must be taken immediately */
- #define KERN_CRIT "<2>" /* critical conditions */
- #deinfe KERN_ERR "<3>" /* error conditions */
- #deinfe KERN_WARNING "<4>" /* warning conditions */
- #deinfe KERN_NOTICE "<5>" /* normal but significant condition */
- #deinfe KERN_INFO "<6>" /* informational */
- #deinfe KERN_DEBUG "<7>" /* debug-level messages */
#define KERN_EMERG	"<0>" 	/* system is unusable 			*/
#define KERN_ALERT	"<1>" 	/* action must be taken immediately	*/
#define KERN_CRIT	"<2>" 	/* critical conditions			*/
#deinfe KERN_ERR	"<3>" 	/* error conditions			*/
#deinfe KERN_WARNING	"<4>" 	/* warning conditions			*/
#deinfe KERN_NOTICE	"<5>" 	/* normal but significant condition	*/
#deinfe KERN_INFO	"<6>" 	/* informational 			*/
#deinfe KERN_DEBUG "<7>" /* debug-level messages */printk(KERN_ALERT"This is the log printed by printk in linux kernel space.");
KERN_ALERT表示日志级别,后面紧跟着要格式化字符串。
在Android系统中,printk输出的日志信息保存在/proc/kmsg中,要查看/proc/kmsg的内容,参照在Ubuntu上下载、编译和安装Android最新内核源代码(Linux Kernel)一文,在后台中运行模拟器:
USER-NAME@MACHINE-NAME:~/Android$ emulator &
启动adb shell工具:
USER-NAME@MACHINE-NAME:~/Android$ adb shell
查看/proc/kmsg文件:
root@android:/ # cat /proc/kmsg
二. 用户空间程序开发时LOG的使用。Android系统在用户空间中提供了轻量级的logger日志系统,它是在内核中实现的一种设备驱动,与用户空间的logcat工具配合使用能够方便地跟踪调试程序。在Android系统中,分别为C/C++ 和Java语言提供两种不同的logger访问接口。C/C++日志接口一般是在编写硬件抽象层模块或者编写JNI方法时使用,而Java接口一般是在应用层编写APP时使用。
Android系统中的C/C++日志接口是通过宏来使用的。在system/core/include/android/log.h定义了日志的级别:
- /*
- * Android log priority values, in ascending priority order.
- */
- typedef enum android_LogPriority {
- ANDROID_LOG_UNKNOWN = 0,
- ANDROID_LOG_DEFAULT, /* only for SetMinPriority() */
- ANDROID_LOG_VERBOSE,
- ANDROID_LOG_DEBUG,
- ANDROID_LOG_INFO,
- ANDROID_LOG_WARN,
- ANDROID_LOG_ERROR,
- ANDROID_LOG_FATAL,
- ANDROID_LOG_SILENT, /* only for SetMinPriority(); must be last */
- } android_LogPriority;
/*
 * Android log priority values, in ascending priority order.
 */
typedef enum android_LogPriority {
	ANDROID_LOG_UNKNOWN = 0,
	ANDROID_LOG_DEFAULT,	/* only for SetMinPriority() */
	ANDROID_LOG_VERBOSE,
	ANDROID_LOG_DEBUG,
	ANDROID_LOG_INFO,
	ANDROID_LOG_WARN,
	ANDROID_LOG_ERROR,
	ANDROID_LOG_FATAL,
	ANDROID_LOG_SILENT,	/* only for SetMinPriority(); must be last */
} android_LogPriority;- /*
- * This is the local tag used for the following simplified
- * logging macros. You can change this preprocessor definition
- * before using the other macros to change the tag.
- */
- #ifndef LOG_TAG
- #define LOG_TAG NULL
- #endif
- /*
- * Simplified macro to send a verbose log message using the current LOG_TAG.
- */
- #ifndef LOGV
- #if LOG_NDEBUG
- #define LOGV(...) ((void)0)
- #else
- #define LOGV(...) ((void)LOG(LOG_VERBOSE, LOG_TAG, __VA_ARGS__))
- #endif
- #endif
- /*
- * Basic log message macro.
- *
- * Example:
- * LOG(LOG_WARN, NULL, "Failed with error %d", errno);
- *
- * The second argument may be NULL or "" to indicate the "global" tag.
- */
- #ifndef LOG
- #define LOG(priority, tag, ...) \
- LOG_PRI(ANDROID_##priority, tag, __VA_ARGS__)
- #endif
- /*
- * Log macro that allows you to specify a number for priority.
- */
- #ifndef LOG_PRI
- #define LOG_PRI(priority, tag, ...) \
- android_printLog(priority, tag, __VA_ARGS__)
- #endif
- /*
- * ================================================================
- *
- * The stuff in the rest of this file should not be used directly.
- */
- #define android_printLog(prio, tag, fmt...) \
- __android_log_print(prio, tag, fmt)
/*
 * This is the local tag used for the following simplified
 * logging macros. You can change this preprocessor definition
 * before using the other macros to change the tag.
 */
#ifndef LOG_TAG
#define LOG_TAG NULL
#endif

/*
 * Simplified macro to send a verbose log message using the current LOG_TAG.
 */
#ifndef LOGV
#if LOG_NDEBUG
#define LOGV(...)   ((void)0)
#else
#define LOGV(...)   ((void)LOG(LOG_VERBOSE, LOG_TAG, __VA_ARGS__))
#endif
#endif

/*
 * Basic log message macro.
 *
 * Example:
 *  LOG(LOG_WARN, NULL, "Failed with error %d", errno);
 *
 * The second argument may be NULL or "" to indicate the "global" tag.
 */
#ifndef LOG
#define LOG(priority, tag, ...) \
     LOG_PRI(ANDROID_##priority, tag, __VA_ARGS__)
#endif

/*
 * Log macro that allows you to specify a number for priority.
 */
#ifndef LOG_PRI
#define LOG_PRI(priority, tag, ...) \
     android_printLog(priority, tag, __VA_ARGS__)
#endif

/*
 * ================================================================
 *
 * The stuff in the rest of this file should not be used directly.
 */
#define android_printLog(prio, tag, fmt...) \
__android_log_print(prio, tag, fmt)#define LOG_TAG "MY LOG TAG"
#include <cutils/log.h>
就可以了,例如使用LOGV:
LOGV("This is the log printed by LOGV in android user space.");
再来看Android系统中的Java日志接口。Android系统在Frameworks层中定义了Log接口(frameworks/base/core/java/android/util/Log.java):
- ................................................
- public final class Log {
- ................................................
- /**
- * Priority constant for the println method; use Log.v.
- */
- public static final int VERBOSE = 2;
- /**
- * Priority constant for the println method; use Log.d.
- */
- public static final int DEBUG = 3;
- /**
- * Priority constant for the println method; use Log.i.
- */
- public static final int INFO = 4;
- /**
- * Priority constant for the println method; use Log.w.
- */
- public static final int WARN = 5;
- /**
- * Priority constant for the println method; use Log.e.
- */
- public static final int ERROR = 6;
- /**
- * Priority constant for the println method.
- */
- public static final int ASSERT = 7;
- .....................................................
- public static int v(String tag, String msg) {
- return println_native(LOG_ID_MAIN, VERBOSE, tag, msg);
- }
- public static int v(String tag, String msg, Throwable tr) {
- return println_native(LOG_ID_MAIN, VERBOSE, tag, msg + '\n' + getStackTraceString(tr));
- }
- public static int d(String tag, String msg) {
- return println_native(LOG_ID_MAIN, DEBUG, tag, msg);
- }
- public static int d(String tag, String msg, Throwable tr) {
- return println_native(LOG_ID_MAIN, DEBUG, tag, msg + '\n' + getStackTraceString(tr));
- }
- public static int i(String tag, String msg) {
- return println_native(LOG_ID_MAIN, INFO, tag, msg);
- }
- public static int i(String tag, String msg, Throwable tr) {
- return println_native(LOG_ID_MAIN, INFO, tag, msg + '\n' + getStackTraceString(tr));
- }
- public static int w(String tag, String msg) {
- return println_native(LOG_ID_MAIN, WARN, tag, msg);
- }
- public static int w(String tag, String msg, Throwable tr) {
- return println_native(LOG_ID_MAIN, WARN, tag, msg + '\n' + getStackTraceString(tr));
- }
- public static int w(String tag, Throwable tr) {
- return println_native(LOG_ID_MAIN, WARN, tag, getStackTraceString(tr));
- }
- public static int e(String tag, String msg) {
- return println_native(LOG_ID_MAIN, ERROR, tag, msg);
- }
- public static int e(String tag, String msg, Throwable tr) {
- return println_native(LOG_ID_MAIN, ERROR, tag, msg + '\n' + getStackTraceString(tr));
- }
- ..................................................................
- /**@hide */ public static native int println_native(int bufID,
- int priority, String tag, String msg);
- }
................................................

public final class Log {

................................................

	/**
	 * Priority constant for the println method; use Log.v.
         */
	public static final int VERBOSE = 2;

	/**
	 * Priority constant for the println method; use Log.d.
         */
	public static final int DEBUG = 3;

	/**
	 * Priority constant for the println method; use Log.i.
         */
	public static final int INFO = 4;

	/**
	 * Priority constant for the println method; use Log.w.
         */
	public static final int WARN = 5;

	/**
	 * Priority constant for the println method; use Log.e.
         */
	public static final int ERROR = 6;

	/**
	 * Priority constant for the println method.
         */
	public static final int ASSERT = 7;

.....................................................

	public static int v(String tag, String msg) {
		return println_native(LOG_ID_MAIN, VERBOSE, tag, msg);
	}

	public static int v(String tag, String msg, Throwable tr) {
		return println_native(LOG_ID_MAIN, VERBOSE, tag, msg + '\n' + getStackTraceString(tr));
	}

	public static int d(String tag, String msg) {
		return println_native(LOG_ID_MAIN, DEBUG, tag, msg);
	}

	public static int d(String tag, String msg, Throwable tr) {
		return println_native(LOG_ID_MAIN, DEBUG, tag, msg + '\n' + getStackTraceString(tr));
	}

	public static int i(String tag, String msg) {
		return println_native(LOG_ID_MAIN, INFO, tag, msg);
	}

	public static int i(String tag, String msg, Throwable tr) {
		return println_native(LOG_ID_MAIN, INFO, tag, msg + '\n' + getStackTraceString(tr));
	}

	public static int w(String tag, String msg) {
		return println_native(LOG_ID_MAIN, WARN, tag, msg);
	}

	public static int w(String tag, String msg, Throwable tr) {
		return println_native(LOG_ID_MAIN, WARN, tag, msg + '\n' + getStackTraceString(tr));
	}

	public static int w(String tag, Throwable tr) {
		return println_native(LOG_ID_MAIN, WARN, tag, getStackTraceString(tr));
	}

	public static int e(String tag, String msg) {
		return println_native(LOG_ID_MAIN, ERROR, tag, msg);
	}

	public static int e(String tag, String msg, Throwable tr) {
		return println_native(LOG_ID_MAIN, ERROR, tag, msg + '\n' + getStackTraceString(tr));
	}

..................................................................

	/**@hide */ public static native int println_native(int bufID,
		int priority, String tag, String msg);
}
因此,如果要使用Java日志接口,只要在类中定义的LOG_TAG常量和引用android.util.Log就可以了:
private static final String LOG_TAG = "MY_LOG_TAG";
Log.i(LOG_TAG, "This is the log printed by Log.i in android user space.");
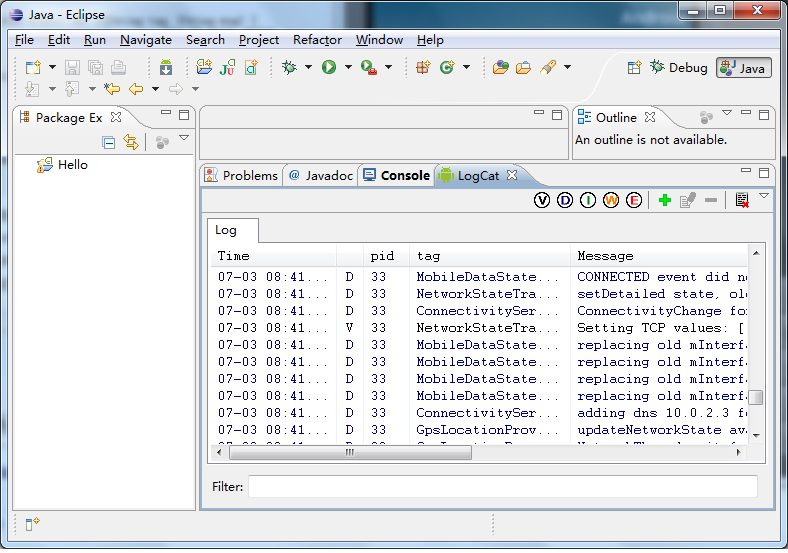
要查看这些LOG的输出,可以配合logcat工具。如果是在Eclipse环境下运行模拟器,并且安装了Android插件,那么,很简单,直接在Eclipse就可以查看了:
如果是在自己编译的Android源代码工程中使用,则在后台中运行模拟器:
USER-NAME@MACHINE-NAME:~/Android$ emulator &
启动adb shell工具:
USER-NAME@MACHINE-NAME:~/Android$ adb shell
使用logcat命令查看日志:
root@android:/ # logcat
这样就可以看到输出的日志了。
老罗的新浪微博:http://weibo.com/shengyangluo,欢迎关注!


 288
288


 被折叠的 条评论
为什么被折叠?
被折叠的 条评论
为什么被折叠?
 到【灌水乐园】发言


