


第一步:
创建maven 工程
第二步:
配置pom依赖,参考官方例子:
http://projects.spring.io/spring-boot/
 	<parent>
		<groupId>org.springframework.boot</groupId>
		<artifactId>spring-boot-starter-parent</artifactId>
		<version>1.4.3.RELEASE</version>
	</parent>
开始只需要引入这个一个依赖就可以了, 由于我们已经继承了 spring-boot-starter-parent ,而 spring-boot-starter-parent 又提供了 dependency-management ,所以我们可以忽略被选中依赖的版本。
在添加依赖之前,我们先看一下现在已有什么:mvn dependency:tree。该命令会打印一个当前项目的依赖树。
 <properties>
        <project.build.sourceEncoding>UTF-8</project.build.sourceEncoding>
        <project.reporting.outputEncoding>UTF-8</project.reporting.outputEncoding>
        <java.version>1.8</java.version>
    </properties>
设置编码格式和制定jdk版本
    <dependency>
        <groupId>org.springframework.boot</groupId>
        <artifactId>spring-boot-starter-web</artifactId>
    </dependency>
通过打印依赖树,可以看出,spring-boot-starter-web 包含了很多内容,spring-webmvc、spring-web、jackson、validation、tomcat、starter。
<build>
        <plugins>
            <plugin>
                <groupId>org.springframework.boot</groupId>
                <artifactId>spring-boot-maven-plugin</artifactId>
            </plugin>
        </plugins>
    </build>
spring-boot 的打包插件,默认是打war包,打包可以使用 mvn pakage 命令 或者
mvn Dmaven.test.skip=true pakage (忽略测试过程),打包之后使用 java -jar 工程名启动
第三步: Hello world
package com.example;
import org.springframework.boot.SpringApplication;
import org.springframework.boot.autoconfigure.SpringBootApplication;
import org.springframework.boot.web.servlet.ServletComponentScan;
import org.springframework.boot.web.support.SpringBootServletInitializer;
@SpringBootApplication
public class SampleWebJspApplication extends SpringBootServletInitializer {

	public static void main(String[] args) throws Exception {
		SpringApplication.run(SampleWebJspApplication.class, args);
	}
}
启动spring-boot 应用的main方法,@SpringBootApplication = (默认属性)@Configuration + @EnableAutoConfiguration + @ComponentScan。
1、@Configuration:提到@Configuration就要提到他的搭档@Bean。使用这两个注解就可以创建一个简单的spring配置类,可以用来替代相应的xml配置文件。@Configuration的注解类标识这个类可以使用Spring IoC容器作为bean定义的来源。@Bean注解告诉Spring,一个带有@Bean的注解方法将返回一个对象,该对象应该被注册为在Spring应用程序上下文中的bean。
2、@EnableAutoConfiguration:能够自动配置spring的上下文,试图猜测和配置你想要的bean类,通常会自动根据你的类路径和你的bean定义自动配置。
3、@ComponentScan:会自动扫描指定包下的全部标有@Component的类,并注册成bean,当然包括@Component下的子注解@Service,@Repository,@Controller。
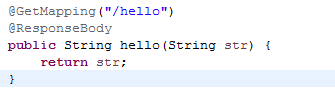
Controller 视图
public class Linked {


    // 存放元素
    private Node first;


    // 有一个值标识存储的大小
    private int size;


    // 有一个添加元素的方法
    public void add(Object obj) {
        Node node = new Node(obj);
        /**
        * 添加分两种情况:1.第一次 2.第n次
        */
        if (first == null) {
            first = node;
        } else {
            // 第n次添加,只能把元素挂在最后一个元素上面,循环找到最后一个
            Node n = first;
            while (n.next != null) {
            n = n.next;
            }
             n.next = node;
        }
        size++;
    }


    // 有一个获得容器大小的方法
    public int getSize() {
        return this.size;
    }


    // 复写toString()方法,查看结果
    @Override
    public String toString() {
        StringBuffer sb = new StringBuffer();
        sb.append("[");
        Node n = first;
        if(n!=null){
            sb.append(n.obj).append(",");
        }
        while (n.next != null) {
            n = n.next;
            if (n.next == null) {
                sb.append(n.obj);
            } else {
                sb.append(n.obj).append(",");
            }
        }
        sb.append("]");
        return sb.toString();
    }


    // 有一个对象存储值和引用
    private class Node {
        // 值.任意类型
        private Object obj;
        // 引用
        private Node next;

        Node(Object obj) {
            this.obj = obj;
        }
    }
}
四 spring -boot 应用的启动方式
① 通过IDE启动
② 启动jar包 ,java -jar 项目名
③使用maven 插件 mvn spring-boot:run
五 热部署
    <dependency>
        <groupId>org.springframework.boot</groupId>
        <artifactId>spring-boot-devtools</artifactId>
        <optional>true</optional>
    </dependency>
只要修改了calss path 下的文件,项目会自动重启.
一些特定的资源改变时没有必要引起重启。有一些不会引起重启,但是会重加载。如果你想自定义的设置一下,可以使用 spring.devtools.restart.exclude 属性。如下:
spring.devtools.restart.exclude=static/**,public/**
如果想在默认的设置之外再添加新的排除选项,可以使用 spring.devtools.restart.additional-exclude 属性。
如果想在修改classpath之外的文件时也让应用重启,可以使用 spring.devtools.restart.additional-paths 属性。还可以配合上面提到的 spring.devtools.restart.exclude 属性,来控制是重启还是重加载。
如果不想使用自动重启功能,可以使用 spring.devtools.restart.enabled 属性。多数情况下,可以在 application.properties 中设置,这样仍然会创建一个restart类加载器,但不再监视改变。
如果想完全禁止自动重启,需要在调用 SpringApplication.run(..) 之前设置一个System属性。如下:
public static void main(String[] args) {
	System.setProperty("spring.devtools.restart.enabled", "false");
 	SpringApplication.run(MyApp.class, args);
}
public static void main(String[] args) {
System.setProperty("spring.devtools.restart.enabled", "false");
SpringApplication.run(MyApp.class, args);
}
六 spring-boot 响应jsp
spring 官方不建议建议使用jsp ,使用jsp需要在main 下面创建webapp文件夹存放jsp页面
jsp页面内容:
要支持jsp相应还需要在 application.properties 做如下配置:
# 页面默认前缀目录
spring.mvc.view.prefix=/WEB-INF/jsp/
# 页面默认后缀目录
spring.mvc.view.suffix=.jsp
application.hello=hello jsp
在pom中添加依赖:
<dependency>
<dependency>
	<groupId>org.apache.tomcat.embed</groupId>
	<artifactId>tomcat-embed-jasper</artifactId>
	<scope>provided</scope>
</dependency>
<dependency>
<groupId>org.apache.tomcat.embed</groupId>
<artifactId>tomcat-embed-jasper</artifactId>
<scope>provided</scope>
</dependency>
Controller 中方法:
package com.example;

import java.util.Map;

import org.springframework.beans.factory.annotation.Value;
import org.springframework.web.bind.annotation.GetMapping;
import org.springframework.web.bind.annotation.RequestMapping;
import org.springframework.web.bind.annotation.RestController;
import org.springframework.web.servlet.ModelAndView;
@RestController
public class HelloController {

    // 从 application.properties 中读取配置,如取不到默认值为Hello
    @Value("${application.hello:Hello}")
    private String hello;

    @RequestMapping("/page1")
    public ModelAndView page1(){
        // 页面位置 /WEB-INF/jsp/helloJsp.jsp
        ModelAndView mav = new ModelAndView("/helloJsp");
        mav.addObject("hello", hello);
        return mav;
    }

 @RequestMapping("/helloJsp")
    public String helloJsp(Map<String, Object> map) {
        map.put("hello", hello);
        return "helloJsp";
    }

}
注意:
在使用 下面的方法返回jsp视图的时候,不能使用 @RestController 注解 要使用 @Controller 不然.就会返回字符串"hellojsp" 而不会返回页面内容:
@RestController=@Controller + @ResponseBody,@ResponseBody注解是返回json格式数据
解决办法是直接使用 @Controller 注解 在需要返回json格式数据的方法上面添加 @ResponseBody 就可以了


 1105
1105

 被折叠的 条评论
为什么被折叠?
被折叠的 条评论
为什么被折叠?
 到【灌水乐园】发言


