


CentOS 6.5安装SVN
1. 安装subversion
1)在Shell命令行中运行以下命令: yum install -y subversion
2)验证是否安装成功: svnserve –version
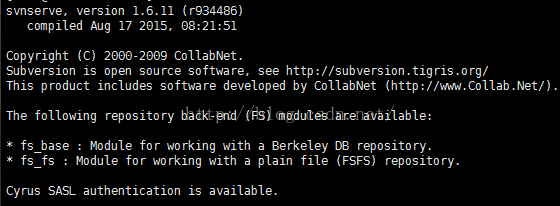
如出现以上信息则表示安装成功。
3)修改服务启动脚本文件/etc/init.d/svnserve:vim /etc/init.d/svnserve
将下面的内容:
exec=/usr/bin/svnserve
prog=svnserve
pidfile=${PIDFILE-/var/run/svnserve.pid}
lockfile=${LOCKFILE-/var/lock/subsys/svnserve}
args="--daemon --pid-file=${pidfile} $OPTIONS"
[ -e /etc/sysconfig/$prog ] && . /etc/sysconfig/$prog
替换为:
exec=/usr/bin/svnserve
prog=svnserve
pidfile=${PIDFILE-/var/run/svnserve.pid}
lockfile=${LOCKFILE-/var/lock/subsys/svnserve}
repo=/home/svn/repos
args="--daemon --pid-file=${pidfile} $OPTIONS -d -r ${repo}"
[ -e /etc/sysconfig/$prog ] && . /etc/sysconfig/$prog
2. 建立SVN版本库
1) 在Shell命令行中运行以下命令:
mkdir -p /home/svn/repos
svnadmin create /home/svn/repos #必须使用svnadmin权限创建
执行上述命令后,会自动在repo目录下建立多个文件和目录,

conf目录下包含如下几个配置文件:
authz -- 用于配置用户的目录访问权限。
Passwd -- 用于配置用户名和密码。
svnserve.conf -- 用于配置SVN的默认行为。
3. 配置passwd文件
/home/svn/repos/conf/passwd文件的内容如下所示: vim /home/svn/repos/conf/passwd
[users]
# harry =harryssecret
# sally =sallyssecret
test=123456
创建test用户,密码为123456
4. 配置authz文件
/home/svn/repos/conf/authz文件的内容如下所示:
[groups]
team =test #创建组
[/]
test = rw
[/repos/]
@team=rw
1) [/],表示根目录及以下,根目录是svnserve启动时指定的,我们指定为/home/svn,[/]就是表示对全部版本库设置权限。
2) [/repos/] 表示对版本库repos设置权限;
3) [/repos/a]表示对版本库repos中的a项目设置权限;试过写[repos:/a] 出现认证失败情况
4) [/repos/a/aa]表示对版本库repos中的a项目的aa目录设置权限;
5) 权限主体可以是用户组、用户或*,用户组在前面加@,*表示全部用户。
6) 权限可以是w、r、wr和空,空表示没有任何权限
5. 配置svnserve.conf文件
/home/svn/repos/conf/svnserve.conf文件的内容如下所示:
general]
##匿名用户访问规则,可以是none、read或write
anon-access= none #禁止匿名访问
##验证用户访问规则,可以是none、read或write
auth-access= write
##指定验证用户配置文件,权限管理主要操作文件,可以指定文件路径
authz-db= authz
##指定密码配置文件,可以指定文件路径
password-db= passwd
6. 启动SVN服务
在Shell中运行以下命令:
chkconfig svnserve on
service svnserve start
7. 连接SVN
svn://ip:3690/repos/ 默认端口是3690
注意:
浏览器中不能通过http的方式进行访问:http://ip:3690/repos/
因为没有配置http的服务,安装的的是独立的SVN服务器


 532
532


 被折叠的 条评论
为什么被折叠?
被折叠的 条评论
为什么被折叠?
 到【灌水乐园】发言


