


在购买物品之后,一般会对商品有个评价,一共有5颗星星,写一个star组件,状态包括全亮、半亮、不亮3个状态,然后其数量是由后台返回来的,前端根据后台返回的数据进行星星的显示。
如下图所示,是前端的一个显示页面效果图
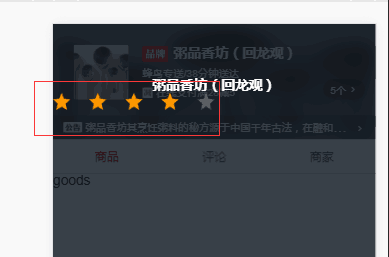
下面就具体描述如何对评价的星星star的封装以及父组件如何向子组件传递数据
先准备一下图片素材,由于在不同的设备上像素不一样,所以准备了不同大小的星星图片分别由24/36/48,一颗星状态全亮、半亮、不亮分别用on,half,off表示,如下面是准备的图片

素材准备好就可以开始写代码了
1、在要调用star组件的.vue文件的<script>标签里面引入star组件,这里是在header.vue文件里面引用star组件,所以在header.vue文件的<script>标签的开头引入star.vue文件
import star from '../star/star';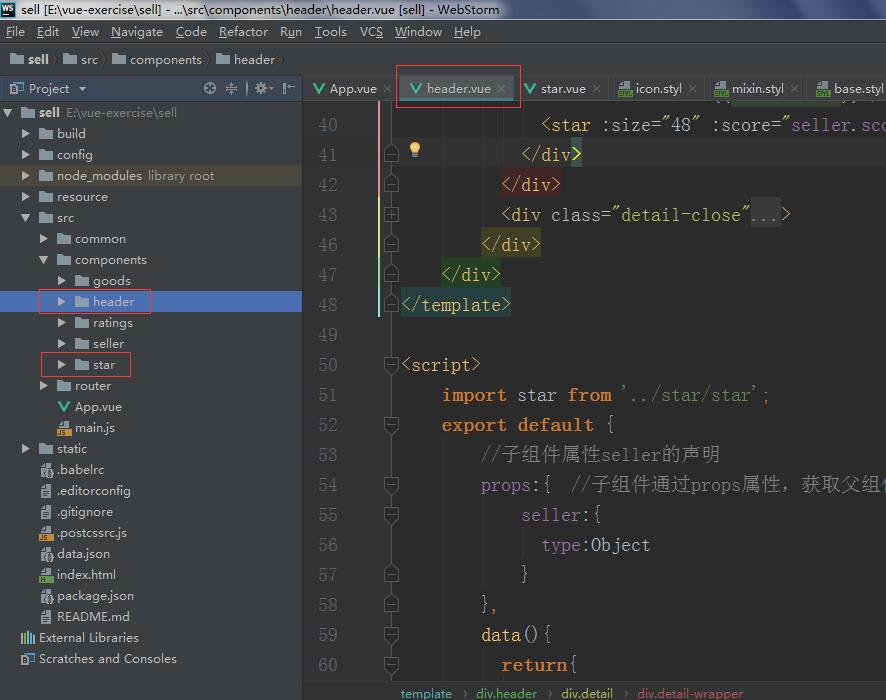
2、在header.vue中的<script>标签的输出里面利用components属性注册star组件
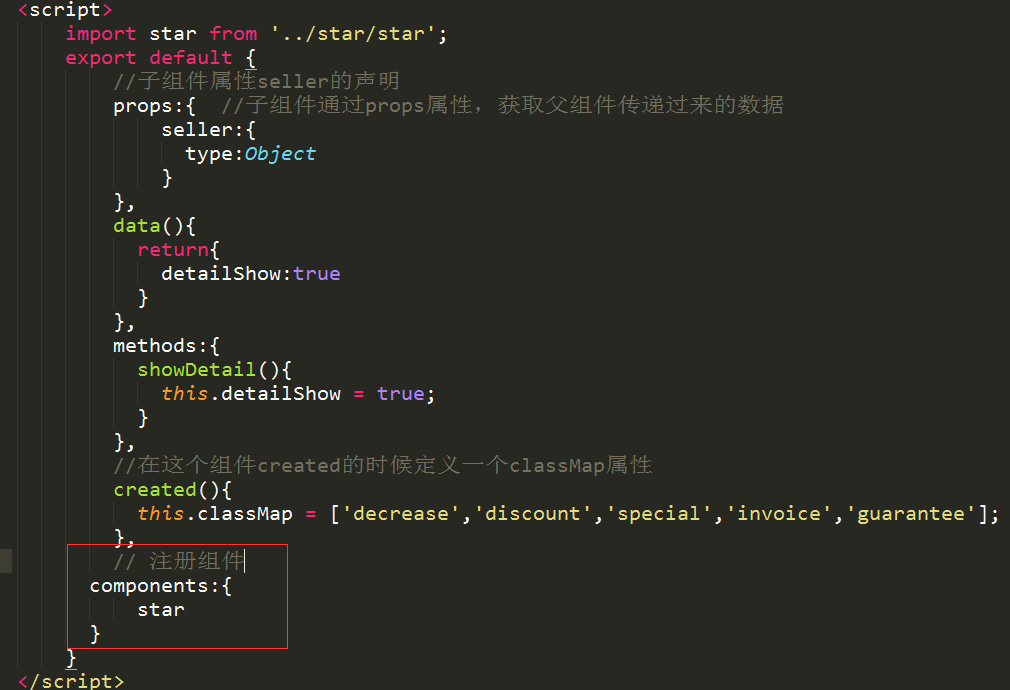
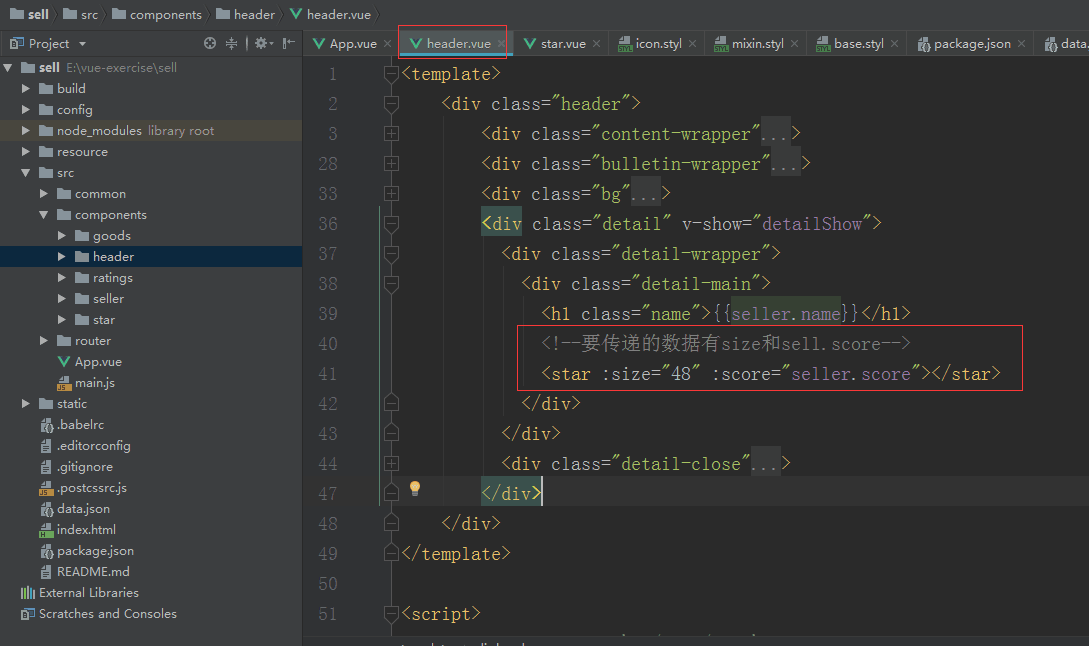
3、现在就可以在header.vue的<template>中引用star组件了,并且利用绑定的自定义的属性向子组件star传递数据,这里要传递的参数有star的size以及评分score,下面是header.vue的<template>的内容
4、然后在stra.vue的<script>标签里面的输出部分利用props对象声明在headr.vue中绑定的变量size score,如下所示
<script>
  export default {
      props:{
        size:{
          type:Number
        },
        score:{
          type:Number
        }
      }
  }
</script>
5、书写star.vue的<template>的内容,由于该star组件一共要显示5颗星,每颗星的状态可能为全亮、半亮、全灭,所以需要用v-for指令来遍历每颗星,并且每颗星根据其状态来显示css样式
<template>
    <!--starType根据父组件传递过来的数据,获取到要显示的星星的尺寸,starType在computed中定义-->
    <div class="star" :class="starType">
      <span v-for="itemClass in itemClasses" :class="itemClass" class="star-item"></span>
    </div>
</template>
starType在computed中的定义如下:
<script>
  export default {
      props:{
        size:{
          type:Number
        },
        score:{
          type:Number
        }
      },
      computed:{
        starType(){
          return 'star-' + this.size;  //这里的size是父组件传递过来的数据,就是图片名字中的数字部分,如下图红圈所示
        }                              //对图片名的@前半部分的拼接
      }
  }
</script>

itemClasses函数返回一个数组,数组里面的元素itemClass表示星星的某个状态类,即
<span v-for="itemClass in itemClasses" :class="itemClass" class="star-item"></span><script>
const LENGTH = 5; //定义星星的个数
const CLS_ON = 'on'; //代表一颗星全亮
const CLS_HALF = 'half'; //代表一颗星半亮
const CLS_OFF = 'off'; //代表一颗星不亮
export default {
props:{
size:{
type:Number
},
score:{
type:Number
}
},
computed:{
starType(){
return 'star-' + this.size;
},
itemClasses(){ //在这里定义itemClasses
let result = [];//用来存放代表星星的状态,一起5颗星
let score = Math.floor(this.score * 2)/2; //对数据进行一个处理要么为整数要么为4.5,3.5等
let hasDecimal = score % 1 !== 0; //是否有半星,true表示有半星,false表示没有半星
let integer = Math.floor(score); //全星个数
//存放全亮的星星
for( let i = 0;i<integer;i++ ){
result.push(CLS_ON);
}
//存放半亮的星星
if( hasDecimal ){
result.push(CLS_HALF);
}
//如果星星状态的个数还没有达到5个,那么剩下的用不亮的星星状态代替
while(result.length < LENGTH){
result.push(CLS_OFF);
}
return result;
}
}
}
</script>其中itemClass的值有on half off ,所以要在star.vue中的<style>标签里面定义不同尺寸star的3种状态的css样式,如下面所示
<style lang="stylus">
  @import "../../common/stylus/mixin.styl"
  .star
    font-size:0
    &.star-48
      .star-item
        display:inline-block
        background-repeat:no-repeat
        width:20px
        height:20px
        margin-right:22px
        background-size:20px 20px
        &:last-child
          margin-right:0
        &.on
          bg-image('star48_on')
        &.half
          bg-image('star48_half')
        &.off
          bg-image('star48_off')
    &.star-36
      .star-item
        display:inline-block
        background-repeat:no-repeat
        width:15px
        height:15px
        margin-right:6px
        background-size:15px 15px
        &:last-child
          margin-right:0
        &.on
          bg-image('star36_on')
        &.half
          bg-image('star36_half')
        &.off
          bg-image('star36_off')
    &.star-24
      .star-item
        display:inline-block
        background-repeat:no-repeat
        width:10px
        height:10px
        margin-right:3px
        background-size:10px 10px
        &:last-child
          margin-right:0
        &.on
          bg-image('star24_on')
        &.half
          bg-image('star24_half')
        &.off
          bg-image('star24_off')

</style>
到这里就可以完成动态显示星星的状态了


 189
189


 被折叠的 条评论
为什么被折叠?
被折叠的 条评论
为什么被折叠?
 到【灌水乐园】发言


