


 本文详细介绍了Apache Httpd服务器的配置技巧,包括如何设置虚拟主机(不同IP端口、相同IP不同端口和域名)、访问控制规则,以及如何启用和配置mod_ssl模块进行HTTPS加密。还涉及了证书类型的选择和Windows系统中的DNS映射设置。
httpd常用配置
httpd常用配置虚拟主机:相同IP不同端口不同IP相同端口这样改:相同ip相同端口不同域名:https配置mod_ssl模块证书类型
访问控制法则:
| 法则 | 功能 |
|---|---|
| Require all granted | 允许所有主机访问 |
| Require all deny | 拒绝所有主机访问 |
| Require ip IPADDR | 授权指定来源地址的主机访问 |
| Require not ip IPADDR | 拒绝指定来源地址的主机访问 |
| Require host HOSTNAME | 授权指定来源主机名的主机访问 |
| Require not host HOSTNAME | 拒绝指定来源主机名的主机访问 |
| IPADDR的类型 | HOSTNAME的类型 |
|---|---|
| IP:192.168.1.1 Network/mask:192.168.1.0/255.255.255.0 Network/Length:192.168.1.0/24 Net:192.168 | FQDN:特定主机的全名 DOMAIN:指定域内的所有主机 |
注意:httpd-2.4版本默认是拒绝所有主机访问的,所以安装以后必须做显示授权访问
示例:
 <Directory /var/www/html/www>
     <RequireAll>
         Require not ip 192.168.1.20
         Require all granted
     </RequireAll>
 </Directory>
虚拟主机:
虚拟主机有三类:
-
相同IP不同端口
-
不同IP相同端口
-
相同IP相同端口不同域名
相同IP不同端口
 [root@localhost ~]# cd /etc/httpd/conf.d/
 [root@localhost conf.d]# ls
 README  autoindex.conf  userdir.conf  welcome.conf
 #文件位置可以通过find查找
 [root@localhost conf.d]# cp /usr/local/httpd/docs/conf/extra/httpd-vhosts.conf /etc/httpd/conf.d/
 [root@localhost conf.d]# ls
 README  autoindex.conf  httpd-vhosts.conf  userdir.conf  welcome.conf
 [root@localhost conf.d]#
修改文件
[root@localhost conf.d]# vi httpd-vhosts.conf [root@localhost conf.d]# cat httpd-vhosts.conf # Virtual Hosts # # Required modules: mod_log_config # If you want to maintain multiple domains/hostnames on your # machine you can setup VirtualHost containers for them. Most configurations # use only name-based virtual hosts so the server doesn't need to worry about # IP addresses. This is indicated by the asterisks in the directives below. # # Please see the documentation at # <URL:http://httpd.apache.org/docs/2.4/vhosts/> # for further details before you try to setup virtual hosts. # # You may use the command line option '-S' to verify your virtual host # configuration. # # VirtualHost example: # Almost any Apache directive may go into a VirtualHost container. # The first VirtualHost section is used for all requests that do not # match a ServerName or ServerAlias in any <VirtualHost> block. # <VirtualHost *:80> # ServerAdmin 邮箱 DocumentRoot "/var/www/html/feijidazhan" #网站根目录 ServerName www.tangyuxuan.com #域名 ErrorLog "/var/log/httpd/www.d.example.com-error_log" #错误日志 CustomLog "/var/log/httpd/www.b.exampl e.com-access_log" common #登录日志 </VirtualHost> Listen 81 <VirtualHost *:81> # ServerAdmin 邮箱 DocumentRoot "/var/www/html/tangke" #网站根目录 ServerName www.tangyuxuan2.com #网站域名 ErrorLog "/var/log/httpd/www.a.example.com-error_log" #错误日志 CustomLog "/var/log/httpd/www.c.exampl e.com-access_log" common #登录日志 </VirtualHost> #下面登录管理 <rectory /var/www/html/www> <RequireAll> Require not ip 192.168.245.128 #上面是不允许登录ip Require all granted #这句话是允许所有ip访问,除了上面那个ip </RequireAll> </Directory>
改完目录需要把自己写的根目录创建一些,并且上传显示内容
[root@localhost conf.d]# cd /var/www/html/ [root@localhost html]# ls [root@localhost html]# mkdir feijidazhan tanke [root@localhost html]# ls feijidazhan tanke
随便找点内容
 [root@localhost html]# ls feijidazhan/
 audio  css  images  index.html  js
 [root@localhost html]# ls tanke/
 css  img  index.html  js
 [root@localhost html]#
检测一下
 [root@localhost html]# httpd -t
 AH00558: httpd: Could not reliably determine the server's fully qualified domain name, using localhost.localdomain. Set the 'ServerName' directive globally to suppress this message
 Syntax OK
 [root@localhost html]# systemctl restart httpd
 [root@localhost html]# ss -antl
 State    Recv-Q   Send-Q      Local Address:Port       Peer Address:Port   Process
 LISTEN   0        128               0.0.0.0:111             0.0.0.0:*
 LISTEN   0        128               0.0.0.0:22              0.0.0.0:*
 LISTEN   0        128                  [::]:111                [::]:*
 LISTEN   0        128                     *:80                    *:*
 LISTEN   0        128                  [::]:22                 [::]:*
 [root@localhost html]#
测试结果: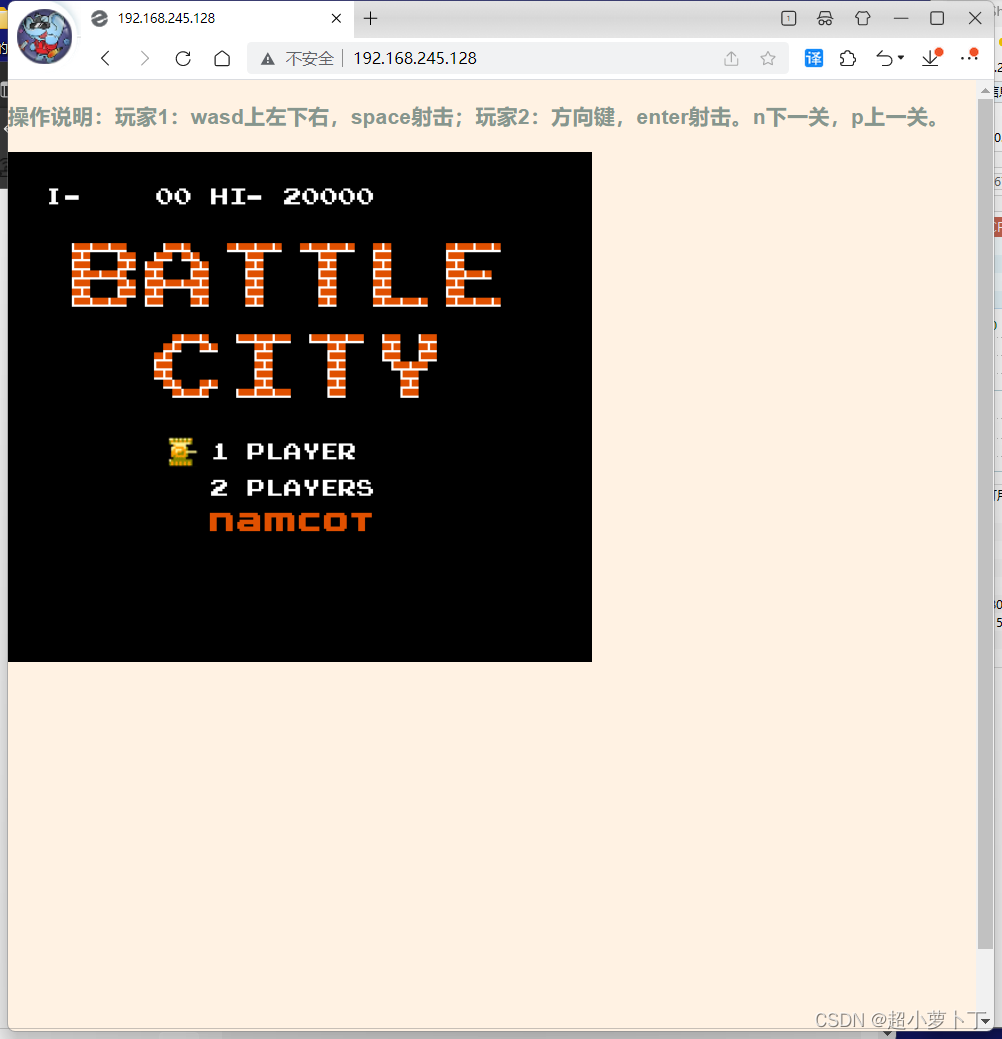

改动的文件内容:
<VirtualHost *:80> DocumentRoot "/var/www/html/tang" ServerName www.tangyuxuan.com ErrorLog "/var/log/httpd/www.tyx.com-error_log" CustomLog "/var/log/httpd/www.tyx2.com-access_log" common </VirtualHost> Listen 81 <VirtualHost *:81> DocumentRoot "/var/www/html/yuxuan" ServerName www.tangyuxuan2.com ErrorLog "/var/log/httpd/www.tyx3.com-error_log" CustomLog "/var/log/httpd/www.tyx5.com-access_log" common </VirtualHost> <Directory "/var/www/html/*" > <RequireAll> Require all granted </RequireAll> </Directory>
不同IP相同端口这样改:
<VirtualHost ip1:80> DocumentRoot "/var/www/html/tang" ServerName www.tangyuxuan.com ErrorLog "/var/log/httpd/www.tyx.com-error_log" CustomLog "/var/log/httpd/www.tyx2.com-access_log" common </VirtualHost> <VirtualHost ip2:80> DocumentRoot "/var/www/html/yuxuan" ServerName www.tangyuxuan2.com ErrorLog "/var/log/httpd/www.tyx3.com-error_log" CustomLog "/var/log/httpd/www.tyx5.com-access_log" common </VirtualHost> <Directory "/var/www/html/*" > <RequireAll> Require all granted </RequireAll> </Directory> 如果需要长期使用,就需要配置能够保存下来的ip
相同ip相同端口不同域名:
<VirtualHost *:80>
DocumentRoot "/var/www/html/tang"
ServerName www.tangyuxuan.com
ErrorLog "/var/log/httpd/www.tyx.com-error_log"
CustomLog "/var/log/httpd/www.tyx2.com-access_log" common
</VirtualHost>
<VirtualHost *:80>
DocumentRoot "/var/www/html/yuxuan"
ServerName www.tangyuxuan2.com
ErrorLog "/var/log/httpd/www.tyx3.com-error_log"
CustomLog "/var/log/httpd/www.tyx5.com-access_log" common
</VirtualHost>
<Directory "/var/www/html/*" >
<RequireAll>
Require all granted
</RequireAll>
</Directory>
因为是局域网,需要自己配置映射
本地:
[root@localhost html]# vim /etc/hosts
[root@localhost html]# cat /etc/hosts
127.0.0.1 localhost localhost.localdomain localhost4 localhost4.localdomain4
::1 localhost localhost.localdomain localhost6 localhost6.localdomain6
192.168.245.128 www.tangyuxuan.com
192.168.245.128 www.tangyuxuan2.com
[root@localhost html]#
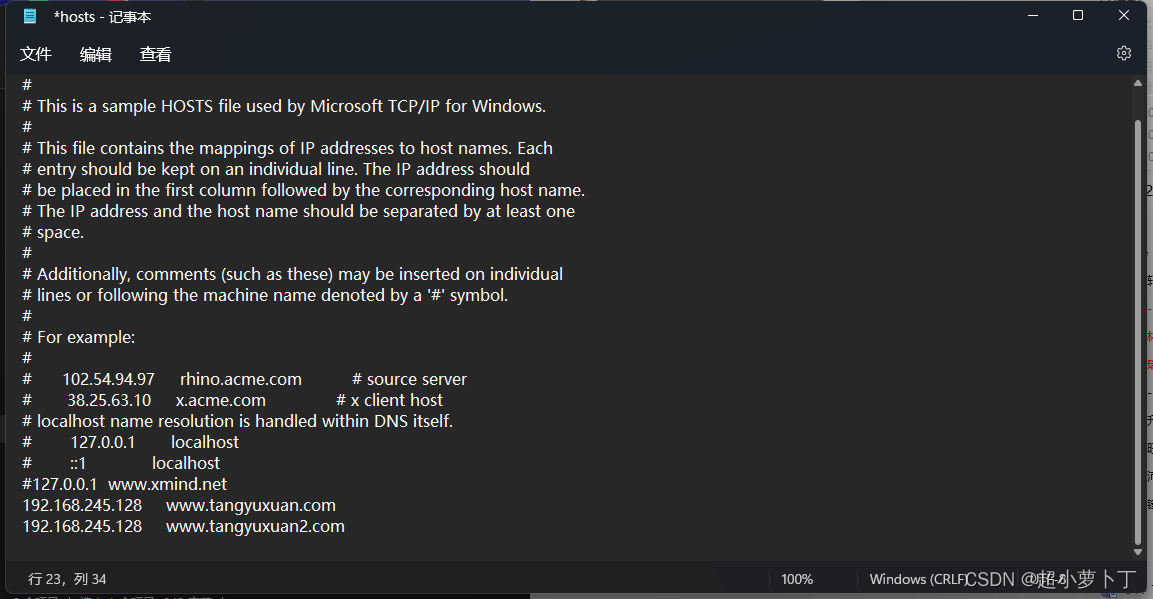
我们找到windows下的 C:\Windows\System32\drivers\etc,用记事本打开host文件,在后边加上ip和对应的域名,前边不要加#,那是注释掉的意思。
加入自己的两个ip 和不同的域名
这就是三种不同的方法
https配置
https(全称:Hyper Text Transfer Protocol over SecureSocket Layer),是以安全为目标的 http 通道,在 http 的基础上通过传输加密和身份认证保证了传输过程的安全性。
mod_ssl模块
-
mod_ssl 模块可以实现https加密认证。
mod_ssl 模块安装后,并未使用,需要我们手动添加启用。
启用模块:编辑/etc/httpd/conf.modules.d/00-base.conf文件,添加下面这行,如果已经有了但是注释了,则取消注释即可。
-
LoadModule ssl_module modules/mod_ssl.so
-
-
yum 安装ssl模块的话,会自动生成模块配置文件,我们重启服务就可以直接使用
证书类型
-
https的证书:
-
SSLCertificateFile:服务器证书文件;
-
SSLCertificateKeyFile:服务器证书私钥文件;
-
SSLCertificateChainFile:服务器证书链文件;
-
SSLCACertificateFile:CA机构证书公钥文件。
-
-
证书类型可以在 /etc/httpd/conf.d/ssl.conf 配置文件中设置;也可在虚拟主机中配置。
[root@localhost ~]# mkdir /etc/httpd/ssl
[root@localhost ~]# cd /etc/httpd/ssl
[root@localhost ssl]# openssl genrsa -out server.key 2048
Generating RSA private key, 2048 bit long modulus (2 primes)
......+++++
..+++++
e is 65537 (0x010001)
[root@localhost ssl]# openssl req -new -key server.key -out server.csr
You are about to be asked to enter information that will be incorporated
into your certificate request.
What you are about to enter is what is called a Distinguished Name or a DN.
There are quite a few fields but you can leave some blank
For some fields there will be a default value,
If you enter '.', the field will be left blank.
-----
Country Name (2 letter code) [XX]:cn
State or Province Name (full name) []:hb
Locality Name (eg, city) [Default City]:wh
Organization Name (eg, company) [Default Company Ltd]:tyx
Organizational Unit Name (eg, section) []:123.com
Common Name (eg, your name or your server's hostname) []:www.tangty^H^H
Email Address []:123.com

Please enter the following 'extra' attributes
to be sent with your certificate request
A challenge password []:
An optional company name []:
[root@localhost ssl]# dnf -y install mod_ssl
[root@localhost ssl]# vim /etc/httpd/conf.d/ssl.conf
[root@localhost ssl]#
配置文件更改内容
<VirtualHost 192.168.245.128:443>
DocumentRoot "/var/www/html"
ServerName www.tangyuxuan.com:443
SSLCertificateFile /etc/httpd/ssl/server.crt
SSLCertificateKeyFile /etc/httpd/ssl/server.key


 640
640

 被折叠的 条评论
为什么被折叠?
被折叠的 条评论
为什么被折叠?
 到【灌水乐园】发言


