


 本文详细介绍了谷歌两步验证的工作原理和用户绑定过程,并提供了Java实现的相关代码,包括生成随机秘钥、校验验证码、生成二维码等步骤。此外,还分享了登录时如何检查和验证6位验证码,以及注意事项,确保验证码的有效性和安全性。
(一)介绍
既然来看该文章就应该知道Google的两步认证是干什么的,这边再提供一次app的下载链接
(apkpure搜索谷歌身份验证器)
验证原理讲解:
- 在数据库中查找该登陆用户之前绑定的32位随机码(该码一般会存入数据库)
- 调用API传入32位随机码,生成正确的6位验证码(每隔1min会变化)
- 根据用户输入的6位验证码和正确的6位验证码做匹配,相同则登陆成功,不同则验证码时间失效或错误
用户绑定讲解:
- 调用API生成32位随机码,准备绑定给用户
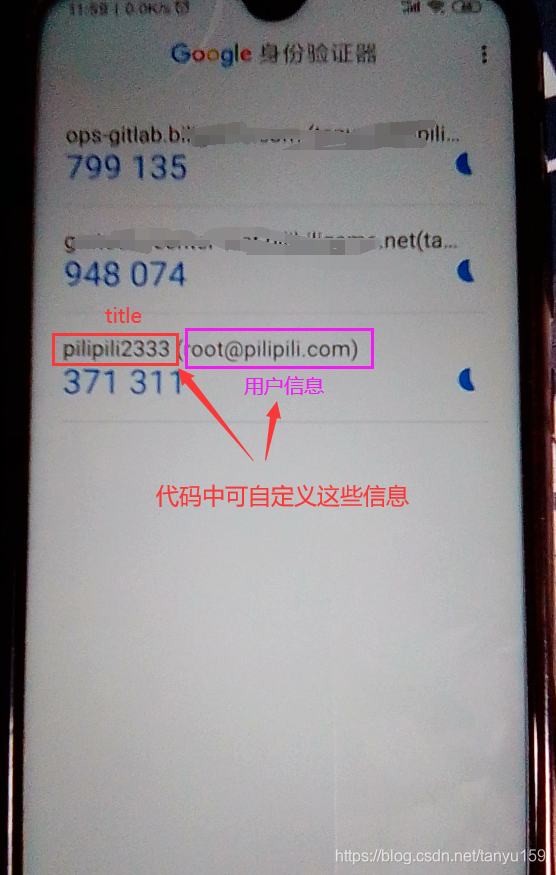
- 调用API生成二维码QR字符串,需要传入用户信息(比如邮箱,id,昵称等),标题,以及生成的32位随机码
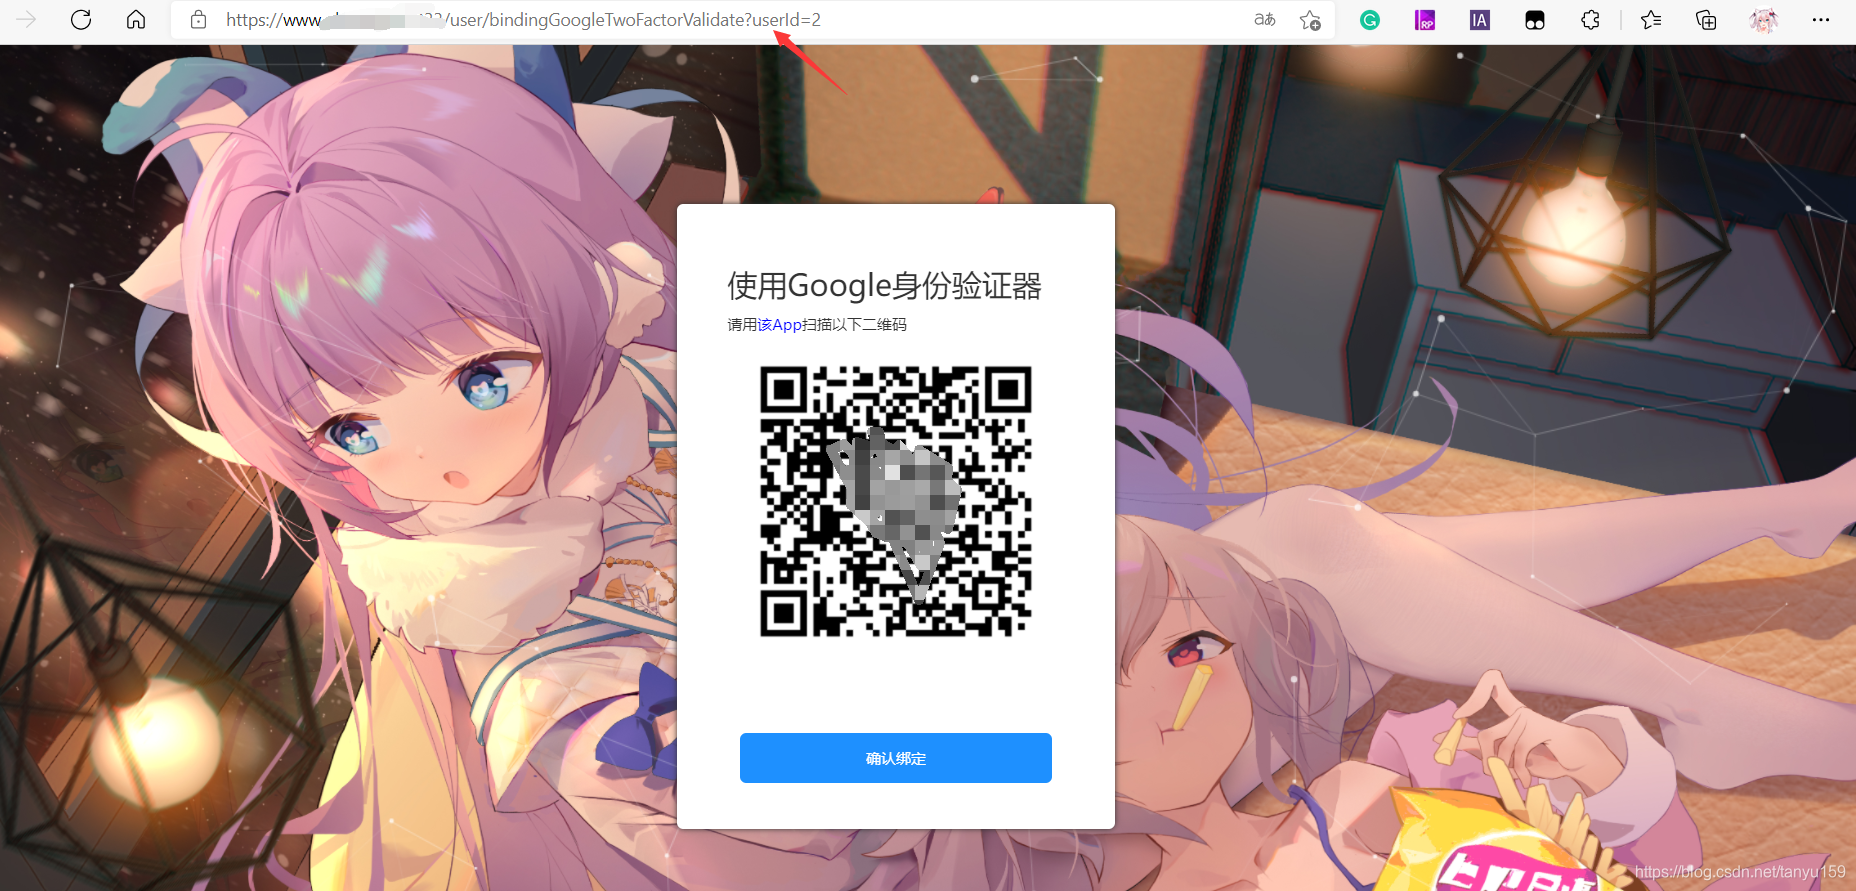
- 调用API将二维码QR字符串转化为图片后以Base64的方式展现到前端页面上
- 用户使用app扫码添加后,在前端页面点击确认绑定,输入本次看到的6位验证码
- 后端根据本次获得的32位随机码,用户信息(用来确定数据库中用户记录),以及输入6位验证码,通过API传入32位随机码获得正确的6位验证码,当其与输入的验证码相同时,则绑定成功,把32位随机码持久化到数据库中对应用户记录上

(二)准备工作
导入一下Maven依赖
         <!--google两步认证相关-->
        <dependency>
            <groupId>de.taimos</groupId>
            <artifactId>totp</artifactId>
            <version>1.0</version>
        </dependency>

        <dependency>
            <groupId>commons-codec</groupId>
            <artifactId>commons-codec</artifactId>
            <version>1.10</version>
        </dependency>

        <dependency>
            <groupId>com.google.zxing</groupId>
            <artifactId>javase</artifactId>
            <version>3.2.1</version>
</dependency>导入工具类GoogleAuthenticationTool
import com.google.zxing.BarcodeFormat;
import com.google.zxing.MultiFormatWriter;
import com.google.zxing.WriterException;
import com.google.zxing.client.j2se.MatrixToImageWriter;
import com.google.zxing.common.BitMatrix;
import de.taimos.totp.TOTP;
import org.apache.commons.codec.binary.Base32;
import org.apache.commons.codec.binary.Hex;
import sun.misc.BASE64Encoder;

import javax.imageio.ImageIO;
import java.awt.image.BufferedImage;
import java.io.*;
import java.net.URLEncoder;
import java.security.SecureRandom;

/**
 * @Author bilibili-nanoda
 * @Date 2021/8/13 10:33
 * @Version 1.0
 */
public class GoogleAuthenticationTool {

    public static String generateSecretKey() {
        SecureRandom random = new SecureRandom();
        byte[] bytes = new byte[20];
        random.nextBytes(bytes);
        Base32 base32 = new Base32();
        return base32.encodeToString(bytes);
    }

    /**
     * 根据32位随机码获得正确的6位数字
     *
     * @param secretKey
     * @return
     */
    public static String getTOTPCode(String secretKey) {
        Base32 base32 = new Base32();
        byte[] bytes = base32.decode(secretKey);
        String hexKey = Hex.encodeHexString(bytes);
        return TOTP.getOTP(hexKey);
    }


    /**
     * 生成绑定二维码(字符串)
     *
     * @param account   账户信息(展示在Google Authenticator App中的)
     * @param secretKey 密钥
     * @param title     标题 (展示在Google Authenticator App中的)
     * @return
     */
    public static String spawnScanQRString(String account, String secretKey, String title) {
        try {
            return "otpauth://totp/"
                    + URLEncoder.encode(title + ":" + account, "UTF-8").replace("+", "%20")
                    + "?secret=" + URLEncoder.encode(secretKey, "UTF-8").replace("+", "%20")
                    + "&issuer=" + URLEncoder.encode(title, "UTF-8").replace("+", "%20");
        } catch (UnsupportedEncodingException e) {
            throw new IllegalStateException(e);
        }
    }

    /**
     * 生成二维码(文件)【返回图片的base64,若指定输出路径则同步输出到文件中】
     *
     * @param barCodeData 二维码字符串信息
     * @param outPath     输出地址
     * @param height
     * @param width
     * @throws WriterException
     * @throws IOException
     */
    public static String createQRCode(String barCodeData, String outPath, int height, int width)
            throws WriterException, IOException {
        BitMatrix matrix = new MultiFormatWriter().encode(barCodeData, BarcodeFormat.QR_CODE,
                width, height);
        BufferedImage bufferedImage = MatrixToImageWriter.toBufferedImage(matrix);

        ByteArrayOutputStream bof = new ByteArrayOutputStream();
        ImageIO.write(bufferedImage, "png", bof);
        String base64 = imageToBase64(bof.toByteArray());
        if(outPath!=null&&!outPath.equals("")) {
            try (FileOutputStream out = new FileOutputStream(outPath)) {
                MatrixToImageWriter.writeToStream(matrix, "png", out);
            }
        }
        return base64;
    }

    /**
     * 将图片文件转换成base64字符串,参数为该图片的路径
     *
     * @param dataBytes
     * @return java.lang.String
     */
    private static String imageToBase64(byte[] dataBytes) {
        // 对字节数组Base64编码
        BASE64Encoder encoder = new BASE64Encoder();
        if (dataBytes != null) {
            return "data:image/jpeg;base64," + encoder.encode(dataBytes);// 返回Base64编码过的字节数组字符串
        }
        return null;
    }

}
(三)使用流程
Tips:其实看工具类就已经知道怎么使用了,但我这边还是贴出我的代码以供参考
-
首次绑定逻辑判断
UserController的login中判断该登陆用户是否存在32位随机码
    //登陆逻辑
    @PostMapping("/login")
    public String login(WebLoginDTO webLoginDTO, HttpSession httpSession, Model model, HttpServletRequest httpServletRequest,RedirectAttributes redirectAttributes) {
        System.out.println("尝试登录:" + webLoginDTO.getEmail() + ":" + webLoginDTO.getEmail());
        Subject subject = SecurityUtils.getSubject();
        UsernamePasswordToken token = new UsernamePasswordToken(webLoginDTO.getEmail(), webLoginDTO.getPassword());
        try {
            subject.login(token);
        } catch (IncorrectCredentialsException e) {
            e.printStackTrace();
            model.addAttribute("msg", "密码错误");
            return "error/systemError";
        } catch (AuthenticationException e) {
            e.printStackTrace();
            model.addAttribute("msg", "账户不存在");
            return "error/systemError";
        }
        //说明登录成功
        ActiveUser activeUser = (ActiveUser) subject.getPrincipal();
        if (activeUser.isLokced()) {
            model.addAttribute("msg", "账户被封锁");
            return "error/systemError";
        }
        //没有32位随机码的情况
        if(activeUser.getTwoFactorCode()==null||activeUser.getTwoFactorCode().equals(""))
        {
            //前往code绑定页面
            redirectAttributes.addAttribute("userId",activeUser.getUser_id());
            //todo 处理设计该页面绑定谷歌认证码(QR二维码)
            return "redirect:/user/bindingGoogleTwoFactorValidate";
        }
不存在则定向到 绑定页面(要携带用户信息,如id)
    /**
     * 前往谷歌两步验证绑定页面
     * @param userId
     * @return
     */
    @GetMapping("/bindingGoogleTwoFactorValidate")
    public String toBindingGoogleTwoFactorValidate(@RequestParam("userId")int userId,Model model){
        String randomSecretKey = GoogleAuthenticationTool.generateSecretKey();
        User user = userService.getUserByUserId(userId);
        //此步设置的参数就是App扫码后展示出来的参数
        String qrCodeString = GoogleAuthenticationTool.spawnScanQRString(user.getEmail(),randomSecretKey,"pilipili2333");
        String qrCodeImageBase64 = null;
        try {
             qrCodeImageBase64 = GoogleAuthenticationTool.createQRCode(qrCodeString,null,512,512);
        } catch (WriterException | IOException e) {
            e.printStackTrace();
        }
        model.addAttribute("randomSecretKey",randomSecretKey);
        model.addAttribute("qrCodeImageBase64",qrCodeImageBase64);

        return "bindingGoogleTwoFactorValidate";
    }
前端页面发起ajax执行绑定,且输入本次的6位验证码做校验
function confirmBinding() {
    var googleRegex =/\d{6}/;
    var inputGoogleCode = window.prompt("请输入6位google验证码");
    if(googleRegex.test(inputGoogleCode)){
        $.ajax({
            url:"[[@{/user/bindingGoogleTwoFactorValidate}]]",
            type:"post",
            data:{
                "userId":"[[${param.userId}]]",
                "randomSecretKey":"[[${randomSecretKey}]]",
                "inputGoogleCode":inputGoogleCode

            },
            dataType:"json",
            success:function (data) {
                if(data.state==='success'){
                    window.alert("绑定成功");
                }else if(data.state==='fail'){
                    window.alert("操作失败:"+data.msg);
                }
            }
        });
    }else {
        window.alert("请正确输入6位google验证码")
    }

}
后端对执行绑定再做一次6位验证码是否正确的校验
     /**
     * 执行谷歌两步验证绑定
     * @return
     */
    @PostMapping("/bindingGoogleTwoFactorValidate")
    @ResponseBody
    public String bindingGoogleTwoFactorValidate(@RequestParam("userId")int userId,@RequestParam("randomSecretKey")String randomSecretKey,@RequestParam("inputGoogleCode")String inputGoogleCode){
        JSONObject respJsonObj =new JSONObject();
        User user = userService.getUserByUserId(userId);
        if(user.getTwoFactorCode()!=null&&!user.getTwoFactorCode().equals("")){
            respJsonObj.put("state","fail");
            respJsonObj.put("msg","该用户已经绑定了,不可重复绑定,若不慎删除令牌,请联系管理员重置");
            return respJsonObj.toString();
        }
        String rightCode =GoogleAuthenticationTool.getTOTPCode(randomSecretKey);
        if(!rightCode.equals(inputGoogleCode)){
            respJsonObj.put("state","fail");
            respJsonObj.put("msg","验证码失效或错误,请重试");
            return respJsonObj.toString();
        }
        user.setTwoFactorCode(randomSecretKey);
        int res = userService.updateUserByUser(user);

        if(res>0){
            respJsonObj.put("state","success");
        }else {
            respJsonObj.put("state","fail");
            respJsonObj.put("msg","数据库操作失败");
        }
        return respJsonObj.toString();
}-
登陆时校验6位验证码的逻辑
UserController的login方法中处理
@PostMapping("/login")
    public String login(WebLoginDTO webLoginDTO, HttpSession httpSession, Model model, HttpServletRequest httpServletRequest,RedirectAttributes redirectAttributes) {
        System.out.println("尝试登录:" + webLoginDTO.getEmail() + ":" + webLoginDTO.getEmail());
        /*
         shiro认证相关代码。。。
        */
        //注意:1min内有效
        String rightGoogleCode = GoogleAuthenticationTool.getTOTPCode(activeUser.getTwoFactorCode());
        if(!webLoginDTO.getGoogleCode().equals(rightGoogleCode)){
            model.addAttribute("msg","谷歌验证码不正确或已超时");
            return "error/systemError";
        }
        /*
         后续逻辑
        */

}
需要注意:
与短信验证,邮件验证不同,验证码的生成与刷新是由我们自己控制的,而对于这种谷歌两步认证,他是1min刷新一次,对于同时刻,我们事先约定好了一套加密解密规则。因此在进行输入的6位验证码验证时,应当在输入之后再去获得此刻正确的6位CODE,而不是事先生成好正确的Code,再等用户输入。后者可能会因为延时问题(用户动作很摸,app上的已经更新了,但系统保留的还是上一次),导致经常性的验证码失效


 1606
1606

 被折叠的 条评论
为什么被折叠?
被折叠的 条评论
为什么被折叠?
 到【灌水乐园】发言


