


本文研究nginx提供的缓存功能,下面是实操记录。
这篇博文基于前面文章的基础上搭建,至始至终都是root用户操作
http://blog.csdn.net/tao_627/article/details/78953800
缓存清除功能需要借助第三方模块ngx_cache_purge,其链接如下
https://github.com/FRiCKLE/ngx_cache_purge
下载其源码并安装进nginx中去
cd /usr/local/src
git clone https://github.com/FRiCKLE/ngx_cache_purge.git
编译
cd nginx-1.12.2
./configure --with-http_ssl_module \
--with-pcre=/usr/local/src/pcre-8.41 \
--with-zlib=/usr/local/src/zlib-1.2.11 \
--with-openssl=/usr/local/src/openssl-1.1.0g \
--with-http_stub_status_module \
--add-module=/usr/local/src/ngx_cache_purge
make
make install
配置
在nginx.conf中添加如下配置块
proxy_cache_path  /usr/local/nginx/cache1  levels=1:2 keys_zone=cache1:100m inactive=1d max_size=2g;

add_header X-Cache $upstream_cache_status;

location ^~ /static/ {
    proxy_cache  cache1;
    proxy_cache_key  $host$uri$is_args$args;
    proxy_cache_valid 200 304 301 302 10m;
    proxy_cache_methods GET;
    proxy_cache_min_uses 3;
    proxy_cache_bypass $cookie_nocache $arg_nocache $arg_comment;

    proxy_pass  http://127.0.0.1:18080;

    expires 30d;
    access_log  logs/cache.log main;
}location ~ /purge(/.*) {
allow 127.0.0.1;
deny all;
proxy_cache_purge cache1 $host$1$is_args$args;
access_log logs/cache.log main;
}完整的nginx.conf配置如下:
user  root;
worker_processes  1;

error_log  logs/error.log  info;
pid        logs/nginx.pid;

events {
    worker_connections  1024;
}

http {
    include       mime.types;
    default_type  application/octet-stream;

    log_format  main  '$remote_addr - $remote_user [$time_local] "$request" '
                      '$status $body_bytes_sent "$http_referer" '
                      '"$http_user_agent" "$http_x_forwarded_for"';

    access_log  logs/access.log  main;
    access_log  logs/access.log  main;

    sendfile        on;

    keepalive_timeout  65;

    proxy_cache_path  /usr/local/nginx/cache1  levels=1:2 keys_zone=cache1:100m inactive=1d max_size=2g;

    server {
        listen       80;
        server_name  localhost;

        #access_log  logs/host.access.log  main;

        add_header X-Cache $upstream_cache_status;

        location ^~ /static/ {
            proxy_cache  cache1;
            proxy_cache_key  $host$uri$is_args$args;
            proxy_cache_valid 200 304 301 302 10m;
            proxy_cache_methods GET;
            proxy_cache_min_uses 3;
            proxy_cache_bypass $cookie_nocache $arg_nocache $arg_comment;

            proxy_pass  http://127.0.0.1:18080;

            expires 30d;
            access_log  logs/cache.log main;-
        }

        location ~ /purge(/.*) {
            proxy_cache_purge  cache1 $host$1$is_args$args;
            allow              127.0.0.1;
            deny               all;
            access_log  logs/cache.log main;
        }

        location /ngx_status {
            stub_status;
            access_log off;
            allow 127.0.0.1;
            deny all;
        }

        location / {
            root   html;
            index  index.html index.htm;
        }

        #error_page  404              /404.html;

        # redirect server error pages to the static page /50x.html
        #
        error_page   500 502 503 504  /50x.html;
        location = /50x.html {
            root   html;
        }
    }


    server {
        listen       18080;
        server_name  localhost;

        location ^~ /static/ {
            root   html;
            expires  10d;
        }

        location / {
            root   html;
            index  index.html index.htm;
        }
        error_page   500 502 503 504  /50x.html;
        location = /50x.html {
            root   html;
        }
    }
}
检测并使配置生效
/usr/local/nginx/sbin/nginx -t
/usr/local/nginx/sbin/nginx -s reload
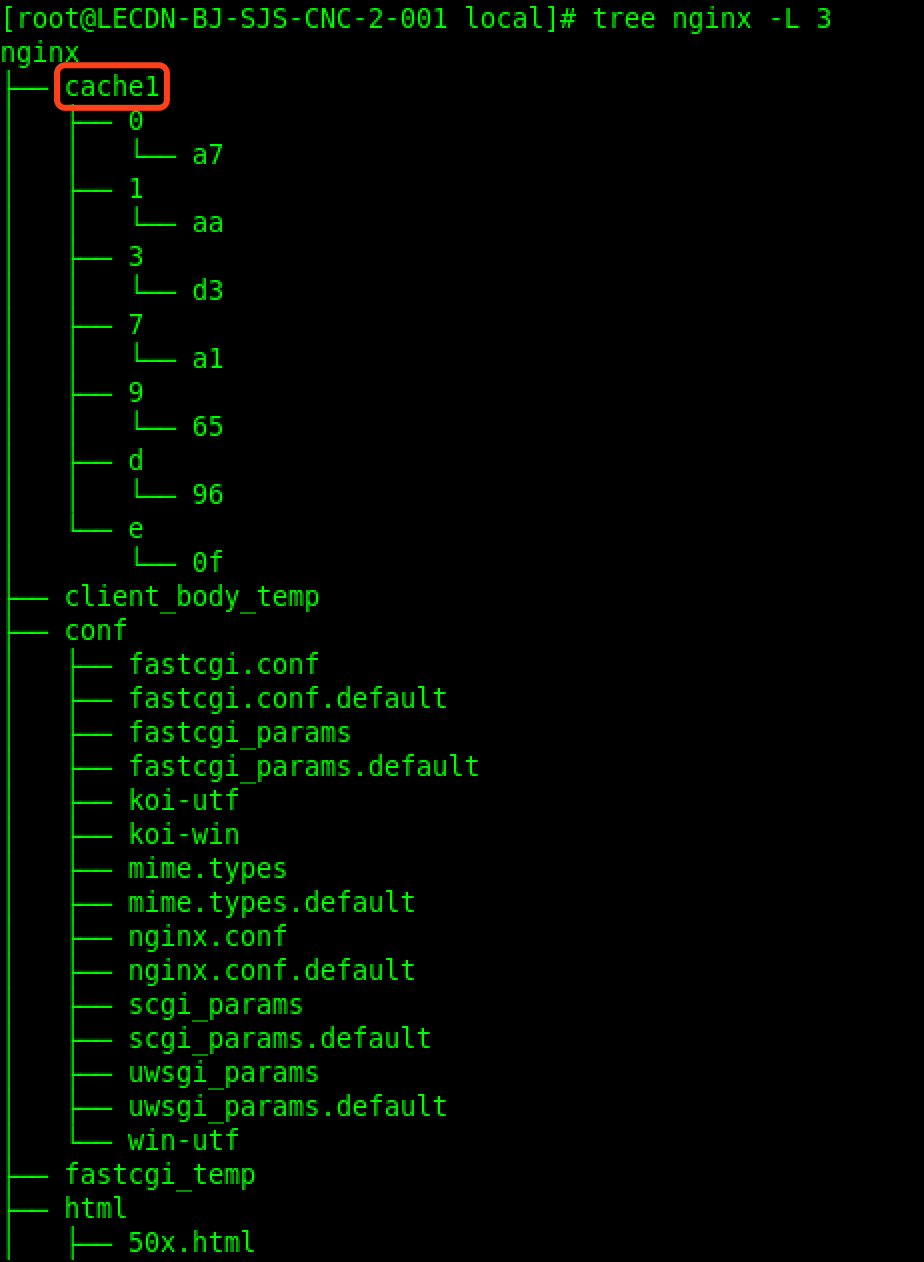
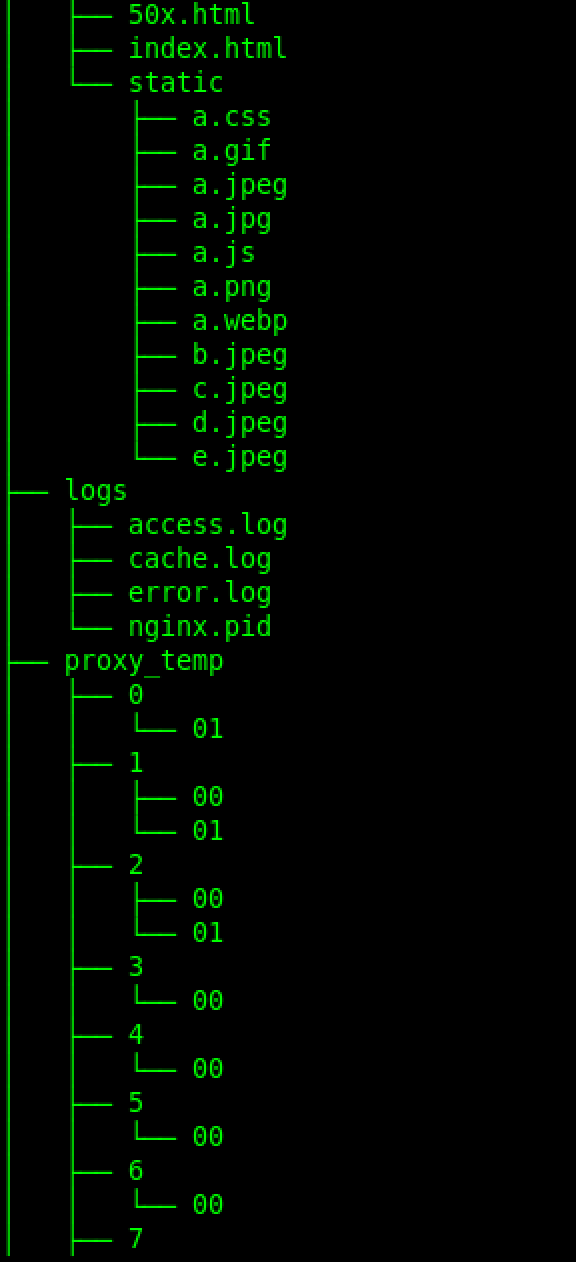
下面是/usr/local/nginx下面的目录结构截图
ps auxf | grep nginx | grep -v grep

注意此时发现已经多了一个cache manager进程。
测试
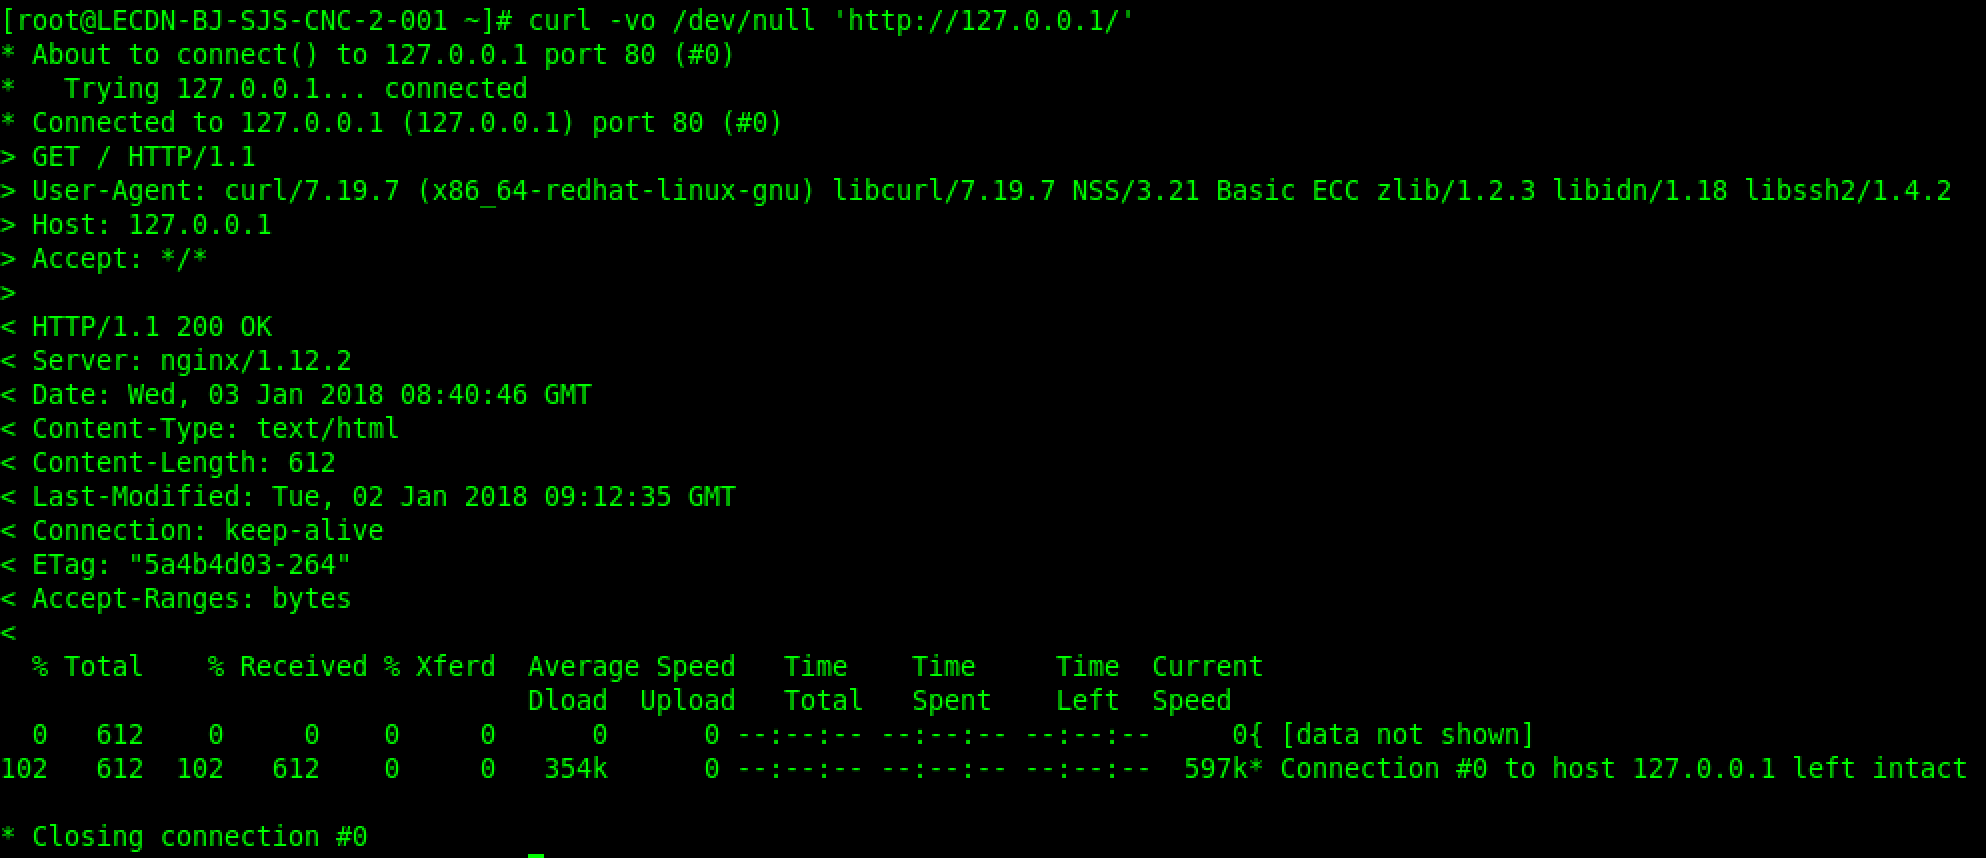
要求现在的nginx cache功能不能和原来添加的模块功能相冲突。下面逐一进行测试。curl -vo /dev/null 'http://127.0.0.1/'
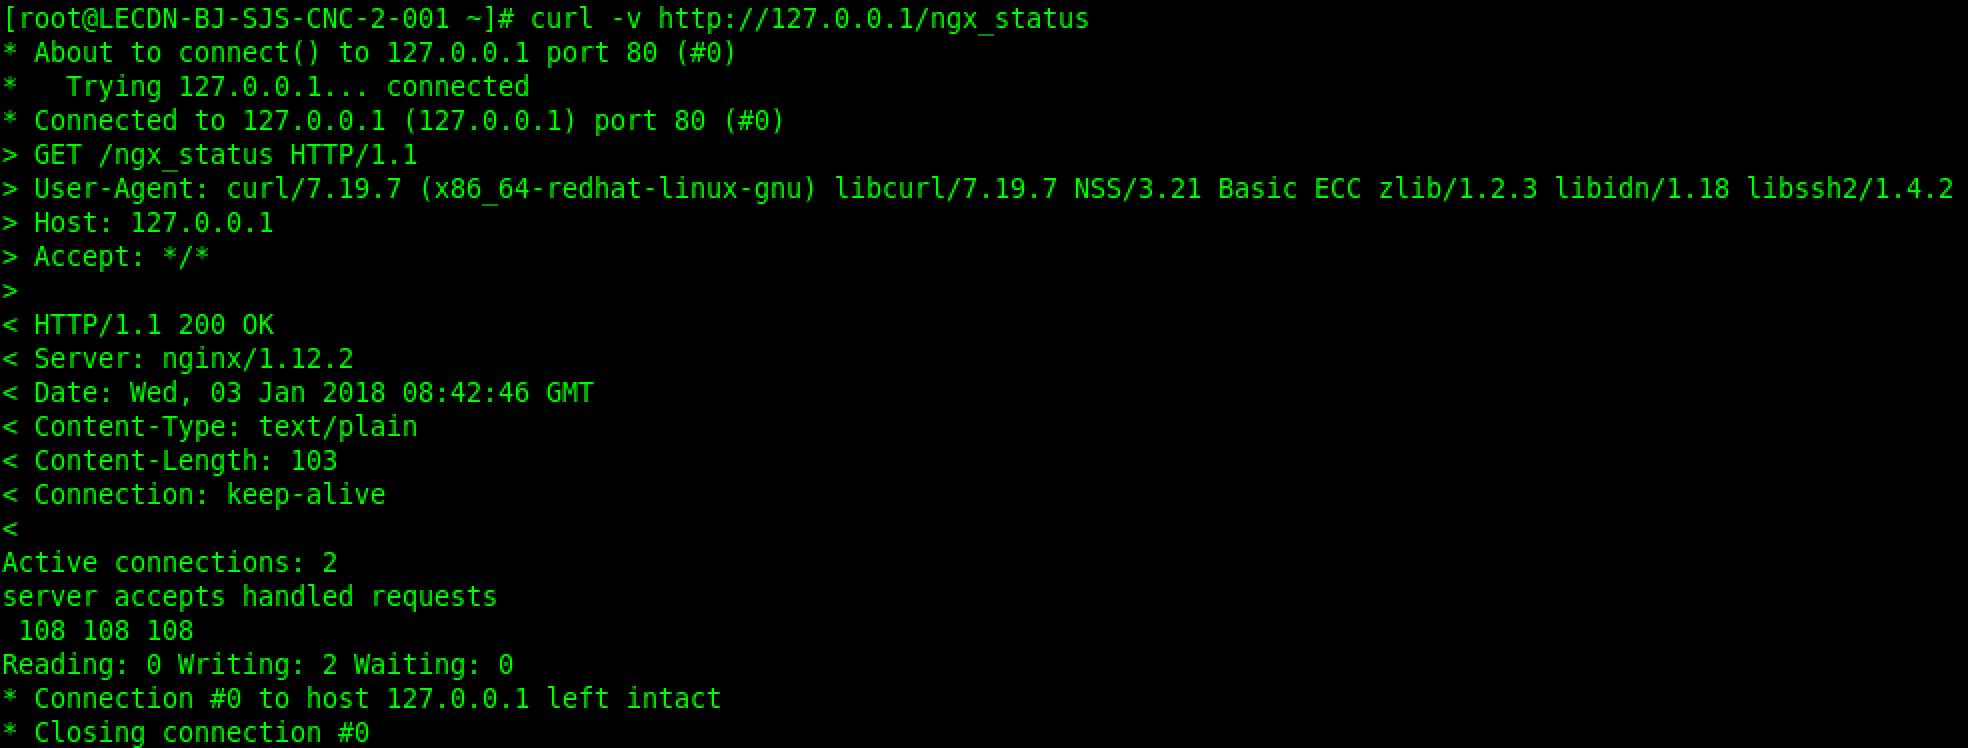
curl -v http://127.0.0.1/ngx_status
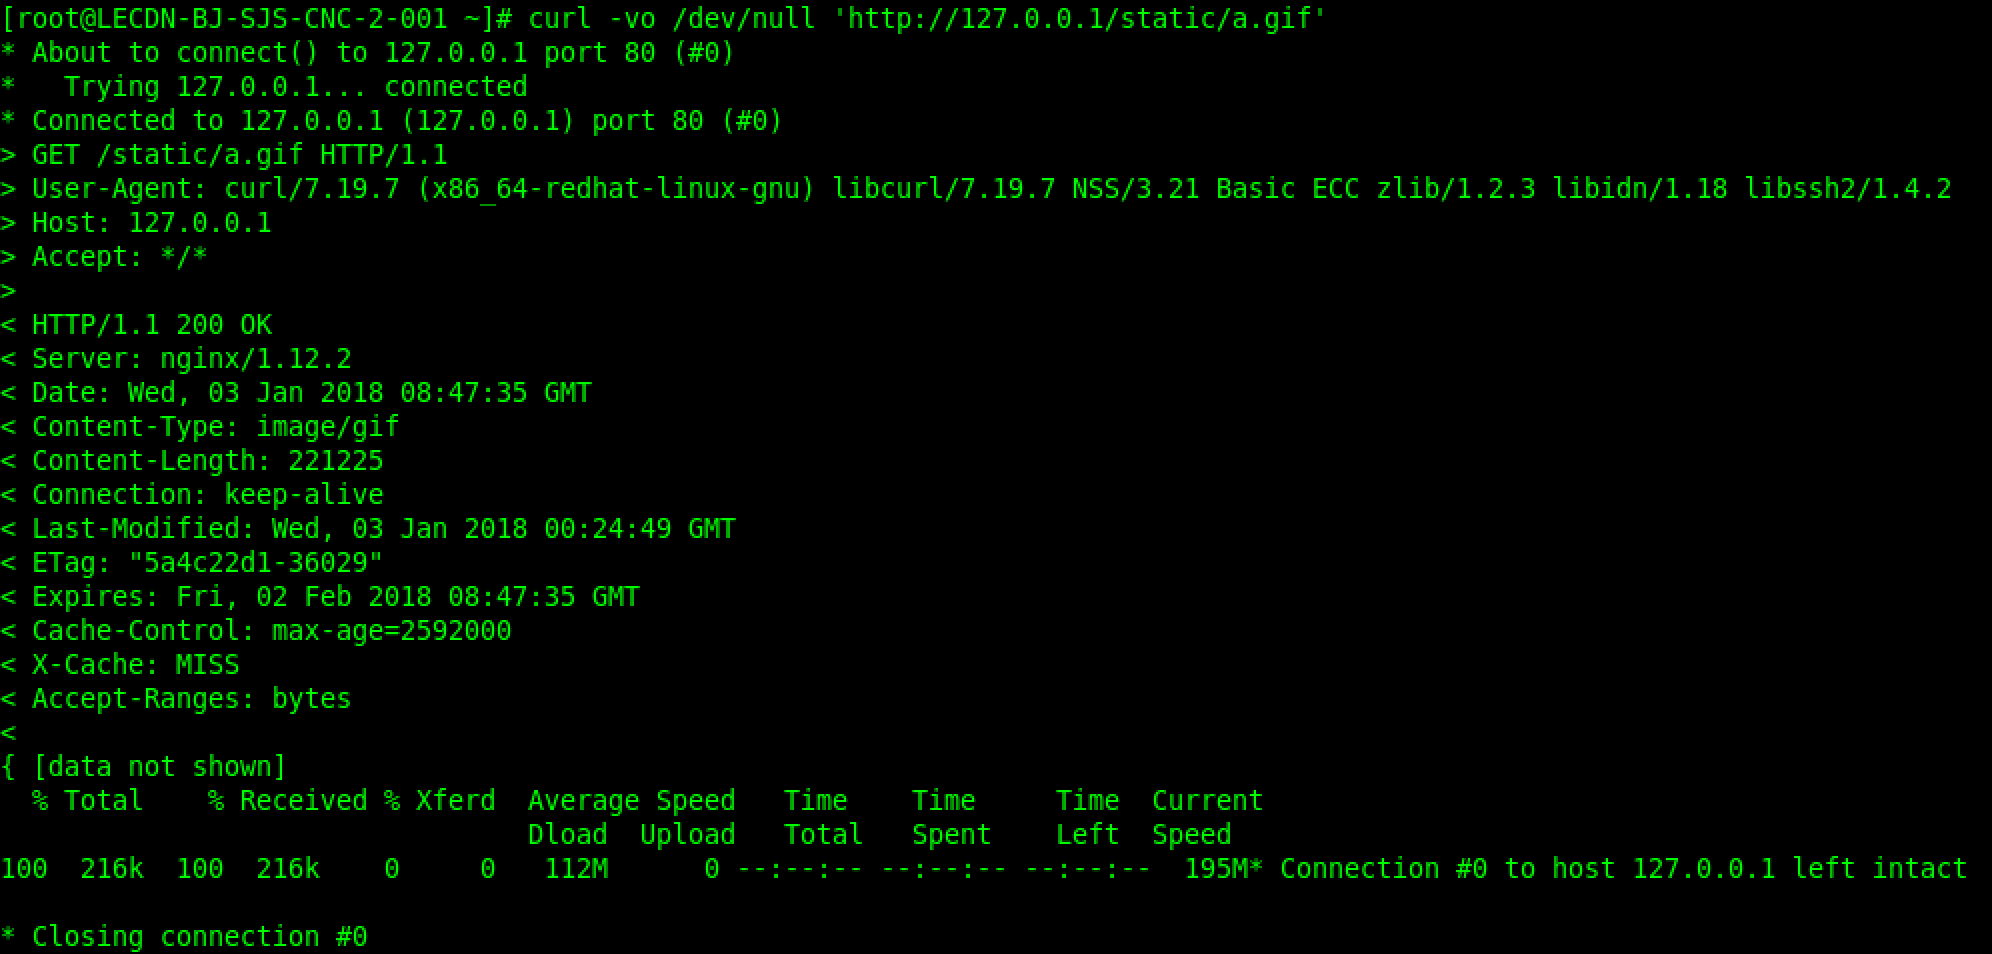
curl -vo /dev/null 'http://127.0.0.1/static/a.gif'
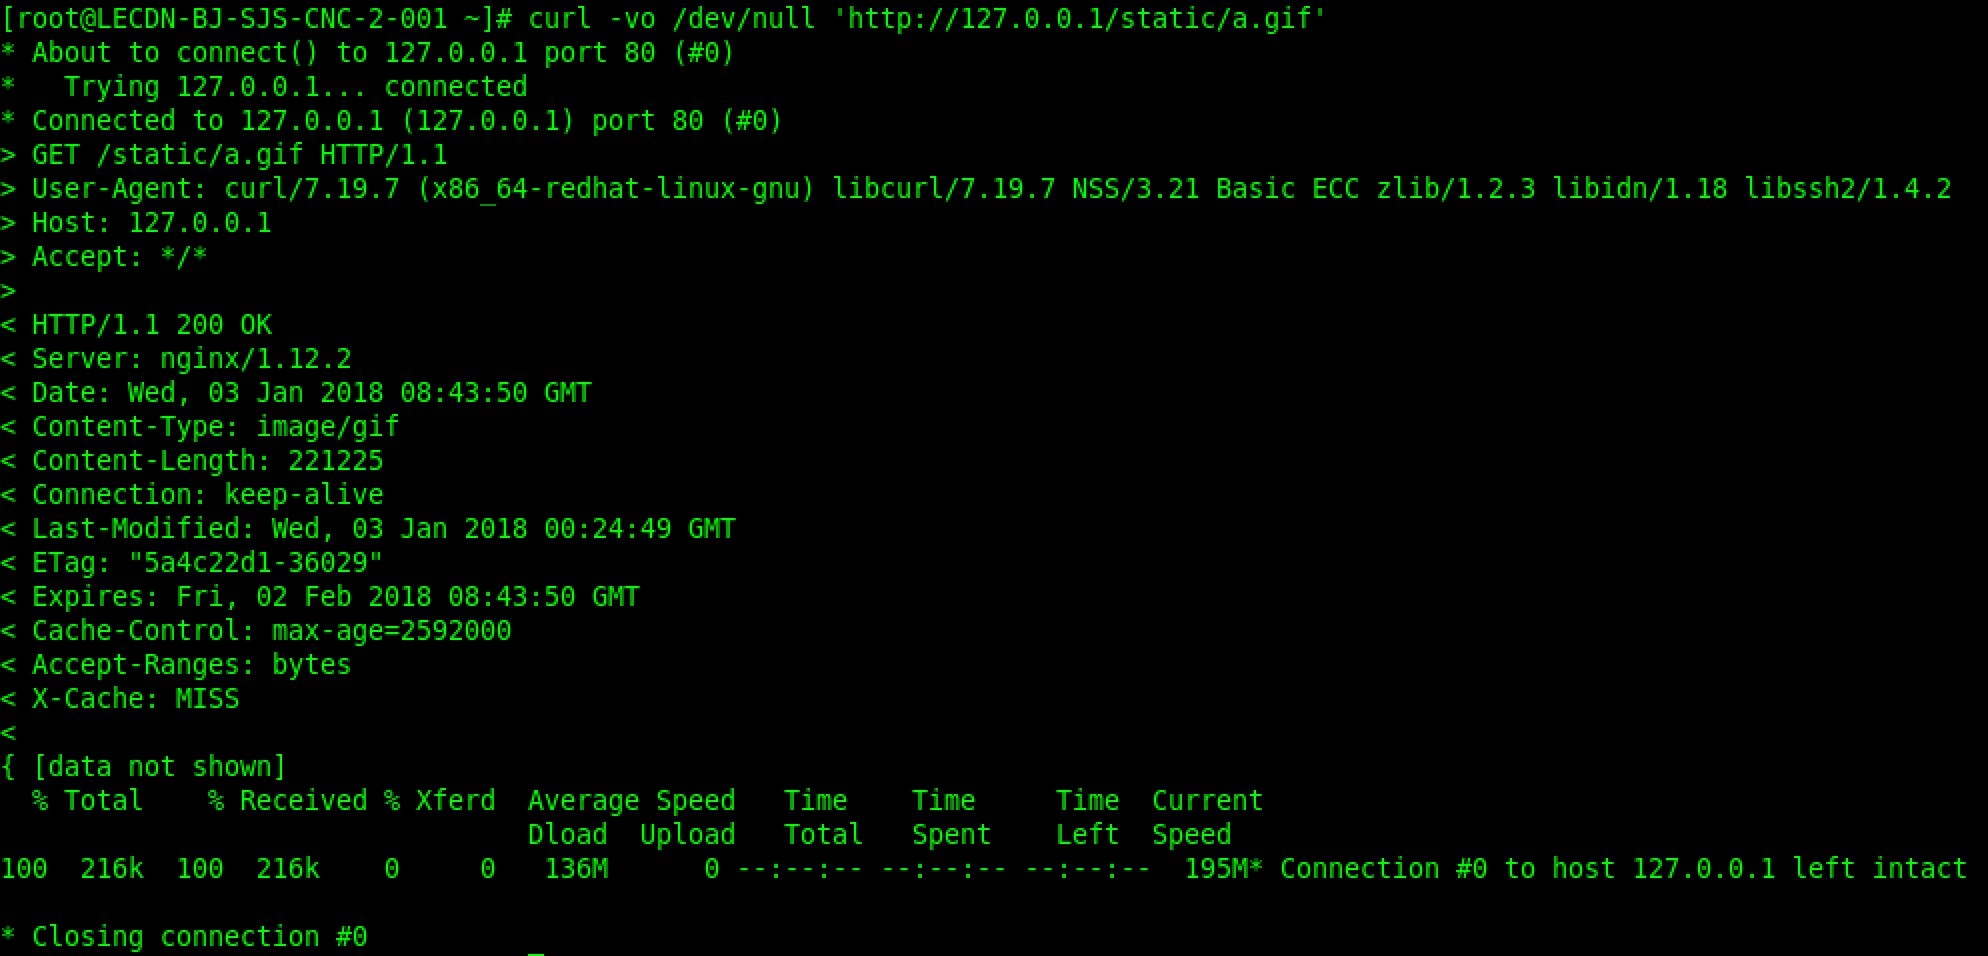
根据配置,累计请求同一请求3次之后,才会缓存主
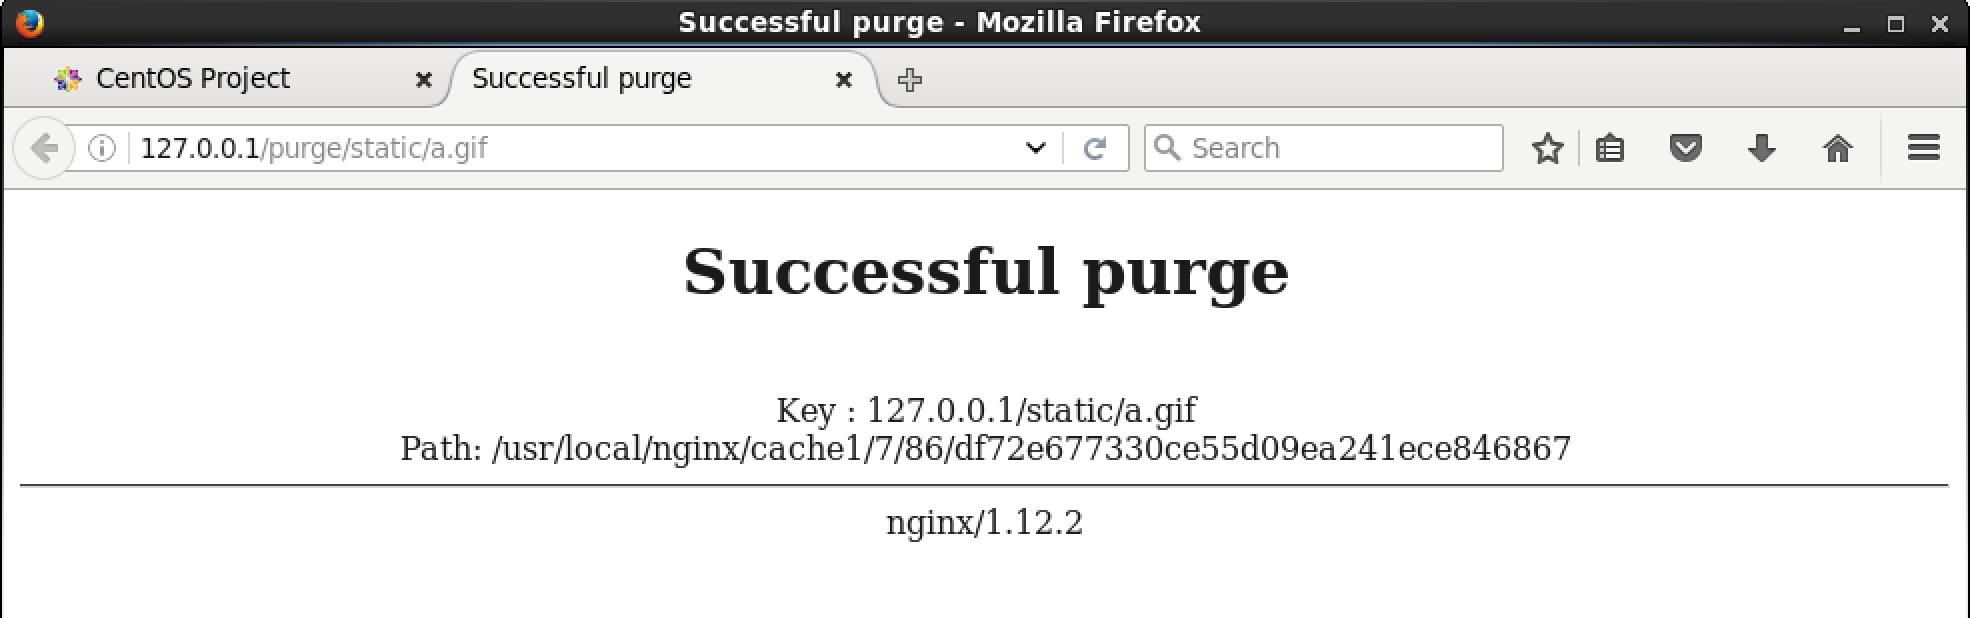
从Firefox浏览器中访问的结果
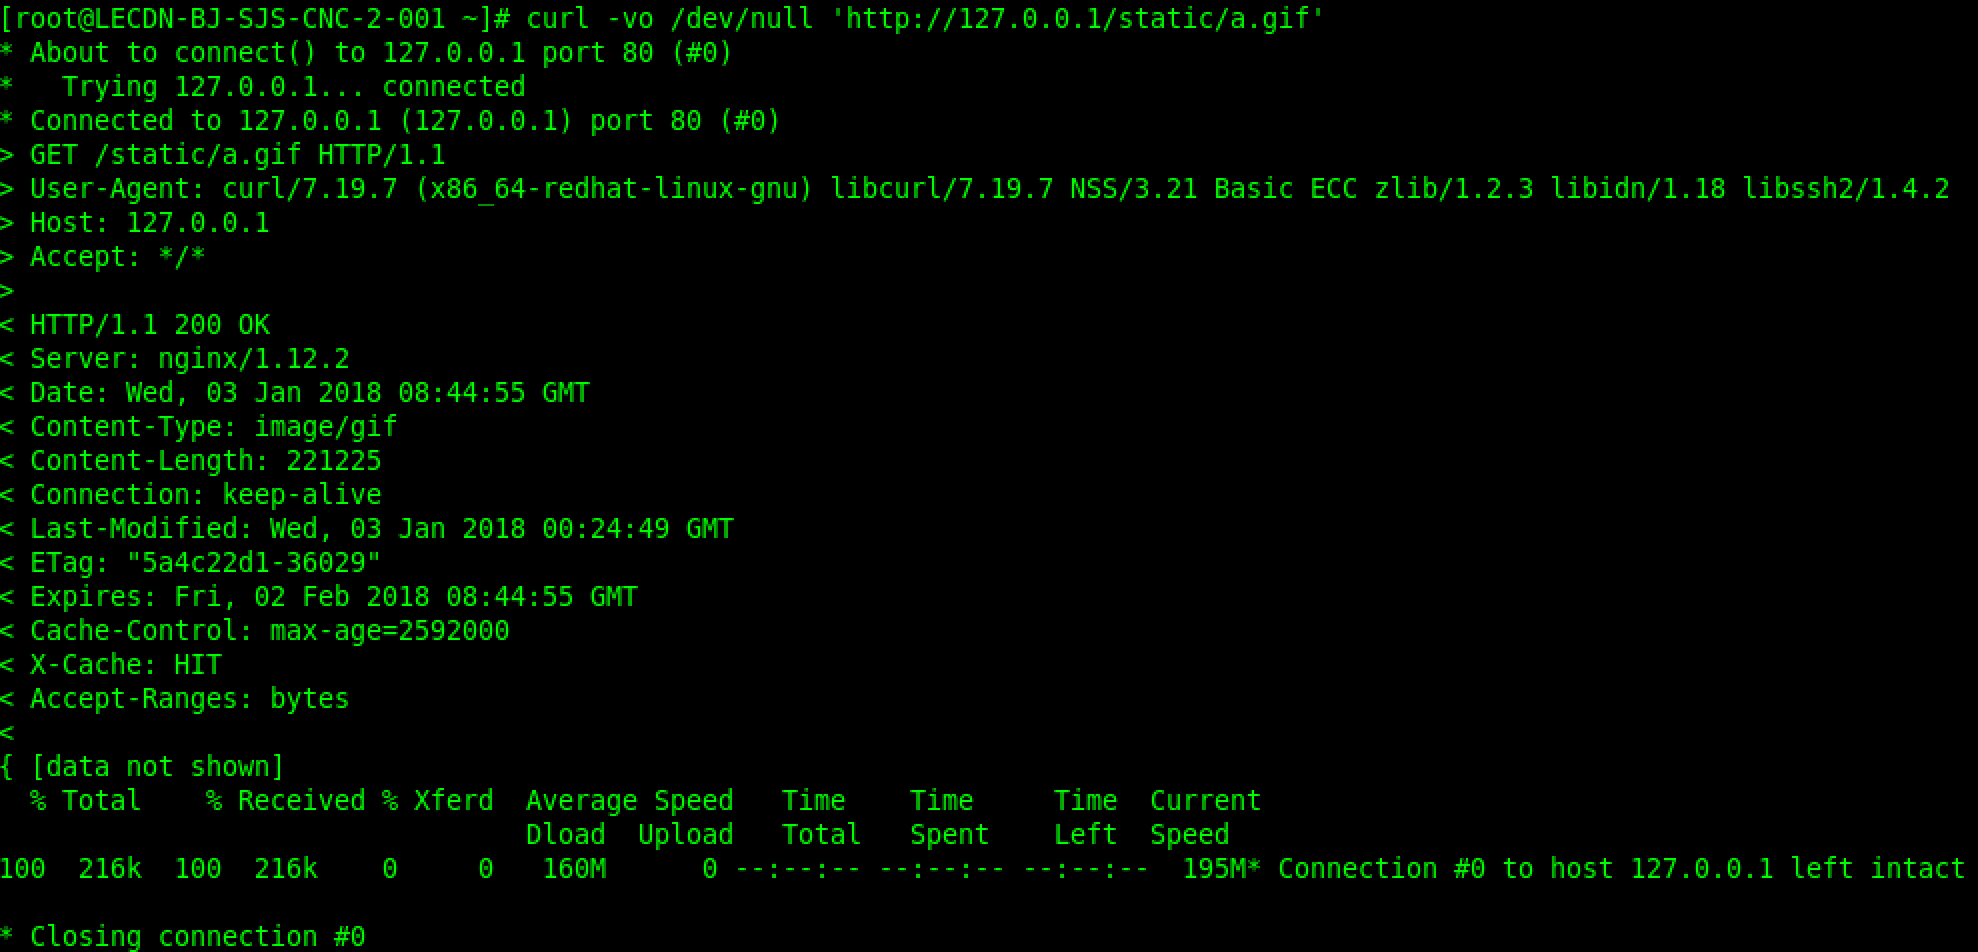
再次请求该资源,发现缓存状态是MISS
curl -vo /dev/null 'http://127.0.0.1/static/a.gif'
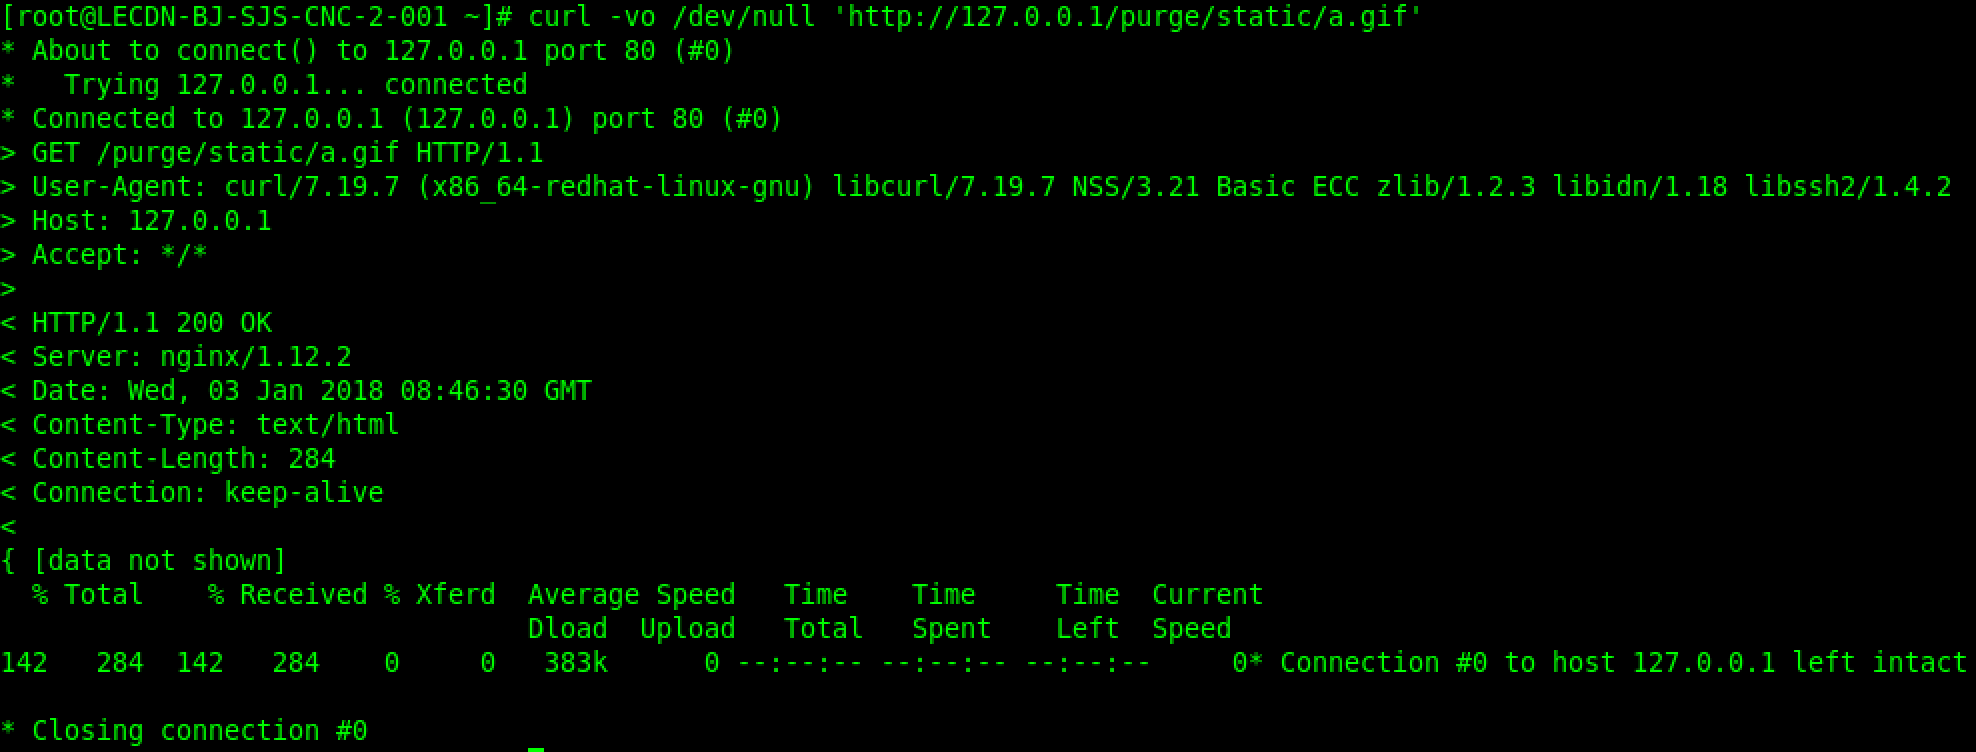
测试中发现的问题
选项proxy_cache_min_uses表示同一个请求超过多少次才放入缓存,但是我发现,使用ngx_cache_purge模块删除之后,再次发送同一个请求,发现两次就缓存了。个人感觉这是个模块兼容性的bug。
[1].http://nginx.org/en/docs/http/ngx_http_proxy_module.html#proxy_cache
[2].https://github.com/FRiCKLE/ngx_cache_purge
[3].http://phl.iteye.com/blog/2256356
[4].http://blog.csdn.net/czp11210/article/details/28596649
[5].http://www.jackieathome.net/archives/411.html
[6].http://blog.csdn.net/dengjiexian123/article/details/53386586


 5277
5277

 被折叠的 条评论
为什么被折叠?
被折叠的 条评论
为什么被折叠?
 到【灌水乐园】发言


