echo-nginx-module是一个第三方模块,在nginx源码中没有,但是OpenResty中有,它为nginx.conf带来了echo,sleep,time等多个类似bash的强大命令。
目前最新版本是v0.61
https://github.com/taoyunxing/github_test/blob/master/nginx.conf
下载源码
cd /usr/local/src
git clone https://github.com/openresty/echo-nginx-module.git
cd nginx-1.12.2
./configure --with-http_ssl_module \
--with-pcre=/usr/local/src/pcre-8.41 \
--with-zlib=/usr/local/src/zlib-1.2.11 \
--with-openssl=/usr/local/src/openssl-1.1.0g \
--with-http_stub_status_module \
--add-module=/usr/local/src/ngx_cache_purge \
--add-module=/usr/local/src/ngx_req_status \
--add-module=/usr/local/src/echo-nginx-module
make
make install
这个例子也给出了OpenResty中的模块如何编译进社区最新版nginx中去的方法。我起初看到OpenResty中的模块目录比较怪异,以为还需要自己调整目录结构再整合到nginx中,其实是没有必要的。
安装完成之后,检查nginx.conf的完整性并重启nginx
/usr/local/nginx/sbin/nginx -t
/usr/local/nginx/sbin/nginx -s stop
/usr/local/nginx/sbin/nginx

测试请求
curl -v 'http://localhost:8081/test'

curl -v 'http://localhost:8082/main3'
目前最新版本是v0.61
安装指南参见
https://github.com/openresty/echo-nginx-module#installation
配置
    server {
        listen 8081;
        server_name localhost;

        location /test {
            set $foo hello;
            echo "foo: $foo";
        }

        location /test1 {
            set $first "hello ";
            echo "${first}world";
        }

        location /foo {
            echo "foo = [$foo]";
        }

        location /bar {
            set $foo 32;
            echo "bar = [$foo]";
        }
} https://github.com/taoyunxing/github_test/blob/master/nginx.conf
下载源码
cd /usr/local/src
git clone https://github.com/openresty/echo-nginx-module.git
cd nginx-1.12.2
./configure --with-http_ssl_module \
--with-pcre=/usr/local/src/pcre-8.41 \
--with-zlib=/usr/local/src/zlib-1.2.11 \
--with-openssl=/usr/local/src/openssl-1.1.0g \
--with-http_stub_status_module \
--add-module=/usr/local/src/ngx_cache_purge \
--add-module=/usr/local/src/ngx_req_status \
--add-module=/usr/local/src/echo-nginx-module
make
make install
这个例子也给出了OpenResty中的模块如何编译进社区最新版nginx中去的方法。我起初看到OpenResty中的模块目录比较怪异,以为还需要自己调整目录结构再整合到nginx中,其实是没有必要的。
安装完成之后,检查nginx.conf的完整性并重启nginx
/usr/local/nginx/sbin/nginx -t
/usr/local/nginx/sbin/nginx -s stop
/usr/local/nginx/sbin/nginx

测试请求
curl -v 'http://localhost:8081/test'
curl -v 'http://localhost:8081/test1'
curl -v 'http://localhost:8081/foo'
curl -v 'http://localhost:8081/bar'
特殊说明
上面仅是最基本的用法,还有很多高级的用法有待后续深入探索时再补充上来。
下面是做得补充。
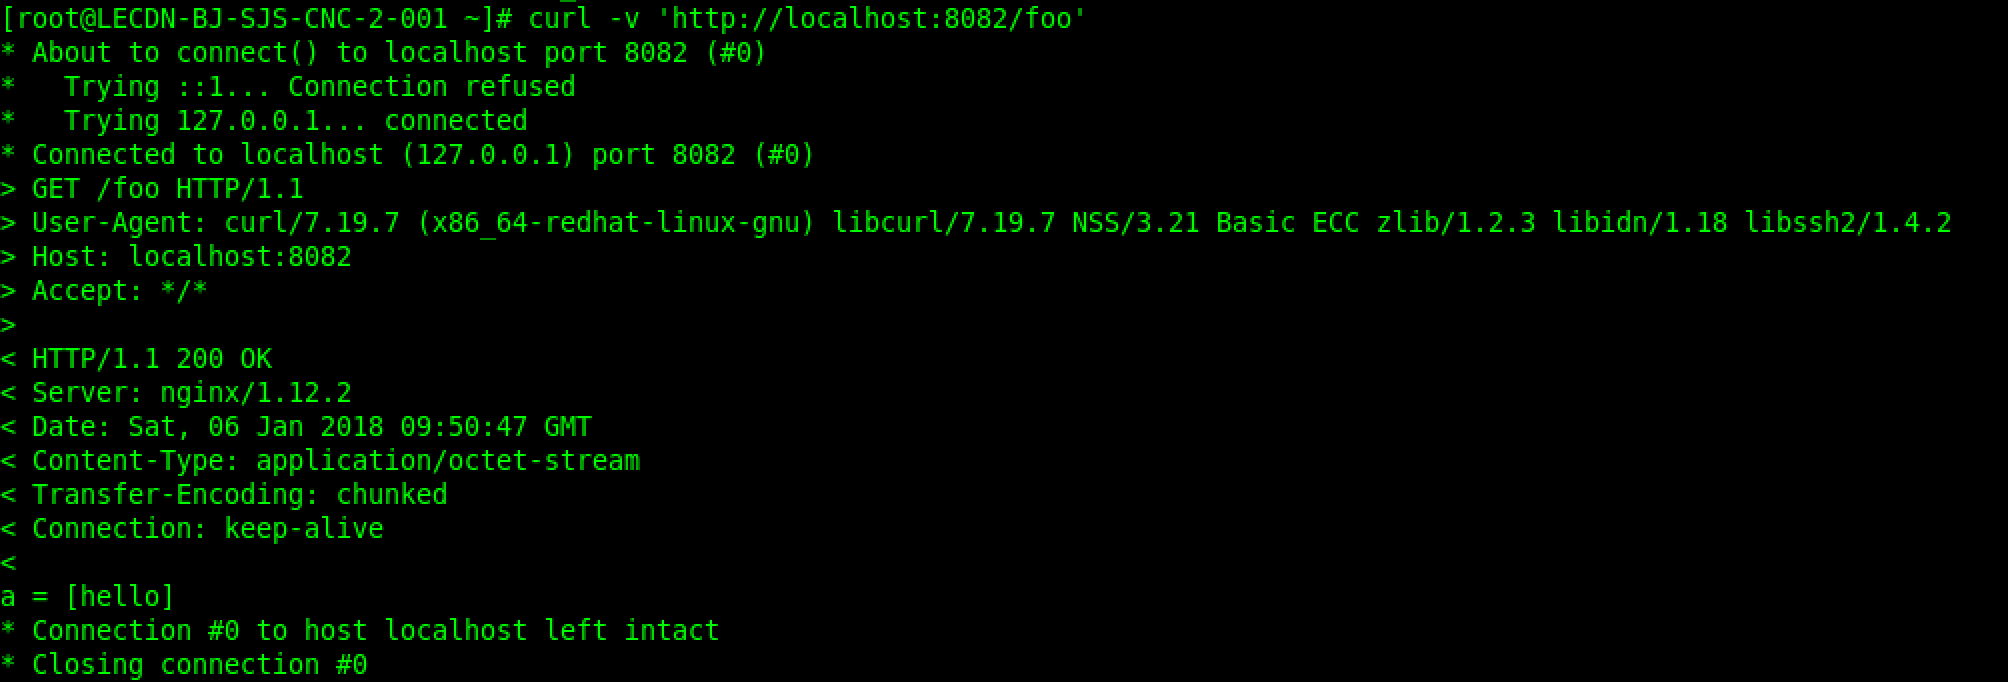
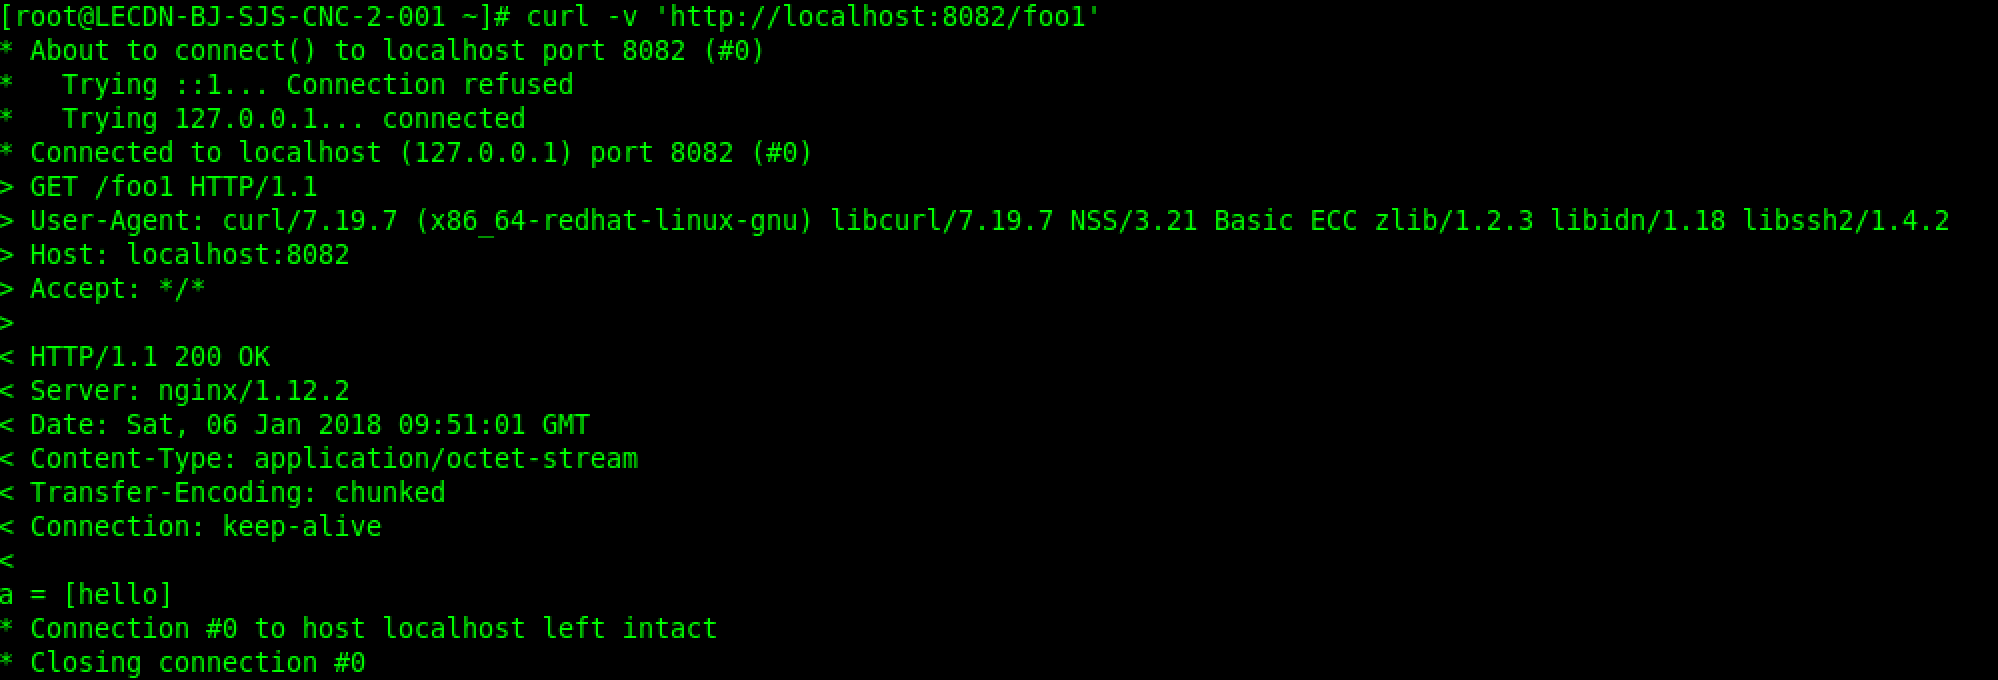
    server {
        listen 8082;
        server_name localhost;

        location /foo {
            set $a hello;
            echo_exec /bar;
        }

        location /foo1 {
            set $a hello;
            rewrite ^ /bar;
        }

        location /bar {
            echo "a = [$a]";
        }
} curl -v 'http://localhost:8082/foo'
curl -v 'http://localhost:8082/foo1'
下面是更进一步的例子
因为对内建变量 $args 的修改会直接导致当前请求的 URL 参数串发生变化,因此内建变量 $arg_XXX 自然也会随之变化。
    location /test3 {
        set $orig_a $arg_a;
        set $args "a=5";
        echo "original a: $orig_a";
        echo "a: $arg_a";
    }
    server {
        listen 8083;
        server_name localhost;

        location /test {
            set $args "foo=1&bar=2";
            proxy_pass http://127.0.0.1:8084/args;
        }
    }

    server {
        listen 8084;
        server_name localhost;

        location /args {
            echo "args: $args";
        }
    }
父子请求之间的变量共享
    location /main {
        echo_location /foo2;
        echo_location /bar2;
    }

    location /foo2 {
        echo foo2;
    }

    location /bar2 {
        echo bar2;
    }
    location /main3 {
        set $var main;
        echo_location /foo3;
        echo_location /bar3;
        echo "main: $var";
    }

    location /foo3 {
        set $var foo;
        echo "foo: $var";
    }

    location /bar3 {
        set $var bar;
        echo "bar: $var";
    }
curl -v 'http://localhost:8082/main3'
参考文献
[1].https://github.com/openresty/echo-nginx-module
[2].http://blog.sina.com.cn/s/blog_6d579ff40100wi7p.html


 9032
9032

 被折叠的 条评论
为什么被折叠?


