


 本文介绍了如何在SpringBoot项目中设置接口统一前缀,使用JWT进行身份验证,包括JWT工具类的创建和拦截器的实现,以及如何处理跨域问题的配置。
0. 注意
ps:本文代码全是基于admin的接口来处理的,记得换成自己的
1. 接口统一前缀设置
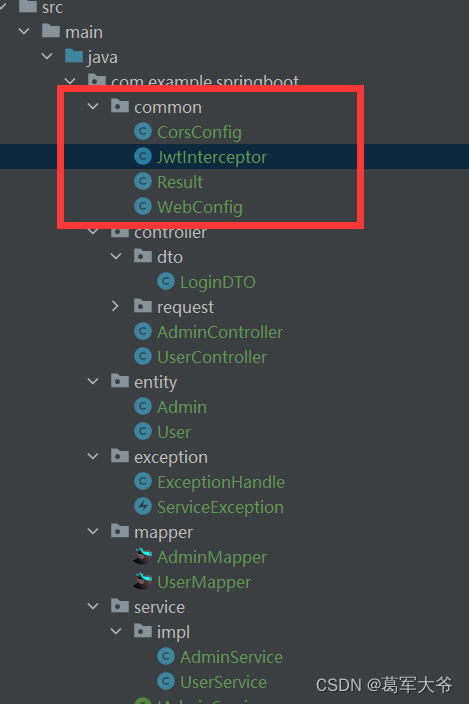
在一个common的包中加WebConfig 类
//给请求加一个api前缀
import org.springframework.context.annotation.Configuration;
import org.springframework.web.bind.annotation.RestController;
import org.springframework.web.servlet.config.annotation.PathMatchConfigurer;
import org.springframework.web.servlet.config.annotation.WebMvcConfigurer;

@Configuration
public class WebConfig implements  WebMvcConfigurer {
    @Override
    public void configurePathMatch(PathMatchConfigurer configurer) {
        // 指定controller统一的接口前缀
        configurer.addPathPrefix("/api", clazz -> clazz.isAnnotationPresent(RestController.class));
    }
}
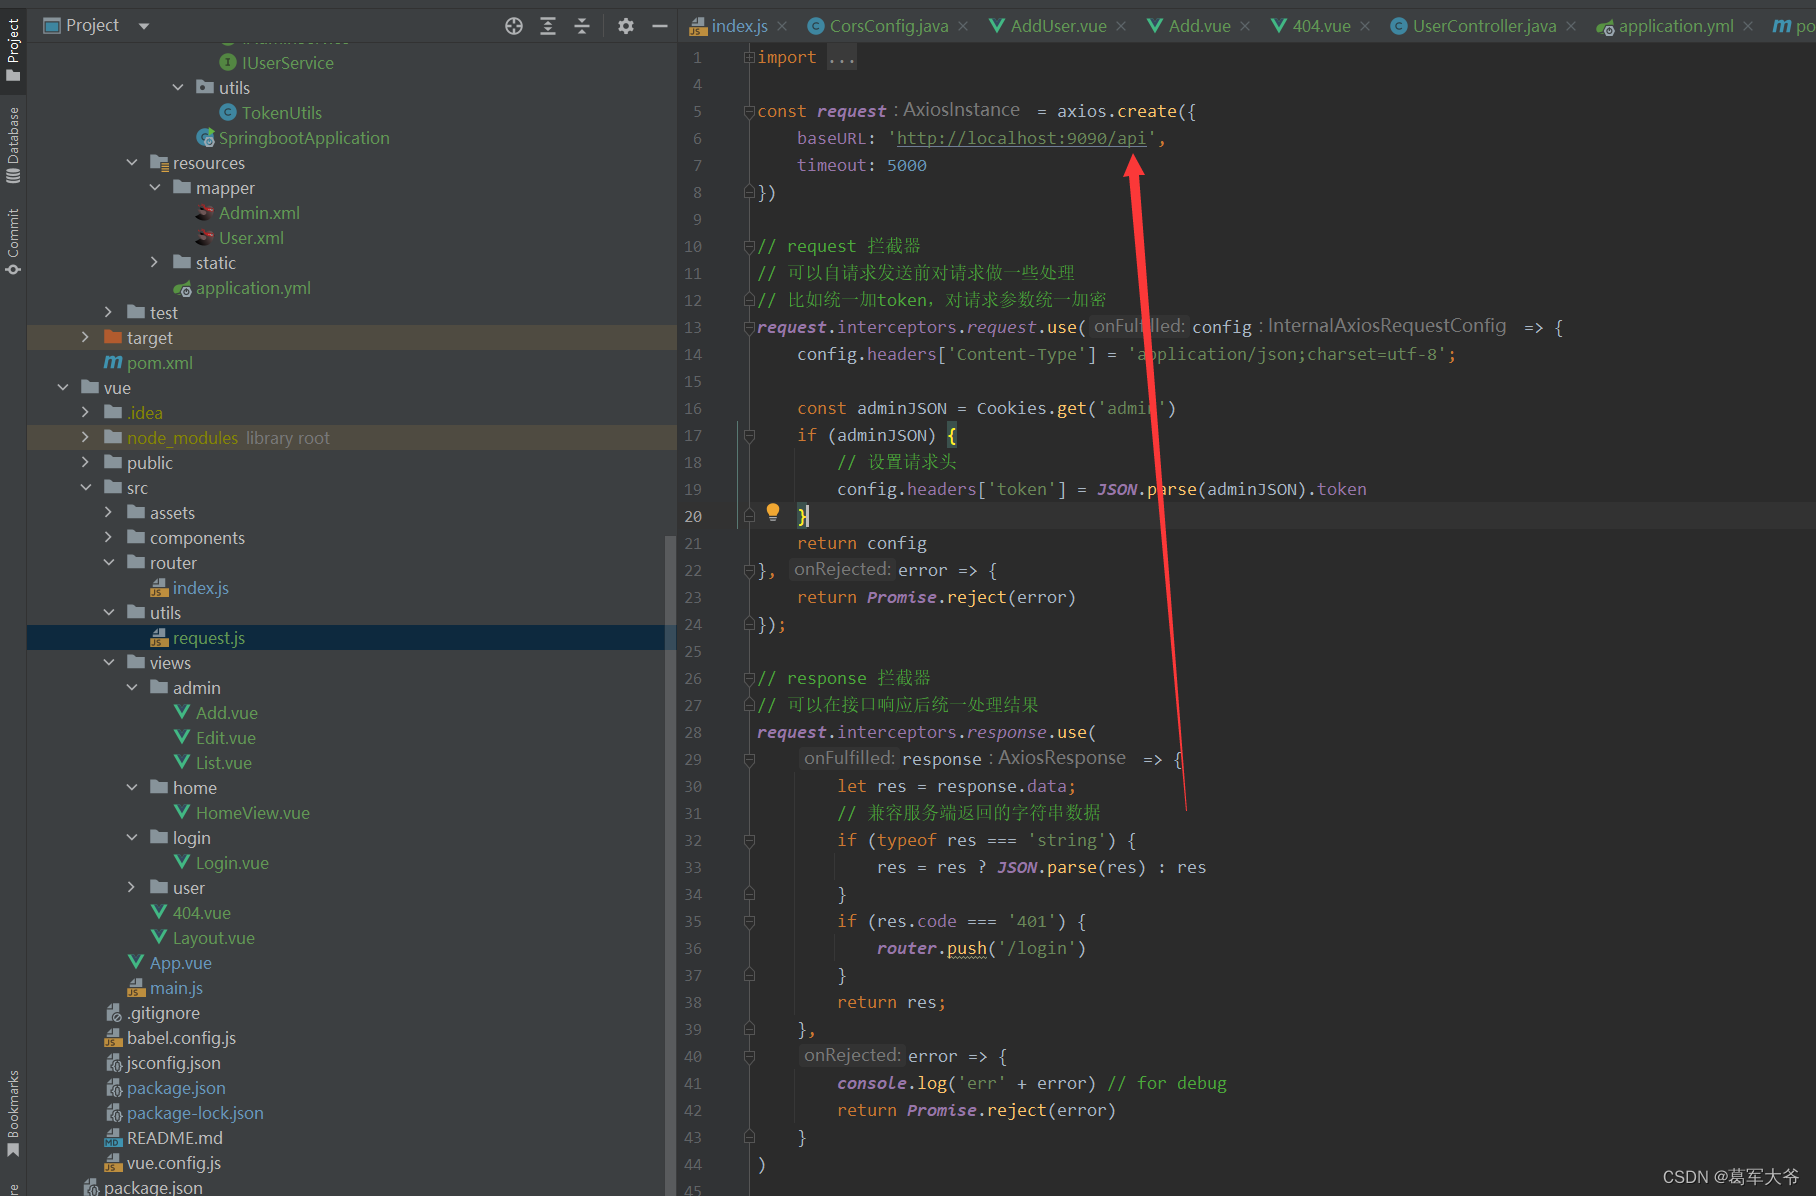
2. 记得给前端也加一个api的请求接口前缀
3. JWT POM依赖
application.yml中添加依赖
		<!-- JWT依赖 -->
        <dependency>
            <groupId>com.auth0</groupId>
            <artifactId>java-jwt</artifactId>
            <version>3.10.3</version>
        </dependency>
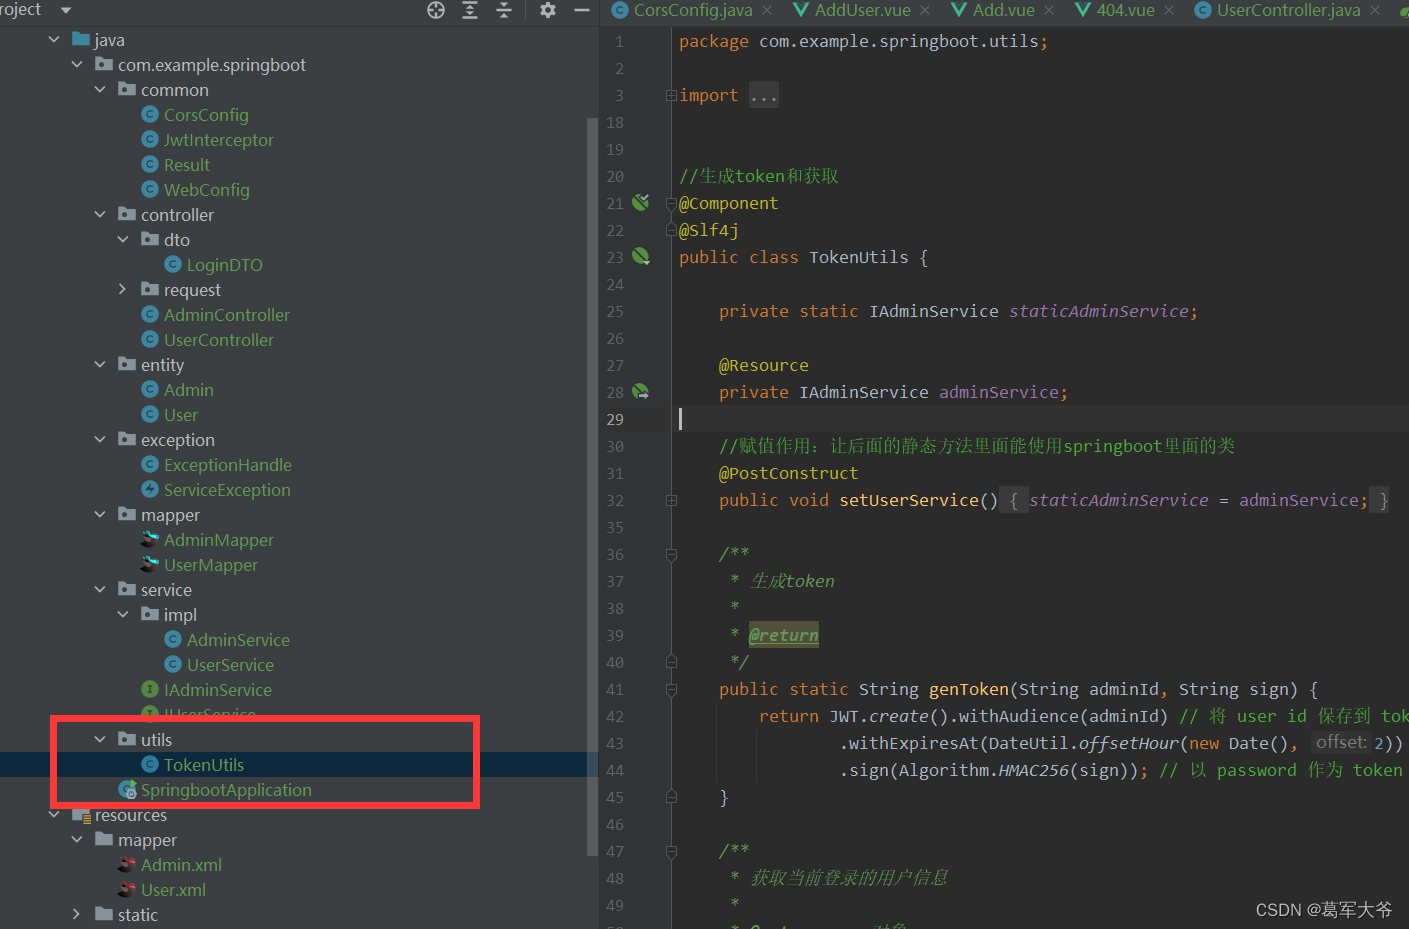
4. JWT工具类TokenUtils.java
在工具类中加入TokenUtils
import cn.hutool.core.date.DateUtil;
import cn.hutool.core.util.StrUtil;
import com.auth0.jwt.JWT;
import com.auth0.jwt.algorithms.Algorithm;
import com.example.springboot.entity.Admin;
import com.example.springboot.service.IAdminService;
import lombok.extern.slf4j.Slf4j;
import org.springframework.stereotype.Component;
import org.springframework.web.context.request.RequestContextHolder;
import org.springframework.web.context.request.ServletRequestAttributes;

import javax.annotation.PostConstruct;
import javax.annotation.Resource;
import javax.servlet.http.HttpServletRequest;
import java.util.Date;


//生成token和获取
@Component
@Slf4j
public class TokenUtils {

    private static IAdminService staticAdminService;

    @Resource
    private IAdminService adminService;

    //赋值作用:让后面的静态方法里面能使用springboot里面的类
    @PostConstruct
    public void setUserService() {
        staticAdminService = adminService;
    }

    /**
     * 生成token
     *
     * @return
     */
    public static String genToken(String adminId, String sign) {
        return JWT.create().withAudience(adminId) // 将 user id 保存到 token 里面,作为载荷
                .withExpiresAt(DateUtil.offsetHour(new Date(), 2)) // 2小时后token过期
                .sign(Algorithm.HMAC256(sign)); // 以 password 作为 token 的密钥
    }

    /**
     * 获取当前登录的用户信息
     *
     * @return user对象
     *  /admin?token=xxxx
     */
    public static Admin getCurrentAdmin() {
        String token = null;
        try {
            HttpServletRequest request = ((ServletRequestAttributes) RequestContextHolder.getRequestAttributes()).getRequest();
            //token两种获得方式:1. 从请求头获取
            token = request.getHeader("token");
            if (StrUtil.isNotBlank(token)) {
                // 2. 从Parameter参数获取:即从/admin?token=xxxx中获取
                token = request.getParameter("token");
            }
            if (StrUtil.isBlank(token)) {
                log.error("获取当前登录的token失败, token: {}", token);
                return null;
            }
            String adminId = JWT.decode(token).getAudience().get(0);
            return staticAdminService.getById(Integer.valueOf(adminId));
        } catch (Exception e) {
            log.error("获取当前登录的管理员信息失败, token={}", token,  e);
            return null;
        }
    }
}
5. 拦截器JwtInterceptor.java
在一个common的包中加JwtInterceptor类
import cn.hutool.core.util.StrUtil;
import com.auth0.jwt.JWT;
import com.auth0.jwt.JWTVerifier;
import com.auth0.jwt.algorithms.Algorithm;
import com.auth0.jwt.exceptions.JWTVerificationException;
import com.example.springboot.entity.Admin;
import com.example.springboot.exception.ServiceException;
import com.example.springboot.service.IAdminService;
import lombok.extern.slf4j.Slf4j;
import org.springframework.beans.factory.annotation.Autowired;
import org.springframework.stereotype.Component;
import org.springframework.web.servlet.HandlerInterceptor;

import javax.servlet.http.HttpServletRequest;
import javax.servlet.http.HttpServletResponse;

@Component
@Slf4j
public class JwtInterceptor implements HandlerInterceptor {

    private static final String ERROR_CODE_401 = "401";

    @Autowired
    private IAdminService adminService;

    @Override
    public boolean preHandle(HttpServletRequest request, HttpServletResponse response, Object handler) {
        String token = request.getHeader("token");
        if (StrUtil.isBlank(token)) {
            token = request.getParameter("token");
        }

        // 执行认证
        if (StrUtil.isBlank(token)) {
            throw new ServiceException(ERROR_CODE_401, "无token,请重新登录");
        }
        // 获取 token 中的adminId
        String adminId;
        Admin admin;
        try {
            adminId = JWT.decode(token).getAudience().get(0);
            // 根据token中的admin_id查询数据库
            admin = adminService.getById(Integer.parseInt(adminId));
        } catch (Exception e) {
            String errMsg = "token验证失败,请重新登录";
            log.error(errMsg + ", token=" + token, e);
            throw new ServiceException(ERROR_CODE_401, errMsg);
        }
        if (admin == null) {
            throw new ServiceException(ERROR_CODE_401, "用户不存在,请重新登录");
        }


        //验证有效期+加签
        try {
            // 用户密码加签验证 token
            JWTVerifier jwtVerifier = JWT.require(Algorithm.HMAC256(admin.getPassword())).build();
            jwtVerifier.verify(token); // 验证token
        } catch (JWTVerificationException e) {
            throw new ServiceException(ERROR_CODE_401, "token验证失败,请重新登录");
        }
        return true;
    }
}
6. 拦截器设置
在1步骤的WebConfig 中添加拦截器
import org.springframework.beans.factory.annotation.Autowired;
import org.springframework.context.annotation.Configuration;
import org.springframework.web.bind.annotation.RestController;
import org.springframework.web.servlet.config.annotation.InterceptorRegistry;
import org.springframework.web.servlet.config.annotation.PathMatchConfigurer;
import org.springframework.web.servlet.config.annotation.WebMvcConfigurer;


//给controller的请求接口都加一个/api的前缀,用于jwt
@Configuration
public class WebConfig implements WebMvcConfigurer {

    @Autowired
    JwtInterceptor jwtInterceptor;

    @Override
    public void configurePathMatch(PathMatchConfigurer configurer) {
        // 指定(有@RestController注解的)controller统一的接口前缀
        configurer.addPathPrefix("/api", clazz -> clazz.isAnnotationPresent(RestController.class));
    }

    // 加自定义拦截器JwtInterceptor,设置拦截规则
    //.excludePathPatterns("/api/admin/login");放开登录接口,因为登录的时候还没有token
    @Override
    public void addInterceptors(InterceptorRegistry registry) {
        registry.addInterceptor(jwtInterceptor).addPathPatterns("/api/**").excludePathPatterns("/api/admin/login");
    }
}
7. 设置自定义头配置
在common包中加一个CorsConfig类:既可以解决跨域问题,还可以解决自定义头配置,让系统识别到设置在cookies中head的token值
import org.springframework.context.annotation.Bean;
import org.springframework.context.annotation.Configuration;
import org.springframework.web.cors.CorsConfiguration;
import org.springframework.web.cors.UrlBasedCorsConfigurationSource;
import org.springframework.web.filter.CorsFilter;


//解决跨域
//解决request中自定义的头配置
@Configuration
public class CorsConfig {


    @Bean
    public CorsFilter corsFilter() {
        UrlBasedCorsConfigurationSource source = new UrlBasedCorsConfigurationSource();
        CorsConfiguration corsConfiguration = new CorsConfiguration();
        corsConfiguration.addAllowedOrigin("*"); // 1 设置访问源地址
        corsConfiguration.addAllowedHeader("*"); // 2 设置访问源请求头
        corsConfiguration.addAllowedMethod("*"); // 3 设置访问源请求方法
        source.registerCorsConfiguration("/**", corsConfiguration); // 4 对接口配置跨域设置
        return new CorsFilter(source);
    }
}


 6705
6705


 被折叠的 条评论
为什么被折叠?
被折叠的 条评论
为什么被折叠?
 到【灌水乐园】发言


