


本文介绍一个使用Jetty开发的Web的小例子。
Jetty是一个开源的servlet容器,它为基于Java的web容器(例如JSP和servlet)提供运行环境。可以把它理解为和Tomcat一样,不过Jetty更小更轻量级。如果想更深入学习Jetty推荐看:http://blog.sina.com.cn/s/blog_9ed7f0d70101ivsu.html,这里面的一系列的文章分别对jetty服务流程、对静态资源的访问方法、把servlet部署到jetty里面、ContextHandler 的使用,都做了非常简洁、通俗易懂的介绍,本文就“把servlet部署到jetty里面”做介绍
本文使用的Maven建工程,对Maven不熟悉的请看:http://blog.csdn.net/tiandixuanwuliang/article/details/78752881
下面开始介绍这个小例子:
1、在maven项目中配置jetty和servlet
<project xmlns="http://maven.apache.org/POM/4.0.0" xmlns:xsi="http://www.w3.org/2001/XMLSchema-instance"
	xsi:schemaLocation="http://maven.apache.org/POM/4.0.0 http://maven.apache.org/xsd/maven-4.0.0.xsd">
	<modelVersion>4.0.0</modelVersion>
	<groupId>testJetty</groupId>
	<artifactId>testJetty</artifactId>
	<version>0.0.1-SNAPSHOT</version>
	<packaging>war</packaging>
	<properties>
		<project.build.sourceEncoding>UTF-8</project.build.sourceEncoding>
		<project.compile.version>1.8</project.compile.version>
		<servlet.version>3.1.0</servlet.version>
		<jsp.version>2.2</jsp.version>
		<jstl.version>1.2.5</jstl.version>
		<jetty.version>8.1.10.v20130312</jetty.version>
	</properties>
	<dependencies>
		<!-- Web Dependencies start -->
		<dependency>
			<groupId>javax.servlet</groupId>
			<artifactId>javax.servlet-api</artifactId>
			<version>${servlet.version}</version>
		</dependency>
		<dependency>
			<groupId>javax.servlet.jsp</groupId>
			<artifactId>jsp-api</artifactId>
			<version>${jsp.version}</version>
		</dependency>
		<dependency>
			<groupId>org.apache.taglibs</groupId>
			<artifactId>taglibs-standard-compat</artifactId>
			<version>${jstl.version}</version>
		</dependency>
		<dependency>
			<groupId>org.apache.taglibs</groupId>
			<artifactId>taglibs-standard-impl</artifactId>
			<version>${jstl.version}</version>
		</dependency>
		<dependency>
			<groupId>org.apache.taglibs</groupId>
			<artifactId>taglibs-standard-jstlel</artifactId>
			<version>${jstl.version}</version>
		</dependency>
		<dependency>
			<groupId>org.apache.taglibs</groupId>
			<artifactId>taglibs-standard-spec</artifactId>
			<version>${jstl.version}</version>
		</dependency>
		<!-- Web Dependencies end -->

		<!-- jetty start -->
		<dependency>
			<groupId>org.eclipse.jetty</groupId>
			<artifactId>jetty-server</artifactId>
			<version>9.0.0.v20130308</version>
		</dependency>
		<dependency>
			<groupId>org.eclipse.jetty</groupId>
			<artifactId>jetty-webapp</artifactId>
			<version>9.0.0.v20130308</version>
		</dependency>
		<dependency>
			<groupId>org.eclipse.jetty</groupId>
			<artifactId>jetty-continuation</artifactId>
			<version>9.0.0.v20130308</version>
		</dependency>
		<dependency>
			<groupId>org.eclipse.jetty</groupId>
			<artifactId>jetty-jsp</artifactId>
			<version>9.0.0.v20130308</version>
		</dependency>
		<!-- jetty end -->
	</dependencies>
</project>import java.io.IOException;
import javax.servlet.ServletException;
import javax.servlet.http.HttpServlet;
import javax.servlet.http.HttpServletRequest;
import javax.servlet.http.HttpServletResponse;
@SuppressWarnings("serial")
public class MainServlet extends HttpServlet{
@Override
protected void doGet(HttpServletRequest req, HttpServletResponse resp)
throws ServletException, IOException {
req.setCharacterEncoding("utf-8");
resp.setCharacterEncoding("utf-8");
resp.setHeader("content-type","text/html;charset=UTF-8");
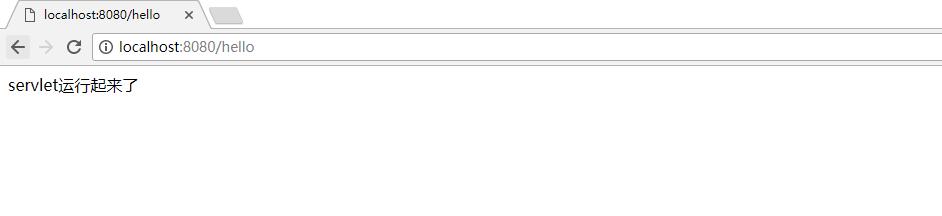
System.out.println("servlet运行起来了");
resp.getWriter().write("servlet运行起来了");
resp.getWriter().close();
}
}3、写Jetty启动文件(注意:不能加包名)
import org.eclipse.jetty.server.Server;
import org.eclipse.jetty.servlet.ServletContextHandler;
import org.eclipse.jetty.servlet.ServletHolder;

import com.welljoint.MainServlet;
public class HelloJetty {

	/**
	 * @throws Exception
	 * @Title: main
	 * @Description:启动jetty,程序入口
	 * @param args
	 * @throws
	 */
	public static void main(String[] args) throws Exception
	{
  Server server = new Server(8080);
  //servletContextHandler是把servlet部署到jetty里面的桥梁
  ServletContextHandler context = new ServletContextHandler(ServletContextHandler.SESSIONS);
  //所有请求都要经过jetty
  context.setContextPath("/");
  server.setHandler(context);
  //配置servlet请求路径
  context.addServlet(new ServletHolder(new MainServlet()), "/hello");

	    server.start();
	    server.join();
	}
}如图:


 392
392

 被折叠的 条评论
为什么被折叠?
被折叠的 条评论
为什么被折叠?
 到【灌水乐园】发言


