


刚开始接触android的时候,就想着如果能定制一款属于自己的刷新效果,肯定会是一件很酷的事情,当然了,github上已经有了很多很炫酷的刷新效果,各种漂亮,但在项目中总要讲究个实用性,有些刷新效果是不错,但在实战中就会显得很不搭,无赖只能舍弃,XListView实用,PullToRefresh也实用,用了这么久,是真不想用,在当时是很酷,可这些项目也早就没人维护,刷新效果有些过时,修改起来也不是那么容易,项目中经常要赶进度,so,也一直将就着用,google 提供的SwipeRefreshLayout效果也不赖,但却很局限,样式局限,子布局还一定得是可以滑动的布局(如ListView,ScrollView),还没提供上拉加载的效果,要用还得自己写,还有一点不知道google怎么搞的,SwipeRefreshLayout居然和RecyclerView冲突(连续下拉,刷新样式会一团糟,还会卡住),自家控件还弄成这样,真是的。说了那么一堆,来看看今天的主角
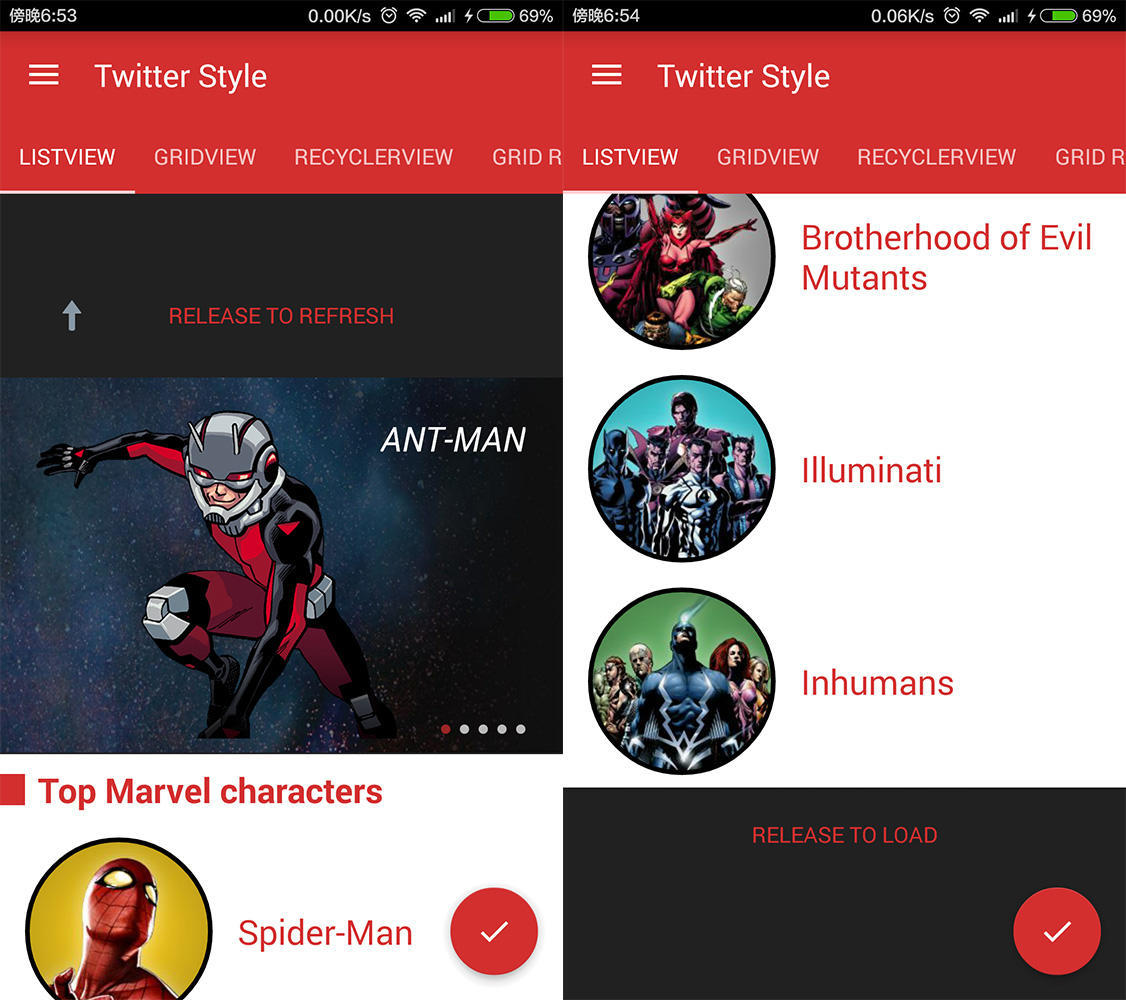
SwipeToLoadLayout,献上两张截图:

Xml中使用
刷新框架那么多,为什么我选择了SwipeToLoadLayout?
-
首先看效果,框架中帮我们实现了几个主流的刷新效果,Twitter style,JD style,google style,Yalantis style,demo也下载下来看了,真不错,还支持各种自定义,自定义头部和尾部,头部还分classic,above,blow,scale四种类型,还有自动刷新的效果,体验也很流畅。
-
再看代码,刷新,加载各一个接口实现,头部和尾部也都是用接口实现,遵循设计模式的依赖倒转原则原则(针对抽象而不是针对具体编程),所以才能具备那么高可塑性,我们要做的就是实现接口里面的内容就可以轻松写一个刷新效果,就像使用baseAdapter一样,无论什么数据,什么样式,都可以轻松实现。
- 接着看功能,支持各种View和ViewGroup(ListView,ScrollView,RecyclerView,GridView,WebView,Linearlayout,RelativeLayout,FrameLayout,ImageView,TextView等)的刷新和加载,还支持自动刷新,手动刷新,自动加载,手动加载,禁止刷新,禁止加载等操作,完全满足需求。
最后,说的这么好,有没有经过测试呢?当然了,口说无凭,带大家实现一个。
通过SwipeToLoadLayout实现一个刷新加载的效果
1、如何集成
Step 1. Add the JitPack repository in your build.gradle at the end of repositories:repositories {
maven { url "https://jitpack.io" }
}
- dependencies {
- compile ‘com.github.Aspsine:SwipeToLoadLayout:v1.0.0’
- }
dependencies {
    compile 'com.github.Aspsine:SwipeToLoadLayout:v1.0.0'
}
2,开始自定义刷新效果
swipeToLoadLayout提供了一套接口,刷新的头部自定义一个View实现SwipeTrigger和SwipeRefreshTrigger就行了,刷新的尾部自定义一个View实现SwipeLoadMoreTrigger和SwipeTrigger,头部实现代码:
- public class CustomRefreshHeadView extends TextView implements SwipeRefreshTrigger, SwipeTrigger {
- public CustomRefreshHeadView(Context context) {
- super(context);
- }
- public CustomRefreshHeadView(Context context, AttributeSet attrs) {
- super(context, attrs);
- }
- public CustomRefreshHeadView(Context context, AttributeSet attrs, int defStyleAttr) {
- super(context, attrs, defStyleAttr);
- }
- @Override
- public void onRefresh() {
- setText(”正在拼命加载数据…”);
- }
- @Override
- public void onPrepare() {
- }
- @Override
- public void onSwipe(int i, boolean b) {
- setText(”释放刷新”);
- }
- @Override
- public void onRelease() {
- }
- @Override
- public void complete() {
- setText(”刷新成功”);
- }
- @Override
- public void onReset() {
- }
- }
public class CustomRefreshHeadView extends TextView implements SwipeRefreshTrigger, SwipeTrigger {
    public CustomRefreshHeadView(Context context) {
        super(context);
    }

    public CustomRefreshHeadView(Context context, AttributeSet attrs) {
        super(context, attrs);
    }

    public CustomRefreshHeadView(Context context, AttributeSet attrs, int defStyleAttr) {
        super(context, attrs, defStyleAttr);
    }

    @Override
    public void onRefresh() {
        setText("正在拼命加载数据...");
    }

    @Override
    public void onPrepare() {

    }

    @Override
    public void onSwipe(int i, boolean b) {
        setText("释放刷新");

    }

    @Override
    public void onRelease() {


    }

    @Override
    public void complete() {
        setText("刷新成功");
    }

    @Override
    public void onReset() {

    }
}
Xml中使用
注意,swipetoloadlayout中布局包裹的View id是指定的,不能乱改,否则找不到
<item name=”swipe_target” type=”id” />刷新目标
<item name=”swipe_refresh_header” type=”id” />刷新头部
<item name=”swipe_load_more_footer” type=”id” />刷新尾部
代码中调用
<item name=”swipe_refresh_header” type=”id” />刷新头部
<item name=”swipe_load_more_footer” type=”id” />刷新尾部
- <?xml version=“1.0” encoding=“utf-8”?>
- <com.aspsine.swipetoloadlayout.SwipeToLoadLayout xmlns:android=“http://schemas.android.com/apk/res/android”
- xmlns:tools=“http://schemas.android.com/tools”
- android:id=“@+id/swipeToLoad”
- android:layout_width=“match_parent”
- android:layout_height=“match_parent”
- tools:context=“com.yyydjk.swipetorefreshdemo.MainActivity”>
- <com.yyydjk.swipetorefreshdemo.CustomRefreshHeadView
- android:id=“@+id/swipe_refresh_header”
- android:layout_width=“match_parent”
- android:layout_height=“wrap_content”
- android:gravity=“center”
- android:padding=“20dp” />
- <TextView
- android:id=“@+id/swipe_target”
- android:layout_width=“match_parent”
- android:layout_height=“match_parent”
- android:background=“@color/colorPrimary”
- android:gravity=“center”
- android:text=“Hello World!” />
- </com.aspsine.swipetoloadlayout.SwipeToLoadLayout>
<?xml version="1.0" encoding="utf-8"?>
<com.aspsine.swipetoloadlayout.SwipeToLoadLayout xmlns:android="http://schemas.android.com/apk/res/android"
    xmlns:tools="http://schemas.android.com/tools"
    android:id="@+id/swipeToLoad"
    android:layout_width="match_parent"
    android:layout_height="match_parent"
    tools:context="com.yyydjk.swipetorefreshdemo.MainActivity">

    <com.yyydjk.swipetorefreshdemo.CustomRefreshHeadView
        android:id="@+id/swipe_refresh_header"
        android:layout_width="match_parent"
        android:layout_height="wrap_content"
        android:gravity="center"
        android:padding="20dp" />

    <TextView
        android:id="@+id/swipe_target"
        android:layout_width="match_parent"
        android:layout_height="match_parent"
        android:background="@color/colorPrimary"
        android:gravity="center"
        android:text="Hello World!" />
</com.aspsine.swipetoloadlayout.SwipeToLoadLayout>
代码中调用
- CustomRefreshHeadView refreshHeadView = new CustomRefreshHeadView(this);
- refreshHeadView.setPadding(20,20,20,20);
- refreshHeadView.setGravity(Gravity.CENTER);
- refreshHeadView.setLayoutParams(new ViewGroup.LayoutParams(ViewGroup.LayoutParams.MATCH_PARENT,
- ViewGroup.LayoutParams.WRAP_CONTENT));
- swipeToLoadLayout.setRefreshHeaderView(refreshHeadView);
CustomRefreshHeadView refreshHeadView = new CustomRefreshHeadView(this);
refreshHeadView.setPadding(20,20,20,20);
refreshHeadView.setGravity(Gravity.CENTER);
refreshHeadView.setLayoutParams(new ViewGroup.LayoutParams(ViewGroup.LayoutParams.MATCH_PARENT,
                ViewGroup.LayoutParams.WRAP_CONTENT));
swipeToLoadLayout.setRefreshHeaderView(refreshHeadView);
就这么简单,看下演示效果,做的丑了点,以后有时间弄个精致点的


 676
676

 被折叠的 条评论
为什么被折叠?
被折叠的 条评论
为什么被折叠?
 到【灌水乐园】发言


