1,为什么要有AIDL?
无论学什么东西,最先弄明白为什么要有这个东西,不要说存在即合理,存在是肯定的,但是你还是没有明白对于AIDL有一些人的浅显概念就是:AIDL可以跨进程访问其它应用程序和其它应用程序通讯,那我告诉你很多技术都可以访问如广播(应用A在AndroidManifest.xml中注册指定Action的广播)应用B发送指定Action的广播,A就能收到消息,这样也能看成不同应用之间完成了通讯(但是这种通讯是单向的);还有ContentProvider通过UI接口暴露数据给其他应用访问,但是这种算不上是应用之间的通讯那么为什么还要有AIDL呢,官方文档介绍AIDL中有这么一句话:
Using AIDL is necessary only if you allow clients from different
applications to access your service for IPC and want to handle
multithreading in your service. If you do not need to perform
concurrent IPC across different applications, you should create your
interface by implementing a Binder or, if you want to perform IPC, but
do not need to handle multithreading, implement your interface using a
Messenger. Regardless, be sure that you understand Bound Services
before implementing an AIDL.
第一句最重要,“只有当你允许来自不同的客户端访问你的服务并且需要处理多线程、多客户端并发访问的时候你必须使用AIDL”,其他情况下你都可以使用其他的方法,如使用广播,ContentProvide也能跨进程通讯。课件AIDL是处理多线程,多客户端并发访问的。
2,AIDL的使用如下:
- 创建一个“类名.aidl”的文件(该文件定义了客户端可用的方法和数据的接口)。
- 创建一个继承“类名.Stub”的类并且实现在“类名.aidl”中声明的方法。
- 新建另外一个客户端工程,同样需要添加AIDL协议文件(这是一个标准的协议文件,定义对外服务的接口)。
向客户端公开接口(如果是编写服务),应该继承service并且重载service.onBind(Intent)以返回实现了接口的对象实例。
AIDL服务只支持有限的数据类型,因此,如果用AIDL服务传递一些复杂的数据就需要做更一步处理。AIDL服务支持的数据类型如下:
Java的简单类型(int、char、boolean等)。不需要导入(import)。
String和CharSequence。不需要导入(import)。
List和Map。但要注意,List和Map对象的元素类型必须是AIDL服务支持的数据类型。不需要导入(import)。
AIDL常使用的数据类型:
- Java的简单类型(int、char、boolean等)。不需要导入(import)。
- String和CharSequence。不需要导入(import)。
- List和Map。但要注意,List和Map对象的元素类型必须是AIDL服务支持的数据类型。不需要导(import)。
- AIDL自动生成的接口。需要导入(import)。
- 实现android.os.Parcelable接口的类。需要导入(import)。(例如,实现android.os.Parcelable接口的类)的步骤略显复杂。除了要建立一个实现android.os.Parcelable接口的类外,还需要为这个类单独建立一个aidl文件,并使用parcelable关键字进行定义。
3,让我们看一下代码方便大家的理解:
(1)创建aidl的服务端定义IRemoteService.aidl 文件里面声明对外访问的接口,返回Student类的对象。
package com.example.aidl;
import com.example.aidl.Student;
interface IRemoteService{
     Student getStudent();
}
(2)Student类必须实现android.os.Parcelable的接口
package com.example.aidl;

import android.os.Parcel;
import android.os.Parcelable;

public class Student implements Parcelable {
    private int age;
    private String name;
    private String address;
    private String phone;

    public Student() {
    }

    public int getAge() {
        return age;
    }

    public void setAge(int age) {
        this.age = age;
    }

    public String getName() {
        return name;
    }

    public void setName(String name) {
        this.name = name;
    }

    public String getAddress() {
        return address;
    }

    public void setAddress(String address) {
        this.address = address;
    }

    public String getPhone() {
        return phone;
    }

    public void setPhone(String phone) {
        this.phone = phone;
    }

    @Override
    public int describeContents() {
        return 0;
    }

    @Override
    public void writeToParcel(Parcel dest, int flags) {
        dest.writeInt(age);
        dest.writeString(name);
        dest.writeString(address);
        dest.writeString(phone);
    }

    public static final Creator<Student> CREATOR = new Parcelable.Creator<Student>() {
        public Student createFromParcel(Parcel in) {
            Student student = new Student();
            student.age = in.readInt();
            student.name = in.readString();
            student.address = in.readString();
            student.phone = in.readString();
            return student;
        }

        public Student[] newArray(int size) {
            return new Student[size];
        }
    };

    @Override
    public String toString() {
        return "Student [age=" + age + ", name=" + name + ", address=" + address + ", phone=" + phone + "]";
    }
}
注意:在实体类我们要的事情
- 实现Parcelable接口
- 实现Creator和writeToParcel这两个方法,分别代表用于对象读取数据和写入数据。
- 同时提供Student.aidl文件,下面则是Student.aidl文件
package com.example.aidl;
import com.example.aidl.Student;
parcelable Student;
下面我们定义一个service我们实现在IRemoteService.aidl声明的接口方法
package com.example.aidl;

import android.app.Service;
import android.content.Intent;
import android.os.IBinder;
import android.os.RemoteException;
import android.util.Log;

public class DDService extends Service {

    private static final String TAG = "DDService";

    @Override
    public void onCreate() {
        Log.e(TAG, "--- onCreate()-----");
    }

    @Override
    public IBinder onBind(Intent intent) {
        Log.e(TAG, "--- onBind()");
        return bunder;
    }

    IRemoteService.Stub bunder = new IRemoteService.Stub() {

        @Override
        public Student getStudent() throws RemoteException {
            Student student = new Student();
            student.setAge(20);
            student.setAddress("山东省");
            student.setName("张三");
            student.setPhone("12321");
            return student;
        }
    };

}
记得service在AndroidManifest.xml文件中需要注册
<service android:name="com.example.aidl.DDService" >
            <intent-filter>
                <action android:name="com.example.aidl.DDService" />
                <category android:name="android.intent.category.DEFAULT"/>
            </intent-filter>
        </service>
我们最后在客户端进行访问服务端定义的aidl的文件
首先把我们在服务端定义的aidl文件同时拷贝到我们的客户端我们这里有Student.java,IRemoteService.aidl,Student.aidl 这三个文件此外记得这三个文件所在工程的包名要与服务端定义aidl文件的包名要保持一致,否则会报错
bindService绑定服务,同时实现ServiceConnection类复写onServiceConnected(ComponentName name, IBinder service)方法调用IRemoteService.Stub.asInterface(service)方法返回实现aidl文件定义接口的实现类对象,用实现类对象调用接口中的方法。
package com.example.aidl2;

import android.app.Activity;
import android.content.ComponentName;
import android.content.Context;
import android.content.Intent;
import android.content.ServiceConnection;
import android.os.Bundle;
import android.os.IBinder;
import android.os.RemoteException;
import android.util.Log;
import android.view.View;
import android.view.View.OnClickListener;
import android.widget.Button;

import com.example.aidl.IRemoteService;
import com.example.aidl.Student;

public class MainActivity extends Activity implements OnClickListener {
    private String TAG = "MainActivity";
    IRemoteService remoteService;
    private Button button;
    private ServiceConnection conn;

    @Override
    protected void onCreate(Bundle savedInstanceState) {
        super.onCreate(savedInstanceState);
        setContentView(R.layout.activity_main);
        button = (Button) findViewById(R.id.button);
        button.setOnClickListener(this);
        conn = new ServiceConnection() {

            @Override
            public void onServiceDisconnected(ComponentName name) {
                unbindService(conn);
            }

            @Override
            public void onServiceConnected(ComponentName name, IBinder service) {
                try {
                    remoteService = IRemoteService.Stub.asInterface(service);
                    Student student = remoteService.getStudent();
                    Log.e(TAG, student.toString());
                } catch (RemoteException e) {
                    e.printStackTrace();
                }
            }
        };
    }

    @Override
    public void onClick(View v) {
        switch (v.getId()) {
        case R.id.button:
            Intent intent = new Intent();
            intent.addCategory(Intent.CATEGORY_DEFAULT);
            intent.setAction("com.example.aidl.DDService");
            bindService(intent, conn, Context.BIND_AUTO_CREATE);
            break;

        default:
            break;
        }
    }

}
同时运行客户端和服务端:

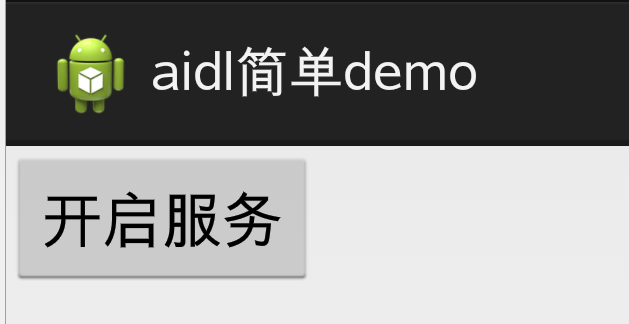
点击“开启服务”button 在客户端打印log如下:
最后祝大家学习愉快。。


 43万+
43万+


 被折叠的 条评论
为什么被折叠?


