


该笔记跟着视频走的,用于回头看,没啥料。
在这个笔记中,主要完成一个迷你的struts,所需要的知识点也不是很多,其一是反射,其二是过滤器,其三就是xml的dom4j解析了。
1、回顾反射
什么是反射?反射就是运行时动态加载类,生成对应的Class对象,然后通过Class对象去做一些我们想做的事情(我乱扯的。)
其实以我个人的理解就是要熟练的使用好反射对应的一些API就可以了,诸如如何生成Class啊,获得对象的方法啊,生成对应的Class的对象啊等等。
a)通过字符串获得Class对象
Class<?> clazz = Class.forName("类的全名");

b)获得实例
Object obj = clazz.newInstance();

c)通过生成的Class对象,获取类中具体的方法,根据方法的名称
Method method = clazz.getMethod("方法名");

d)执行具体的方法
method.invoke("需要用上作用的对象obj",方法的参数);
2、回顾xml的解析
 关于xml的解析有多种多样,比较常用的就是dom4j了。但是由于我个人的能力问题,我经常会忘记如何去使用(将它和其他的解析搞混,比如创建工厂:我会分不清该使用SaxReader还是使用SaxBuilder。。。)
 总之还是那句话,要时常练。
3、回顾Filter过滤器
过滤器过滤器,它的作用到底是什么呢?它主要是用于过滤来自浏览器发送来的请求,它会在service()方法被调用之前先处理一次(在请求到达访问资源自谦,会先经过过滤器)。过滤器的主要功能是可以帮助我们完成一些批处理,比如要记录以下每个Servlet执行的时间啊,设置一下字符编码啊等等,还可以根据filterChain来决定是否放行。**当然也可以使用请求转发或者重定向,不让请求到达目的地!**
好了,下面还是进入正常的节目吧:自定义了一个mini的struts,既然是迷你的struts,功能当然很简陋,将就着看吧:
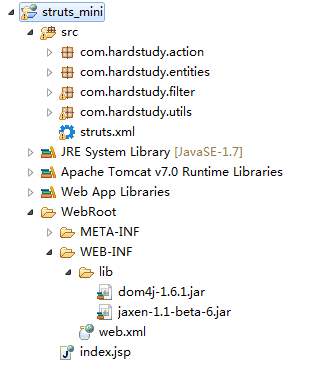
这是我这个mini的struts项目的大致结构
**
- 第一步:当然是导入jar包啊,在没有学习Maven之前,所有的项目都要这样先导一遍,这个项目只需要导入两个jar包:一个dom4j的jar文件,另一个用于支持xpath的jar文件(注意了:这个xpath可是一个好东西,要学会怎么使用噢!)
- 第二步:在src下(也就是classpath)下新建一个xml文件,这个xml可以随便取名字,但是既然在这里是用于模拟struts的,那么就将其命名为struts.xml吧。
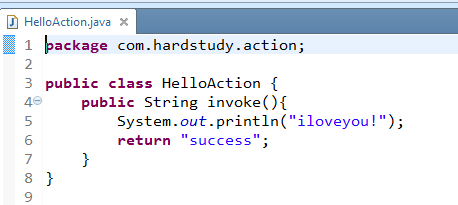
- 第三步:新建一个action,就叫它HelloAction吧,一个普通的Java类(你也可以叫他POJO,Plain Ordinary Java Object),在它里面主要定义了一个方法,你看:
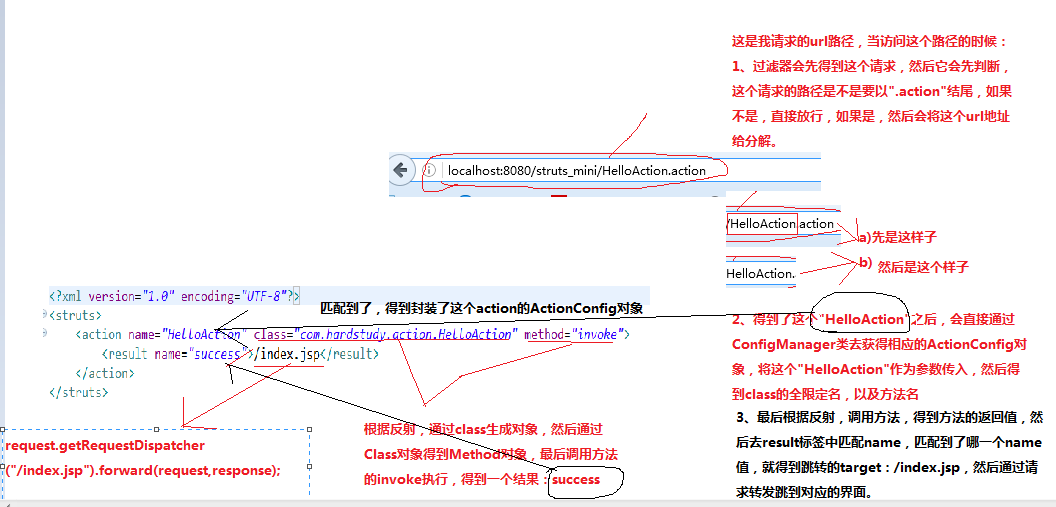
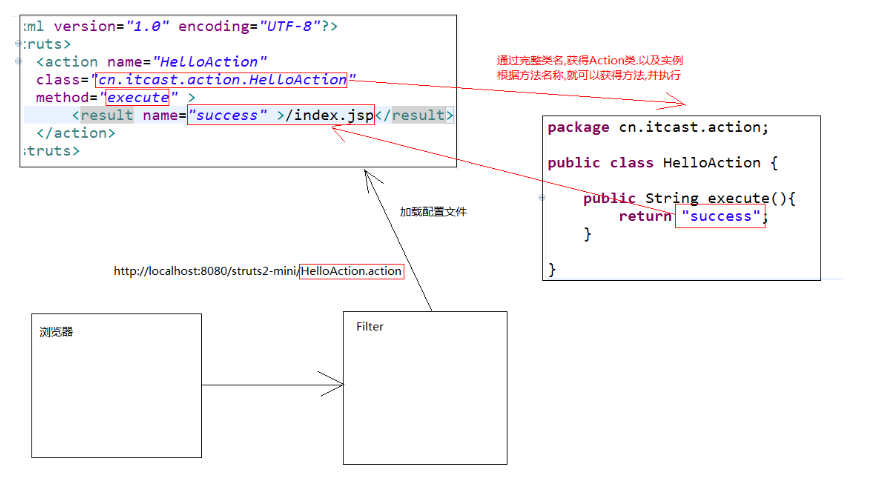
方法名一般叫execute,但是为了表示我的与众不同,我取名为invoke,很简单就是返回一个字符串。 - 然后需要在struts.xml文件中进行配置:
这个配置文件中的玩意我们解析xml文件的时候都可以得到,然后通过得到的信息通过反射创建对象,然后调用方法,看看方法的返回值是否是success,然后在跳转到result标签中的/index.jsp页面中。 - 下面进行编码第一步,创建一个用于解析xml文件的类,叫做ConfigManager:

package com.hardstudy.utils;

import java.util.HashMap;
import java.util.List;
import java.util.Map;

import org.dom4j.Document;
import org.dom4j.DocumentException;
import org.dom4j.Element;
import org.dom4j.io.SAXReader;

import com.hardstudy.entities.ActionConfig;
import com.hardstudy.entities.ResultConfig;

public class ConfigManager {
    public static Map<String, ActionConfig> getActionConfig(){
        Map<String,ActionConfig> map = new HashMap<>();
        //1:使用dom4j进行解析
            //a:生成解析器工厂
        SAXReader reader = new SAXReader();
        try {
            //b:解析struts.xml文件得到document对象
            Document document = reader.read(ConfigManager.class.getResourceAsStream("/struts.xml"));

            //c:使用xpath快速进行解析,明确目的,现在已经加载到了struts.xml文件,要做的就是获得action标签,但是这样的标签,在struts.xml文件中可能有多个,所以需要将这个标签及其内容封装到一个List中
            //得到所有的action标签
            List<Element> elements = document.selectNodes("//action");

            //循环每个action标签,将它们封装成一个ActionConfig对象
            for(Element element : elements){
                ActionConfig config = new ActionConfig();
                config.setName(element.attributeValue("name"));
                config.setClazz(element.attributeValue("class"));
                config.setMethod(element.attributeValue("method"));

                //一个action中可能有若干个result标签,现在由action标签得到它下面的所有的result子元素
                List<Element> results = element.elements("result");
                Map<String, ResultConfig> resultMaps = new HashMap<>();
                for(Element result : results){
                    ResultConfig resultConfig = new ResultConfig();
                    resultConfig.setName(result.attributeValue("name"));
                    resultConfig.setTarget(result.getText());
                    //将所有的result标签中存到Map
                    resultMaps.put(resultConfig.getName(), resultConfig);
                }
                config.setResults(resultMaps);
                map.put(config.getName(), config);
            }
        } catch (DocumentException e) {
            throw new RuntimeException("文件找不到,请重新确认!");
        }
        return map;
    }
}
6、在解析的时候需要注意一点,在一个struts.xml文件中,可能会有多个action标签,每个action标签中也可能会有多个result标签,那么该如何去表示这每一个标签呢?根据面向对象的编程方式:应该将每个action标签中的内容封装成一个ActionConfig对象,然后将每个action标签中的result标签也封装成一个ResultConfig对象,然后通过Map,将每个ResultConfig对象封装到它对应的ActionConfig对象中,然后将struts.xml中的每个ActionConfig对象也封装到一个Map,供我们使用。
ActionConfig类:
package com.hardstudy.entities;

import java.util.Map;

public class ActionConfig {
    private String name;
    private String clazz;
    private String method;
    private Map<String, ResultConfig> results;
    public String getName() {
        return name;
    }
    public void setName(String name) {
        this.name = name;
    }
    public String getClazz() {
        return clazz;
    }
    public void setClazz(String clazz) {
        this.clazz = clazz;
    }
    public String getMethod() {
        return method;
    }
    public void setMethod(String method) {
        this.method = method;
    }
    public Map<String, ResultConfig> getResults() {
        return results;
    }
    public void setResults(Map<String, ResultConfig> results) {
        this.results = results;
    }

}
ResultConfig类:
package com.hardstudy.entities;

public class ResultConfig {
    private String name;
    private String target;
    public String getName() {
        return name;
    }
    public void setName(String name) {
        this.name = name;
    }
    public String getTarget() {
        return target;
    }
    public void setTarget(String target) {
        this.target = target;
    }

}
一定要注意:这两个Map对象的key值都是使用ActionConfig对象的name以及ResultConfig的name来唯一标识的,同样的,只要解析获得了action标签中的name,那个就可以从Map对象中取到封装好了的对象。
**
7、最关键的一个文件:过滤器Filter:StrutsPrepareAndExecuteFilter,不要忘记在web.xml中配置这个过滤器,当然此处是不需要的,因为使用了注解:@WebFilter(“/*”),表示该过滤器作用于所有的请求
package com.hardstudy.filter;

import java.io.IOException;
import java.lang.reflect.InvocationTargetException;
import java.lang.reflect.Method;
import java.util.HashMap;
import java.util.Map;

import javax.servlet.Filter;
import javax.servlet.FilterChain;
import javax.servlet.FilterConfig;
import javax.servlet.ServletException;
import javax.servlet.ServletRequest;
import javax.servlet.ServletResponse;
import javax.servlet.annotation.WebFilter;
import javax.servlet.http.HttpServletRequest;
import javax.servlet.http.HttpServletResponse;

import com.hardstudy.entities.ActionConfig;
import com.hardstudy.entities.ResultConfig;
import com.hardstudy.utils.ConfigManager;

@WebFilter("/*")
public class StrutsPreparedAndExcuteFilter implements Filter {
    Map<String, ActionConfig> configs = new HashMap<>();

    public void init(FilterConfig fConfig) throws ServletException {
        configs = ConfigManager.getActionConfig();
    }

    public void doFilter(ServletRequest request, ServletResponse response, FilterChain chain) throws IOException, ServletException {
        HttpServletRequest req = (HttpServletRequest) request;
        HttpServletResponse resp = (HttpServletResponse) response;

        //获取路径:http://localhost:8080/struts_mini/HelloAction.action -->> /HelloAction.action
        String path = req.getServletPath();
        //先判断以下path,看看是不是Action发送的
        if(!path.endsWith(".action")){
            chain.doFilter(req, resp);
            return;
        }
        //将路径分解,得到   HelloAction
        //取左不取右
        path = path.substring(1,path.lastIndexOf("."));

        //得到了这个值之后,就可以让它去与struts.xml中的action的name进行匹配,得到那个唯一的action
        ActionConfig config = configs.get(path);

        //目前,已经得到了封装好了的name属性为HelloAction的action标签,现在要做的就是得到class和method
        String actionClass = config.getClazz();
        String method = config.getMethod();

        //生成HelloAction对应的那个类的对象
        try {
            Class<?> clazz = Class.forName(actionClass);
            Method me = clazz.getMethod(method, null);
            //方法调用之后得到了结果:success
            String result = (String)me.invoke(clazz.newInstance(), null);
            ResultConfig config2 = config.getResults().get(result);
            String target = config2.getTarget();
            req.getRequestDispatcher(target).forward(req, resp);
        } catch (ClassNotFoundException e) {
            e.printStackTrace();
        } catch (NoSuchMethodException e) {
            e.printStackTrace();
        } catch (SecurityException e) {
            // TODO Auto-generated catch block
            e.printStackTrace();
        } catch (IllegalAccessException e) {
            // TODO Auto-generated catch block
            e.printStackTrace();
        } catch (IllegalArgumentException e) {
            // TODO Auto-generated catch block
            e.printStackTrace();
        } catch (InvocationTargetException e) {
            // TODO Auto-generated catch block
            e.printStackTrace();
        } catch (InstantiationException e) {
            // TODO Auto-generated catch block
            e.printStackTrace();
        }


    }

    public void destroy() {
    }
}
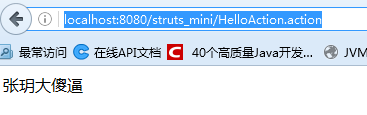
8、测试:在地址栏输入url:http://localhost:8080/struts_mini/HelloAction.action 经过一系列的操作步骤,最后成功到达index.jsp页面
index.jsp:
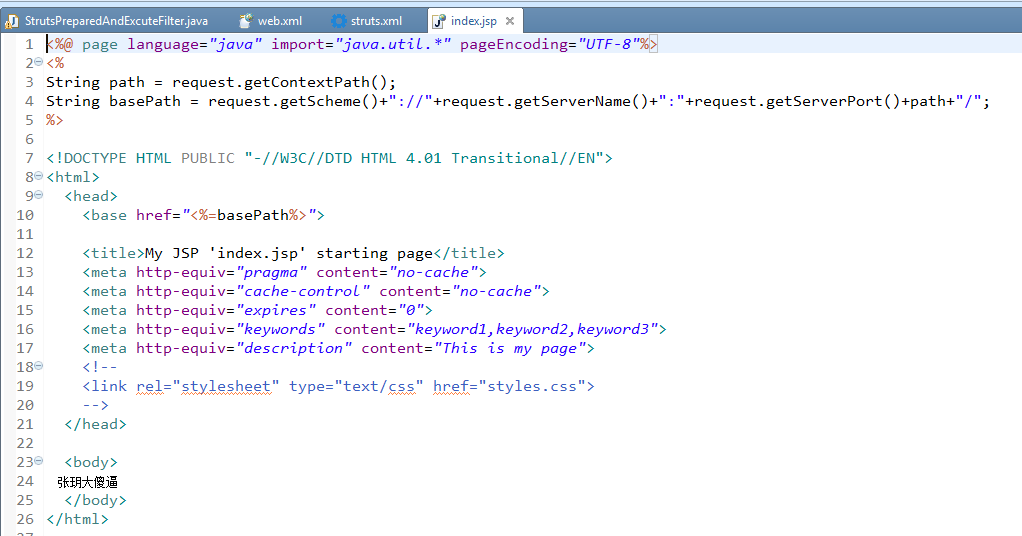
最后的结果:
这个项目的整体的流程图如下所示:
这是给自己看的,所以写的很渣,没啥料可言,就这样。


 1万+
1万+


 被折叠的 条评论
为什么被折叠?
被折叠的 条评论
为什么被折叠?
 到【灌水乐园】发言


