


目的
因为有这种需求,希望开发一个上位机软件,可以在Windows和Linux上同时运行,而且这个Linux很可能是arm平台的板子,其实就是可以代替一部分工控机的功能,省钱也节约设备占用的体积,鉴于自己现在不太清楚C++,也懒得去折腾QT(毕竟商用要钱,公司并没有整这个,但是公司买了VS),找了找可以实现上位机界面软件的方法,可能这个跨平台UI库Avalonia就比较合适了,对C#已经略知一二的我,能够写Winform小工具,WPF也能了解些了,感觉可以来学一学这个东西了。
这是一个目录
- 目的
- Avalonia下,我目前整出的一些实现备忘
- 怎么学
- 开始
- Logging Errors and Warnings
- Unhandled Exceptions
- Application Lifetimes
- 绑定
- Style
- Resources
- 各种各样的控件
- 模板Template
Avalonia下,我目前整出的一些实现备忘
窗口标题栏消除掉
        ExtendClientAreaToDecorationsHint="True"
        ExtendClientAreaChromeHints="NoChrome"
        ExtendClientAreaTitleBarHeightHint="-1"
加在window标签下
visualbrush画分割线
这个和WPF下,有点点不一样
DestinationRect=“10,10,10,10” SourceRect=“0,0,0,0”
我感觉是矩形坐标,我画的分割线宽度是10
            <Border.Background>
                <VisualBrush
                    AlignmentX="Left"
                    AlignmentY="Top"
                    DestinationRect="10,10,10,10"
                    SourceRect="0,0,0,0"
                    Stretch="None"
                    TileMode="Tile">
                    <VisualBrush.Visual>
                        <Grid Width="10" Height="10">
                            <Line
                                Stroke="DarkGray"
                                StrokeThickness="2"
                                StartPoint="0,10"
                                EndPoint="10,0" />
                            <Line
                                Stroke="DarkGray"
                                StrokeThickness="2"
                                StartPoint="10,10"
                                EndPoint="0,0" />
                        </Grid>
                    </VisualBrush.Visual>
                </VisualBrush>
            </Border.Background>
样式
这里和WPF非常不一样,建议再看看Document
首先新建一个样式文件
我是希望做一个RadioButton,带图标和字,按下对应的背景和字的颜色会变的样式
据它官网说,它这套样式系统类似与CSS,不是WPF那种用样式名字来绑定的,有点不习惯,具体的我还没有学到
看这个似乎它还整出了一个样式预览的功能,这个WPF倒是没有
<Styles xmlns="https://github.com/avaloniaui" xmlns:x="http://schemas.microsoft.com/winfx/2006/xaml">
    <Design.PreviewWith>
        <Border Padding="100">
            <!--  Add Controls for Previewer Here  -->
            <!--<RadioButton
                Background="White"
                Content="hahahah"
                FontSize="20" />-->
        </Border>
    </Design.PreviewWith>

    <!--  Add Styles Here  -->
    <Style Selector="RadioButton">
        <Setter Property="Background" Value="White" />
        <Setter Property="FontSize" Value="30" />
        <Setter Property="Foreground" Value="Black" />
        <Setter Property="HorizontalAlignment" Value="Left" />
        <Setter Property="Height" Value="{Binding Height}" />
        <Setter Property="Width" Value="200" />
        <Setter Property="VerticalContentAlignment" Value="Center" />
        <Setter Property="FontFamily" Value="/Assets/Fonts/#iconfont" />
        <Setter Property="Template">
            <Setter.Value>
                <ControlTemplate TargetType="RadioButton">
                    <Grid Background="Transparent">
                        <Border
                            Width="200"
                            Height="500"
                            Background="{TemplateBinding Background}">
                            <ContentPresenter HorizontalAlignment="Center" VerticalAlignment="Center" />
                        </Border>
                        <StackPanel Orientation="Horizontal">
                            <TextBlock
                                Margin="0,0,5,0"
                                VerticalAlignment="Center"
                                Text="{TemplateBinding Content}" />
                            <TextBlock
                                Margin="0,0,5,0"
                                VerticalAlignment="Center"
                                Text="{TemplateBinding Name}" />
                        </StackPanel>

                    </Grid>
                </ControlTemplate>
            </Setter.Value>
        </Setter>
    </Style>

    <Style Selector="RadioButton:checked">
        <Setter Property="Background" Value="Orange" />
        <Setter Property="Foreground" Value="White" />
    </Style>
    <Style Selector="RadioButton:unchecked">
        <Setter Property="Background" Value="Transparent" />
    </Style>
</Styles>
这个样式写好了,在要用的XAML上写
    <Window.Styles>
        <StyleInclude Source="/xxxx.axaml" />
    </Window.Styles>
Command
这个功能和WPF,有点不一样
首先在用的地方定义好Command
        #region 命令
        public ReactiveCommand<Unit, Unit> CloseButtonCommand { get; }

        #endregion
        public MainWindowViewModel()
        {
        	//前面就是你WindowViewModel的各种初始化
            CloseButtonCommand = ReactiveCommand.Create(CloseButtonHandler);
        }
        //回调
        public void CloseButtonHandler()
        {
            //我这里是希望做一个关闭程序的功能,关掉是OK,但是会出很多异常
            //暂时没找到其他方法
            Environment.Exit(0);
        }
在XAML对应的按钮写好Command绑定就可以了
怎么学
主要还是看官方的Document学吧,一上来整那种完整的例子也是摸不着头脑。
官网: https://www.avaloniaui.net/
Document: https://docs.avaloniaui.net/
文档打包下载
打算一点点按照官方Document的顺序把它学一学,过一过,挑我觉得有必要的东西记录下

开始
Getting Started
官方说运行Avalonia需要.NET Standard 2.0以上
系统win8以上/Linux Ubuntu16.04以上
Emmm.我试过拿到我那块RK3568+Ubuntu20+.NET 6上运行,也是可以的,感觉不错.
我自己的开发环境是用VS2022,然后.NET 6
Programming with Avalonia
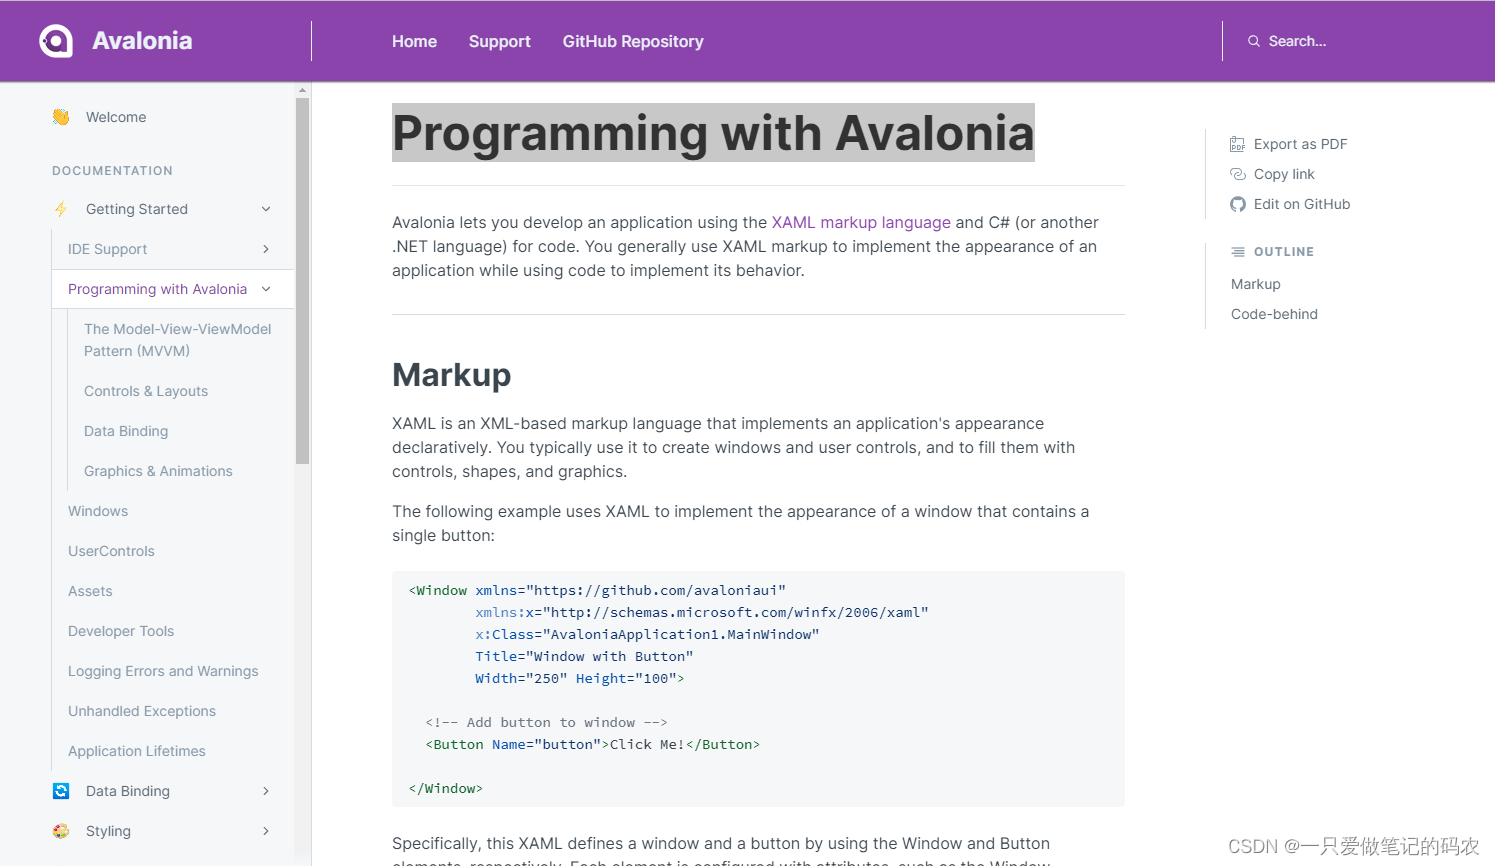
这一节介绍了Avalonia其实和WPF是差不多的,也是整XAML写前端,C#整后端,后面会知道他们俩语法上还是有些差异的。后面再说
这里举了一个例子,就是一个按钮按下触发事件,然后修改按钮的文本的Demo
XAML部分
<Window xmlns="https://github.com/avaloniaui"
        xmlns:x="http://schemas.microsoft.com/winfx/2006/xaml"
        x:Class="AvaloniaApplication1.MainWindow"
        Title="Window with Button"
        Width="250" Height="100">

  <!-- Add button to window -->
  <Button Name="button" Click="button_Click">Click Me!</Button>

</Window>
C#部分
using Avalonia;
using Avalonia.Controls;
using Avalonia.Interactivity;
using Avalonia.Markup.Xaml;

namespace AvaloniaApplication1
{
    public partial class MainWindow : Window
    {
        public MainWindow()
        {
            // Generated with Avalonia.NameGenerator
            InitializeComponent();
        }

        public void button_Click(object sender, RoutedEventArgs e)
        {
            // Change button text when button is clicked.
            var button = (Button)sender;
            button.Content = "Hello, Avalonia!";
        }
    }
}
其实和WPF真的很像,唯一不太像的就是Avalonia它再VS的智能提示没有WPF那么好,像是button_Click函数声明基本上需要手打,不像WPF VS可以智能提示直接Tab,然后回车生成。例子本身很简单,这里就没有自己去VS里打了。
The Model-View-ViewModel Pattern (MVVM)
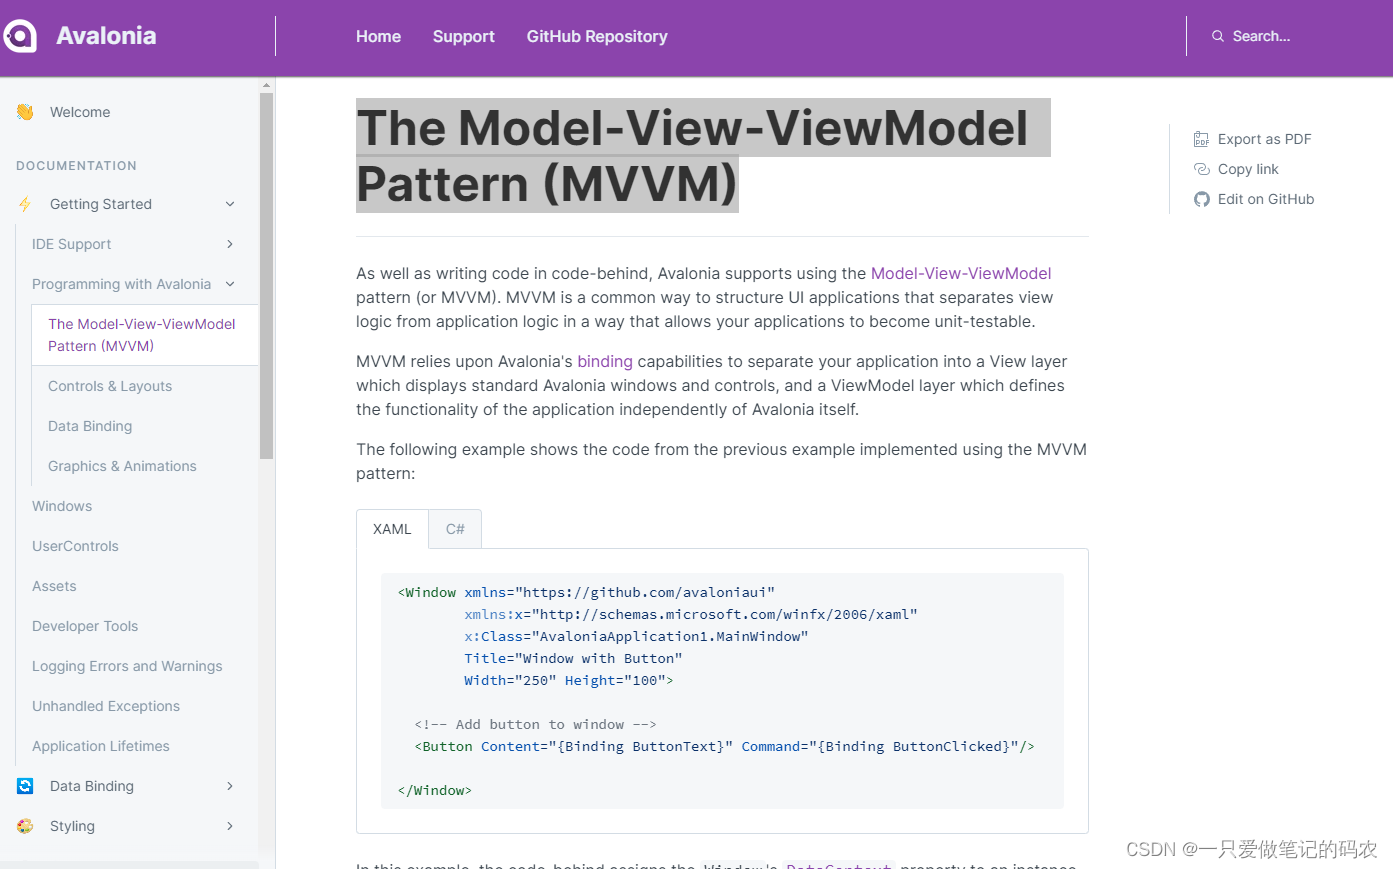
MVVM这个有必要去VS里打一打,开发环境搭建可以参考下[链接]
这个不是重点,跟着做就好
新建项目的时候选MVVM模板新建工程,然后照着官方的例子写一遍
XAML前端
<Window xmlns="https://github.com/avaloniaui"
        xmlns:x="http://schemas.microsoft.com/winfx/2006/xaml"
        x:Class="AvaloniaApplication1.MainWindow"
        Title="Window with Button"
        Width="250" Height="100">

  <!-- Add button to window -->
  <Button Content="{Binding ButtonText}" Command="{Binding ButtonClicked}"/>

</Window>
C#后端
using System.ComponentModel;
using Avalonia.Controls;
using Avalonia.Markup.Xaml;

namespace AvaloniaApplication1
{
    public partial class MainWindow : Window
    {
        public MainWindow()
        {
            InitializeComponent();
            DataContext = new MainWindowViewModel();
        }
    }

    public class MainWindowViewModel : INotifyPropertyChanged
    {
        string buttonText = "Click Me!";

        public string ButtonText
        {
            get => buttonText;
            set
            {
                buttonText = value;
                PropertyChanged?.Invoke(this, new PropertyChangedEventArgs(nameof(ButtonText)));
            }
        }

        public event PropertyChangedEventHandler PropertyChanged;

        public void ButtonClicked() => ButtonText = "Hello, Avalonia!";
    }
}
代码我原样从官网搬一份过来,国外网站网络时好时坏的,留个备份
ViewModel这里,现在是INotifyPropertyChanged,后面它会介绍用ReactiveUI的Set方法,打的代码贼少,效果和这个是一样的。
姑且先这样体验下,哈哈哈

单击Click Me之后出现

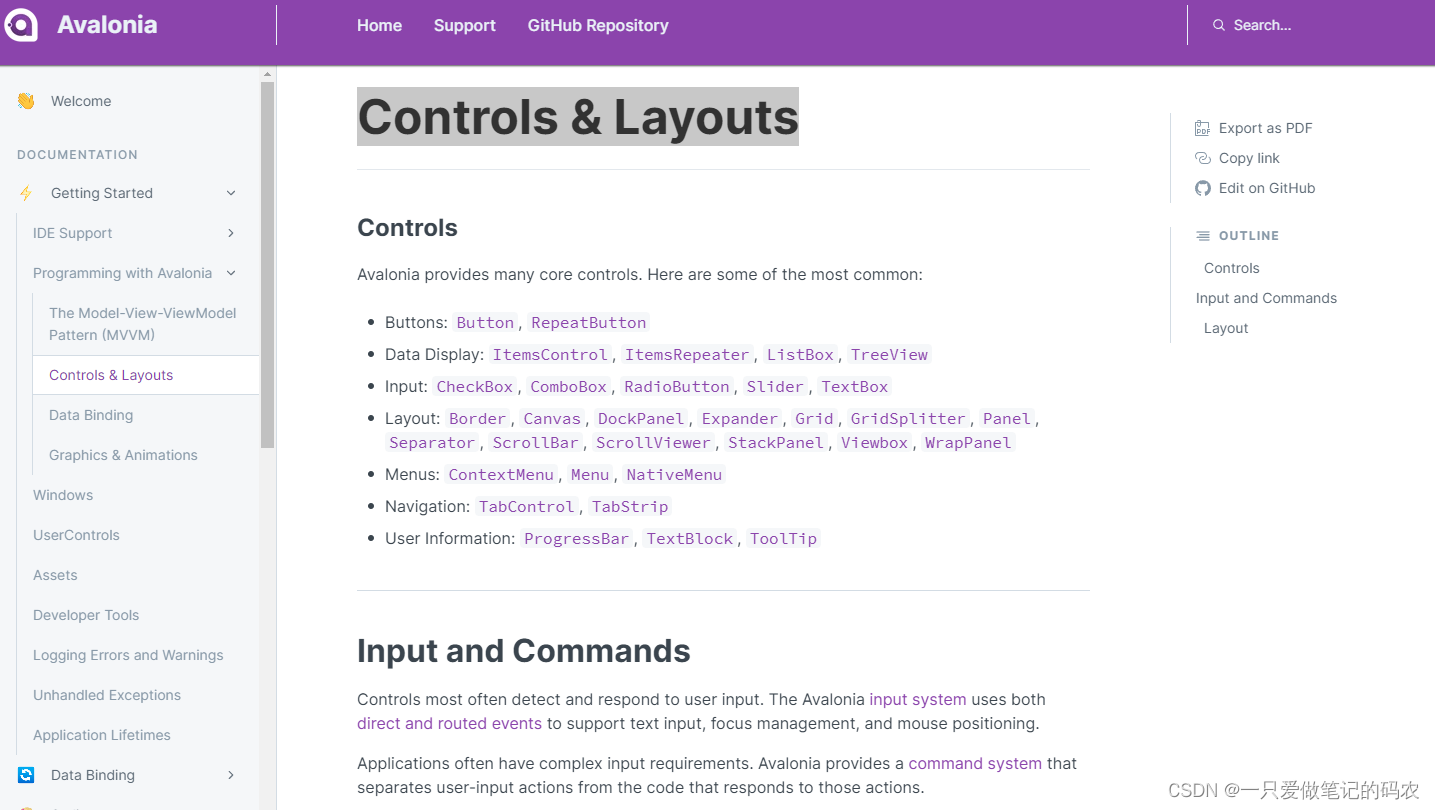
Controls & Layouts
这节主要是介绍了它支持的主要的控件和布局方式,和WPF差不多
Data Binding
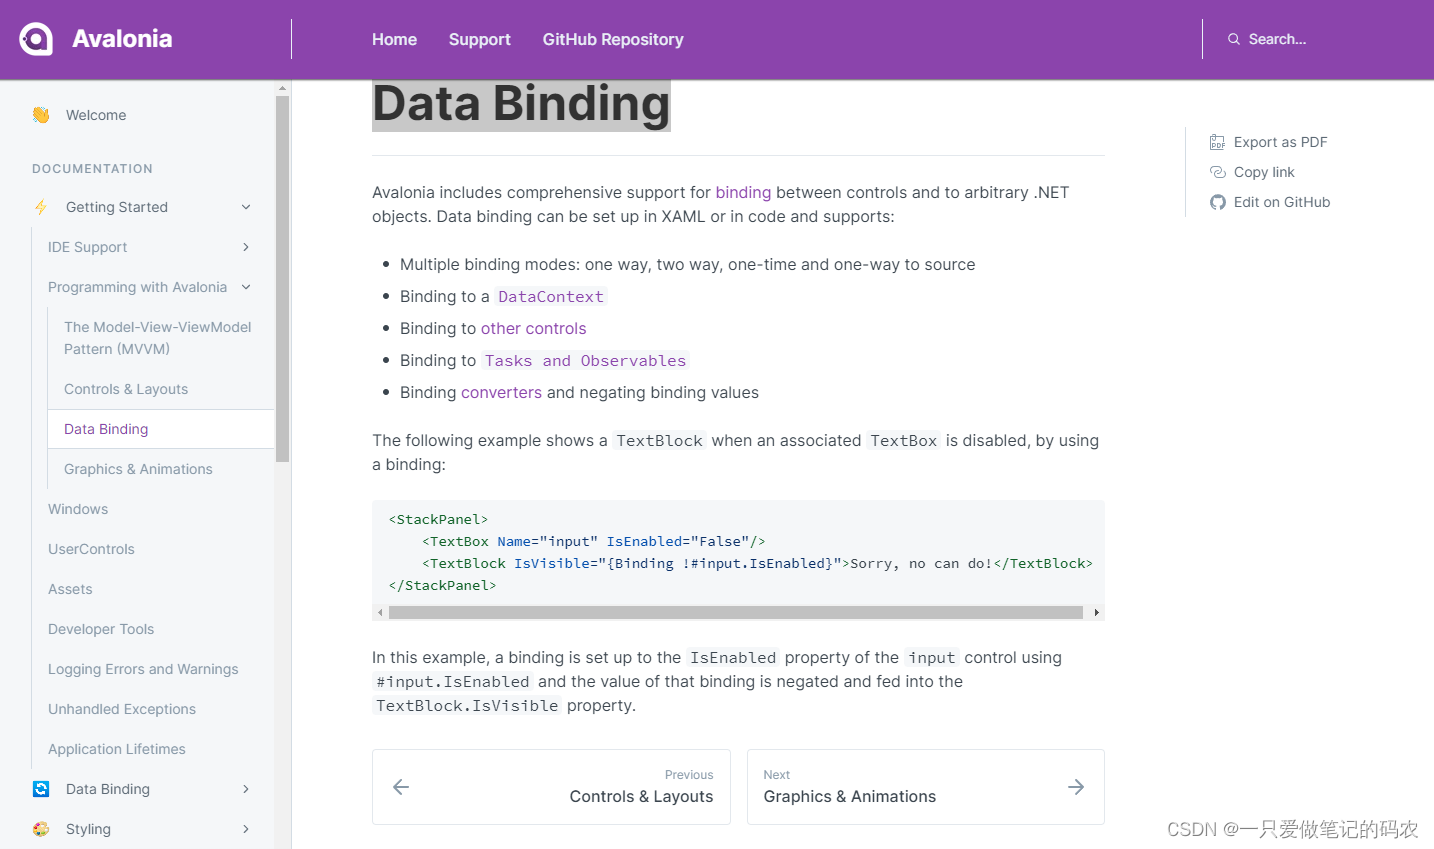
这里只是简单的讲了下数据绑定,这个其实很多内容,后面有专门一章讲这个
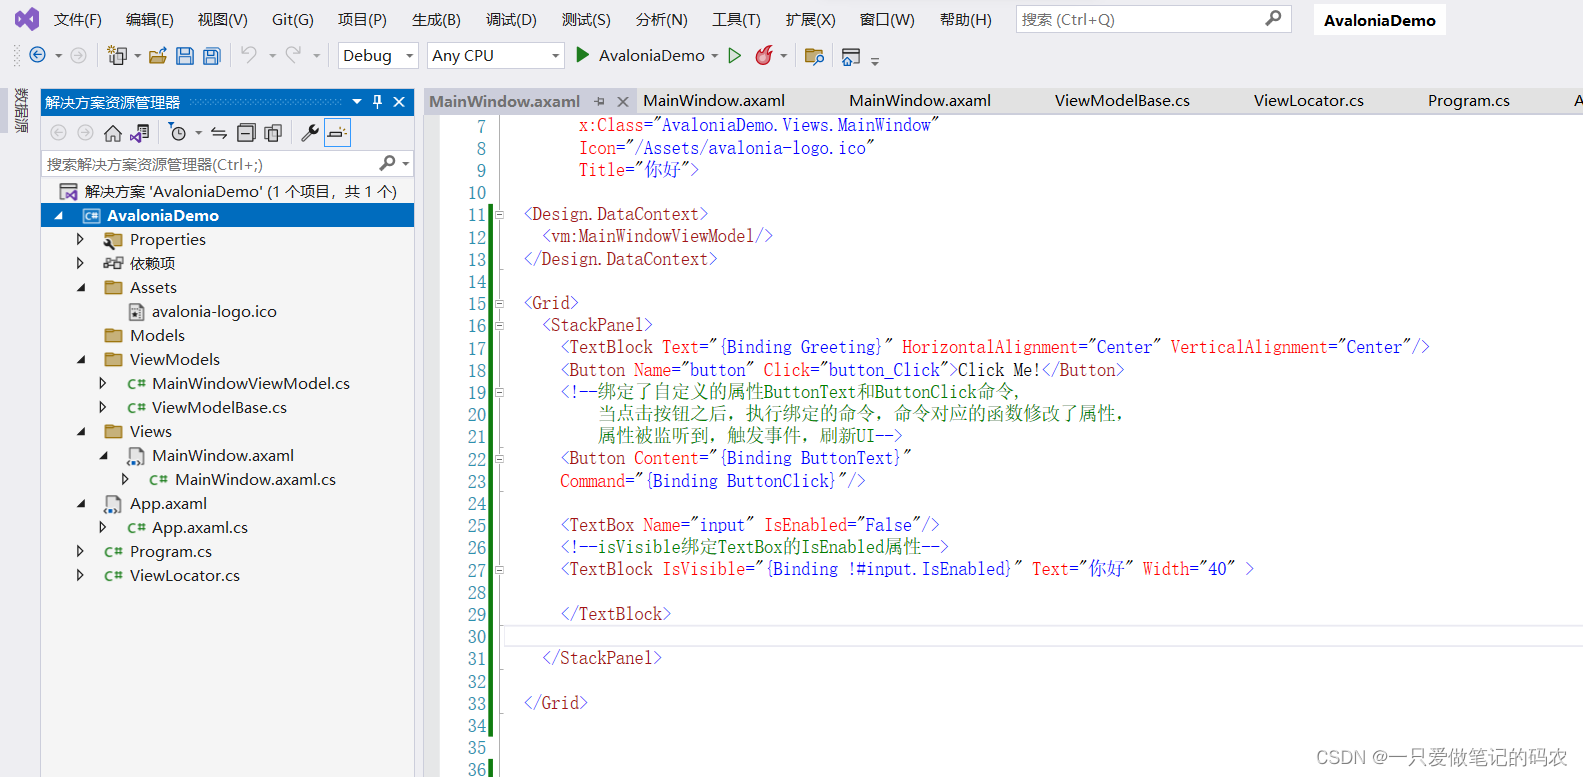
我也试了下打它范例的这段XAML,这种binding我还是第一次用
<StackPanel>
    <TextBox Name="input" IsEnabled="False"/>
    <TextBlock IsVisible="{Binding !#input.IsEnabled}">Sorry, no can do!</TextBlock>
</StackPanel>
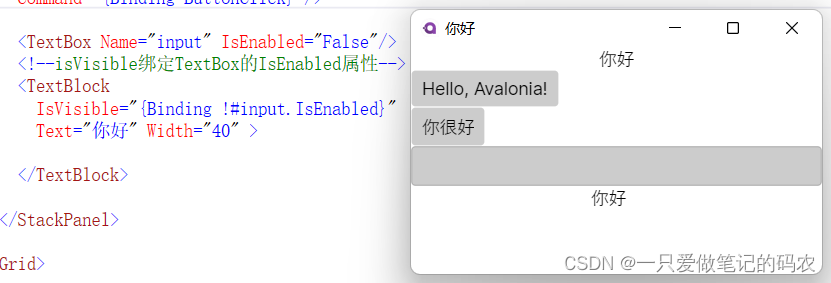
TextBlock的IsVisible属性绑定上面名字为input的IsEnabled的取反,操作一步到位,实际效果也是一样,因为Textbox失能,所以TextBlock可见
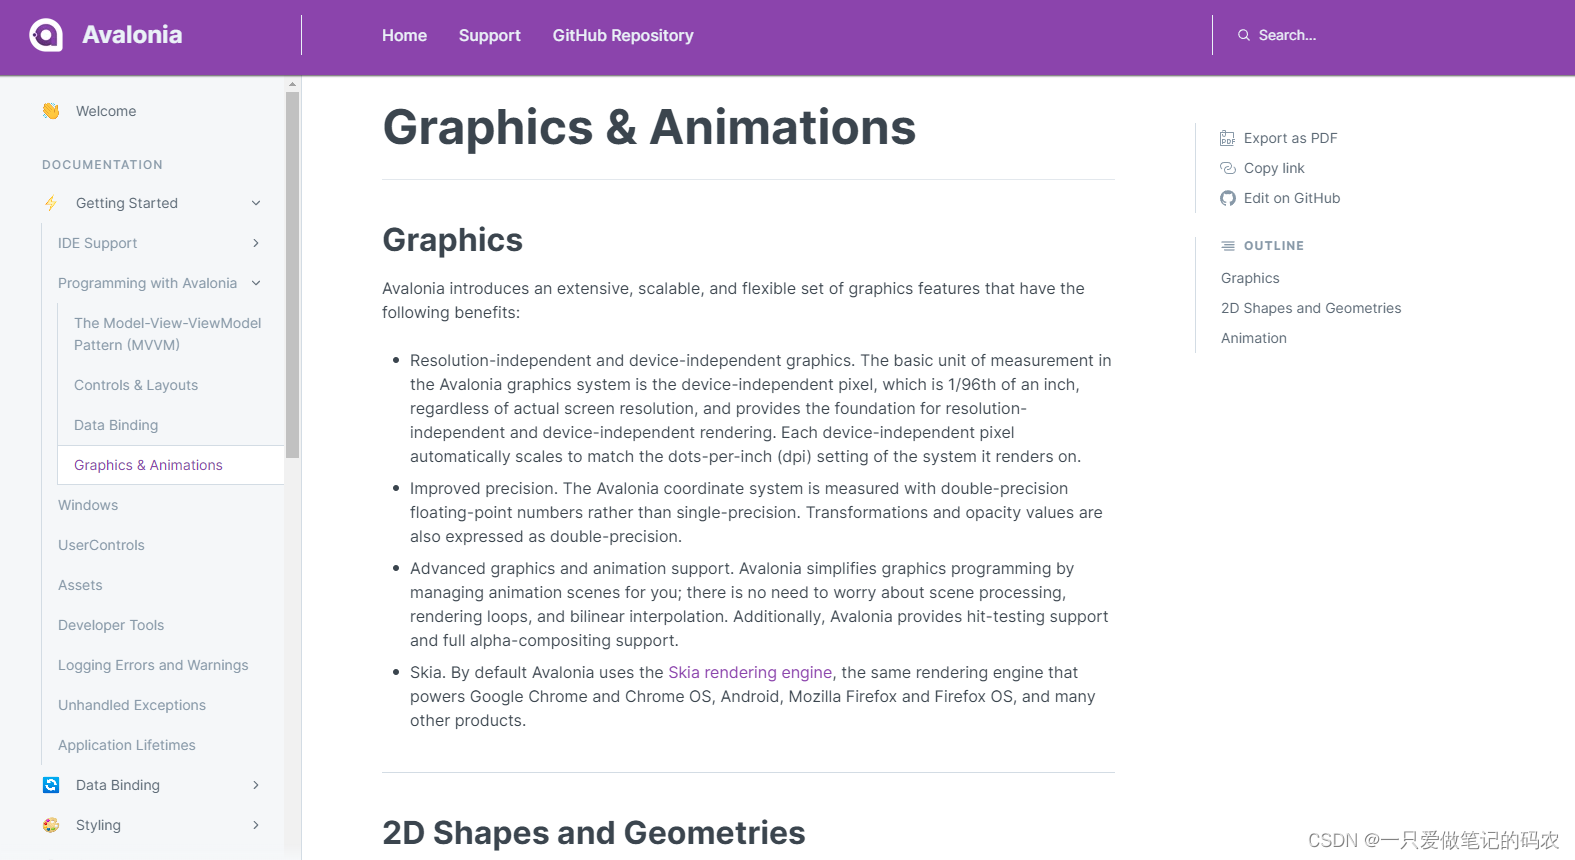
Graphics & Animations
介绍了他们实现动画和图形的优势,巴拉巴拉说了很多,很厉害就是啦,话说上次学WPF,跟着那个教程做了一点点动画就很复杂了,不知道在他们这做体验如何
Windows
讲如何新建窗口

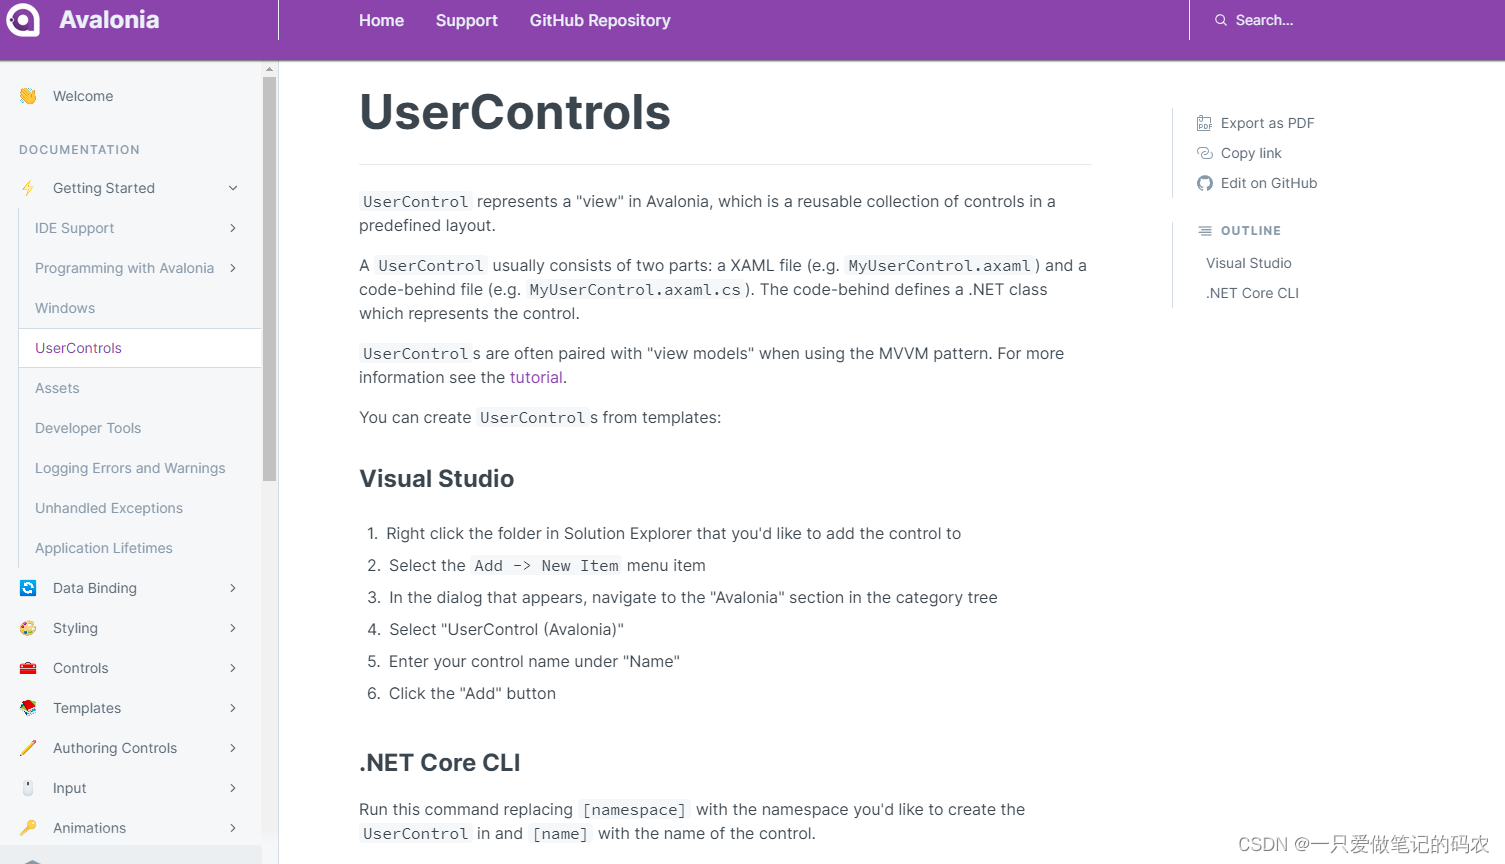
UserControls
讲如何新建用户控件
Assets
这里说的资源如何定义
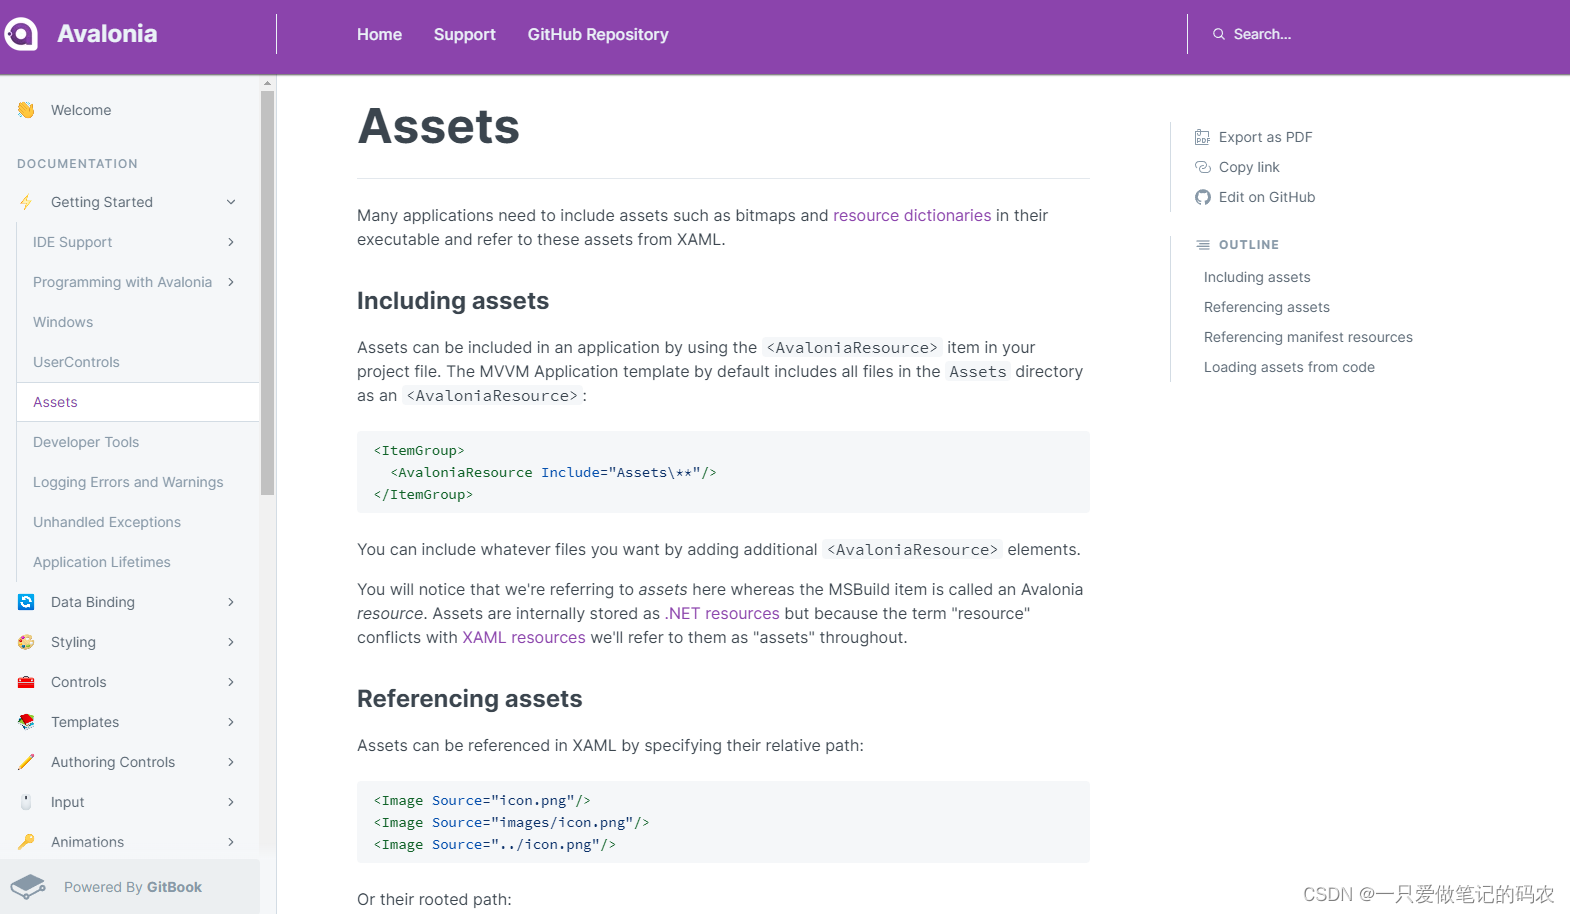
在Avalonia中,资源用标记,注意它内部其实对应的是VS中的资源
<ItemGroup>
  <AvaloniaResource Include="Assets\**"/>
</ItemGroup>
You will notice that we’re referring to assets here whereas the MSBuild item is called an Avalonia resource. Assets are internally stored as .NET resources but because the term “resource” conflicts with XAML resources we’ll refer to them as “assets” throughout.
引用资源可以用相对路径,也可以用文件夹路径这种,还可以引用外部的路径
相对路径
<Image Source="../icon.png"/>
文件夹路径
<Image Source="/Assets/icon.png"/>
外部的路径,注意avares::标记
<Image Source="avares://MyAssembly/Assets/icon.png"/>
另外,它还支持引用别的程序集中的资源,resm:
<<Image Source="resm:MyApp.Assets.icon.png"/>
<Image Source="resm:MyApp.Assets.icon.png?assembly=MyAssembly"/>
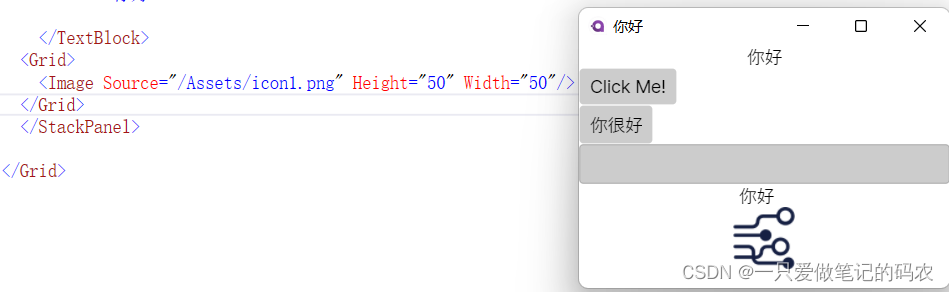
如果需要代码的方式读取资源
var assets = AvaloniaLocator.Current.GetService<IAssetLoader>();
var bitmap = new Bitmap(assets.Open(new Uri(uri)));
我这里就试了试比较容易弄的png图片来引用下
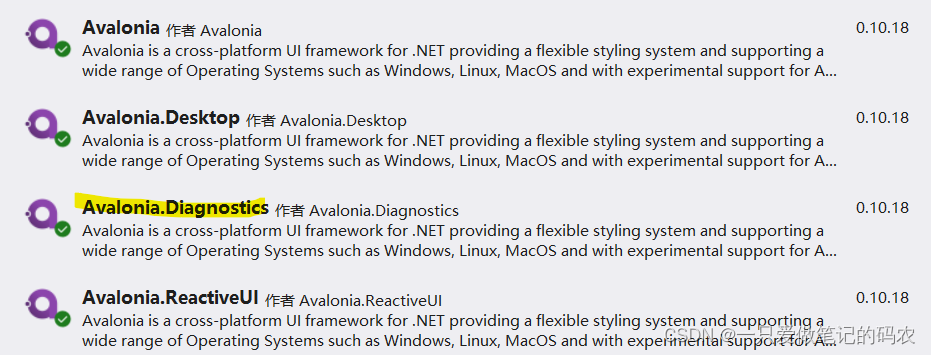
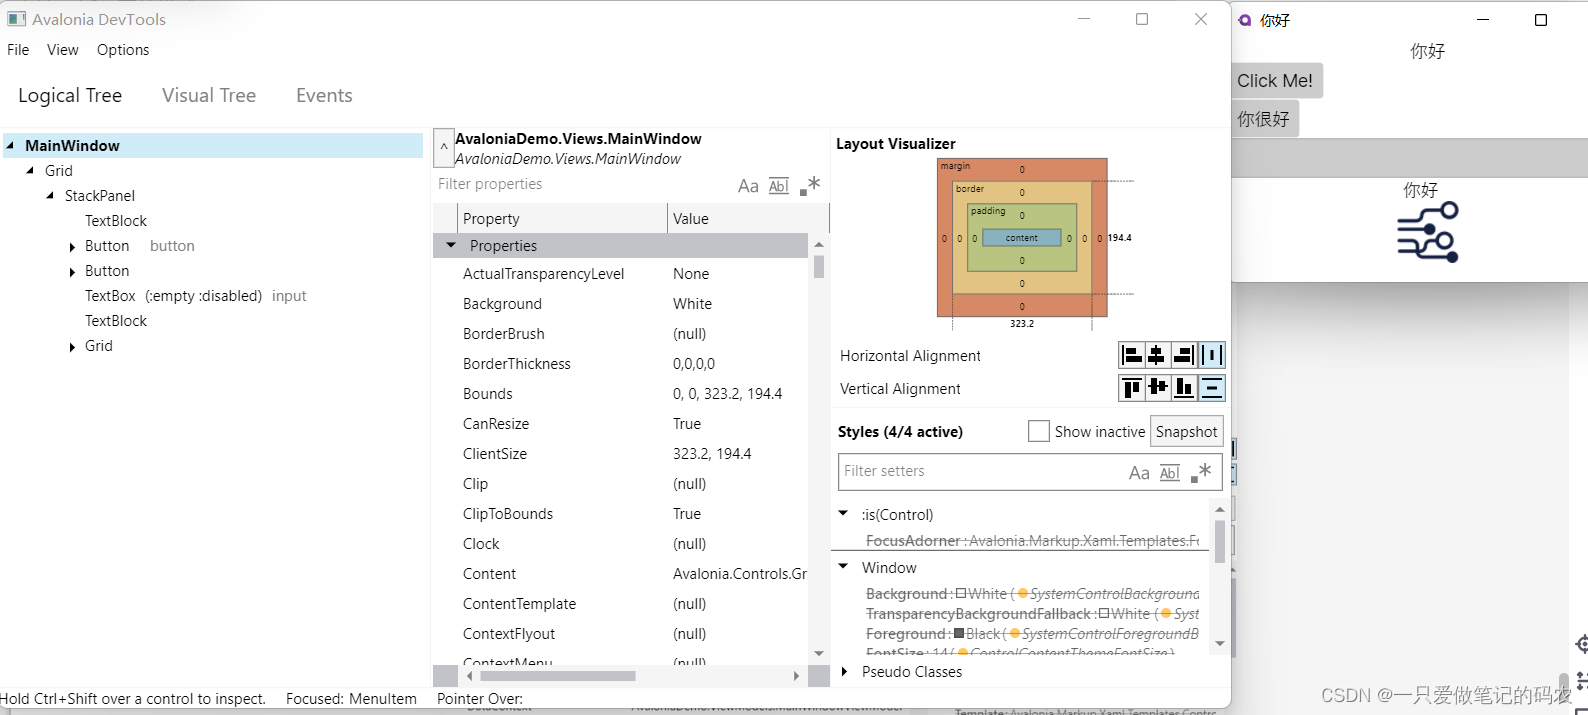
Developer Tools
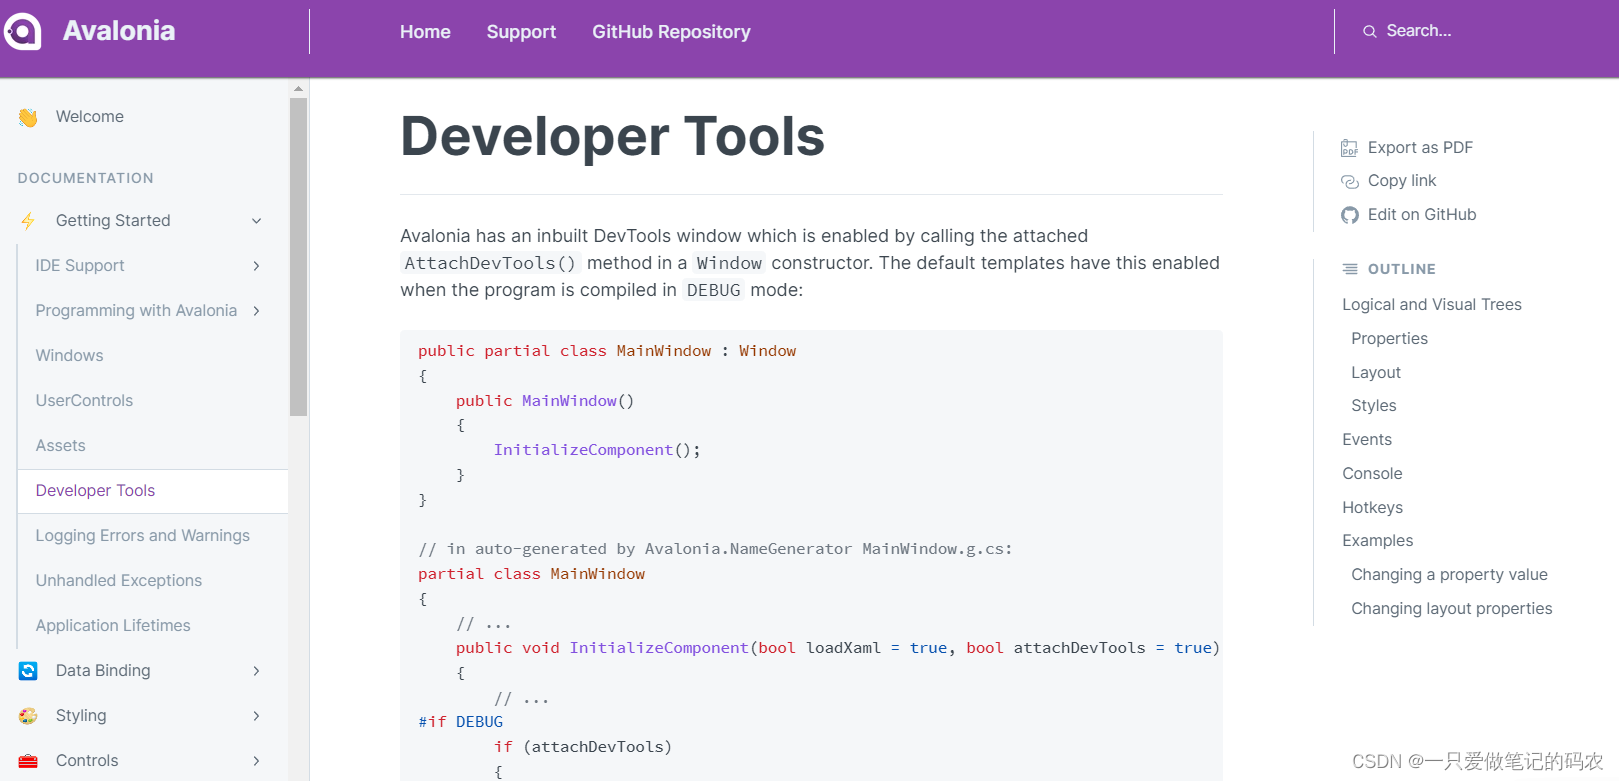
在Avalonia中,他们提供了一个调试工具,这个需要用nuget装黄色标记这个,目前最新的是0.10.18
装了之后,当你以调试方式运行的时候按F12会弹出Avalonia调试小工具(我这么理解)
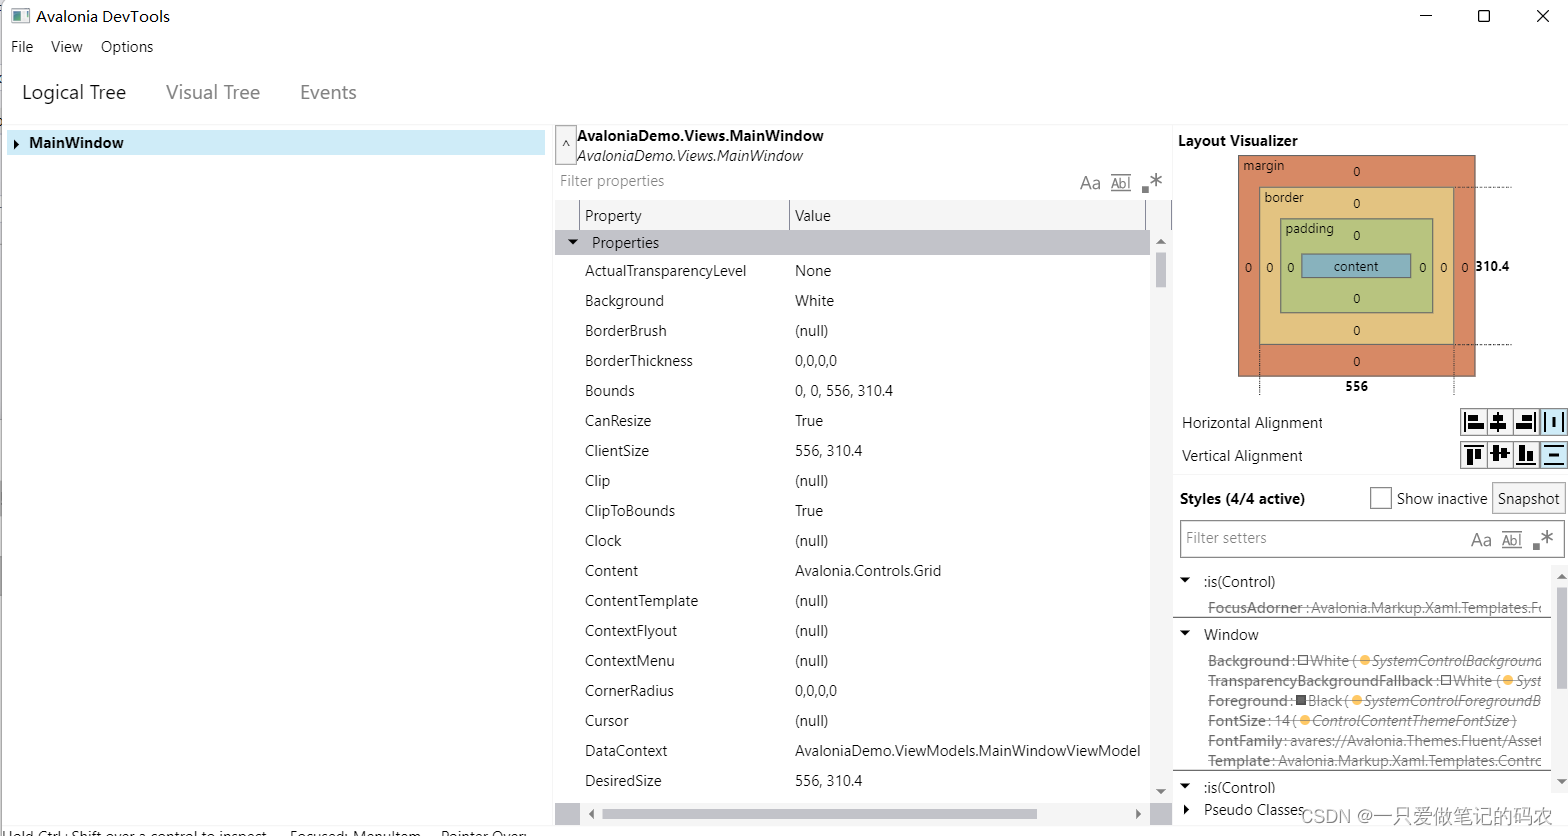
这感觉有点像它WPF那几个分散的调试时候看的工具整合在了一起,我觉得挺好
DEBUG模式下面才有,RELEASE模式下面编译出来的就没有这个功能了
功能很多,具体看官方文档吧,我这里就不细写了
从目前来看,可以看组件的属性,看事件,可以看挺多东西的
Logging Errors and Warnings
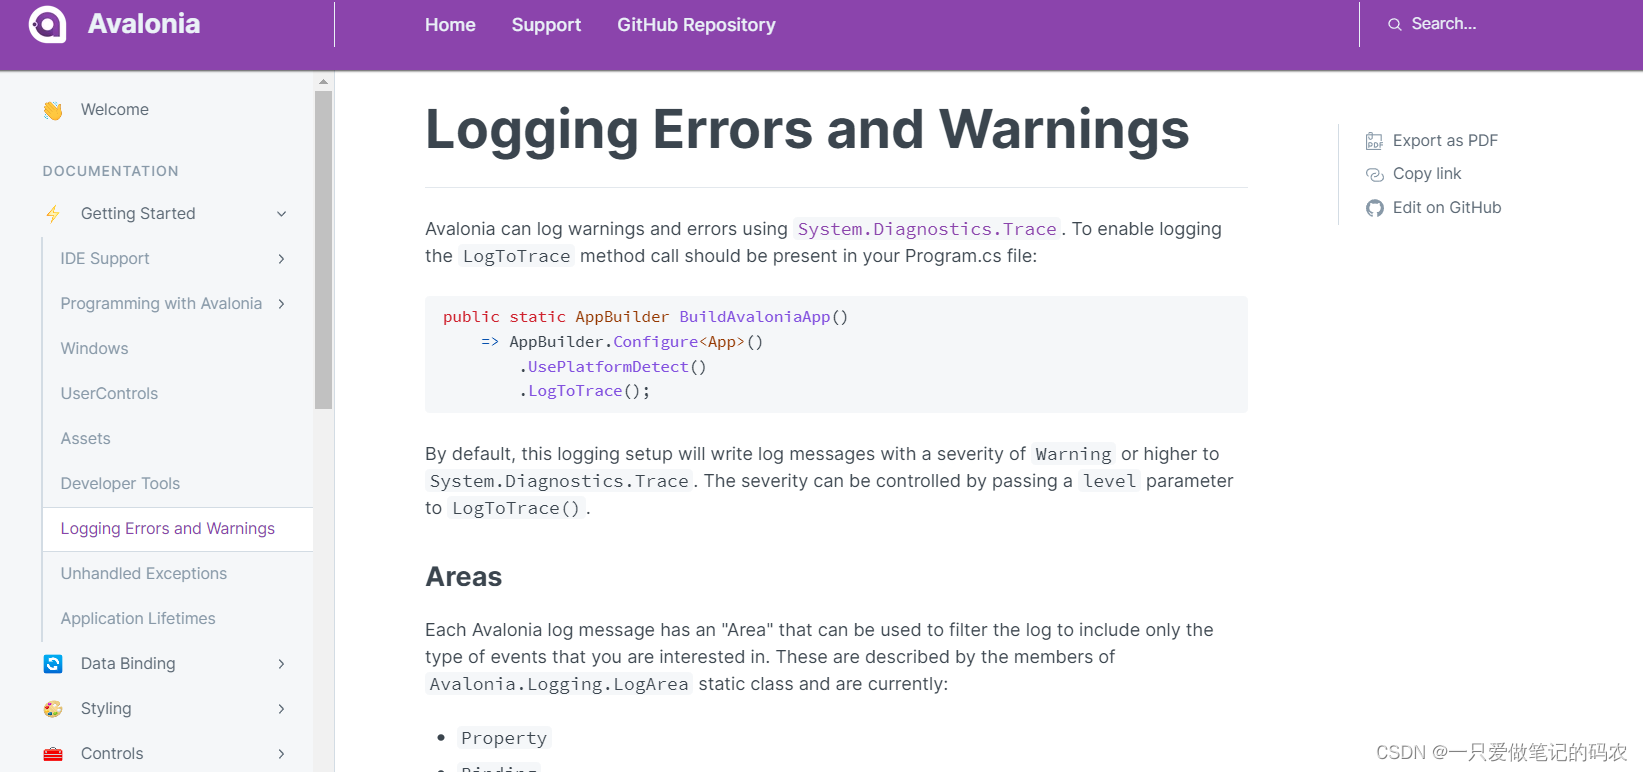
这里说Avalonia有自带log系统,会将log信息输出到System.Diagnostics.Trace,这个输出log的范围和等级还是可以指定的.
public static AppBuilder BuildAvaloniaApp()
    => AppBuilder.Configure<App>()
        .UsePlatformDetect()
        .LogToTrace(LogEventLevel.Debug, LogArea.Property, LogArea.Layout);
官网说可以指定的范围有:
- Property
- Binding
- Animations
- Visual
- Layout
- Control
Unhandled Exceptions
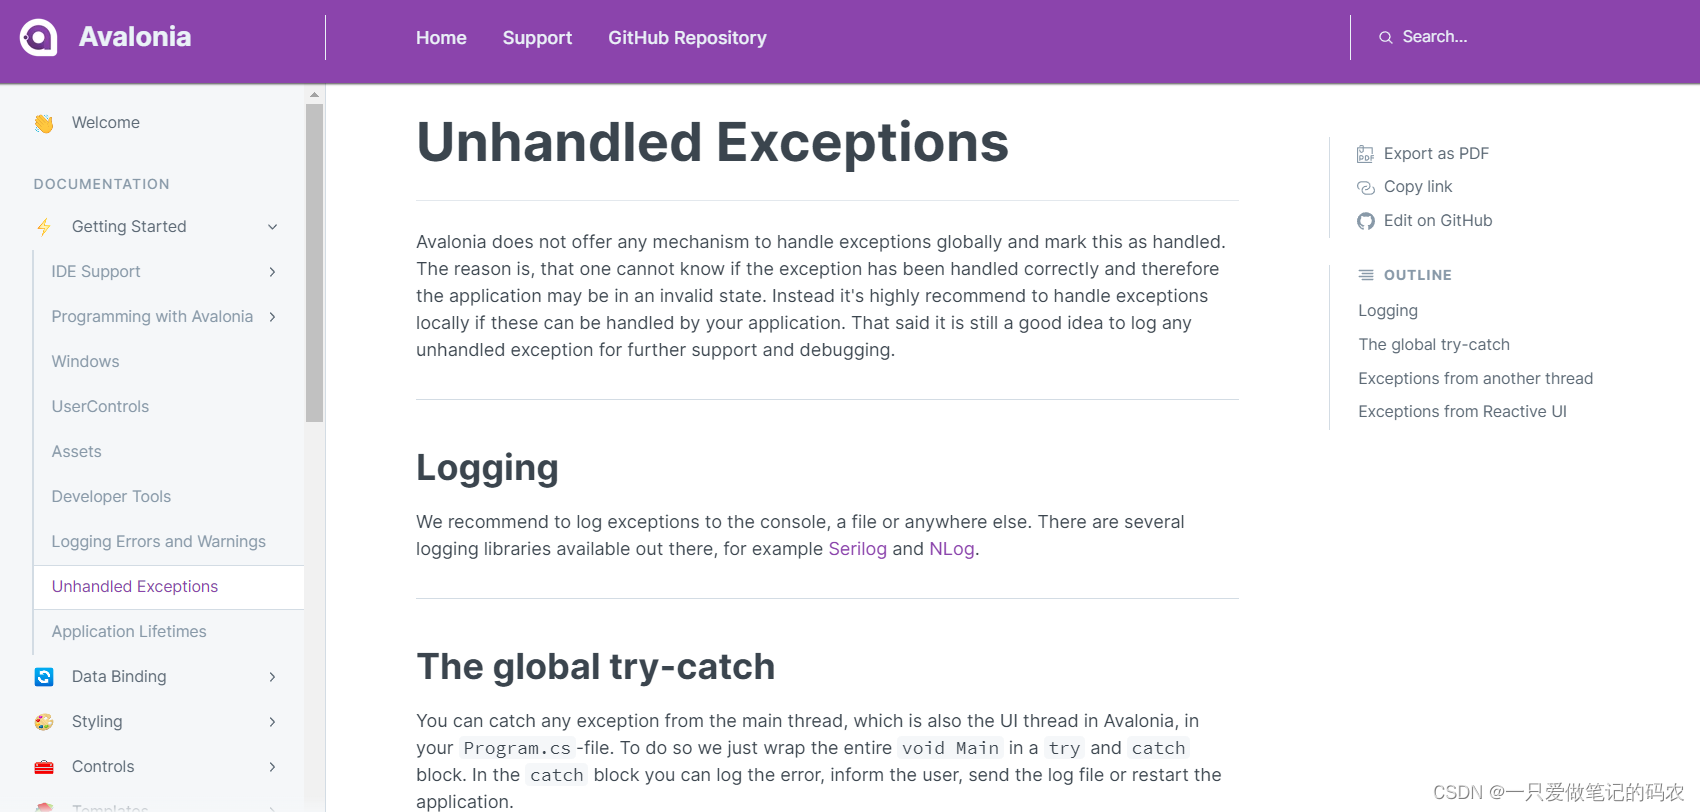
这里说Avalonia没有提供异常捕捉机制,官方建议开发者自己整个log库(Serilog or NLog)
开发者可以用一个大try-catch包住main函数中Avalonia相关的内容,然后异常捕捉到了就把信息输出到Log
// File: Program.cs

public static void Main(string[] args)
{
    try
    {
        // prepare and run your App here
        BuildAvaloniaApp()
            .StartWithClassicDesktopLifetime(args);
    }
    catch (Exception e)
    {
        // here we can work with the exception, for example add it to our log file
        Log.Fatal(e, "Something very bad happened");
    }
    finally
    {
        // This block is optional.
        // Use the finally-block if you need to clean things up or similar
        Log.CloseAndFlush();
    }
}
对于用Task开出的其他线程中的异常
可以设置TaskScheduler.UnobservedTaskException
对于ReactiveUI中相关的异常,可以监听RxApp.DefaultExceptionHandler.
Application Lifetimes
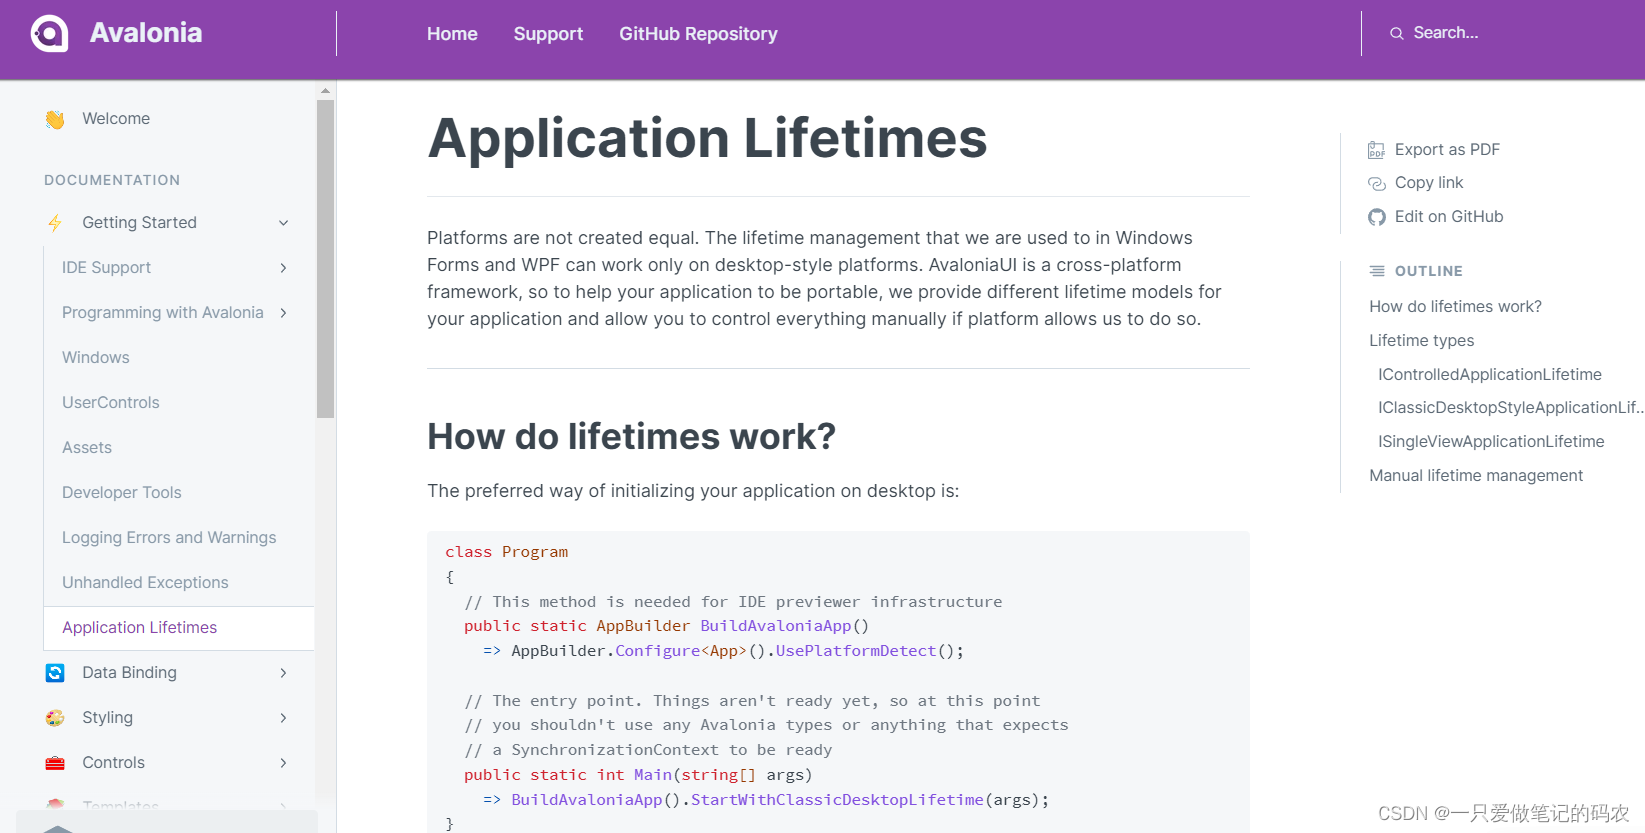
应用程序生命期
这个是跨平台框架需要考虑的问题,就是不同平台对于UI有各自不同的处理,这部分代码就是处理这个差异的问题的。
看它工程中的Program.cs中,UsePlatformDetect是不是处理不同平台适配的
    internal class Program
    {
        // Initialization code. Don't use any Avalonia, third-party APIs or any
        // SynchronizationContext-reliant code before AppMain is called: things aren't initialized
        // yet and stuff might break.
        [STAThread]
        public static void Main(string[] args) => BuildAvaloniaApp()
            .StartWithClassicDesktopLifetime(args);

        // Avalonia configuration, don't remove; also used by visual designer.
        public static AppBuilder BuildAvaloniaApp()
            => AppBuilder.Configure<App>()
                .UsePlatformDetect()
                .LogToTrace()
                .UseReactiveUI();
    }
看工程中的App.axaml.cs,官网说当主窗口类完成设置之后会到Application类,然后待框架加载完毕,会调用OnFrameworkInitializationCompleted,这里便会根据不同的 Application Lifetimes做不同的处理。
    public partial class App : Application
    {
        public override void Initialize()
        {
            AvaloniaXamlLoader.Load(this);
        }

        public override void OnFrameworkInitializationCompleted()
        {
            if (ApplicationLifetime is IClassicDesktopStyleApplicationLifetime desktop)
            {
                desktop.MainWindow = new MainWindow
                {
                    DataContext = new MainWindowViewModel(),
                };
            }

            base.OnFrameworkInitializationCompleted();
        }
    }
那具体有哪些 Application Lifetimes的
- IControlledApplicationLifetime
- IClassicDesktopStyleApplicationLifetime
- ISingleViewApplicationLifetime
IControlledApplicationLifetime
由StartWithClassicDesktopLifetime或者StartLinuxFramebuffer提供
这个模式下允许开发者订阅启动和退出事件,还可以通过调用关闭方法直接关掉程序,并提供返回值。
IClassicDesktopStyleApplicationLifetime
由StartWithClassicDesktopLifetime提供
这个模式和WPF的模式是一样的。提供下面这三个模式
- OnLastWindowClose
- OnMainWindowClose
- OnExplicitShutdown
ISingleViewApplicationLifetime
StartLinuxFramebuffer或移动平台提供
这个模式下没有PC桌面下的窗口的概念,同时仅允许显示一个View在屏幕上
最后它说,也不强制你用它提供的lifetime管理,你也可以自己管理
绑定
DataContext

每一个控件都有DataContext,描述当控件在绑定的时候从哪开始搜索值,一般都是设置在最顶部的控件,譬如Window,在其之前的子控件会继承这个DataContext。
当使用MVVM开发的时候,DataContext一般都是ViewModel的变量
看看App.cs,官网说是在Program.cs,可能后来变了
		public override void OnFrameworkInitializationCompleted()
        {
            if (ApplicationLifetime is IClassicDesktopStyleApplicationLifetime desktop)
            {
                desktop.MainWindow = new MainWindow
                {
                    DataContext = new MainWindowViewModel(),
                };
            }

            base.OnFrameworkInitializationCompleted();
        }
这么写就是让Mainwindow下的控件都从MainWindowViewModel 找绑定。
那么如果开发者去绑定DataContext,那么父控件的DataContext会当作绑定的源,这个怎么试一下我没研究出来,不知道效果是怎么样的
<Window>
    <!-- Will bind `DataContext` to `Window.DataContext.Content -->
    <StackPanel DataContext="{Binding Content}"/>
</Window>
基于data template会显示内容的控件会自动将DataContext设置好
    <ContentControl DataContext="{Binding Content}">
        <ContentControl.ContentTemplate>
            <DataTemplate>
                <!-- Will bind `Text` to `Window.DataContext.Content.Header -->
                <TextBlock Text="{Binding Header}"/>
            </DataTemplate>
        </ContentControl.ContentTemplate>
    </ContentControl>
Change Notifications
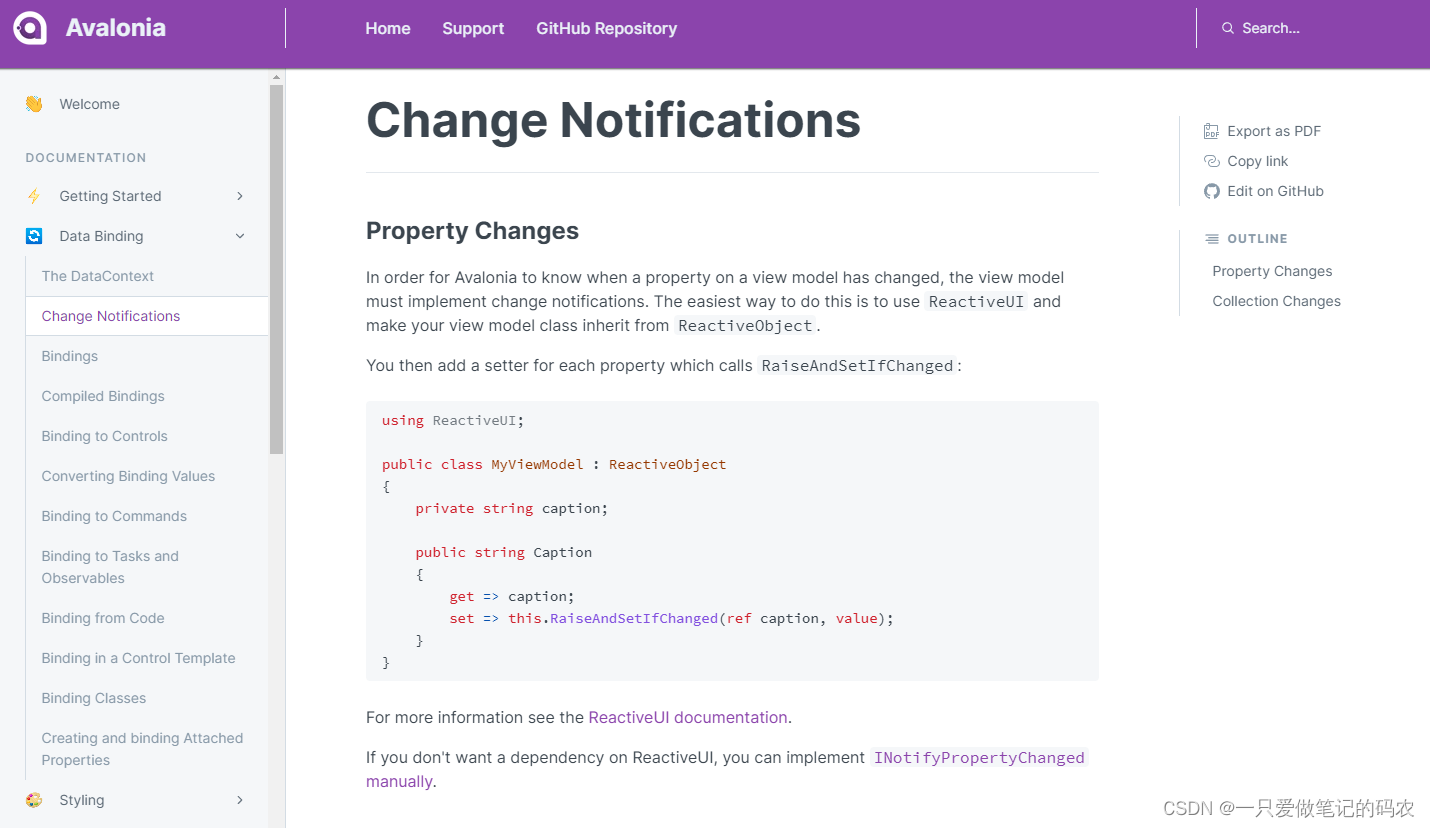
属性改变,为了让ViewModel将属性变化传递到界面,最方便的弄法就是用ReactiveUI的RaiseAndSetIfChanged函数,将自己写的类继承 ReactiveObject,当然也可以自己写 INotifyPropertyChanged 接口
using ReactiveUI;

public class MyViewModel : ReactiveObject
{
    private string caption;

    public string Caption
    {
        get => caption;
        set => this.RaiseAndSetIfChanged(ref caption, value);
    }
}
数据集合变化,也就是Collection Changes
这个适合那种一类数据要展示的情况,当然也可以自己写 INotifyCollectionChanged接口
有2种弄法
- ObservableCollection (.NET自带的)
- DynamicData (ReactiveUI)
具体 怎么玩这个集合,可以参考下这个大佬 的帖子
Bindings
从这一节开始,就是讲绑定了,这是重要的内容了。
在Avalonia里,绑定也是写binding关键字弄的,对控件写了绑定之后,后端对应的值发生改变之后,前端的控件就会自动更新。
默认情况下,Binding是绑定Datacontext属性的
<!-- Binds to the TextBlock's DataContext.Name property -->
<TextBlock Text="{Binding Name}"/>

<!-- Which is the same as ('Path' is optional) -->
<TextBlock Text="{Binding Path=Name}"/>

<!-- Binds to the TextBlock's DataContext property -->
<TextBlock Text="{Binding}"/>

<!-- Which is the same as -->
<TextBlock Text="{Binding .}"/>
绑定路径可以是单一属性或者是属性链。例如DataContext中有Student这个属性,属性下还有一个Name的属性。于是乎就可以这样写绑定。
<TextBlock Text="{Binding Student.Name}"/>
<!-- 如果Students是一个数组或者链表 -->
<TextBlock Text="{Binding Students[0].Name}"/>
绑定有不同的模式
| 模式 | 说明 |
|---|---|
| 单向 | 数据源的变化会影响到目标控件 |
| 双向 | 数据源的变化会影响到目标控件,反过来目标控件的变化会影响到数据源 |
| 单次 | 数据源的变化会在初始化的时候影响到目标控件,后面就不会了 |
| 单向到源 | 目标控件的变化会影响到数据源 |
默认的模式是单向
一个官方的例子
这里官方提供了一个例子,我下了下来运行了下
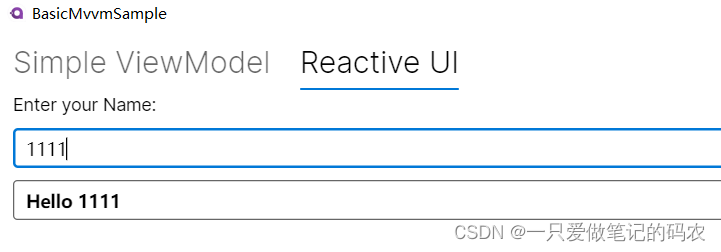
例子其实就是前端界面输入字符串之后,传递到后端,又反映到前端界面中
它提供了两种实现的方式
一个是使用INotifyCollectionChanged
另一个是使用ReactiveUI的方式
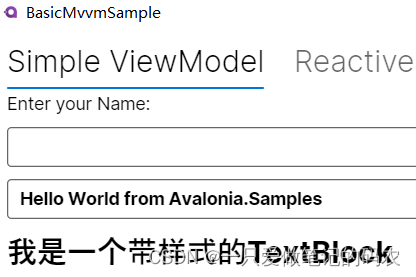
Main主界面xmal
它写了Tab区分两种方式
上面绑定Name,下面绑定Greeting
根据不同的方式,修改了StackPanel 的DataContext,让他去各自不同的ViewModel去找数据绑定
<Window xmlns="https://github.com/avaloniaui"
        xmlns:x="http://schemas.microsoft.com/winfx/2006/xaml"
        xmlns:vm="using:BasicMvvmSample.ViewModels"
        xmlns:d="http://schemas.microsoft.com/expression/blend/2008"
        xmlns:mc="http://schemas.openxmlformats.org/markup-compatibility/2006"
        mc:Ignorable="d" d:DesignWidth="800" d:DesignHeight="450"
        x:CompileBindings="True"
		x:DataType="vm:MainWindowViewModel"
        x:Class="BasicMvvmSample.Views.MainWindow"
        Icon="/Assets/avalonia-logo.ico"
        Title="BasicMvvmSample">

	<!--We are using Compiled bindings. This is not mandotory but makes life easier. Read more about it here:-->
	<!-- https://docs.avaloniaui.net/docs/data-binding/compiledbindings -->

	<Design.DataContext>
        <vm:MainWindowViewModel/>
    </Design.DataContext>

	<TabControl>

		<!-- Our Simplie ViewModel -->
		<TabItem Header="Simple ViewModel" >
			<StackPanel DataContext="{Binding SimpleViewModel}" Spacing="10">
				<TextBlock>Enter your Name:</TextBlock>
				<TextBox Text="{Binding Name}" />
				<TextBox Text="{Binding Greeting, Mode=OneWay}"
						 IsReadOnly="True"
						 FontWeight="Bold" />
			</StackPanel>
		</TabItem>

		<!-- Our ReactiveViewModel -->
		<TabItem Header="Reactive UI" >
			<StackPanel DataContext="{Binding ReactiveViewModel}" Spacing="10">
				<TextBlock>Enter your Name:</TextBlock>
				<TextBox Text="{Binding Name}" FontFamily="Microsoft YaHei" />
				<TextBox Text="{Binding Greeting, Mode=OneWay}"
						 IsReadOnly="True"
						 FontWeight="Bold" FontFamily="Microsoft YaHei"  />
			</StackPanel>
		</TabItem>

	</TabControl>
</Window>
使用INotifyCollectionChanged的方式
手写的部分就很多了,用事件做的比较传统的方法
前端上面的文本框绑定的是Name,下面的文本框绑定Greeting,然后Greeting返回的值又和Name有关系
using System.ComponentModel;
using System.Runtime.CompilerServices;

namespace BasicMvvmSample.ViewModels
{
    // This is our simple ViewModel. We need to implement the interface "INotifyPropertyChanged"
    // in order to notify the View if any of our properties changed.
    public class SimpleViewModel : INotifyPropertyChanged
    {
        // This event is implemented by "INotifyPropertyChanged" and is all we need to inform
        // our View about changes.
        public event PropertyChangedEventHandler? PropertyChanged;

        // For convinience we add a method which will raise the above event.
        private void RaisePropertyChanged([CallerMemberName] string? propertyName = null)
        {
            PropertyChanged?.Invoke(this, new PropertyChangedEventArgs(propertyName));
        }

        // ---- Add some Properties ----

        private string? _Name; // This is our backing field for Name

        public string? Name
        {
            get
            {
                return _Name;
            }
            set
            {
                // We only want to update the UI if the Name actually changed, so we check if the value is actually new
                if (_Name != value)
                {
                    // 1. update our backing field
                    _Name = value;

                    // 2. We call RaisePropertyChanged() to notify the UI about changes.
                    // We can omit the property name here because [CallerMemberName] will provide it for us.
                    RaisePropertyChanged();

                    // 3. Greeting also changed. So let's notify the UI about it.
                    RaisePropertyChanged(nameof(Greeting));
                }
            }
        }


        // Greeting will change based on a Name.
        public string Greeting
        {
            get
            {
                if (string.IsNullOrEmpty(Name))
                {
                    // If no Name is provided, use a default Greeting
                    return "Hello World from Avalonia.Samples";
                }
                else
                {
                    // else Greet the User.
                    return $"Hello {Name}";
                }
            }
        }
    }
}
ReactiveUI的方式
这个就很简洁了,ReactiveViewModel的构造函数里,直接通过WhenAnyValue接口订阅Name属性的变化,之后触发订阅的事件,RaisePropertyChanged,返回Greeting
using ReactiveUI;
using System;
using System.Collections.Generic;
using System.Linq;
using System.Text;
using System.Threading.Tasks;

namespace BasicMvvmSample.ViewModels
{
    // Instead of implementing "INotifyPropertyChanged" on our own we use "ReachtiveObject" as
    // our base class. Read more about it here: https://www.reactiveui.net
    public class ReactiveViewModel : ReactiveObject
    {
        public ReactiveViewModel()
        {
            // We can listen to any property changes with "WhenAnyValue" and do whatever we want in "Subscribe".
            this.WhenAnyValue(o => o.Name)
                .Subscribe(o => this.RaisePropertyChanged(nameof(Greeting)));
        }

        private string? _Name; // This is our backing field for Name

        public string? Name
        {
            get
            {
                return _Name;
            }
            set
            {
                // We can use "RaiseAndSetIfChanged" to check if the value changed and automatically notify the UI
                this.RaiseAndSetIfChanged(ref _Name, value);
            }
        }

        // Greeting will change based on a Name.
        public string Greeting
        {
            get
            {
                if (string.IsNullOrEmpty(Name))
                {
                    // If no Name is provided, use a default Greeting
                    return "Hello World from Avalonia.Samples";
                }
                else
                {
                    // else Greet the User.
                    return $"Hello {Name}";
                }
            }
        }
    }
}
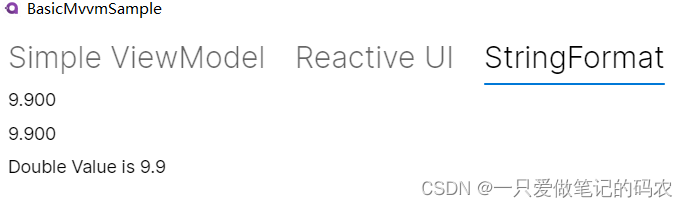
StringFormat
可以在绑定的时候对绑定的数据做些字符串格式的修改
例如
<!-- Option 1: Use curly braces {} to escape string format -->
<TextBlock Text="{Binding FloatValue, StringFormat={}{0:0.0}}" />
<!-- Option 2: Use backslash \{ to escape string format -->
<TextBlock Text="{Binding FloatValue, StringFormat=\{0:0.0\}" />
<!-- Option 3: If the string format does not start with {0}, you don't need to escap --!>
<!-- Note: If you have a whitespace in your string format, surround it with single quotes '' --!>
<TextBlock Text="{Binding Animals.Count, StringFormat='I have {0} animals.'}" />
与WPF的差异

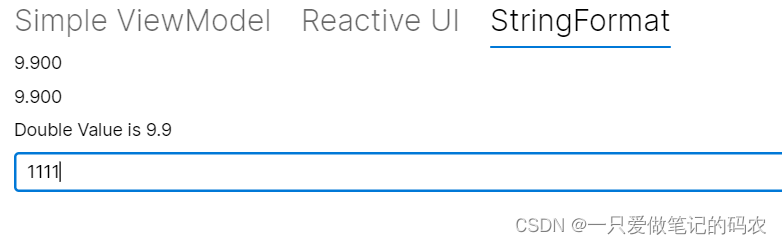
基于官方那个例子,我改了下
试了试这个,很简单就是绑定一个固定的小数9.9
		<TabItem Header="StringFormat">
			<StackPanel DataContext="{Binding StringFormatViewModel}" Spacing="10">
				<TextBlock Text="{Binding DoubleValue,StringFormat={}{0:0.000}}"/>
				<TextBlock Text="{Binding DoubleValue,StringFormat=\{0:0.000\}}"/>
				<TextBlock Text="{Binding DoubleValue,StringFormat='Double Value is {0}'}"/>
			</StackPanel>
		</TabItem>
模仿前面两个的写法,写了一个将小数转换成字符串显示的方式。
Converting Binding Values
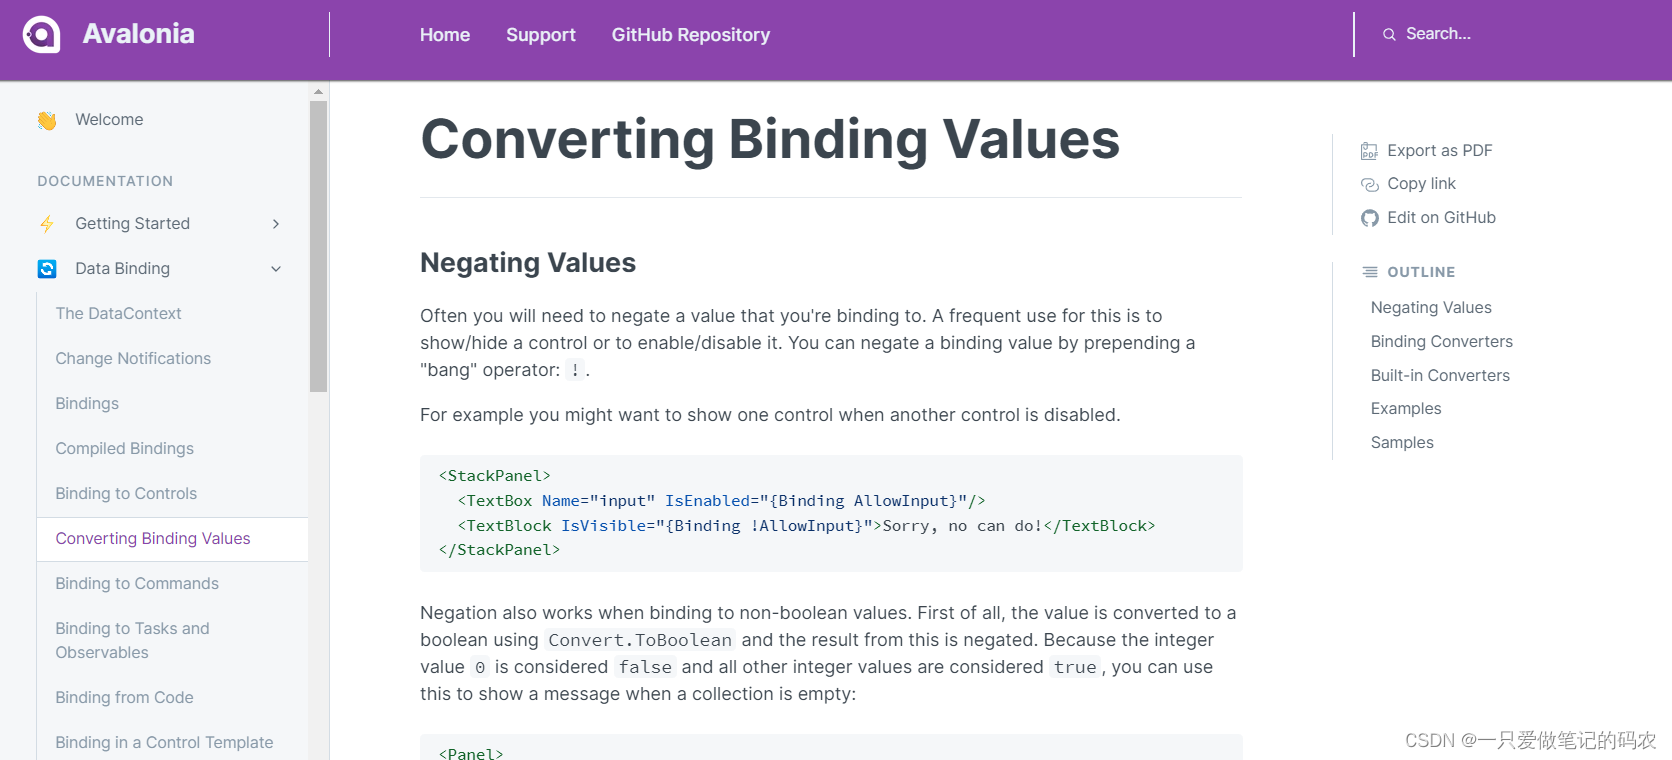
值转换器,最常用的就是取反的操作
例如如果希望一个控件使能的情况下,使另一个控件看不见的话,
<StackPanel>
  <TextBox Name="input" IsEnabled="{Binding AllowInput}"/>
  <TextBlock IsVisible="{Binding !AllowInput}">Sorry, no can do!</TextBlock>
</StackPanel>
这里的取反并不需要一定绑定布尔值,也可以绑定非布尔值。此时值会通过Convert.ToBoolean转换。例如整形数为正是true,0为false
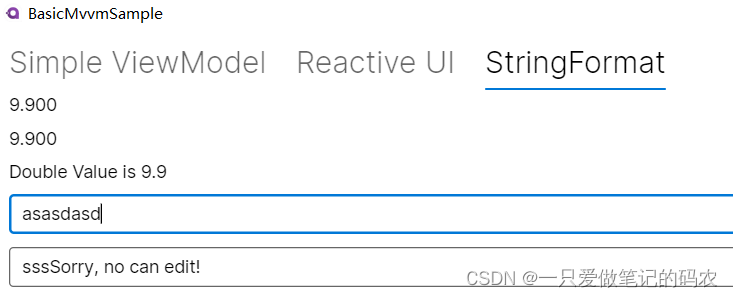
例如我这样写,绑定一个字符串属性,并赋了一个有效初始值,取它的长度作为绑定值,然后取反
	<TextBox Name="input" IsEnabled="{Binding AllowInputStr.Length}"/>
	<TextBox  IsEnabled="{Binding !AllowInputStr.Length}">Sorry, no can edit!</TextBox>

当然也可以取反两次~
	<TextBox Name="input" IsEnabled="{Binding AllowInputStr.Length}"/>
	<TextBox IsEnabled="{Binding !!AllowInputStr.Length}">Sorry, no can edit!</TextBox>
绑定转换器
这个写法上和WPF是一样的
<Window xmlns="https://github.com/avaloniaui"
        xmlns:x="http://schemas.microsoft.com/winfx/2006/xaml"
        xmlns:local="clr-namespace:ExampleApp;assembly=ExampleApp">

  <Window.Resources>
    <local:MyConverter x:Key="myConverter"/>
  </Window.Resources>

  <TextBlock Text="{Binding Value, Converter={StaticResource myConverter}}"/>
</Window>
内建的转换器
Avalonia内部支持的转换器如下:
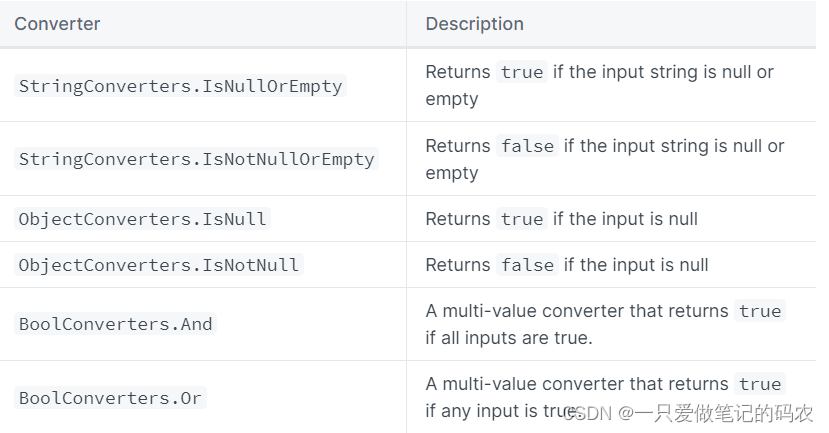
我编写了一个试了试
<TextBox Text="{Binding AllowInputStr}" IsEnabled="{Binding AllowInputStr,Converter={x:Static StringConverters.IsNullOrEmpty}}"/>
<TextBox Text="{Binding AllowInputStr}" IsEnabled="{Binding AllowInputStr,Converter={x:Static StringConverters.IsNotNullOrEmpty}}"/>
<TextBox Text="{Binding AllowInputStr}" IsEnabled="{Binding AllowObj,Converter={x:Static ObjectConverters.IsNull}}"/>
<TextBox Text="{Binding AllowInputStr}" IsEnabled="{Binding AllowObj,Converter={x:Static ObjectConverters.IsNotNull}}"/>
也是利用之前的属性,我加了一个object变量,给它赋值了一个字符串初值。

Binding to Commands
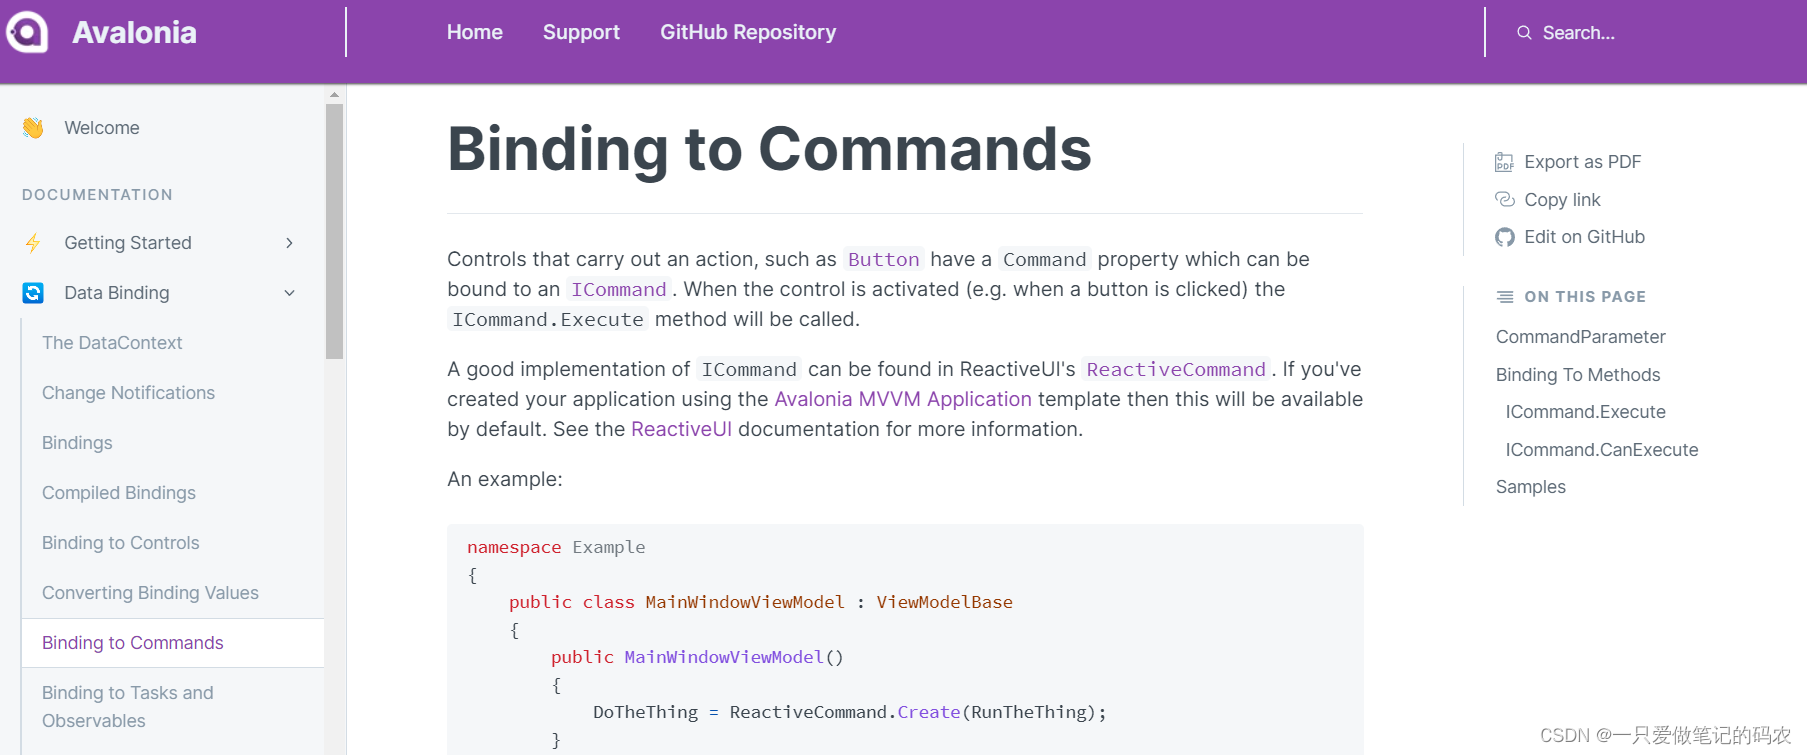
这一讲说的是命令功能,某些控件可以触发命令,例如按钮它是有Command属性的,继承了ICommand,只要调用ICommand.Execute就可以调用命令了
在Avalonia中是使用ReactiveUI的 ReactiveCommand实现Command的
看下面这个例子,一个按钮绑定命令
namespace Example
{
    public class MainWindowViewModel : ViewModelBase
    {
        public MainWindowViewModel()
        {
            DoTheThing = ReactiveCommand.Create(RunTheThing);//创建Command
        }
		//这个应该就是ReactiveCommand实现Command的变量
        public ReactiveCommand<Unit, Unit> DoTheThing { get; }

        void RunTheThing()
        {
            // 命令的实现
        }
    }
}
<Window xmlns="https://github.com/avaloniaui">
    <Button Command="{Binding DoTheThing}">Do the thing!</Button>
</Window>
既然是命令,那么可能就会有参数,也就是CommandParameter
如何让Command带入一个参数呢
看下面这个例子,一个按钮绑定带参数的命令
namespace Example
{
    public class MainWindowViewModel : ViewModelBase
    {
        public MainWindowViewModel()
        {
            DoTheThing = ReactiveCommand.Create<string>(RunTheThing);
        }
		//第一个泛型是填参数类型,第二个泛型填返回值void
        public ReactiveCommand<string, Unit> DoTheThing { get; }

        void RunTheThing(string parameter)
        {
            // Code for executing the command here.
        }
    }
}

Uint是啥,我终于知道了,其实就是表示void

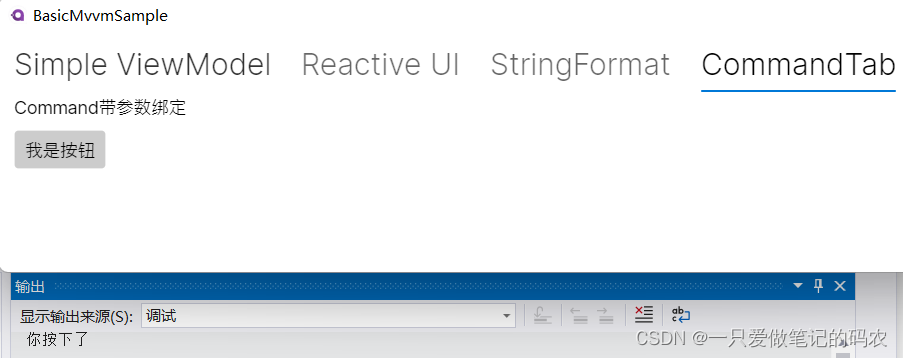
当然也要自己编一个玩一玩
namespace BasicMvvmSample.ViewModels
{
    public class ButtonViewModel:ViewModelBase
    {
        public ReactiveCommand<string, Unit> DoTheThing { get; }
        public ButtonViewModel()
        {
            DoTheThing = ReactiveCommand.Create<string>(RunTheThing);
        }
        void RunTheThing(string parameter)
        {
            Debug.WriteLine(parameter);
        }

    }
}
		<TabItem Header="CommandTab">
			<StackPanel DataContext="{Binding ButtonViewModel}" Spacing="10">
				<TextBlock Text="Command带参数绑定"/>
				<Button Content="我是按钮" Command="{Binding DoTheThing}" CommandParameter="你按下了"/>
			</StackPanel>
		</TabItem>
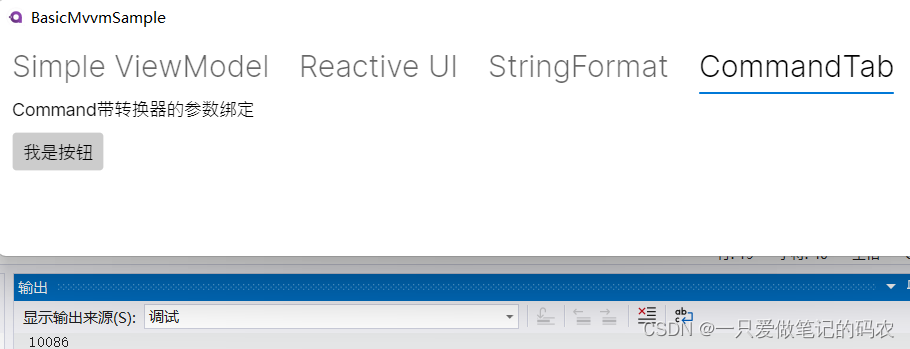
下面的例子还说了一种场景就是希望传递不是字符串类型的数据当参数,但是CommandParameter是字符串,这种需要加一个转换器
<Window xmlns="https://github.com/avaloniaui"
        xmlns:sys="clr-namespace:System;assembly=mscorlib">
    <Button Command="{Binding DoTheThing}">
        <Button.CommandParameter>
            <sys:Int32>42</sys:Int32>
        </Button.CommandParameter>
        Do the thing!
    </Button>
</Window>
这个我也试了试
namespace BasicMvvmSample.ViewModels
{
    public class ButtonViewModel:ViewModelBase
    {
        public ReactiveCommand<int, Unit> DoTheThing { get; }
        public ButtonViewModel()
        {
            DoTheThing = ReactiveCommand.Create<int>(RunTheThing);
        }
        void RunTheThing(int parameter)
        {
            Debug.WriteLine(parameter);
        }

    }
}
		<TabItem Header="CommandTab">
			<StackPanel DataContext="{Binding ButtonViewModel}" Spacing="10">
				<TextBlock Text="Command带转换器的参数绑定"/>
				<Button Content="我是按钮" Command="{Binding DoTheThing}">
					<Button.CommandParameter>
						<sys:Int32>
							10086
						</sys:Int32>
					</Button.CommandParameter>
				</Button>
			</StackPanel>
		</TabItem>
某些时候,可能开发者希望直接绑定方法,这个也是可以的
注意这种写法需要关闭"编译时绑定检查"
x:CompileBindings=“False”
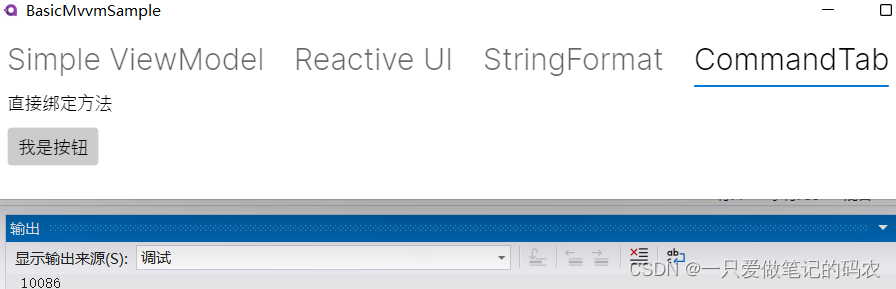
		<TabItem Header="CommandTab">
			<StackPanel DataContext="{Binding ButtonViewModel}" Spacing="10">
				<TextBlock Text="直接绑定方法"/>
				<Button Content="我是按钮" Command="{Binding RunTheThing}">
					<Button.CommandParameter>
						<sys:Int32>
							10086
						</sys:Int32>
					</Button.CommandParameter>
				</Button>
			</StackPanel>
		</TabItem>
如果开发者希望加一个判断命令能不能执行的判断,可以加一个方法,方法名前面带一个前缀Can,再用一个布尔变量来接判断的结果,配合特性便可以实现调用这个判断函数。
namespace Example
{
    public class MainWindowViewModel : ViewModelBase
    {
        bool _isTheThingEnabled = true;

        bool IsTheThingEnabled
        {
            get
            {
               return  _isTheThingEnabled;
            }
            set
            {
                if(value == _isTheThingEnabled)
                   return;
                _isTheThingEnabled = value;
                PropertyChanged?
                    .Invoke(this, new PropertyChangedEventArgs(nameof(IsTheThingEnabled)));
            }
        }

        public void RunTheThing(string parameter)
        {
            // Code for executing the command here.
        }

        [DependsOn(nameof(IsTheThingEnabled))]
        bool CanRunTheThing(/* CommandParameter */object parameter)
        {
            return IsTheThingEnabled && parameter != null;
        }
    }
}
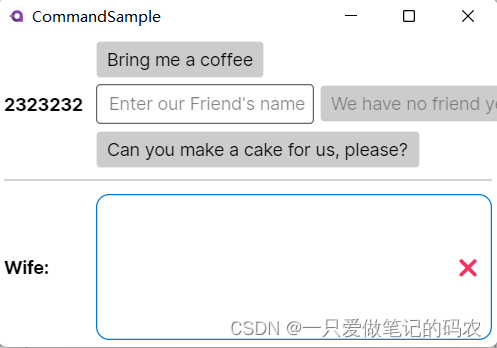
一个官方的例子
这一讲官方提供了一个案例,运行起来是这样的。来看看具体是怎么做的
<Window xmlns="https://github.com/avaloniaui"
        xmlns:x="http://schemas.microsoft.com/winfx/2006/xaml"
        xmlns:vm="using:CommandSample.ViewModels"
        xmlns:d="http://schemas.microsoft.com/expression/blend/2008"
        xmlns:mc="http://schemas.openxmlformats.org/markup-compatibility/2006"
        mc:Ignorable="d"
		Width="400"
		Height="250"
		x:CompileBindings="True"
		x:DataType="vm:MainWindowViewModel"
        x:Class="CommandSample.Views.MainWindow"
        Icon="/Assets/avalonia-logo.ico"
        Title="CommandSample">

    <Design.DataContext>
        <vm:MainWindowViewModel/>
    </Design.DataContext>

	<Grid RowDefinitions="Auto, Auto, *" ColumnDefinitions="Auto, *">

		<TextBlock Grid.Column="0" Grid.Row="0"
				   Text="Me:"
				   FontWeight="Bold"
				   VerticalAlignment="Center"
		           Margin="5" />

		<StackPanel Grid.Column="1" Grid.Row="0"
					Spacing="5" Margin="5" >

			<!-- This button will ask our wife for a coffee -->
			<Button Command="{Binding BringMeACoffeeCommand}"
					Content="Bring me a coffee" />

			<!-- This button will ask our wife for a coffee for our friend               -->
			<!-- We use CommandParameter to provide the name of our friend               -->
			<!-- Note that the button is automatically disabled if we don't enter a name -->
		    <StackPanel Orientation="Horizontal" Spacing="5">
				<TextBox Text="{Binding FriendsName}" Watermark="Enter our Friend's name"  />
			    <Button Command="{Binding BringMyFriendACoffeeCommand}"
						Content="{Binding FriendsName, StringFormat='Bring {0} a coffee', TargetNullValue='We have no friend yet'}"
						CommandParameter="{Binding FriendsName}"/>
			</StackPanel>

			<!-- This button will ask our wife to make us a cake                 -->
			<!-- As this is a long operation, the command is async.              -->
			<!-- Our wife will inform us about the current state.                -->
			<!-- Note: The button will be disabled while the process is running. -->
			<Button Command="{Binding BakeUsACakeCommand}"
					Content="Can you make a cake for us, please?" />
		</StackPanel>

		<Separator Grid.Row="1" Grid.ColumnSpan="2"
				   HorizontalAlignment="Stretch"
				   Margin="5"
				   Height="2"
				   Background="LightGray"/>

		<TextBlock Grid.Column="0" Grid.Row="2"
			       Text="Wife:"
				   FontWeight="Bold"
		           Margin="5"
		           VerticalAlignment="Center"/>

		<!-- This is the area where the output of our wife is rendered -->
		<Border Grid.Column="1" Grid.Row="2"
				CornerRadius="10" Margin="5"
			    BorderThickness="1" BorderBrush="{DynamicResource SystemAccentColor}">
			<Grid ColumnDefinitions="*,Auto">
				<ItemsRepeater Margin="5"
							   Items="{Binding WhatYourWifeSaid}" />

				<!-- This button will clear what our wife said recently                          -->
				<!-- We use ReflectionBinding as we bind to a method instead of a Command here,  -->
				<!-- which is not supported via CompiledBinding.                                 -->
				<Button Grid.Column="1"
						VerticalAlignment="Stretch" VerticalContentAlignment="Center"
						Background="Transparent"
						Command="{ReflectionBinding WhatYourWifeSaid.Clear}"
						Content="❌"/>
			</Grid>
		</Border>
	</Grid>
</Window>
using ReactiveUI;
using System;
using System.Collections.ObjectModel;
using System.Threading.Tasks;
using System.Windows.Input;
namespace CommandSample.ViewModels
{
public class MainWindowViewModel : ViewModelBase
{
// We use the constructor to initialize the Commands.
public MainWindowViewModel()
{
// We initiate our Commands using ReactiveCommand.Create...
// see: https://www.reactiveui.net/docs/handbook/commands/
// Init BringMeACoffeeCommand
BringMeACoffeeCommand = ReactiveCommand.Create(BringMeACoffee);
// Init BringMyFriendACoffeeCommand
// The IObservable<bool> is needed to enable or disable the command depending on the parameter
// The Observable listens to FriendsName and will enable the Command if the name is not empty.
// See also: https://www.reactiveui.net/docs/handbook/when-any/#watching-single-property
IObservable<bool> canExecuteBringMyFriendACoffeeCommand =
this.WhenAnyValue(vm => vm.FriendsName, (name) => !string.IsNullOrEmpty(name));
BringMyFriendACoffeeCommand =
ReactiveCommand.Create<string?>(name => BringMyFriendACoffee(name), canExecuteBringMyFriendACoffeeCommand);
// Init BakeUsACakeCommand
BakeUsACakeCommand = ReactiveCommand.CreateFromTask(BakeUsACakeAsync);
}
/// <summary>
/// This command will ask our wife to bring us a coffee.
/// </summary>
// Note: We use the interface ICommand here because this makes things more flexible.
public ICommand BringMeACoffeeCommand { get; }
// The method that will be executed when the command is invoked
private void BringMeACoffee()
{
WhatYourWifeSaid.Clear();
WifeSays("Go, get your self a coffee !!");
}
/// <summary>
/// This command will ask our wife to bring our friend a coffee.
/// </summary>
// Note: We use the interface ICommand here because this makes things more flexible.
public ICommand BringMyFriendACoffeeCommand { get; }
// The method that will be executed when the command is invoked
private void BringMyFriendACoffee(string? friendsName)
{
WhatYourWifeSaid.Clear();
WifeSays($"Dear {friendsName}, here is your coffee :-)");
}
// Backing field for FriendsName
private string? _FriendsName;
/// <summary>
/// The name of our Friend. If the name is null or empty, you have no friend to bring a coffee.
/// </summary>
public string? FriendsName
{
get => _FriendsName;
set => this.RaiseAndSetIfChanged(ref _FriendsName, value);
}
/// <summary>
/// This command will ask our wife to bake us a cake.
/// </summary>
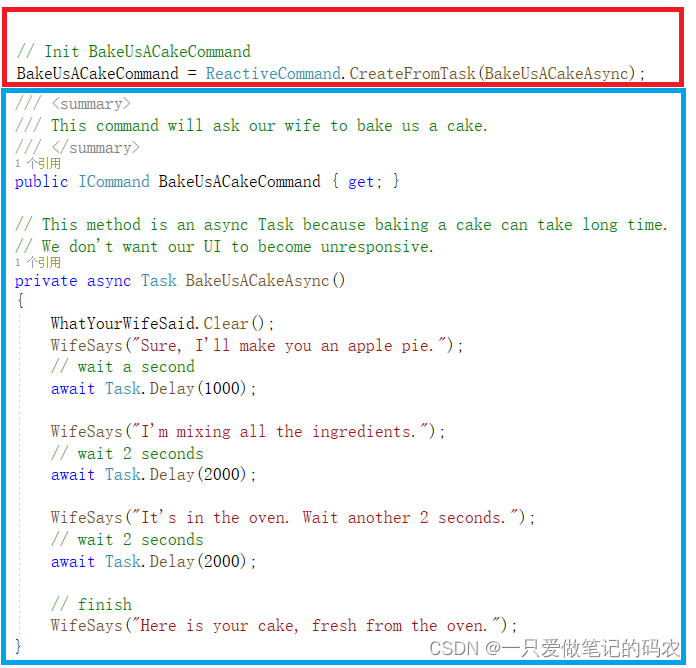
public ICommand BakeUsACakeCommand { get; }
// This method is an async Task because baking a cake can take long time.
// We don't want our UI to become unresponsive.
private async Task BakeUsACakeAsync()
{
WhatYourWifeSaid.Clear();
WifeSays("Sure, I'll make you an apple pie.");
// wait a second
await Task.Delay(1000);
WifeSays("I'm mixing all the ingredients.");
// wait 2 seconds
await Task.Delay(2000);
WifeSays("It's in the oven. Wait another 2 seconds.");
// wait 2 seconds
await Task.Delay(2000);
// finish
WifeSays("Here is your cake, fresh from the oven.");
}
// Your wife (our output)
/// <summary>
/// This collection will store what our wife said
/// </summary>
public ObservableCollection<string> WhatYourWifeSaid { get; } = new ObservableCollection<string>();
// Just a helper to add content to WhatYourWifeSaid
private void WifeSays(string content)
{
WhatYourWifeSaid.Add(content);
}
}
}
第一行的按钮,绑定了BringMeACoffeeCommand

ViewModel里是用ICommand做的,调用ReactiveCommand.Create初始化

第二行的两个按钮有交互效果,具体看Gif

文本框绑定FriendsName,Watermark是没输入之前的提示文本
按钮这边复杂些,Command绑定BringMyFriendACoffeeCommand,Content绑定FriendsName,然后弄了弄StringFormat,TargetNullValue应该是要是没有输入的情况下显示的值,CommandParameter绑定FriendsName.
后台这边,FriendsName做依赖属性,弄个RaiseAndSetIfChanged
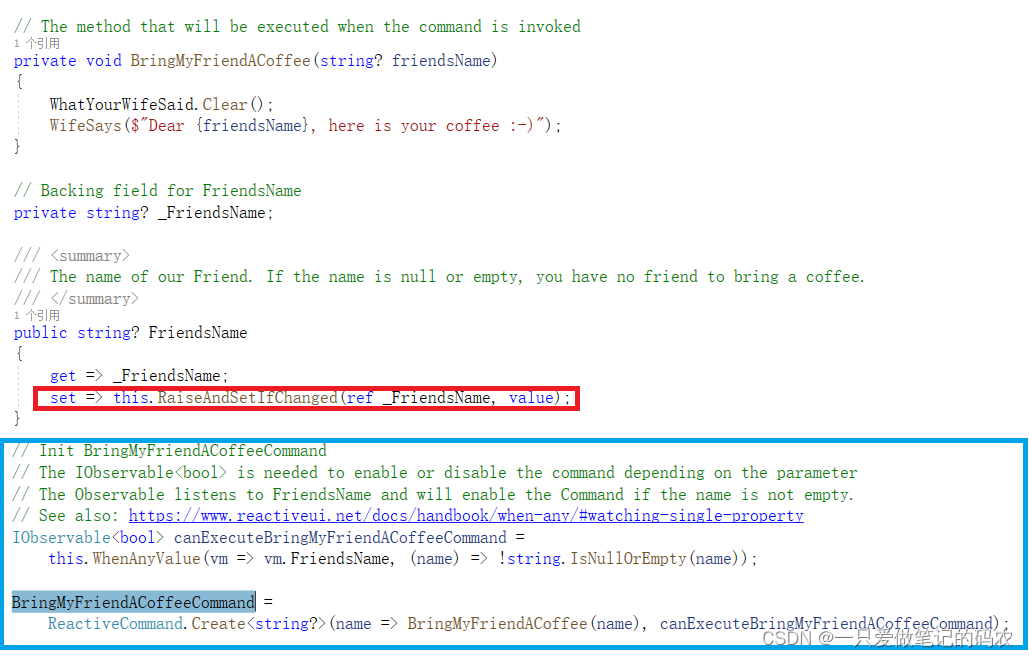
然后蓝色框中的初始化比较复杂
创建Command的时候,Lambda表达式,传入的参数直接就送进BringMyFriendACoffee作为函数参数,后面然后弄了IObservable的判断接口,判断可以执行不
WhenAnyValue起到监听的效果,当输入不为空的时候才执行对应的Command,否则不执行


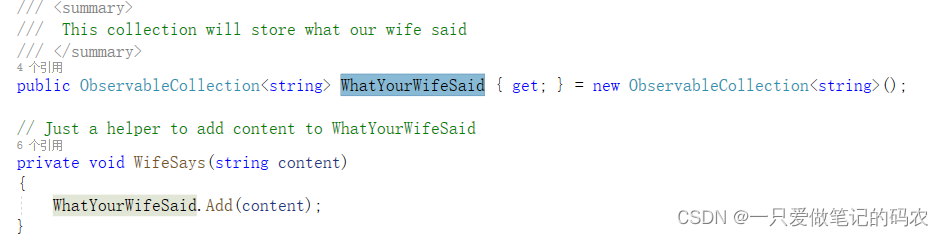
WatYourWifeSaid是一个动态数据集合,在界面的下半部分中用了一个ItemRepeat显示,WifeSays是往里头加数据的接口
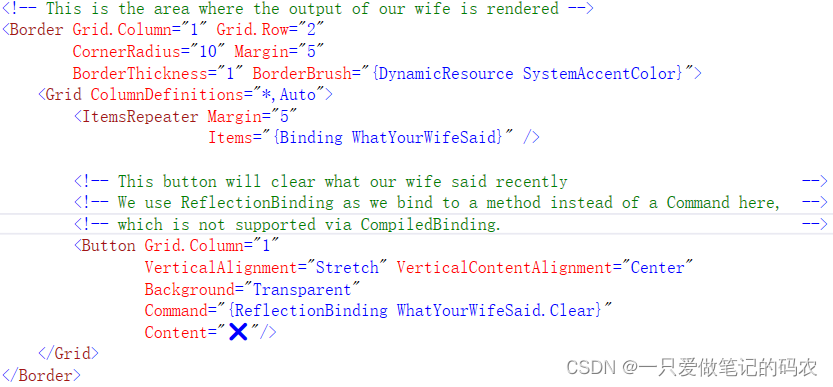
注意这里它用了ReflectionBinding 直接绑定方法,应该是开始编译绑定检查的功能,开启之后如果不这样写,应该编译过不了。
最后一个按钮,绑定了Task,为了演示复杂任务需要等待而不是将UI拖死的效果
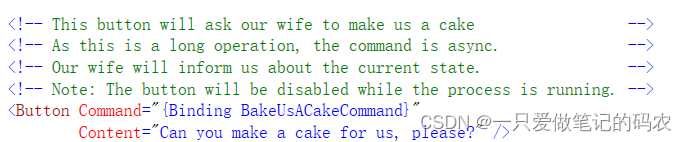
这里弄了await/async的写法
Binding to Tasks and Observables
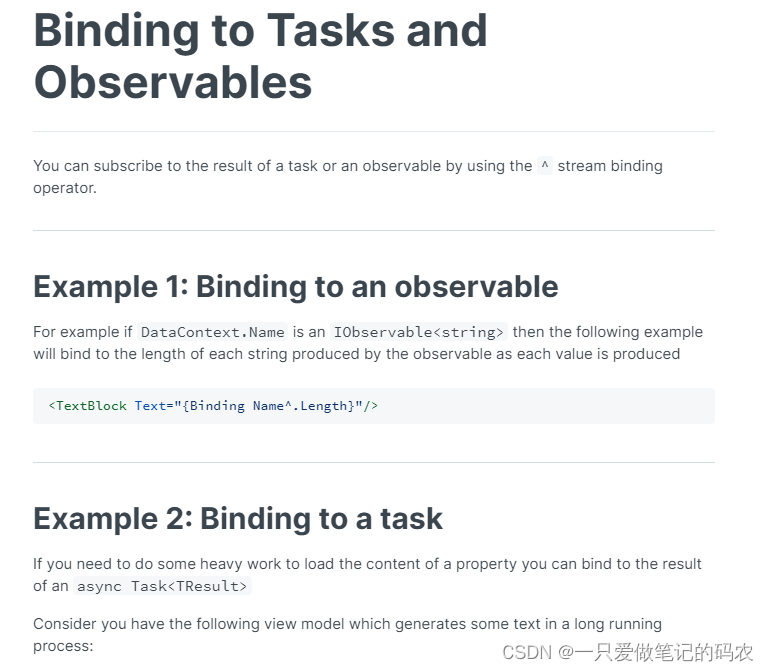
开发者可以通过使用^符号来订阅Task的结果或者观察者。
例子1-绑定观察者
如果DataContext.Name是一个观察者IObservable,下面的例子就会绑定观察者产生的每一个字符串的长度。【我还没用过这个功能~】
<TextBlock Text="{Binding Name^.Length}"/>
例子2-绑定Task
如果加载Content是一个很耗时间的任务的话,可以绑定async Task的结果
看下面的例子
public Task<string> MyAsyncText => GetTextAsync();

private async Task<string> GetTextAsync()
{
  await Task.Delay(1000); // The delay is just for demonstration purpose
  return "Hello from async operation";
}
xmal绑定这样写(FallbackValue 用来显示还在加载时的值)
<TextBlock Text="{Binding MyAsyncText^, FallbackValue='Wait a second'}" />
Binding from Code
使用代码绑定,这个和WPF是不太一样的。Avalonia基于Reactive 扩展的IObservable,然后用XAML绑定构建。
Subscribing to Changes to a Property
可以通过GetObservable订阅属性的变化,返回IObservable,可以用来监听属性的变化。
var textBlock = new TextBlock();
var text = textBlock.GetObservable(TextBlock.TextProperty);
每一个属性可以通过调用[PropertyName]Property拥有一个静态只读字段,传递给GetObservable来订阅属性的变化。
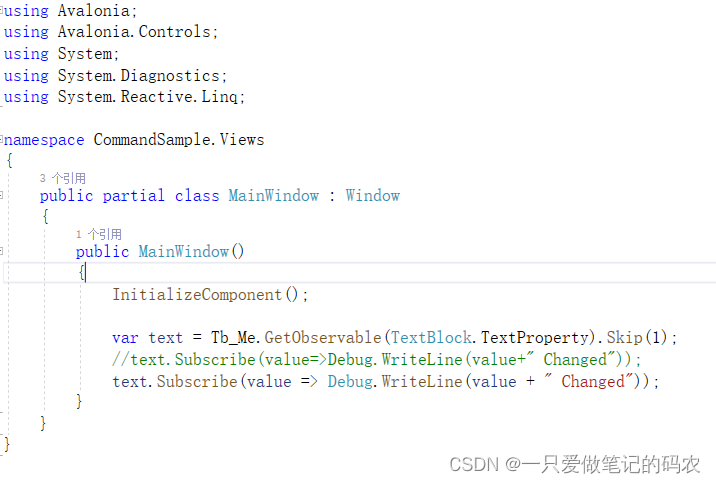
IObservable在这里用来返回观察者,打印属性的变化
var textBlock = new TextBlock();
var text = textBlock.GetObservable(TextBlock.TextProperty);
//订阅TextProperty,值变化的时候打印输出
text.Subscribe(value => Console.WriteLine(value + " Changed"));
写了一个试一试
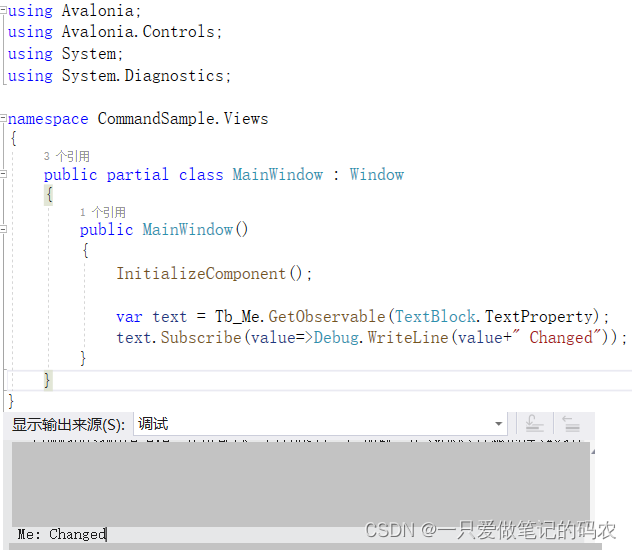
打印了变化的值
当返回的观察者被订阅之后,它会立即返回当前的属性值,然后每次属性值发生变化的时候就会推出新的属性值。如果不需要当前的值,可以用Skip跳过。
var text = textBlock.GetObservable(TextBlock.TextProperty).Skip(1);
这样写确实是没有打印刚刚上一条的Changed了
Binding to an observable
可以将属性绑定给观察者
// We use an Rx Subject here so we can push new values using OnNext
var source = new Subject<string>();
var textBlock = new TextBlock();

// Bind TextBlock.Text to source
var subscription = textBlock.Bind(TextBlock.TextProperty, source);

// Set textBlock.Text to "hello"
source.OnNext("hello");
// Set textBlock.Text to "world!"
source.OnNext("world!");

// Terminate the binding
subscription.Dispose();
如果不调用Dispose,那么绑定会自动终止,观察者会触发OnCompleted 或者OnError
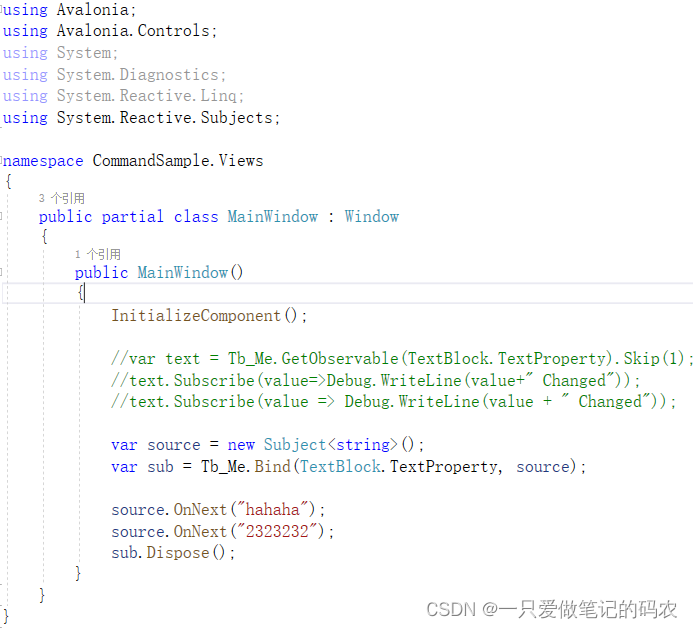
效果就是显示最后的一次绑定
Setting a binding in an object initializer
在对象初始化的时候就可以直接做绑定了
var source = new Subject<string>();
var textBlock = new TextBlock
{
    Foreground = Brushes.Red,
    MaxWidth = 200,
    [!TextBlock.TextProperty] = source.ToBinding(),
};
也可以直接将一个元素绑定到另一个元素之上
var textBlock1 = new TextBlock();
var textBlock2 = new TextBlock
{
    Foreground = Brushes.Red,
    MaxWidth = 200,
    [!TextBlock.TextProperty] = textBlock1[!TextBlock.TextProperty],
};
当然也可以用在初始化之外
textBlock2[!TextBlock.TextProperty] = textBlock1[!TextBlock.TextProperty];
这种做法的缺点就是没有返回的IDisposable变量给你操作绑定了,如果需要返回的变量,还是要用Bind
Transforming binding values
变换绑定的值
因为用的是观察者,可以很容易的转换绑定的值
var source = new Subject<string>();
var textBlock = new TextBlock
{
    Foreground = Brushes.Red,
    MaxWidth = 200,
    [!TextBlock.TextProperty] = source.Select(x => "Hello " + x).ToBinding(),
};
Using XAML bindings from code
有时候希望用XAML绑定加一些额外的特性。例如仅用观察者可以绑定属性到DataContext
var textBlock = new TextBlock();
var viewModelProperty = textBlock.GetObservable(TextBlock.DataContext)
    .OfType<MyViewModel>()
    .Select(x => x?.Name);
textBlock.Bind(TextBlock.TextProperty, viewModelProperty);
对于这个例子,这样写比较好
var textBlock = new TextBlock
{
    [!TextBlock.TextProperty] = new Binding("Name")
};
如果需要返回变量可以关掉绑定
var textBlock = new TextBlock();
var subscription = textBlock.Bind(TextBlock.TextProperty, new Binding("Name"));

subscription.Dispose();
Subscribing to a property on any object
GetObservable方法返回的观察者在单例上可以追踪属性的变化,但是如果你在编写一个控件,你可能希望执行OnPropertyChanged方法,它并不绑定变量实例。
为了做到这个效果,你可以订阅AvaloniaProperty.Changed,它是一个观察者,任何实例的任何变化都会触发它
在WPF中需要传递静态的PropertyChangedCallback 到DependencyProperty,但是这仅允许控件的作者去注册属性变化回调
另外,我们设计了AddClassHandler,可以自动关联事件到你的控件
例如如果希望监听你自己的控件中的Foo属性变化,可以这么干
static MyControl()
{
    FooProperty.Changed.AddClassHandler<MyControl>(x => x.FooChanged);
}

private void FooChanged(AvaloniaPropertyChangedEventArgs e)
{
    // The 'e' parameter describes what's changed.
}
Binding to INotifyPropertyChanged objects
也可以绑定实现了INotifyPropertyChanged的方法
var textBlock = new TextBlock();

var binding = new Binding
{
    Source = someObjectImplementingINotifyPropertyChanged,
    Path = nameof(someObjectImplementingINotifyPropertyChanged.MyProperty)
};

textBlock.Bind(TextBlock.TextProperty, binding);
Binding in a Control Template
如果你希望创建一个控件模板,然后你希望绑定模板的父对象
<TextBlock Name="tb" Text="{TemplateBinding Caption}"/>
<!-- Which is the same as -->
<TextBlock Name="tb" Text="{Binding Caption, RelativeSource={RelativeSource TemplatedParent}}"/>
虽然这两句看上去大部分情况是一样的,但是还是有点不同的
- TemplateBinding仅接受单属性,而不是属性路径。所以如果你希望用属性路径这种方式,你必须用第二中写法。
<!-- 这样写不行,TemplateBinding仅仅接受单属性 -->
<TextBlock Name="tb" Text="{TemplateBinding Caption.Length}"/>

<!-- 要这么写才能接受属性路径-->
<TextBlock Name="tb" Text="{Binding Caption.Length, RelativeSource={RelativeSource TemplatedParent}}"/>
- TemplateBinding 因为性能原因,仅仅接受OneWay模式的绑定。这意味着TemplateBinding 实际上等同于{Binding RelativeSource={RelativeSource TemplatedParent}, Mode=OneWay}。如果模板控件需要TwoWay绑定,那么完整实现的语法要这么写,注意Binding在默认绑定模式下也是要使用的
{Binding RelativeSource={RelativeSource TemplatedParent}, Mode=TwoWay}
Binding Classes
在Avalonia中,也可以绑定类。有时候在切换类绑定会很有用。
这个例子是说,有两个不同的样式,通过MyProperty进行切换
 <ListBox Items="{Binding MyItems}">
    <ListBox.Styles>
        <Style Selector="TextBlock.myClass">
            <Setter Property="Background" Value="Red" />
        </Style>
        <Style Selector="TextBlock.myClass2">
            <Setter Property="Background" Value="Green" />
        </Style>
    </ListBox.Styles>
    <ListBox.ItemTemplate>
        <DataTemplate>
            <StackPanel>
                <TextBlock
                    Classes.myClass="{Binding MyProperty}"
                    Classes.myClass2="{Binding !MyProperty}"
                    Text="{Binding Name}"/>
            </StackPanel>
        </DataTemplate>
    </ListBox.ItemTemplate>
 </ListBox>
Creating and binding Attached Properties
当你需要添加外部属性到Avalonia组件,然后可以通过附加属性实现,还可以用于创建行为,用来修改托管的GUI组件。例如,绑定命令到具体的事件。
这里我们展示一个例子,说明在MVVM中如何使用command去绑定事件
这可能不是最好的方法,但是通过Avalonia Behavior可以达到目的,这里我们会展示
- 如何创建附加属性
- 如何以MVVM方式使用
首先,我们需要创建我们自己的附加属性,用AvaloniaProperty.RegisterAttached。注意,按照惯例,附加属性的公共静态CLR属性的名称为XxxxProperty.另外注意,按照管理,附加属性的名称(参数)是Xxx,而不带具体的属性名。还必须提供两个公共的静态方法SetXxxx和GetXxxx。
这样做可以保证,属性是有类型,所有者类型和可以使用的类型。
验证方法可以用来清除正在被设置了的值,可以返回更正的值也可以通过AvaloniaProperty.UnsetValue丢弃掉。或者可以使用包含这个属性的元素执行特殊的操作。Setter和Getter应该始终仅仅设置值,而从不执行超出范围的任何操作。实际上,他们通常永远不会被调用,因为绑定昔日将识别并直接在存储他们的位置设置属性。
下面的例子创建了两个附加属性,Command property和 CommandParameter
/// <summary>
/// 附件属性的容器类 必须继承 AvaloniaObject
/// </summary>
public class DoubleTappedBehav : AvaloniaObject
{
    static DoubleTappedBehav()
    {
        CommandProperty.Changed.Subscribe(x => HandleCommandChanged(x.Sender, x.NewValue.GetValueOrDefault<ICommand>()));
    }

    /// <summary>
    ///  avalonia 附加属性.
    /// </summary>
    /// <value>Provide an <see cref="ICommand"/> derived object or binding.</value>
    public static readonly AttachedProperty<ICommand> CommandProperty = AvaloniaProperty.RegisterAttached<DoubleTappedBehav, Interactive, ICommand>(
        "Command", default(ICommand), false, BindingMode.OneTime);

    /// <summary>
    /// avalonia 附加属性.
    /// Use this as the parameter for the <see cref="CommandProperty"/>.
    /// </summary>
    /// <value>Any value of type <see cref="object"/>.</value>
    public static readonly AttachedProperty<object> CommandParameterProperty = AvaloniaProperty.RegisterAttached<DoubleTappedBehav, Interactive, object>(
        "CommandParameter", default(object), false, BindingMode.OneWay, null);


    /// <summary>
    /// 事件变化处理
    /// </summary>
    private static void HandleCommandChanged(IAvaloniaObject element, ICommand commandValue)
    {
        if (element is Interactive interactElem)
        {
            if (commandValue != null)
            {
                // 加入非空值
                interactElem.AddHandler(InputElement.DoubleTappedEvent, Handler);
            }
            else
            {
                // 移除之前的值
                interactElem.RemoveHandler(InputElement.DoubleTappedEvent, Handler);
            }
        }

        // 本地处理函数
        void Handler(object s, RoutedEventArgs e)
        {
            // This is how we get the parameter off of the gui element.
            object commandParameter = interactElem.GetValue(CommandParameterProperty);
            if (commandValue?.CanExecute(commandParameter) == true)
            {
                commandValue.Execute(commandParameter);
            }
        }
    }


    /// <summary>
    /// Set函数
    /// </summary>
    public static void SetCommand(AvaloniaObject element, ICommand commandValue)
    {
        element.SetValue(CommandProperty, commandValue);
    }

    /// <summary>
    /// Get函数
    /// </summary>
    public static ICommand GetCommand(AvaloniaObject element)
    {
        return element.GetValue(CommandProperty);
    }

    /// <summary>
    /// Set函数
    /// </summary>
    public static void SetCommandParameter(AvaloniaObject element, object parameter)
    {
        element.SetValue(CommandParameterProperty, parameter);
    }

    /// <summary>
    /// Get函数
    /// </summary>
    public static object GetCommandParameter(AvaloniaObject element)
    {
        return element.GetValue(CommandParameterProperty);
    }
}
在验证方法,我们使用事件系统来附加一个新的处理函数。注意,应再次分离处理函数。属性的值由GetValue函数来请求。
XAML编译器知道正确的命名空间之后,可以用点操作符使用,然后绑定。
<UserControl xmlns="https://github.com/avaloniaui"
             xmlns:x="http://schemas.microsoft.com/winfx/2006/xaml"
             xmlns:loc="clr-namespace:MyApp.Behaviors"
             x:Class="MyApp.Views.TestView">
    <ListBox Items="{Binding Accounts}"
             SelectedIndex="{Binding SelectedAccountIdx, Mode=TwoWay}"
             loc:DoubleTappedBehav.Command="{Binding EditCommand}"
             loc:DoubleTappedBehav.CommandParameter="test77"
             >
      <ListBox.ItemTemplate>
        <DataTemplate>
          <TextBlock Text="{Binding }" />
        </DataTemplate>
      </ListBox.ItemTemplate>
    </ListBox>
</UserControl>
虽然CommandParameter 值使用静态值,它也可以用来绑定。当使用ViewModel时,EditCommandExecuted会在双击后运行一次
public class TestViewModel : ReactiveObject
{
    public ObservableCollection<Profile> Accounts { get; } = new ObservableCollection<Profile>();

    public ReactiveCommand<object, Unit> EditCommand { get; set; }

    public TestViewModel()
    {
        EditCommand = ReactiveCommand.CreateFromTask<object, Unit>(EditProfileExecuted);
    }

    private async Task<Unit> EditCommandExecuted(object p)
    {
        // p contains "test77"

        return Unit.Default;
    }
}
Style
在Avalonia中的样式是CSS方式和普通WPF样式的结合样式包括一系列的选择器和一系列的设置器。
下面的样式就是选择Window下带有h1样式的TextBlock,然后样式本身是设置字体为24,加粗.
样式可以被定义在控件级别(Control.Styles)也可以被定义在应用级别(Application.Styles)
<Window xmlns="https://github.com/avaloniaui"
        xmlns:x="http://schemas.microsoft.com/winfx/2006/xaml">
    <Window.Styles>
        <Style Selector="TextBlock.h1">
            <Setter Property="FontSize" Value="24"/>
            <Setter Property="FontWeight" Value="Bold"/>
        </Style>
    </Window.Styles>
	<!-- 以上省略一堆xmal -->
    <TextBlock Classes="h1">I'm a Heading!</TextBlock>
</Window>
样式也可以定义在另一个xaml中,然后通过StyleInclude引入到需要的文件
例如我的样式文件CustomStyles.xaml我要把它引入进来
<Window xmlns="https://github.com/avaloniaui"
        xmlns:x="http://schemas.microsoft.com/winfx/2006/xaml">
    <Window.Styles>
        <StyleInclude Source="/CustomStyles.xaml" />
    </Window.Styles>

    <TextBlock Classes="h1">I'm a Heading!</TextBlock>
</Window>
然后在CustomStyles.xaml中,顶层标记就直接写Styles了
然后样式直接写在内部,就和写在window下差不多
<Styles xmlns="https://github.com/avaloniaui"
        xmlns:x="http://schemas.microsoft.com/winfx/2006/xaml">
    <Style Selector="TextBlock.h1">
        ...
    </Style>
</Styles>
和WPF不一样,如果样式被加入到应用的资源字典ResourceDictionary或者控件内,这样是不起作用的。这是因为在Avalonia中样式是很重要的,ResourceDictionary资源字典是一个无序字典。
Style Classes
与CSS的用法一样,可以在已经被赋予了样式的控件后面再跟样式
例如已经给了样式h1,再给一个blue
<Button Classes="h1 blue"/>
另外还可以直接使用Classes直接添加样式
control.Classes.Add("blue");
control.Classes.Remove("red");
Pseudoclasses
和CSS一样,控件也有伪类。他们是由控件本身定义的类而不是由用户定义的,伪类一般以:号开始
例如下面这个例子中的:pointerover
<StackPanel>
	<StackPanel.Styles>
		<Style Selector="Border:pointerover">
			<Setter Property="Background" Value="Red"/>
		</Style>
	</StackPanel.Styles>

	<Border>
		<TextBlock>划过会变红</TextBlock>
	</Border>
</StackPanel>
另外的例子包含控件模板内部的属性变化
其他伪类包括:focus, :disabled, button的:pressed,checkbox的:checked
<StackPanel>
  <StackPanel.Styles>
    <Style Selector="Button:pressed /template/ ContentPresenter">
        <Setter Property="TextBlock.Foreground" Value="Red"/>
    </Style>
  </StackPanel.Styles>
  <Button>I will have red text when pressed.</Button>
</StackPanel>
Custom Pseudoclasses
你可以为自己的自定义控件或者模板控件创建伪类。下面的函数通过传入一个bool变量到伪类中来控制样式的开启或关闭。
PseudoClasses.Set(":className", bool);
Selector
选择器使用类似于CSS选择器的语法来选择需要给样式的控件。
这里它举了几个例子
| Selector | 描述 |
|---|---|
| Button | 选择所有按钮 |
| Button.red | 选择所有带有red属性的按钮 |
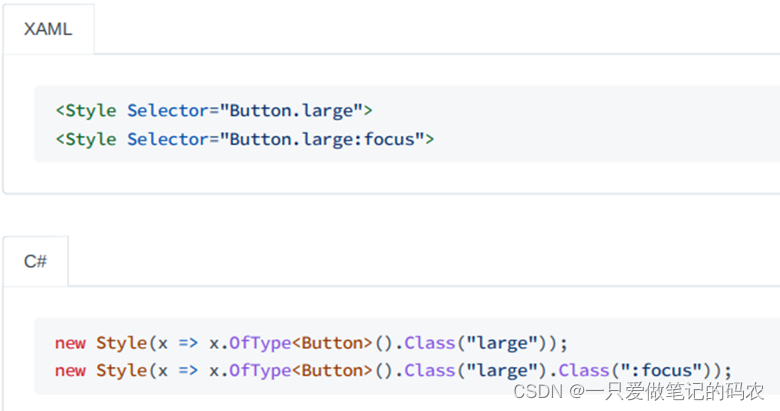
| Button.red.large | 选择所有带有red属性和large属性的按钮 |
| Button:focus | 选择所有带有focus伪类的按钮 |
| Button.red:focus | 选择所有带有focus伪类和red属性的按钮 |
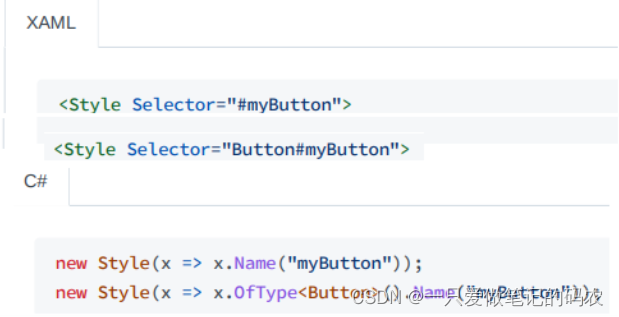
| Button#myButton | 选择所有名为myButton的按钮 |
| StackPanel Button.foo | 选择所有StackPanel内带有foo类的按钮 |
| StackPanel > Button.foo | 选择父元素是StackPanel,带有foo类的按钮 |
| Button /template/ ContentPresenter | 选择在Buuton模板内所有的ContentPresenter controls |
Setter
样式的设置器描述了当选择器选中了控件之后的处理。
<Setter Property="FontSize" Value="24"/>
<Setter Property="Padding" Value="4 2 0 4"/>
当然也可以这样写
<Setter Property="MyProperty">
   <MyObject Property1="My Value"/>
</Setter>
当然也可以用绑定
<Setter Property="FontSize" Value="{Binding SelectedFontSize}"/>
不管任何时候样式匹配了控件,所有的setter会应用到控件上。如果选择器不在匹配对应的控件,对应的属性值会回退到它目前最高优先级的值。
注意,当所有的控件匹配样式,Setter创建了Value的单例。
如果对象是可变的,那么对所有控件来说改变会影响所有的控件。对于下面的例子,在Setter 中设置的值,对于绑定的任何对象来说,不会访问到目标控件的DataContext,因为可能有多个目标控件。
<Style Selector="local|MyControl">
  <Setter Property="MyProperty">
     <MyObject Property1="{Binding MyViewModelProperty}"/>
  </Setter>
</Style>
在上面的例子中,绑定源会是MyObject.DataContext,而不是MyControl.DataContext.如果MyObject没有Data Context,那么绑定就无法产生出对应的值。
注意,目前秒如果用的是编译时绑定,你必须在Style中显式的设置绑定源的数据类型。
<Style Selector="MyControl" x:DataType="MyViewModelClass">
  <Setter Property="ControlProperty" Value="{Binding MyViewModelProperty}" />
</Style>
Style Precedence
如果多个样式匹配同一个控件,他们同时尝试设置用一个属性,那么在style中最接近控件的会生效。
<Window xmlns="https://github.com/avaloniaui"
        xmlns:x="http://schemas.microsoft.com/winfx/2006/xaml">
    <Window.Styles>
        <Style Selector="TextBlock.h1">
            <Setter Property="FontSize" Value="24"/>
            <Setter Property="FontWeight" Value="Bold"/>
        </Style>
    </Window.Styles>

    <StackPanel>
        <StackPanel.Styles>
            <Style Selector="TextBlock.h1">
                <Setter Property="FontSize" Value="48"/>
                <Setter Property="Foreground" Value="Red"/>
            </Style>
        </StackPanel.Styles>

        <TextBlock Classes="h1">
            <StackPanel.Styles>
                <Style Selector="TextBlock.h1">
                    <Setter Property="Foreground" Value="Blue"/>
                </Style>
            </StackPanel.Styles>

            I'm a Heading!
        </TextBlock>
    </StackPanel>
</Window>
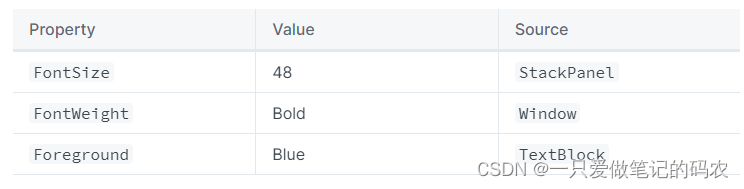
最后执行了3次设置,最后实际效果如下
越靠近被设置控件本身的样式优先
同一个属性,以后面设置的优先
Selectors
OfType
通过控件的类型来选择。第一个例子选择的时所有的按钮。如果需要包含类型所在的XAML命名空间的话,需要加一个|
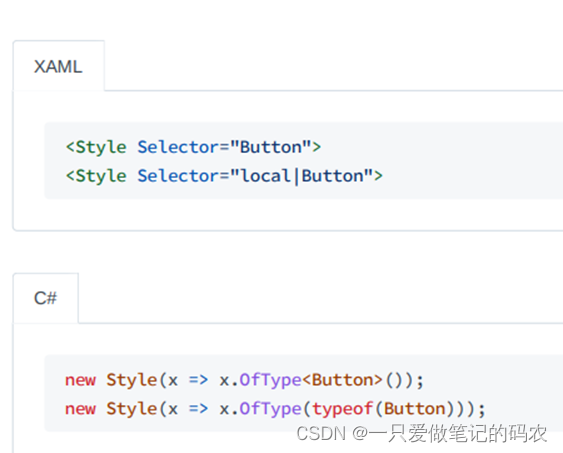
这个选择器不能匹配衍生出的类型,如果需要的话请使用Is选择器
注意对象的类型实际上取决于它自己的IStyleable.StyleKey property.默认情况下,它返回的是当前实例的类型。但是,如果你将自己编写的控件继承自Button,样式也和Button一样的话,那么你可以写一个IStyleable.StyleKey属性,然后返回typeof(Button)
Name
通过控件的名字来选择对应的控件
Class
悬着指定了某个类型样式类的控件,如果包含多个类的话需要用.符号分隔开或者用:符号(如果是伪类)。如果指定了多个类,那么控件必须包含所有指定的样式类才可以被选中。
is
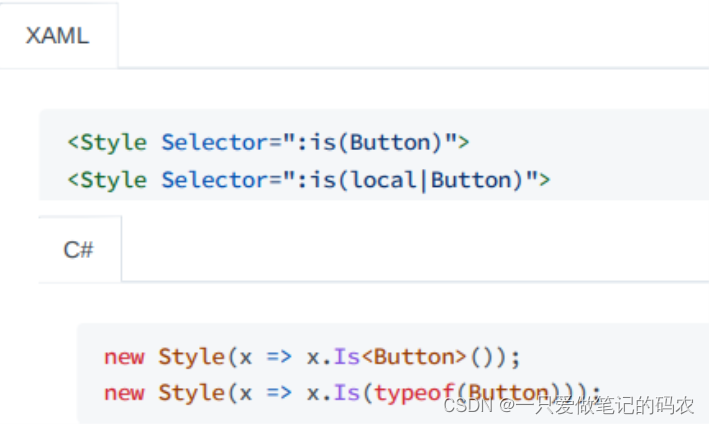
这个非常类似于OfType选择器,但是它会选中衍生出的类型
另外,对象的类型实际上取决于它自己的IStyleable.StyleKey property
Chlid

Chlid选择器使用>符号分割开两个选择的对象。这个选择器是匹配逻辑树的直接子对象,所以在上面的例子中,选择器会直接匹配所有属于StackPanel在逻辑树上的子Button.
Descendant

两个选择对象被空格分开,选择器选中在逻辑树中的后代。在这个例子中,选中器会选中StackPanel在逻辑树中所有的后代Button。
PropertyEquals
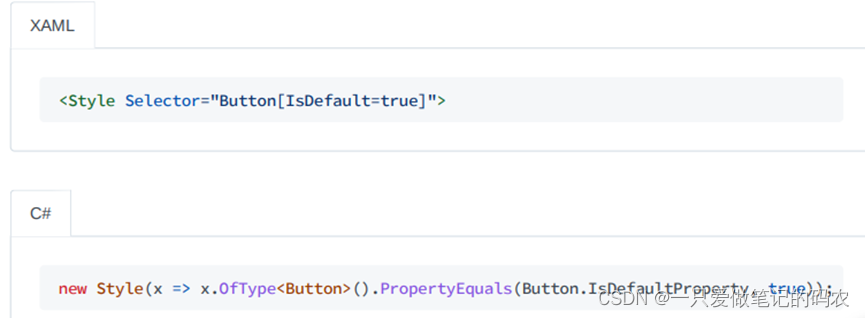
选择器会选中指定值的指定属性的控件
注意,在XAML中使用AttachedProperty时,需要用括号包起来
<Style Selector=”TextBlock[(Grid.Row)=0]”>
Template
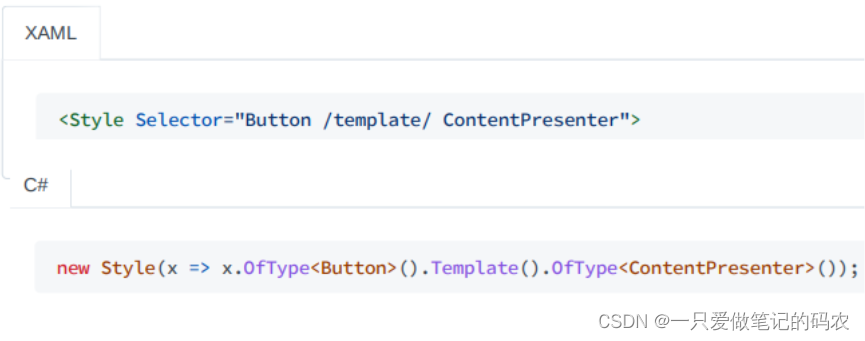
在Control template中匹配控件。在这里面的选中对象都是在逻辑树范围内的。如果你希望选中一个在control template中的控件,那么你必须用这个选择器.这个例子在Button的模板中选择ContentPresenter。
Not
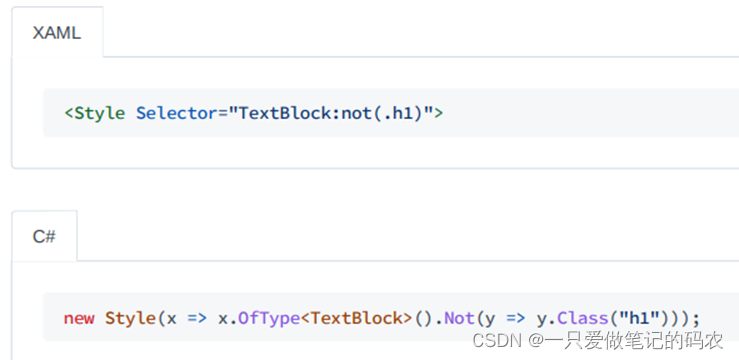
在选择器中内部取反
Or
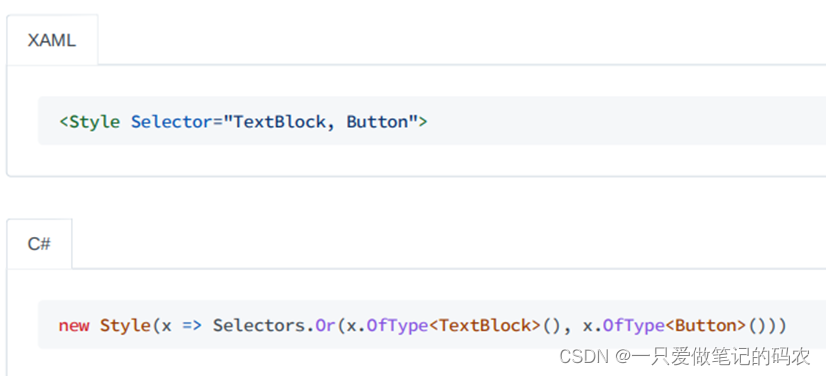
选中匹配任何选择对象的控件,每个选择对象用,分割开
Nth Child
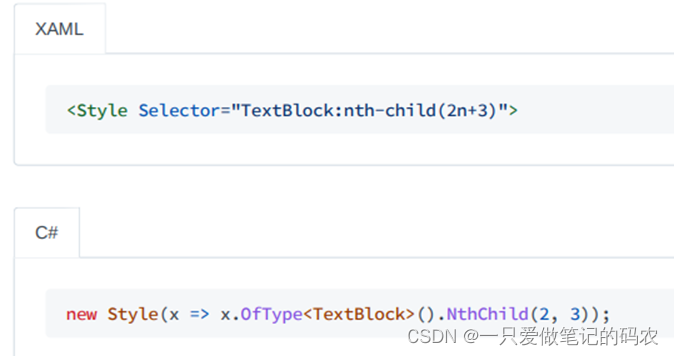
在一组相同的控件之中,按照他们的位置,选中对应的控件
Nth Last Child

在一组相同的控件之中,按照他们的位置,从后往前选中对应的控件
Resources
经常的,样式和控件需要共享资源,例如Brushes和颜色。你可以把这些样式放在样式字典里,这样每个样式和资源就可以随处调用了
Declaring resources
如果资源对整个应用都需要可见,你可以定义在App.xaml里
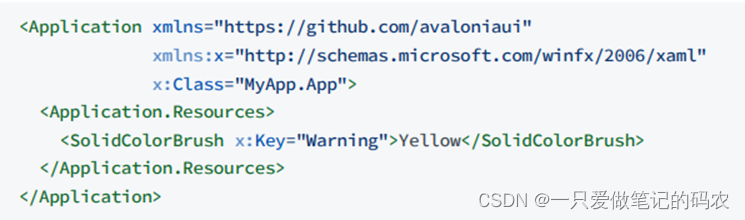
如果资源只是对Window或者UserControl可见,那么就定义为他们的子对象
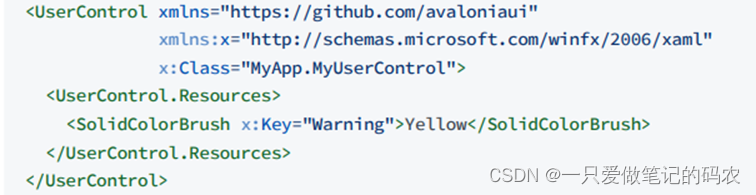
最后,对于任何控件也是一样的

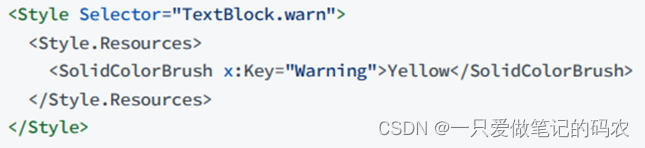
在样式中也可以定义资源
Referencing resources
可以通过{DynamicResource}来引用资源

当然也可以用StaticResource来引用,但是会有一些限制
- 资源的变化不起作用
- 资源必须定义在同一个XAML中
StaticResource不需要添加一个事件监听来监听资源的变化,这更节约内存。
Overriding resources
资源的解析时从逻辑树解析到DynamicResource或StaticResource直到资源找到对应的键。这意味着资源时有可能被覆写的
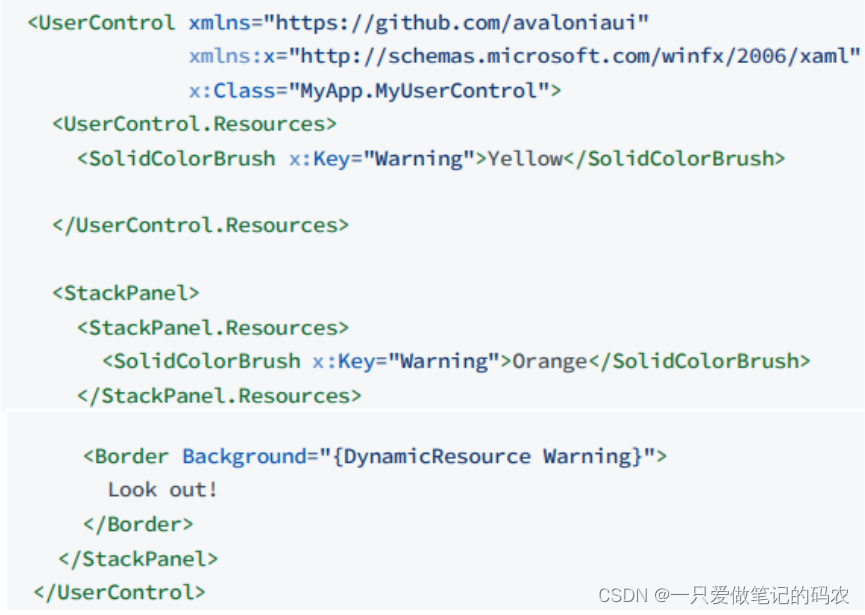
在这里最后的生效的资源是Orange,因为这个离控件最近。
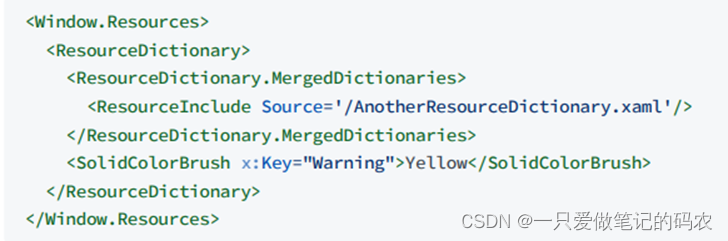
Merged resource dictionaries
对于每一个控件的资源属性来说,样式是归属于ResourceDictionary。ResourceDictionary可以通过MergedDictionaries来包含进其他的ResourceDictionary。具体的,如果需要包含进其他的ResourceDictionary,需要用到ResourceInclude关键字。
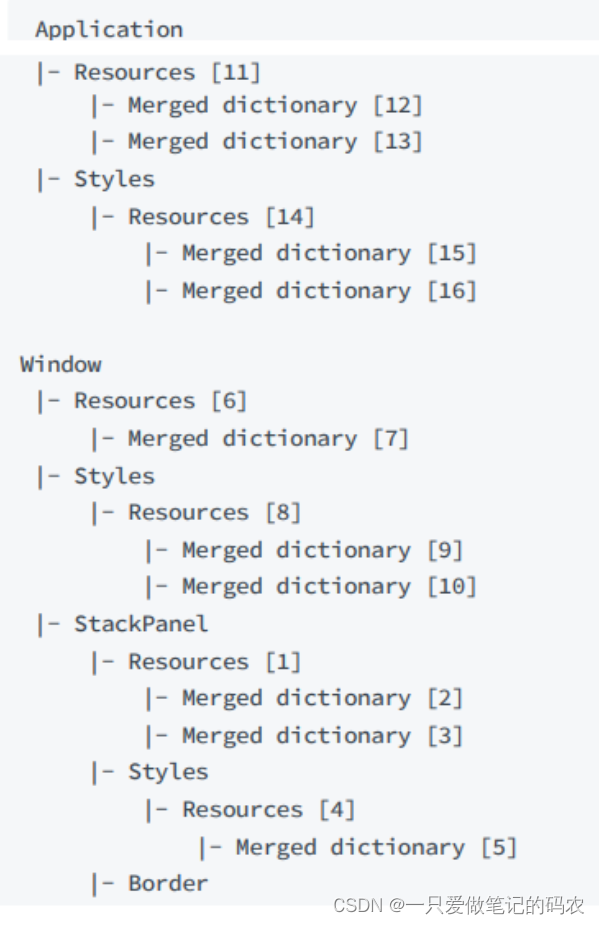
Resource resolution
资源的解析时从逻辑树解析到DynamicResource或StaticResource直到资源找到对应的键。但是有时候样式的呈现和MergedDictionaries是复杂的。常规的情况有
控件资源的MergedDictionaries
样式资源的MergedDictionaries
就下面的例子来看,对Border的资源样式的查找,会按照[]内的顺序执行。
Theme resources
主题通常是由一系列的Brushes,Colors和其他的设定构成的。通过切换这些资源,例如从暗黑系主题切换到明亮系主题。这些样式被定义为主题。
Troubleshooting
由于Avalonia使用的样式系统是CSS和XMAL混合的,所以有时候会因为知识不足会有困惑的地方
选中的控件不存在
选中的控件不存在,在Avalonia的选择器中,像CSS选择器,不会因为选中不存在的对象而告警或报错,包括Name或Class不存在或者内部选择器没有符合条件的子对象。为啥呢,原因很简单,单个样式可能服务于很多控件,他们可能被实时创建或删除。所以没办法去对选择器做校验。
目标的属性被其他的样式覆写
样式是用来美化的,如果这里有很多个样式文件同时指向同一个控件的话,样式就会出现覆写。
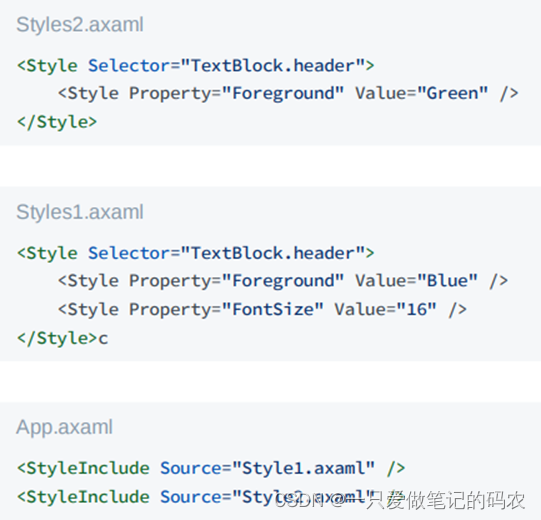
这里的样式最后会按Style2做,后面的语句覆盖前面的
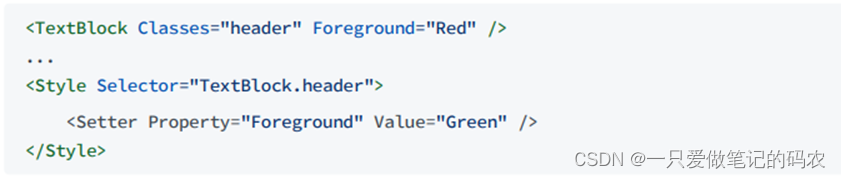
本地设置的属性覆盖样式
和WPF类似,Avalonia属性也会有多个值。在这个例子中,你可以看到本地值的设置高于样式值,所以Textblock会被设置为Red
你看以去看看BindingPriority枚举中的全部priorities值,值越小的枚举值的优先级越高。例如,Animation的值优先级最高,比本地值还要高
一些默认的Avalonia样式在他们的模板中使用的是本地治,而不是模板绑定或者样式Setter,所以这样的结果就是无法在不替换掉整个模板的情况下修改模板的属性。
缺少样式伪类选择器
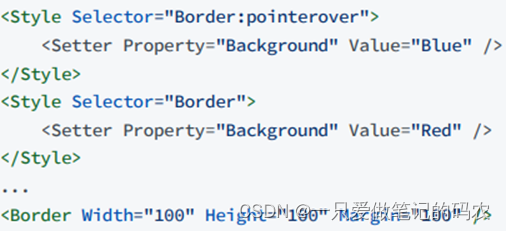
在这个例子中Border在正常情况下有红色的背景,但是鼠标划过之后会变成蓝色。这是应为,CSS的选择器更优先。当你希望通过单样式覆写默认的样式的时候,这个会是一个问题。为了达到这个效果,你需要写一个新的样式。
带有伪类的选择器没有将默认的样式覆写
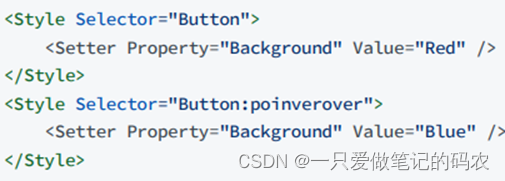
在这种情况下,带有伪类的选择器不起作用。这个和Button的样式有关系。
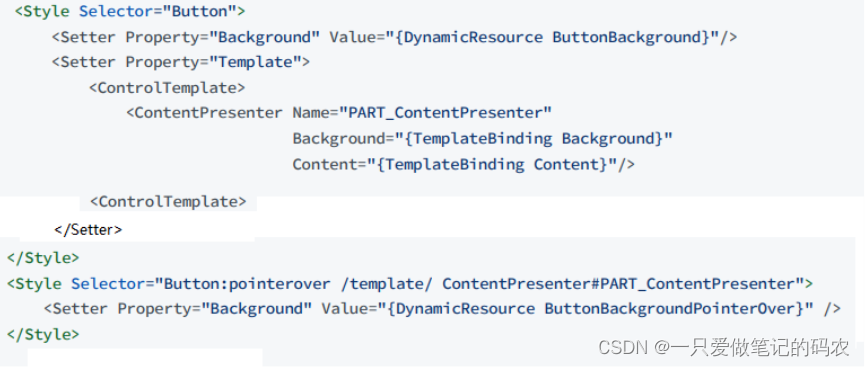
可以看到实际的背景色是ContentPresenter渲染的。默认情况下是绑定Button的Background属性。但是pointer-over状态的选择器是直接应用到ContentPresenter的background上的。这就是为什么在前一个例子中我们自己写的Setter没有作用。正确的代码需要直接指向ContentPresenter.

你可以看看所有控件在默认主题下的行为,不只是Button,也不止是Background,还包括所有其他依赖状态的属性。
为啥要直接改ContentPresenter而不是改Button.Background,这是因为如果用户对Buttob设置了一个本地值,会覆写所有的样式,造成很多的Button都会显示同样的颜色
前面对应的属性值即使样式已经不在指定给它了也无法恢复
在Avalonia中,我们有多种类型的属性,其中的一部分,直接属性,是不支持的样式的。这些属性这么弄是为了简单和更好的性能,并不会根据优先级存储很多的值。而是仅存储最新的值,且无法恢复。
各种各样的控件
这部分不打算弄了,用到的时候直接去看对应的控件~
模板Template
Data Templates
很多控件都有Content这个属性,像是ContentControl.Content,Window继承至ContentControl。来看下面的例子
<Window xmlns="https://github.com/avaloniaui"
        xmlns:x="http://schemas.microsoft.com/winfx/2006/xaml">
  Hello World!
</Window>

例子很简单,就是显示一段字
假如在窗口显示的不是一段字,是一个对象。
在Model下新建一个对象

然后再MainWindow下直接新建一个这个对象
运行,效果就是下面这样的,显示不出对象的具体内容,只能显示出类型

Avalonia不知道怎样显示对象,因为它不是一个控件,所以直接就调用ToString了。我们要定义一个DataTemplate来告诉它,如何显示这个对象。
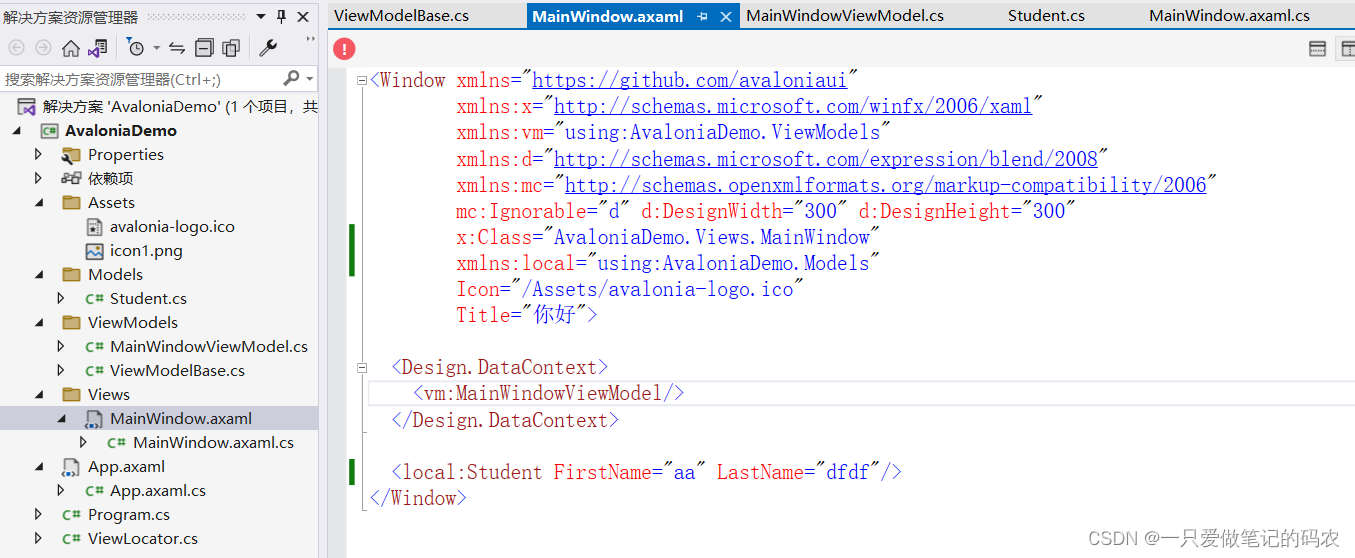
<Window xmlns="https://github.com/avaloniaui"
        xmlns:x="http://schemas.microsoft.com/winfx/2006/xaml"
        xmlns:vm="using:AvaloniaDemo.ViewModels"
        xmlns:d="http://schemas.microsoft.com/expression/blend/2008"
        xmlns:mc="http://schemas.openxmlformats.org/markup-compatibility/2006"
        mc:Ignorable="d" d:DesignWidth="300" d:DesignHeight="300"
        x:Class="AvaloniaDemo.Views.MainWindow"
		xmlns:local="using:AvaloniaDemo.Models"
        Icon="/Assets/avalonia-logo.ico"
        Title="你好">

  <Design.DataContext>
    <vm:MainWindowViewModel/>
  </Design.DataContext>

	<Window.ContentTemplate>
		<DataTemplate>
			<StackPanel>
				<Grid ColumnDefinitions="Auto,Auto" RowDefinitions="Auto,Auto">
					<TextBlock Grid.Row="0" Grid.Column="0">First Name:</TextBlock>
					<TextBlock Grid.Row="0" Grid.Column="1" Text="{Binding FirstName}"/>
					<TextBlock Grid.Row="1" Grid.Column="0">Last Name:</TextBlock>
					<TextBlock Grid.Row="1" Grid.Column="1" Text="{Binding LastName}"/>
				</Grid>
			</StackPanel>
		</DataTemplate>
	</Window.ContentTemplate>

  <local:Student FirstName="aa" LastName="dfdf"/>
</Window>

Window的内容的数据模板并不只是来自于ContentTemplate属性,每一个控件都有DataTemplate集合,可以包含多个DataTemplate。
- 如果本地没有找到该控件的模板(ContentTemplate),那么它就会去找它的DataTemplate。
- 还是没找到,继续去父节点内找DataTemplate
- 还是没找到,继续往更上一层的节点找
- 还是没找到,去App.xaml/App.axaml内找
- 如果还是没找到,那么就调用ToString了
DataTemplates是按匹配类型的,模板匹配的类型是通过在模板上设置 DataType 属性来指定的。
DataTemplates集合中的每一个DataTemplate都应该将其DataType设置为其匹配的对象类型,否则DataTemplate将不匹配任何内容
如果使用DataTemplates集合来写前面的例子的话
<Window xmlns="https://github.com/avaloniaui"
        xmlns:x="http://schemas.microsoft.com/winfx/2006/xaml"
        xmlns:vm="using:AvaloniaDemo.ViewModels"
        xmlns:d="http://schemas.microsoft.com/expression/blend/2008"
        xmlns:mc="http://schemas.openxmlformats.org/markup-compatibility/2006"
        mc:Ignorable="d" d:DesignWidth="300" d:DesignHeight="300"
        x:Class="AvaloniaDemo.Views.MainWindow"
		xmlns:local="using:AvaloniaDemo.Models"
        Icon="/Assets/avalonia-logo.ico"
        Title="你好">

  <Design.DataContext>
    <vm:MainWindowViewModel/>
  </Design.DataContext>

	<!--<Window.ContentTemplate>
		<DataTemplate>
			<StackPanel>
				<Grid ColumnDefinitions="Auto,Auto" RowDefinitions="Auto,Auto">
					<TextBlock Grid.Row="0" Grid.Column="0">First Name:</TextBlock>
					<TextBlock Grid.Row="0" Grid.Column="1" Text="{Binding FirstName}"/>
					<TextBlock Grid.Row="1" Grid.Column="0">Last Name:</TextBlock>
					<TextBlock Grid.Row="1" Grid.Column="1" Text="{Binding LastName}"/>
				</Grid>
			</StackPanel>
		</DataTemplate>
	</Window.ContentTemplate>-->
	<Window.DataTemplates>
		<!--需要指定这个Datatemplate的数据类型-->
		<DataTemplate DataType="{x:Type local:Student}">
			<Grid ColumnDefinitions="Auto,Auto" RowDefinitions="Auto,Auto">
				<TextBlock Grid.Row="0" Grid.Column="0">First Name:</TextBlock>
				<TextBlock Grid.Row="0" Grid.Column="1" Text="{Binding FirstName}"/>
				<TextBlock Grid.Row="1" Grid.Column="0">Last Name:</TextBlock>
				<TextBlock Grid.Row="1" Grid.Column="1" Text="{Binding LastName}"/>
			</Grid>
		</DataTemplate>
	</Window.DataTemplates>
	<local:Student FirstName="aa" LastName="dfdf"/>
</Window>

如果用这种机制
- 如果需要重用模板,可以把模板放到Window级
- 如果需要在整个程序中使用模板,可以把模板放到App.xaml的Application.DataTemplates
如果再加一个对象
namespace Example
{
    public class Teacher
    {
        public Teacher(string firstName, string lastName)
        {
            FirstName = firstName;
            LastName = lastName;
        }

        public string FirstName { get; }
        public string LastName { get; }
    }
}
对应这个对象的数据模板也要多写一个
    <DataTemplate DataType="{x:Type local:Teacher}">
      <Grid ColumnDefinitions="Auto,4,Auto">
        <TextBlock Grid.Row="0" Grid.Column="0">Professor</TextBlock>
        <TextBlock Grid.Row="0" Grid.Column="2" Text="{Binding LastName}"/>
      </Grid>
    </DataTemplate>
官方的例子
这里提供了一个例子
它的工程目录结构是这样的

Model中的Student和Teacher都是继承自Person类
在ViewModels中定义了一个List,存放需要使用的数据
using BasicDataTemplateSample.Models;
using System;
using System.Collections.Generic;
using System.Text;

namespace BasicDataTemplateSample.ViewModels
{
    public class MainWindowViewModel : ViewModelBase
    {
        /// <summary>
        /// As this is a list of Persons, we can add Students and Teachers here.
        /// </summary>
        public List<Person> People { get; } = new List<Person>()
        {
            new Teacher
            {
                FirstName = "Mr.",
                LastName = "X",
                Age = 55,
                Sex=Sex.Diverse,
                Subject = "My Favorite Subject"
            },
            new Student
            {
                FirstName = "Hello",
                LastName = "World",
                Age = 17,
                Sex= Sex.Male,
                Grade=12
            },
            new Student
            {
                FirstName = "Hello",
                LastName = "Kitty",
                Age = 12,
                Sex= Sex.Female,
                Grade=6
            }
        };
    }
}
在主界面xmal上
<Window x:Class="BasicDataTemplateSample.Views.MainWindow"
xmlns="https://github.com/avaloniaui"
xmlns:x="http://schemas.microsoft.com/winfx/2006/xaml"
xmlns:d="http://schemas.microsoft.com/expression/blend/2008"
xmlns:mc="http://schemas.openxmlformats.org/markup-compatibility/2006"
xmlns:model="using:BasicDataTemplateSample.Models"
xmlns:view="using:BasicDataTemplateSample.Views"
xmlns:vm="using:BasicDataTemplateSample.ViewModels"
Title="BasicDataTemplateSample"
d:DesignHeight="450"
d:DesignWidth="800"
x:CompileBindings="true"
x:DataType="vm:MainWindowViewModel"
Icon="/Assets/avalonia-logo.ico"
mc:Ignorable="d">
<Design.DataContext>
<vm:MainWindowViewModel />
</Design.DataContext>
<Window.Resources>
<!-- 对任意的Person类添加模板 -->
<!-- 通过Key来访问这个模板 -->
<DataTemplate x:Key="My.DataTemplates.Person" DataType="model:Person">
<Grid ColumnDefinitions="Auto, *" RowDefinitions="Auto, Auto, Auto, Auto">
<TextBlock Grid.Row="0" Text="First Name: " />
<TextBlock Grid.Row="0"
Grid.Column="1"
Text="{Binding FirstName}" />
<TextBlock Grid.Row="1" Text="Last Name: " />
<TextBlock Grid.Row="1"
Grid.Column="1"
Text="{Binding LastName}" />
<TextBlock Grid.Row="2" Text="Age: " />
<TextBlock Grid.Row="2"
Grid.Column="1"
Text="{Binding Age, StringFormat={}{0} years}" />
<TextBlock Grid.Row="3" Text="Sex: " />
<TextBlock Grid.Row="3"
Grid.Column="1"
Text="{Binding Sex}" />
</Grid>
</DataTemplate>
</Window.Resources>
<Window.DataTemplates>
<!-- 对任意Student类添加数据模板 -->
<!-- 注意模板的顺序,顺序上先写的模板为更具体的模板 -->
<DataTemplate DataType="model:Student">
<StackPanel>
<TextBlock FontWeight="Bold" Text="{Binding Grade, StringFormat='I am a student in {0}. grade'}" />
<!-- 这里我们用DynamicResource重新使用PersonTemplate -->
<ContentControl Content="{Binding}" ContentTemplate="{DynamicResource My.DataTemplates.Person}" />
</StackPanel>
</DataTemplate>
<!-- 对任意Teacher类添加数据模板 -->
<DataTemplate DataType="model:Teacher">
<StackPanel>
<TextBlock FontWeight="Bold" Text="{Binding Subject, StringFormat='I am a teacher for: "{0}"'}" />
<!-- 这里用自定义的控件来展示-->
<view:PersonView />
</StackPanel>
</DataTemplate>
</Window.DataTemplates>
<ListBox Items="{Binding People}" />
</Window>
先是定义了Person类的模板,放在Resource中,给了一个Key来给外部访问
对于Student类,通过DynamicResource 给ContentTemplate绑定定义好了的Person类的模板
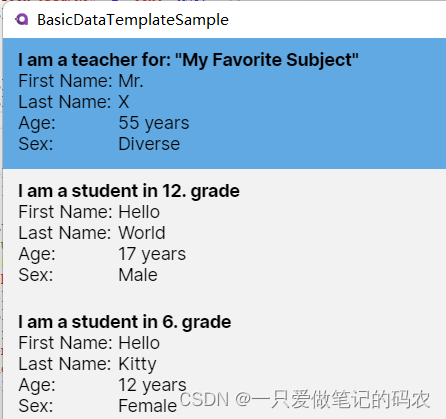
对于Teacher类的绑定这里,是通过引入另一个自定义控件来实现的,x:DataType="model:Person"这里指定了模型的类型
<UserControl x:Class="BasicDataTemplateSample.Views.PersonView"
             xmlns="https://github.com/avaloniaui"
             xmlns:x="http://schemas.microsoft.com/winfx/2006/xaml"
             xmlns:d="http://schemas.microsoft.com/expression/blend/2008"
             xmlns:mc="http://schemas.openxmlformats.org/markup-compatibility/2006"
             xmlns:model="using:BasicDataTemplateSample.Models"
             xmlns:vm="using:BasicDataTemplateSample.ViewModels"
             d:DesignHeight="450"
             d:DesignWidth="800"
             x:CompileBindings="True"
             x:DataType="model:Person"
             mc:Ignorable="d">
    <Grid ColumnDefinitions="Auto, *" RowDefinitions="Auto, Auto, Auto, Auto">
        <TextBlock Grid.Row="0" Text="First Name: " />
        <TextBlock Grid.Row="0"
                   Grid.Column="1"
                   Text="{Binding FirstName}" />

        <TextBlock Grid.Row="1" Text="Last Name: " />
        <TextBlock Grid.Row="1"
                   Grid.Column="1"
                   Text="{Binding LastName}" />

        <TextBlock Grid.Row="2" Text="Age: " />
        <TextBlock Grid.Row="2"
                   Grid.Column="1"
                   Text="{Binding Age, StringFormat={}{0} years}" />

        <TextBlock Grid.Row="3" Text="Sex: " />
        <TextBlock Grid.Row="3"
                   Grid.Column="1"
                   Text="{Binding Sex}" />
    </Grid>
</UserControl>
通过代码创建数据模板
通过FuncDataTemplate来实现模板
例如的下面的代码与XMAL的作用一致
var template = new FuncDataTemplate<Student>((value, namescope) =>
    new TextBlock
    {
        [!TextBlock.TextProperty] = new Binding("FirstName"),
    });
<DataTemplate DataType="{x:Type local:Student}">
    <TextBlock Text="{Binding FirstName}"/>
</DataTemplate>
这里也是提供了一个例子

工程的目录结构如下

Model定义了Person类
在ViewMoel类中,定义People类的列表用来存放不同的Peoson对象,给界面调用
在界面XAML中,将ListBox的ItemTemplate重新定义,绑定我们自定义的用代码写的数据模板
<Window x:Class="FuncDataTemplateSample.Views.MainWindow"
        xmlns="https://github.com/avaloniaui"
        xmlns:x="http://schemas.microsoft.com/winfx/2006/xaml"
        xmlns:d="http://schemas.microsoft.com/expression/blend/2008"
        xmlns:dataTemplates="using:FuncDataTemplateSample.DataTemplates"
        xmlns:mc="http://schemas.openxmlformats.org/markup-compatibility/2006"
        xmlns:models="using:FuncDataTemplateSample.Models"
        xmlns:vm="using:FuncDataTemplateSample.ViewModels"
        Title="FuncDataTemplateSample"
        d:DesignHeight="450"
        d:DesignWidth="800"
        x:CompileBindings="True"
        x:DataType="vm:MainWindowViewModel"
        Icon="/Assets/avalonia-logo.ico"
        mc:Ignorable="d">

    <Design.DataContext>
        <vm:MainWindowViewModel />
    </Design.DataContext>

    <ListBox Items="{Binding People}">
        <ListBox.ItemTemplate>
            <DataTemplate DataType="models:Person">
                <Grid ColumnDefinitions="Auto, *">
                    <!-- 我们用x:Static来索引任意类的静态属性  -->
                    <ContentControl
                    Content="{Binding}"
                    ContentTemplate="{x:Static dataTemplates:DataTemplateProvider.GenderDataTemplate}"
                    />
                    <TextBlock Grid.Column="1"
                               Margin="10,0"
                               VerticalAlignment="Center"
                               Text="{Binding}" />
                </Grid>
            </DataTemplate>
        </ListBox.ItemTemplate>
    </ListBox>

</Window>
那么我们重点看看代码定义的数据模板的实现
首先这个DataTemplateProvider类是一个静态类
FuncDataTemplate的详细定义如下

using Avalonia;
using Avalonia.Controls;
using Avalonia.Controls.Shapes;
using Avalonia.Controls.Templates;
using Avalonia.Data;
using Avalonia.Media;
using FuncDataTemplateSample.Models;
using System;
using System.Collections.Generic;
using System.Linq;
using System.Text;
using System.Threading.Tasks;

namespace FuncDataTemplateSample.DataTemplates
{
    // Path-Data taken from here: https://icons.getbootstrap.com
    public static class DataTemplateProvider
    {
        // 这个FuncDataTemplate是一个静态变量,因为它在运行的过程中不会被修改
        public static FuncDataTemplate<Person> GenderDataTemplate { get; }
            = new FuncDataTemplate<Person>(
                // 检查变量是不是空,是空就不执行了
                (person) => person is not null,

                // Avalonia 会自动把Person当作参数传入.
                BuildGenderPresenter);


        // 这里函数会根据传入的Person来具体区分实现,返回IControl
        private static IControl BuildGenderPresenter(Person person)
        {
            // Create a new Path as a presenter. You can also use any other Control.
            // If you want to add more than one control, remember to wrap them inside a Panel.
            Path path = new Path()
            {
                Width = 32,
                Height = 32,

                // We set Stretch to Uniform. That way our Path will be made as big as needed while keeping the aspect ratio.
                Stretch = Stretch.Uniform,

                // Create a Binding for the ToolTip
                [!ToolTip.TipProperty] = new Binding(nameof(person.Sex))
            };

            //下面这部分是根据传入的Sex来区分画出对应的符号
            switch (person.Sex)
            {
                case Sex.Diverse:
                    // We use StreamGeometry.Parse() to get the needed Data.
                    path.Data = StreamGeometry.Parse("M 0,9.3750041 A 9.375,9.375 0 0 1 9.375,4.0698515e-6 h 56.25 A 9.375,9.375 0 0 1 65.625,18.750004 H 32.00625 L 65.625,52.368754 77.7375,40.237504 a 9.3868425,9.3868425 0 1 1 13.275,13.275 l -12.13125,12.1125 15.4125,15.4125 A 74.8125,74.8125 0 0 1 150,56.250004 c 22.125,0 41.98125,9.5625 55.70625,24.7875 l 62.2875,-62.2875 H 215.625 a 9.375,9.375 0 0 1 0,-18.7499999301485 h 75 A 9.375,9.375 0 0 1 300,9.3750041 V 84.375004 a 9.375,9.375 0 0 1 -18.75,0 v -52.36875 l -64.6875,64.6875 A 75,75 0 0 1 159.375,205.6875 V 243.75 H 187.5 a 9.375,9.375 0 0 1 0,18.75 h -28.125 v 28.125 a 9.375,9.375 0 0 1 -18.75,0 V 262.5 H 112.5 a 9.375,9.375 0 0 1 0,-18.75 h 28.125 V 205.6875 A 75,75 0 0 1 83.4375,96.675004 L 65.625,78.881254 53.5125,91.012504 a 9.3868425,9.3868425 0 1 1 -13.275,-13.275 L 52.36875,65.625004 18.75,32.006254 v 33.61875 a 9.375,9.375 0 0 1 -18.75,0 z M 102.9375,100.425 a 56.258862,56.258862 0 1 0 94.125,61.65 56.258862,56.258862 0 0 0 -94.125,-61.65 z");

                    // We can set Fill to any Brush. We can also look up a Brush in Resources, if needed.
                    path.Fill = new LinearGradientBrush
                    {
                        StartPoint = new RelativePoint(0, 0, RelativeUnit.Relative),
                        EndPoint = new RelativePoint(0, 1, RelativeUnit.Relative),
                        GradientStops =
                        {
                            new GradientStop(Colors.Red, 0),
                            new GradientStop(Colors.Orange, 0.2),
                            new GradientStop(Colors.Yellow, 0.4),
                            new GradientStop(Colors.DarkTurquoise, 0.6),
                            new GradientStop(Colors.Blue, 0.8),
                            new GradientStop(Colors.Violet, 1),
                        }
                    };
                    break;
                case Sex.Female:
                    path.Data = StreamGeometry.Parse("m 150,18.748842 a 75,75 0 1 0 0,149.999998 75,75 0 0 0 0,-149.999998 z m -93.75,75 a 93.75,93.75 0 1 1 103.125,93.281248 v 37.96875 h 37.5 a 9.375,9.375 0 0 1 0,18.75 h -37.5 v 46.875 a 9.375,9.375 0 0 1 -18.75,0 v -46.875 h -37.5 a 9.375,9.375 0 0 1 0,-18.75 h 37.5 V 187.03009 A 93.75,93.75 0 0 1 56.25,93.748842 Z");
                    path.Fill = new SolidColorBrush(Colors.DeepPink);
                    break;
                case Sex.Male:
                    path.Data = StreamGeometry.Parse("m 178.125,37.539801 a 9.375,9.375 0 0 1 0,-18.75 h 93.75 a 9.375,9.375 0 0 1 9.375,9.375 V 121.9148 a 9.375,9.375 0 0 1 -18.75,0 V 50.796051 L 185.08125,128.2148 A 93.75,93.75 0 1 1 171.825,114.95855 L 249.24375,37.539801 Z M 112.5,112.5398 a 75,75 0 1 0 0,150 75,75 0 0 0 0,-150 z");
                    path.Fill = new SolidColorBrush(Colors.Blue);
                    break;
                default:
                    // Fall-back value
                    return new TextBlock { Text = "NOT SUPPORTED" };
            }

            return path;
        }
    }
}
打算分P了,内容太多了,编辑器太慢了,请看下篇 Go


 344
344

 被折叠的 条评论
为什么被折叠?
被折叠的 条评论
为什么被折叠?
 到【灌水乐园】发言


