Android中收货地址管理Demo

本文介绍了一个Android电商平台的收货地址管理功能,重点在于实现省市区三级联动的选择。通过数据库填充数据,利用ListView和HorizontalScrollView实现联动效果,并提供了Bean和数据库管理器的实现详情。
摘要由CSDN通过智能技术生成

Android 收货地址管理,城市选择为省市区三级联动

最近公司在做一个电商平台,这里展示的是一个收货地址管理的功能,实现了省市区三级联动的集成,本Demo得力于网络提供的三级联动案例,特此感谢提供者。
首先就是完成布局UI设计:
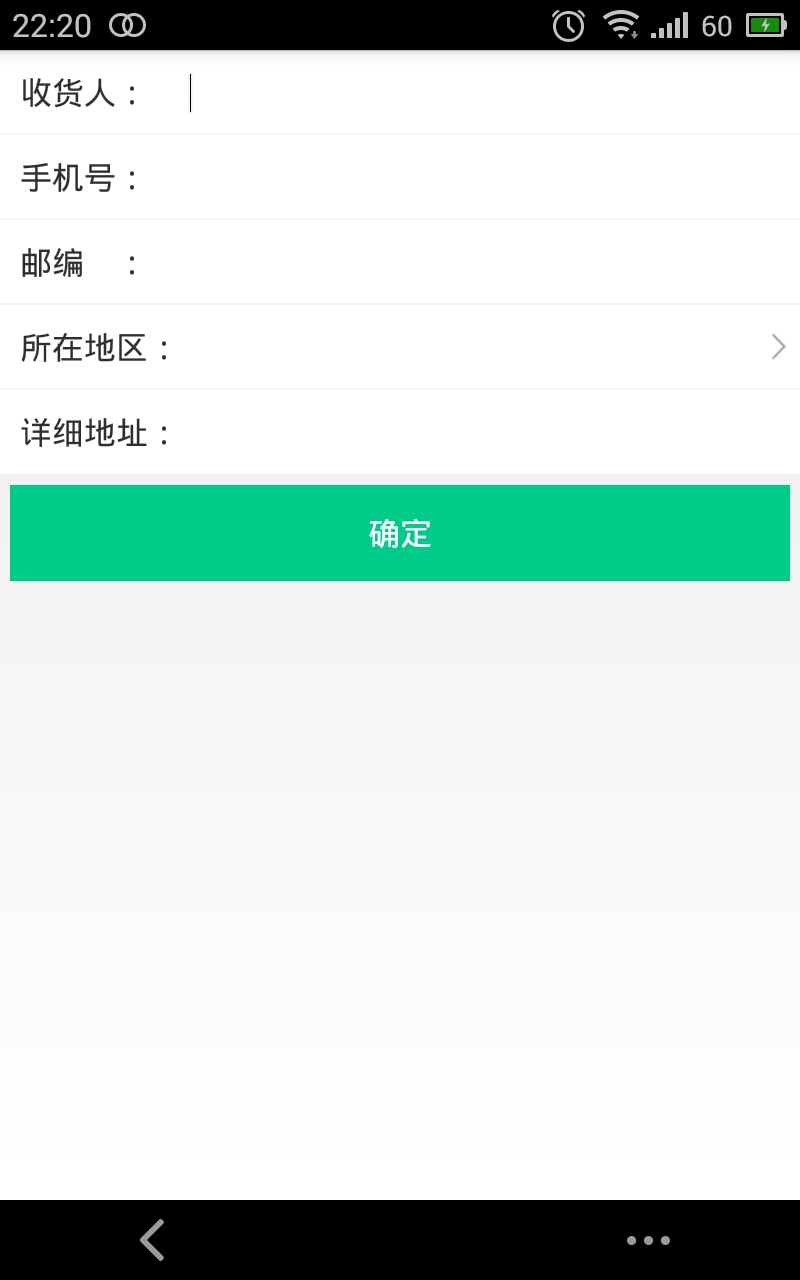
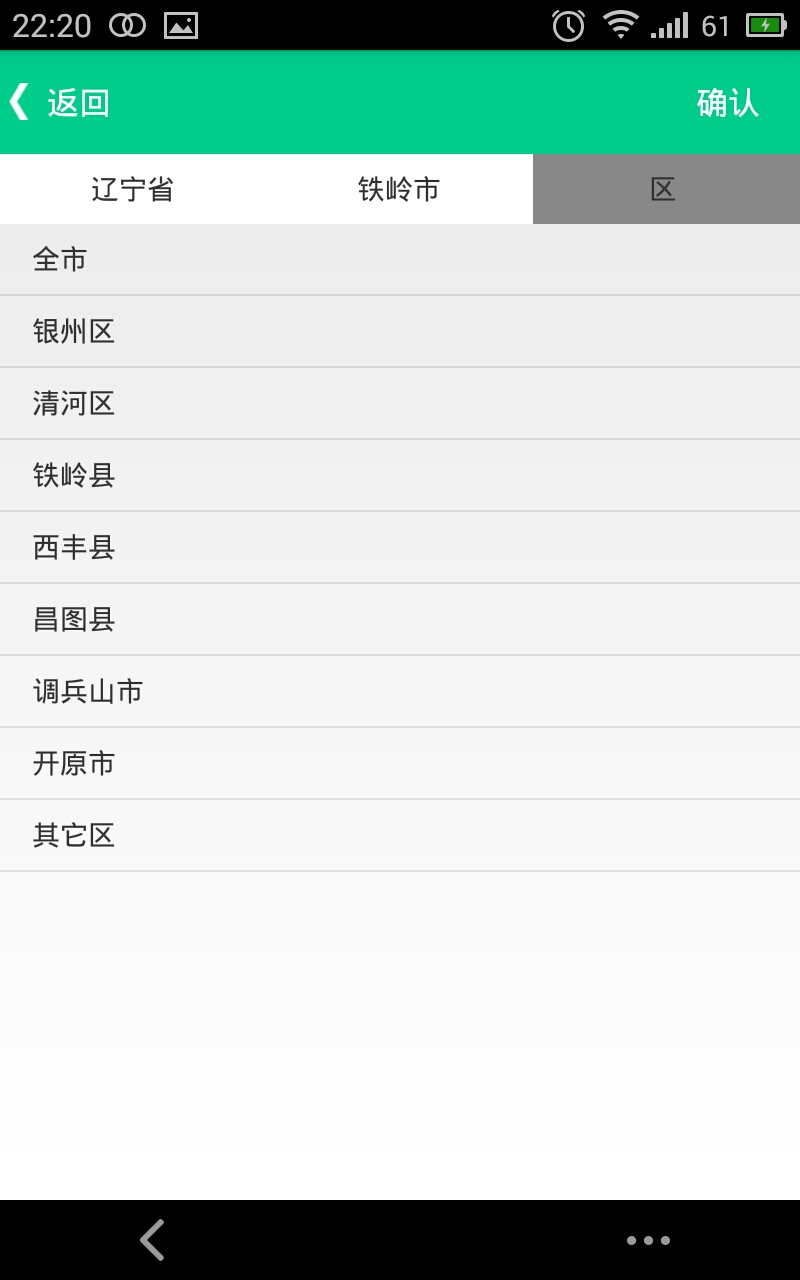
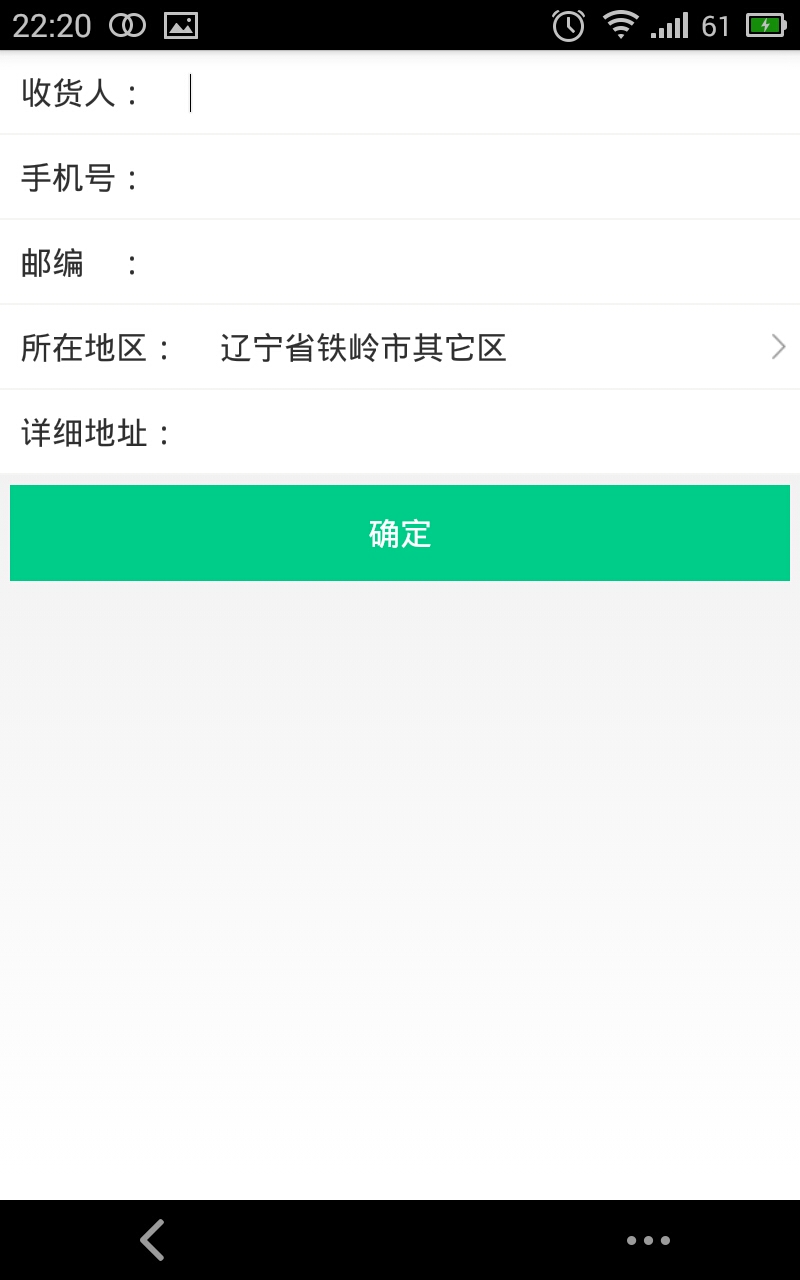
UI布局
城市选择UI
选择后的UI

UI布局代码:
主页面布局:
<LinearLayout xmlns:android="http://schemas.android.com/apk/res/android"
    xmlns:tools="http://schemas.android.com/tools"
    android:layout_width="match_parent"
    android:layout_height="match_parent"
    android:orientation="vertical"
    >

     <LinearLayout
        android:layout_width="match_parent"
        android:layout_height="wrap_content"
        android:orientation="horizontal"
        >

        <TextView 

        android:padding="10dp"
        android:textSize="16sp"
        android:background="#ffffff"
        android:layout_width="wrap_content"
        android:layout_height="wrap_content"
        android:text="收货人:"
        android:layout_alignParentLeft="true"
            />
    <EditText
        android:layout_weight="1"
        android:id="@+id/et_shouhuoren"
        android:layout_width="match_parent"
        android:layout_height="wrap_content"
        android:background="#ffffff"
        android:textSize="16sp"
        android:padding="10dp" />
</LinearLayout>

    <View 
        android:layout_width="match_parent"
        android:layout_height="1dp"
        android:background="#F6F5F4"
        />
      <LinearLayout
        android:layout_width="match_parent"
        android:layout_height="wrap_content"
        android:orientation="horizontal"
        >

        <TextView 

        android:padding="10dp"
        android:textSize="16sp"
        android:background="#ffffff"
        android:layout_width="wrap_content"
        android:layout_height="wrap_content"
        android:text="手机号:"
        android:layout_alignParentLeft="true"
            />
    <EditText
        android:layout_weight="1"
        android:id="@+id/et_Mobile"
        android:layout_width="match_parent"
        android:layout_height="wrap_content"
        android:background="#ffffff"
        android:textSize="16sp"
        android:padding="10dp" />
</LinearLayout>

    <View 
        android:layout_width="match_parent"
        android:layout_height="1dp"
        android:background="#F6F5F4"
        />
      <LinearLayout
        android:layout_width="match_parent"
        android:layout_height="wrap_content"
        android:orientation="horizontal"
        >

        <TextView 

        android:padding="10dp
Android串口(SerialPort)接收数据的Demo示例如下: ```java import android.support.v7.app.AppCompatActivity; import android.os.Bundle; import android.util.Log; import java.io.File; import java.io.IOException; import java.io.InputStream; import android_serialport_api.SerialPort; public class SerialPortActivity extends AppCompatActivity { private SerialPort mSerialPort; private InputStream mInputStream; private ReadThread mReadThread; @Override protected void onCreate(Bundle savedInstanceState) { super.onCreate(savedInstanceState); setContentView(R.layout.activity_serial_port); try { mSerialPort = new SerialPort(new File("/dev/ttyS1"), 9600, 0); mInputStream = mSerialPort.getInputStream(); } catch (SecurityException e) { e.printStackTrace(); } catch (IOException e) { e.printStackTrace(); } mReadThread = new ReadThread(); mReadThread.start(); } private class ReadThread extends Thread { @Override public void run() { super.run(); while (!isInterrupted()) { try { if (mInputStream == null) { return; } byte[] buffer = new byte[1024]; int size = mInputStream.read(buffer); if (size > 0) { String data = new String(buffer, 0, size); Log.d("SerialPort", "Received data: " + data); // 处理接收到的数据... } } catch (IOException e) { e.printStackTrace(); } } } } @Override protected void onDestroy() { super.onDestroy(); if (mReadThread != null) { mReadThread.interrupt(); mReadThread = null; } if (mSerialPort != null) { mSerialPort.close(); mSerialPort = null; } } } ``` 以上是一个Android通过串口接收数据的示例代码。在`onCreate`方法,首先打开串口并获取输入流。然后创建一个`ReadThread`线程用于循环读取串口数据。在`ReadThread`线程的`run`方法通过`InputStream`的`read`方法读取数据,并将读取到的数据进行处理(这里只是简单地打印出来)。在`onDestroy`方法,关闭串口和销毁线程。 需要注意的是,这里使用到了一个`android_serialport_api`库,需要在项目的`build.gradle`文件添加对应的依赖。
评论 6
添加红包

请填写红包祝福语或标题

红包个数最小为10个

红包金额最低5元

当前余额3.43前往充值 >
需支付:10.00
成就一亿技术人!
领取后你会自动成为博主和红包主的粉丝 规则
hope_wisdom
发出的红包
实付
使用余额支付
点击重新获取
扫码支付
钱包余额 0

抵扣说明:

1.余额是钱包充值的虚拟货币,按照1:1的比例进行支付金额的抵扣。
2.余额无法直接购买下载,可以购买VIP、付费专栏及课程。

余额充值