


一、前言
之前整理完CAS Server的安装,现在开始做CAS Server的改造
二、语言改造
CAS默认是使用英文的,虽然在界面上可以切换语言,但还是默认成中文的比较好
打开到WEB-INF/cas-servlet.xml,找到bean id="localeResolver",将默认语言改为zh_CN
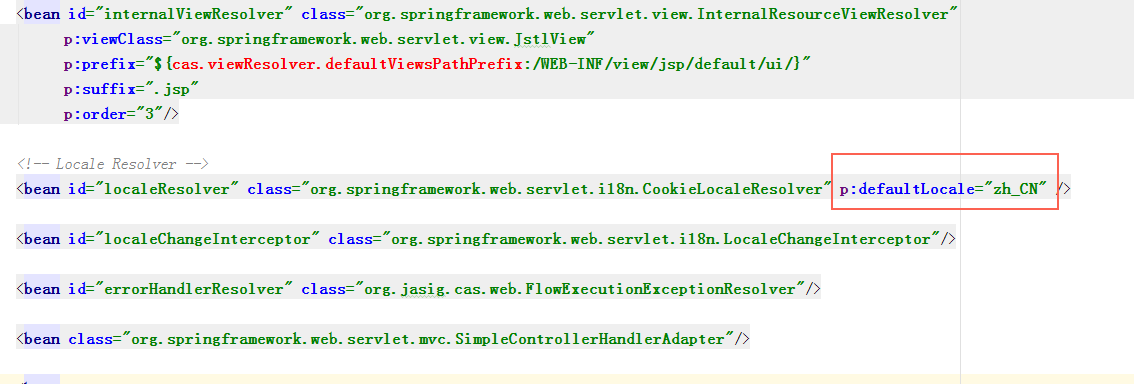
重启Tomcat,清除浏览器缓存就可以了
三、账号认证方式改造
CAS支持多种认证方式,现在账号认证基本都是用数据库查询,增加这一部分
首先修改pom.xml,增加数据库访问依赖项
    <dependency>
      <groupId>mysql</groupId>
      <artifactId>mysql-connector-java</artifactId>
      <version>5.0.8</version>
    </dependency>
    <dependency>
      <groupId>org.jasig.cas</groupId>
      <artifactId>cas-server-support-jdbc</artifactId>
      <version>${project.version}</version>
</dependency> <!--
| TODO: Replace this component with one suitable for your enviroment.
|
| This component provides authentication for the kind of credential used in your environment. In most cases
| credential is a username/password pair that lives in a system of record like an LDAP directory.
| The most common authentication handler beans:
|
| * org.jasig.cas.authentication.LdapAuthenticationHandler
| * org.jasig.cas.adaptors.jdbc.QueryDatabaseAuthenticationHandler
| * org.jasig.cas.adaptors.x509.authentication.handler.support.X509CredentialsAuthenticationHandler
| * org.jasig.cas.support.spnego.authentication.handler.support.JCIFSSpnegoAuthenticationHandler
-->
<!--<bean id="primaryAuthenticationHandler"-->
<!--class="org.jasig.cas.authentication.AcceptUsersAuthenticationHandler">-->
<!--<property name="users">-->
<!--<map>-->
<!--<entry key="casuser" value="Mellon"/>-->
<!--</map>-->
<!--</property>-->
<!--</bean>-->
<bean id="primaryAuthenticationHandler" class="org.jasig.cas.adaptors.jdbc.QueryDatabaseAuthenticationHandler">
<property name="dataSource" ref="casDataSource" />
<property name="sql" value="select password from user where lower(login_name) = lower(?)" />
<property name="passwordEncoder" ref="passwordEncoder"/>
</bean>
<bean id="passwordEncoder" class="org.jasig.cas.custome.Md5PasswordEncoder"/>
<!-- c3p0连接池配置 -->
<bean id="casDataSource" class="com.mchange.v2.c3p0.ComboPooledDataSource">
<!-- 用户名-->
<property name="user" value="root"/>
<!-- 用户密码-->
<property name="password" value="123456"/>
<property name="driverClass" value="com.mysql.jdbc.Driver"/>
<property name="jdbcUrl" value="jdbc:mysql://localhost:3306/test?useUnicode=true&characterEncoding=utf8"/>
<!--连接池中保留的最大连接数。默认值: 15 -->
<property name="maxPoolSize" value="50"/>
<!-- 连接池中保留的最小连接数,默认为:3-->
<property name="minPoolSize" value="5"/>
<!-- 初始化连接池中的连接数,取值应在minPoolSize与maxPoolSize之间,默认为3-->
<property name="initialPoolSize" value="5"/>
<!--最大空闲时间,60秒内未使用则连接被丢弃。若为0则永不丢弃。默认值: 0 -->
<property name="maxIdleTime" value="60"/>
<!-- 当连接池连接耗尽时,客户端调用getConnection()后等待获取新连接的时间,超时后将抛出SQLException,如设为0则无限期等待。单位毫秒。默认: 0 -->
<property name="checkoutTimeout" value="3000"/>
<!--当连接池中的连接耗尽的时候c3p0一次同时获取的连接数。默认值: 3 -->
<property name="acquireIncrement" value="3"/>
<!--定义在从数据库获取新连接失败后重复尝试的次数。默认值: 30 ;小于等于0表示无限次-->
<property name="acquireRetryAttempts" value="1"/>
<!--重新尝试的时间间隔,默认为:1000毫秒-->
<property name="acquireRetryDelay" value="1000" />
<!--关闭连接时,是否提交未提交的事务,默认为false,即关闭连接,回滚未提交的事务 -->
<property name="autoCommitOnClose" value="false" />
<!--如果为false,则获取连接失败将会引起所有等待连接池来获取连接的线程抛出异常,但是数据源仍有效保留,并在下次调用getConnection()的时候继续尝试获取连接。如果设为true,那么在尝试获取连接失败后该数据源将申明已断开并永久关闭。默认: false-->
<property name="breakAfterAcquireFailure" value="false"/>
<!--每60秒检查所有连接池中的空闲连接。默认值: 0,不检查 -->
<property name="idleConnectionTestPeriod" value="60"/>
<!--c3p0全局的PreparedStatements缓存的大小。如果maxStatements与maxStatementsPerConnection均为0,则缓存不生效,只要有一个不为0,则语句的缓存就能生效。如果默认值: 0-->
<property name="maxStatements" value="0"/>
<!--maxStatementsPerConnection定义了连接池内单个连接所拥有的最大缓存statements数。默认值: 0 -->
<property name="maxStatementsPerConnection" value="0"/>
</bean>在cas-server-webapp下新建包org.jasig.cas.custom,包下新建类Md5PasswordEncoder,代码如下:
/*
 * Licensed to Apereo under one or more contributor license
 * agreements. See the NOTICE file distributed with this work
 * for additional information regarding copyright ownership.
 * Apereo licenses this file to you under the Apache License,
 * Version 2.0 (the "License"); you may not use this file
 * except in compliance with the License.  You may obtain a
 * copy of the License at the following location:
 *
 *   http://www.apache.org/licenses/LICENSE-2.0
 *
 * Unless required by applicable law or agreed to in writing,
 * software distributed under the License is distributed on an
 * "AS IS" BASIS, WITHOUT WARRANTIES OR CONDITIONS OF ANY
 * KIND, either express or implied.  See the License for the
 * specific language governing permissions and limitations
 * under the License.
 */
package org.jasig.cas.custom;

import org.apache.commons.codec.digest.DigestUtils;
import org.jasig.cas.authentication.handler.PasswordEncoder;
import java.io.UnsupportedEncodingException;

/**
 * Default password encoder for the case where no password encoder is needed.
 * Encoding results in the same password that was passed in.
 *
 * @author tsfdez

 * @since 3.0.0
 */
public final class Md5PasswordEncoder implements PasswordEncoder {
    // 转MD5的签名密钥
    private static final String MD5_KEY="67hdskj73nhsdf7";
    private static final String INPUT_CHARSET = "utf-8";

    @Override
    public String encode(final String password) {
        try {
            return DigestUtils.md5Hex((MD5_KEY + password + MD5_KEY).getBytes(INPUT_CHARSET));
        } catch (final UnsupportedEncodingException e) {
            throw new RuntimeException("MD5签名过程中出现错误,指定的编码集不对,您目前指定的编码集是:" + INPUT_CHARSET, e);
        }
    }
}
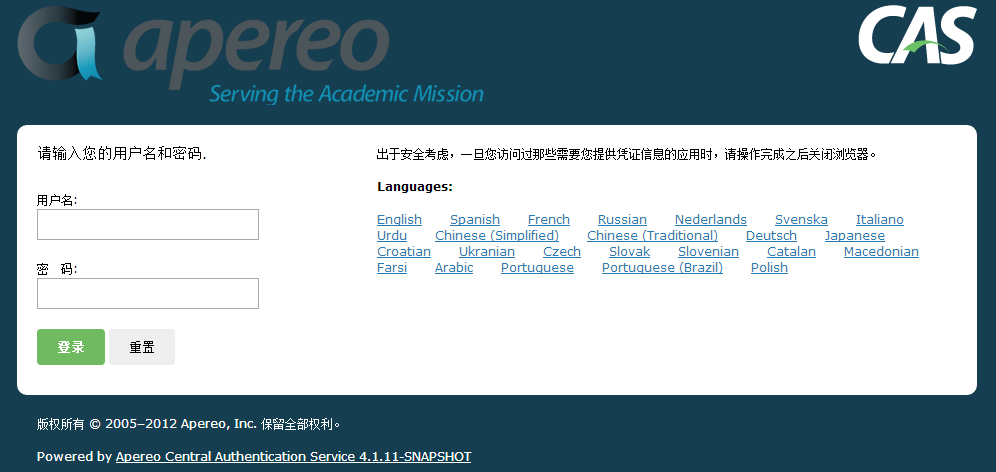
四、主题改造
先说个问题,打开CAS页面的时候,浏览器会一直转圈载入,虽说功能也能用
十有八九是直接引用到国外的CSS或者JS了,翻翻页面代码,果然如此,因为网络的关系,国外的软件多少都有这个问题
打开webapp/js/cas.js,这里用了后台加载,看到带google字样估计就有问题了
var scripts = [ "https://ajax.googleapis.com/ajax/libs/jquery/1.10.2/jquery.min.js",
    "https://ajax.googleapis.com/ajax/libs/jqueryui/1.10.3/jquery-ui.min.js",
    "https://cdnjs.cloudflare.com/ajax/libs/jquery-cookie/1.4.1/jquery.cookie.min.js",
    "https://cdn.rawgit.com/cowboy/javascript-debug/master/ba-debug.min.js"];

head.ready(document, function() {
    head.load(scripts, resourceLoadedSuccessfully);
});
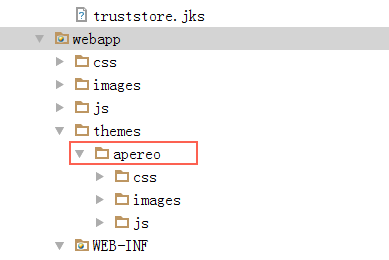
打开WEB-INF/cas.properties,做如下修改
#cas.themeResolver.defaultThemeName=cas-theme-default
cas.themeResolver.defaultThemeName=apereo
重启Tomcat,看看效果
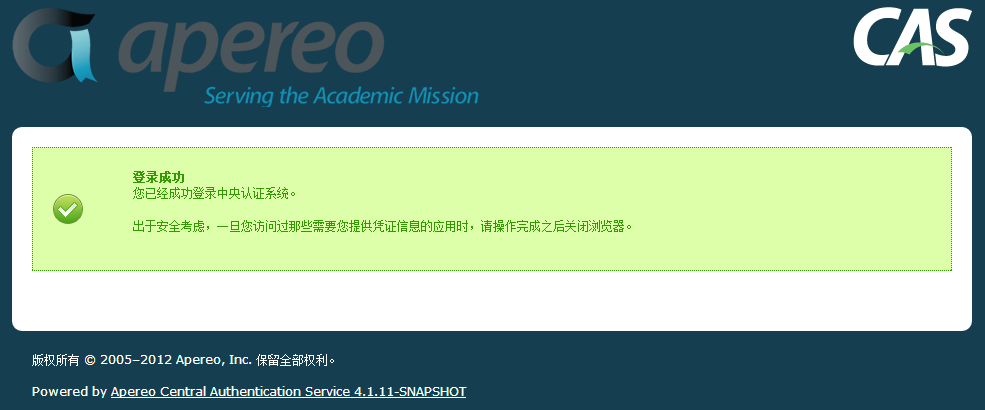
样式变了,也不转圈了,这个主题比起默认主题更加单纯,可以在它基础上修改出自定义的主题样式
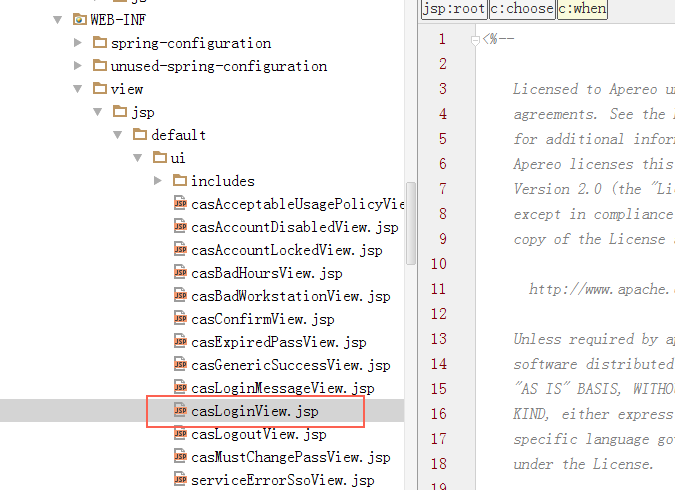
公司都有自己的登录页面,可以在WEB-INF/view/jsp/default/ui/casLoginView.jsp里修改,其他页面不用改,一般登录完就跳回原系统了
五、登出改造
登出使用https://localhost:9001/cas/logout这个地址

实际使用中,要求登出后返回到登录界面的,而CAS默认是不支持返回跳转的,这里需要做个修改
打开WEB-INF/cas-servlet.xml,基本上业务逻辑都在这里了,搜索logout,找到这个
  <bean id="logoutAction" class="org.jasig.cas.web.flow.LogoutAction"
        p:servicesManager-ref="servicesManager"
p:followServiceRedirects="${cas.logout.followServiceRedirects:false}"/># Specify whether CAS should redirect to the specified service parameter on /logout requests
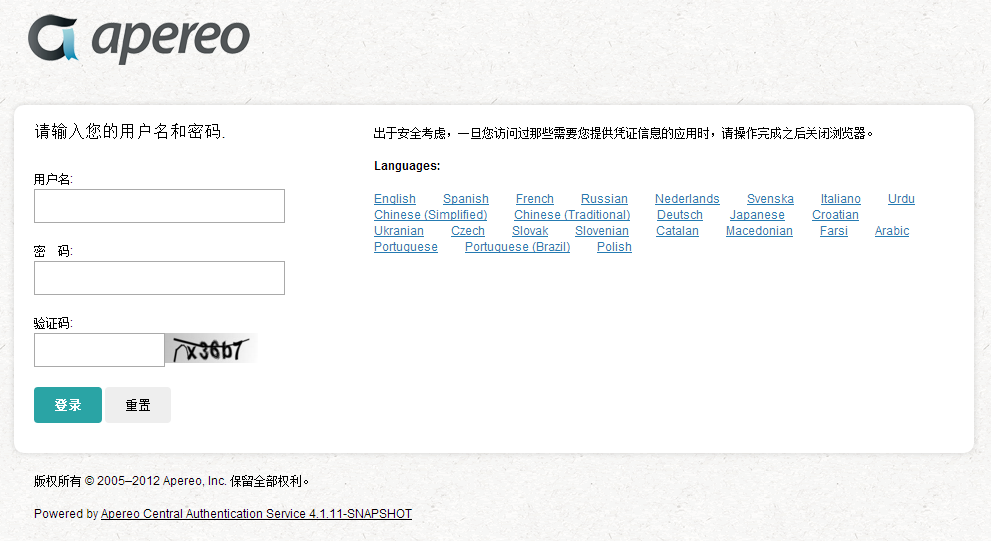
cas.logout.followServiceRedirects=true六、验证码改造
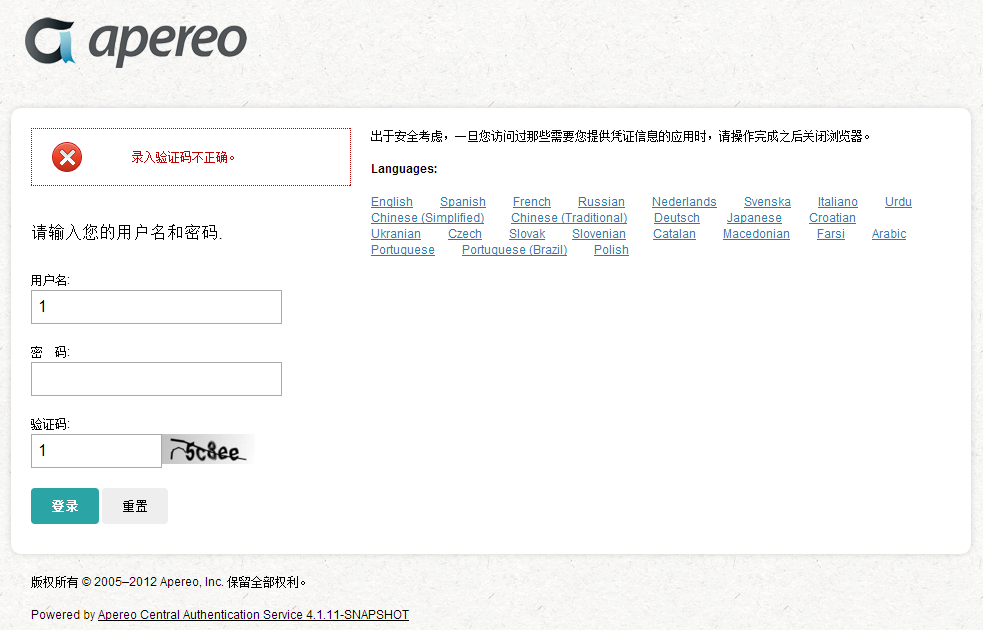
这里用google的Kaptcha来实现,可以用servlet方式配置,也可以用spring方式,选用servlet的
首先打开cas-server-webapp的pom.xml文件,增加Kaptcha依赖
    <dependency>
      <groupId>com.github.penggle</groupId>
      <artifactId>kaptcha</artifactId>
      <version>2.3.2</version>
</dependency> <!-- 验证码功能 -->
<servlet>
<servlet-name>Kaptcha</servlet-name>
<servlet-class>com.google.code.kaptcha.servlet.KaptchaServlet</servlet-class>
<init-param>
<param-name>kaptcha.border</param-name>
<param-value>no</param-value>
</init-param>
<init-param>
<param-name>kaptcha.textproducer.char.space</param-name>
<param-value>5</param-value>
</init-param>
<init-param>
<param-name>kaptcha.textproducer.char.length</param-name>
<param-value>5</param-value>
</init-param>
</servlet>
<servlet-mapping>
<servlet-name>Kaptcha</servlet-name>
<url-pattern>/captcha.jpg</url-pattern>
</servlet-mapping> <section class="row">
<label for="captcha"><spring:message code="screen.welcome.label.captcha" /></label>
<spring:message code="screen.welcome.label.captcha.accesskey" var="captchaAccessKey" />
<table>
<tr>
<td>
<form:input cssClass="required" cssErrorClass="error" id="captcha" size="10" tabindex="2" path="captcha" accesskey="${captchaAccessKey}" htmlEscape="true" autocomplete="off" />
</td>
<td style="vertical-align: bottom;">
<img οnclick="this.src='captcha.jpg?'+Math.random()" width="93" height="30" src="captcha.jpg">
</td>
</tr>
</table>
</section>screen.welcome.label.captcha=\u9A8C\u8BC1\u7801:
screen.welcome.label.captcha.accesskey=c/*
* Licensed to Apereo under one or more contributor license
* agreements. See the NOTICE file distributed with this work
* for additional information regarding copyright ownership.
* Apereo licenses this file to you under the Apache License,
* Version 2.0 (the "License"); you may not use this file
* except in compliance with the License. You may obtain a
* copy of the License at the following location:
*
* http://www.apache.org/licenses/LICENSE-2.0
*
* Unless required by applicable law or agreed to in writing,
* software distributed under the License is distributed on an
* "AS IS" BASIS, WITHOUT WARRANTIES OR CONDITIONS OF ANY
* KIND, either express or implied. See the License for the
* specific language governing permissions and limitations
* under the License.
*/
package org.jasig.cas.custom;
import org.apache.commons.lang3.builder.HashCodeBuilder;
import org.jasig.cas.authentication.UsernamePasswordCredential;
import javax.validation.constraints.NotNull;
import javax.validation.constraints.Size;
/**
* 带验证码的登录界面.
*
* @author tsfdez
* @since 3.0.0
*/
public class UsernamePasswordCredentialWithCaptcha extends UsernamePasswordCredential {
/**
* 验证码.
*/
@NotNull
@Size(min = 1, message = "captcha.required")
private String captcha;
public String getCaptcha() {
return captcha;
}
public void setCaptcha(final String captcha) {
this.captcha = captcha;
}
/**
* {@inheritDoc}
*/
@Override
public boolean equals(final Object o) {
if (this == o) {
return true;
}
if (o == null || getClass() != o.getClass()) {
return false;
}
final UsernamePasswordCredentialWithAuthCode that = (UsernamePasswordCredentialWithAuthCode) o;
if (getPassword() != null ? !getPassword().equals(that.getPassword())
: that.getPassword() != null) {
return false;
}
if (getPassword() != null ? !getPassword().equals(that.getPassword())
: that.getPassword() != null) {
return false;
}
if (captcha != null ? !captcha.equals(that.captcha)
: that.captcha != null) {
return false;
}
return true;
}
@Override
public int hashCode() {
return new HashCodeBuilder().append(getUsername())
.append(getPassword()).append(captcha).toHashCode();
}
}
    <!--<var name="credential" class="org.jasig.cas.authentication.UsernamePasswordCredential"/>-->
    <var name="credential" class="org.jasig.cas.custom.UsernamePasswordCredentialWithCaptcha"/>
/*
 * Licensed to Apereo under one or more contributor license
 * agreements. See the NOTICE file distributed with this work
 * for additional information regarding copyright ownership.
 * Apereo licenses this file to you under the Apache License,
 * Version 2.0 (the "License"); you may not use this file
 * except in compliance with the License.  You may obtain a
 * copy of the License at the following location:
 *
 *   http://www.apache.org/licenses/LICENSE-2.0
 *
 * Unless required by applicable law or agreed to in writing,
 * software distributed under the License is distributed on an
 * "AS IS" BASIS, WITHOUT WARRANTIES OR CONDITIONS OF ANY
 * KIND, either express or implied.  See the License for the
 * specific language governing permissions and limitations
 * under the License.
 */
package org.jasig.cas.custom;

import javax.servlet.http.HttpServletRequest;
import javax.servlet.http.HttpSession;

import org.apache.commons.lang3.StringUtils;
import org.jasig.cas.authentication.Credential;
import org.jasig.cas.web.flow.AuthenticationViaFormAction;
import org.jasig.cas.web.support.WebUtils;
import org.springframework.binding.message.MessageBuilder;
import org.springframework.binding.message.MessageContext;
import org.springframework.webflow.execution.Event;
import org.springframework.webflow.execution.RequestContext;

/**
 * 验证码校验类.
 *
 * @author tsfdez
 * @since 3.0.0
 */
public class AuthenticationViaFormActionWithCaptcha extends AuthenticationViaFormAction {

    /**
     * 验证码校验.
     * @param context context
     * @param credentials credentials
     * @param messageContext messageContext
     * @return the resulting event.
     * @since 3.0.0
     */
    public final Event validatorCode(final RequestContext context, final Credential credentials,
                                      final MessageContext messageContext) {
        final HttpServletRequest request = WebUtils.getHttpServletRequest(context);
        final HttpSession session = request.getSession();
        final String captcha = (String) session.getAttribute(com.google.code.kaptcha.Constants.KAPTCHA_SESSION_KEY);
        session.removeAttribute(com.google.code.kaptcha.Constants.KAPTCHA_SESSION_KEY);

        final UsernamePasswordCredentialWithCaptcha upc = (UsernamePasswordCredentialWithCaptcha) credentials;
        final String submitCaptcha = upc.getCaptcha();

        if (StringUtils.isEmpty(submitCaptcha) || StringUtils.isEmpty(captcha)) {
            messageContext.addMessage(new MessageBuilder().error().code("captcha.required").build());
            return new Event(this, ERROR);
        }
        if (submitCaptcha.equals(captcha)) {
            return new Event(this, SUCCESS);
        }
        messageContext.addMessage(new MessageBuilder().error().code("error.authentication.captcha.bad").build());
        return new Event(this, ERROR);
    }
}
error.invalid.loginticket=\u60a8\u4e0d\u80fd\u591f\u518d\u6b21\u63d0\u4ea4\u5df2\u7ecf\u63d0\u4ea4\u8fc7\u7684\u8868\u5355\u3002
username.required=\u5fc5\u987b\u5f55\u5165\u7528\u6237\u540d\u3002
password.required=\u5fc5\u987b\u5f55\u5165\u5bc6\u7801\u3002
captcha.required=\u5fc5\u987b\u5f55\u5165\u9a8c\u8bc1\u7801\u3002
error.authentication.captcha.bad=\u5f55\u5165\u9a8c\u8bc1\u7801\u4e0d\u6b63\u786e\u3002 <view-state id="viewLoginForm" view="casLoginView" model="credential">
<binder>
<binding property="username" required="true"/>
<binding property="password" required="true"/>
<binding property="captcha" required="true"/>
</binder>
<on-entry>
<set name="viewScope.commandName" value="'credential'"/>
<!--
<evaluate expression="samlMetadataUIParserAction" />
-->
</on-entry>
<transition on="submit" bind="true" validate="true" to="captchaValidate"/>
</view-state>
<action-state id="captchaValidate">
<evaluate expression="authenticationViaFormAction.validatorCode(flowRequestContext, flowScope.credential, messageContext)" />
<transition on="error" to="generateLoginTicket" />
<transition on="success" to="realSubmit" />
</action-state>
七、小结
Server端的改造完成了,后面开始Client端的设置


 1417
1417


 被折叠的 条评论
为什么被折叠?
被折叠的 条评论
为什么被折叠?
 到【灌水乐园】发言


