


在《使用Eclipse的Axis1.4插件开发Web Service及客户端》介绍的Axis是用的Axis1.x,而Axis2是改进版本,进行了重新的设计,应该是Axis的第二代,本文介绍Axis2的使用方法。
http://ws.apache.org/axis2/是Axis2的主页,写这篇文章的时候最新版本是1.5,从http://ws.apache.org/axis2/download/1_5/download.cgi下载axis2-1.5-bin.zip、axis2-1.5-war.zip。
axis2-1.5-war.zip是web发布版本,可以在网页上进行Web Service的动态部署,提供Web Service服务。解压缩后把axis2.war放到tomcat的webapps下面,启动tomcat,在网页中输入http://localhost:8080/axis2(取决于tomcat的设置)就可以进行操作了。这方面的资料很多,就不详细介绍了。
下面介绍使用Eclipse插件开发的方法,环境与《使用Eclipse的Axis1.4插件开发Web Service及客户端》的相同。
启动Eclipse后,首先设置Axis2的主目录,需要先解压缩axis2-1.5-bin.zip,然后把解压缩之后的路径填入Eclipse的Window|Preferences|Web Services|Axis2 Preferences的界面上,如下图所示:
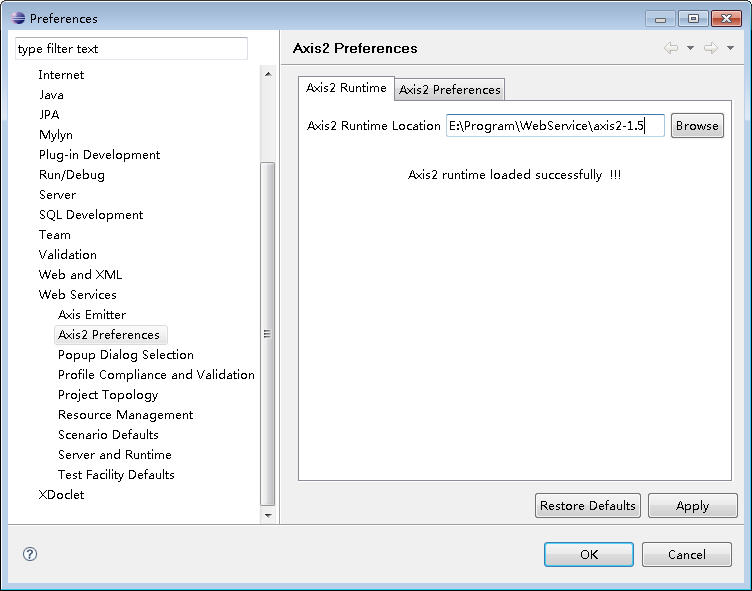
图1在Eclipse中设置Axis2的runtime
建立一个简单的类:
package demo.axis;
public class User
{
public String sayHello(String userName)
{
return "hello " + userName;
}
}
public class User
{
public String sayHello(String userName)
{
return "hello " + userName;
}
}
把这个类发布为Web Service的步骤与《使用Eclipse的Axis1.4插件开发Web Service及客户端》中的相同,只是要注意选择Axis2,生成之后的目录结构是:
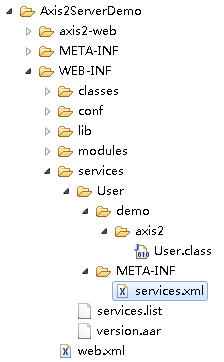
图2生成Web Service后的目录结构
但生成之后的项目中缺少.jar文件,可以把%AXIS2-HOME%/lib下的所有文件复制到项目的WEB-INF/lib下面,部署到tomcat就可以运行了,在浏览器中输入
http://localhost:8080/Axis2ServerDemo/services/User?wsdl就可以看到发布的Web Service的wsdl了。
除了利用Eclipse插件生成Web Service之外,自己动手部署也不困难。建立一个目录,把需要部署为Web Service的class文件放到一个目录下面,并建立一个META-INF目录,把services.xml放入META-INF下。目录结构如下:
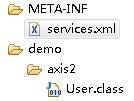
图3Axis2 aar目录结构
用jar命令把以上内容打包为一个aar文件,命令为“jar cvf User.aar *.*”。这样就会生成一个User.aar文件,放到应用的WEB-INF/services下面,也就部署了Web Service。
其中services.xml的内容可以是:
<service name="User" >
<Description>
Please Type your service description here
</Description>
<messageReceivers>
<messageReceiver mep="http://www.w3.org/2004/08/wsdl/in-only" class="org.apache.axis2.rpc.receivers.RPCInOnlyMessageReceiver" />
<messageReceiver mep="http://www.w3.org/2004/08/wsdl/in-out" class="org.apache.axis2.rpc.receivers.RPCMessageReceiver"/>
</messageReceivers>
<parameter name="ServiceClass" locked="false">demo.axis2.User</parameter>
</service>
这样类中所有public方法都发布为Web Service,如果只想发布类的某些方法,services.xml可以这样写:
<service name="User" >
<Description>
Please Type your service description here
</Description>
<parameter name="ServiceClass" locked="false">demo.axis2.User</parameter>
<operation name="sayHello">
<messageReceiver class="org.apache.axis2.rpc.receivers.RPCMessageReceiver" />
</operation>
</service>
<Description>
Please Type your service description here
</Description>
<parameter name="ServiceClass" locked="false">demo.axis2.User</parameter>
<operation name="sayHello">
<messageReceiver class="org.apache.axis2.rpc.receivers.RPCMessageReceiver" />
</operation>
</service>
客户端的编写可以直接写代码,也可以用Axis2提供的命令wsdl2java生成客户端的代码。
直接写代码的方式,示例代码如下:
package demo.axis2.client;
import javax.xml.namespace.QName;
import org.apache.axis2.addressing.EndpointReference;
import org.apache.axis2.client.Options;
import org.apache.axis2.rpc.client.RPCServiceClient;
public class UserClient
{
public static void main(String[] args) throws Exception
{
// 使用RPC方式调用WebService
RPCServiceClient serviceClient = new RPCServiceClient();
Options options = serviceClient.getOptions();
// 指定调用WebService的URL
EndpointReference targetEPR = new EndpointReference(
"http://localhost:8080/Axis2ServerDemo/services/User");
options.setTo(targetEPR);
// 指定方法的参数值
Object[] opAddEntryArgs = new Object[] {"tom"};
// 指定方法返回值的数据类型的Class对象
Class[] classes = new Class[] {String.class};
// 指定要调用的getGreeting方法及WSDL文件的命名空间
QName opAddEntry = new QName("http://axis2.demo", "sayHello");
// 调用方法并输出该方法的返回值
System.out.println(serviceClient.invokeBlocking(opAddEntry, opAddEntryArgs, classes)[0]);
}
}
用wsdl2java命令的方式,首先要生成代码,命令如下:
set AXIS2_HOME=E:/Program/WebService/axis2-1.5
%AXIS2_HOME%/bin/wsdl2java -uri http://localhost:8080/Axis2ServerDemo/services/User?wsdl -p client -s -o stub
%AXIS2_HOME%/bin/wsdl2java -uri http://localhost:8080/Axis2ServerDemo/services/User?wsdl -p client -s -o stub
生成客户端访问代码后,调用方法如下:
package demo.axis2.client;
import client.UserStub;
public class Stub
{
public static void main(String[] args) throws Exception
{
UserStub stub = new UserStub();
UserStub.SayHello sayHello = new UserStub.SayHello();
sayHello.setUserName("tom");
System.out.println(stub.sayHello(sayHello).get_return());
}
}
import client.UserStub;
public class Stub
{
public static void main(String[] args) throws Exception
{
UserStub stub = new UserStub();
UserStub.SayHello sayHello = new UserStub.SayHello();
sayHello.setUserName("tom");
System.out.println(stub.sayHello(sayHello).get_return());
}
}


 1713
1713


 被折叠的 条评论
为什么被折叠?
被折叠的 条评论
为什么被折叠?
 到【灌水乐园】发言


