


开源项地址:https://github.com/chrisbanes/Android-PullToRefresh
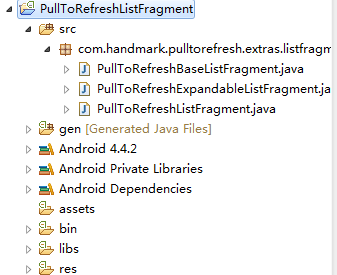
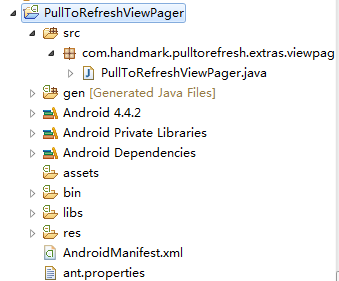
在Android-PullToRefresh-master文件夹下,我们会看到还有三个文件夹:extras,
library,sample。其中sample就是作者为我们提供的Demo,library是我们在使用Sample必须用到的jar。extras中是使用ListFragment和ViewPage用到的jar。
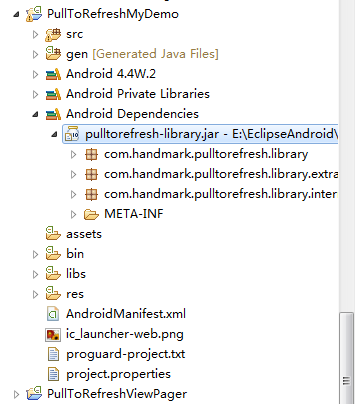
里面有三个库工程分别导入到eclipse中:
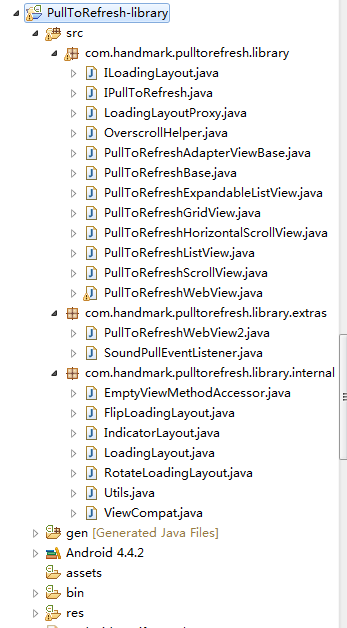
最主要的还是library库工程
创建自己工程project,然后查看project的properties->android项,在下面添加依赖库
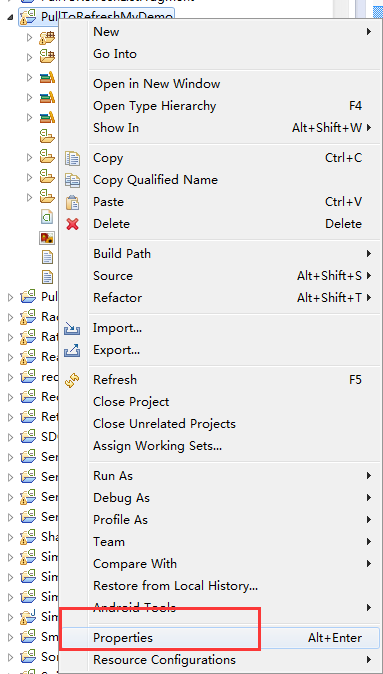
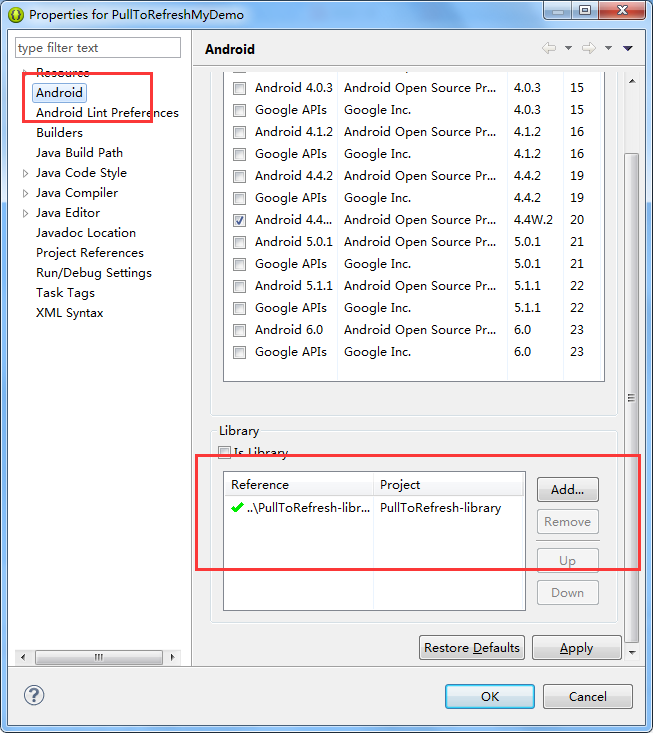
然后就可以使用了
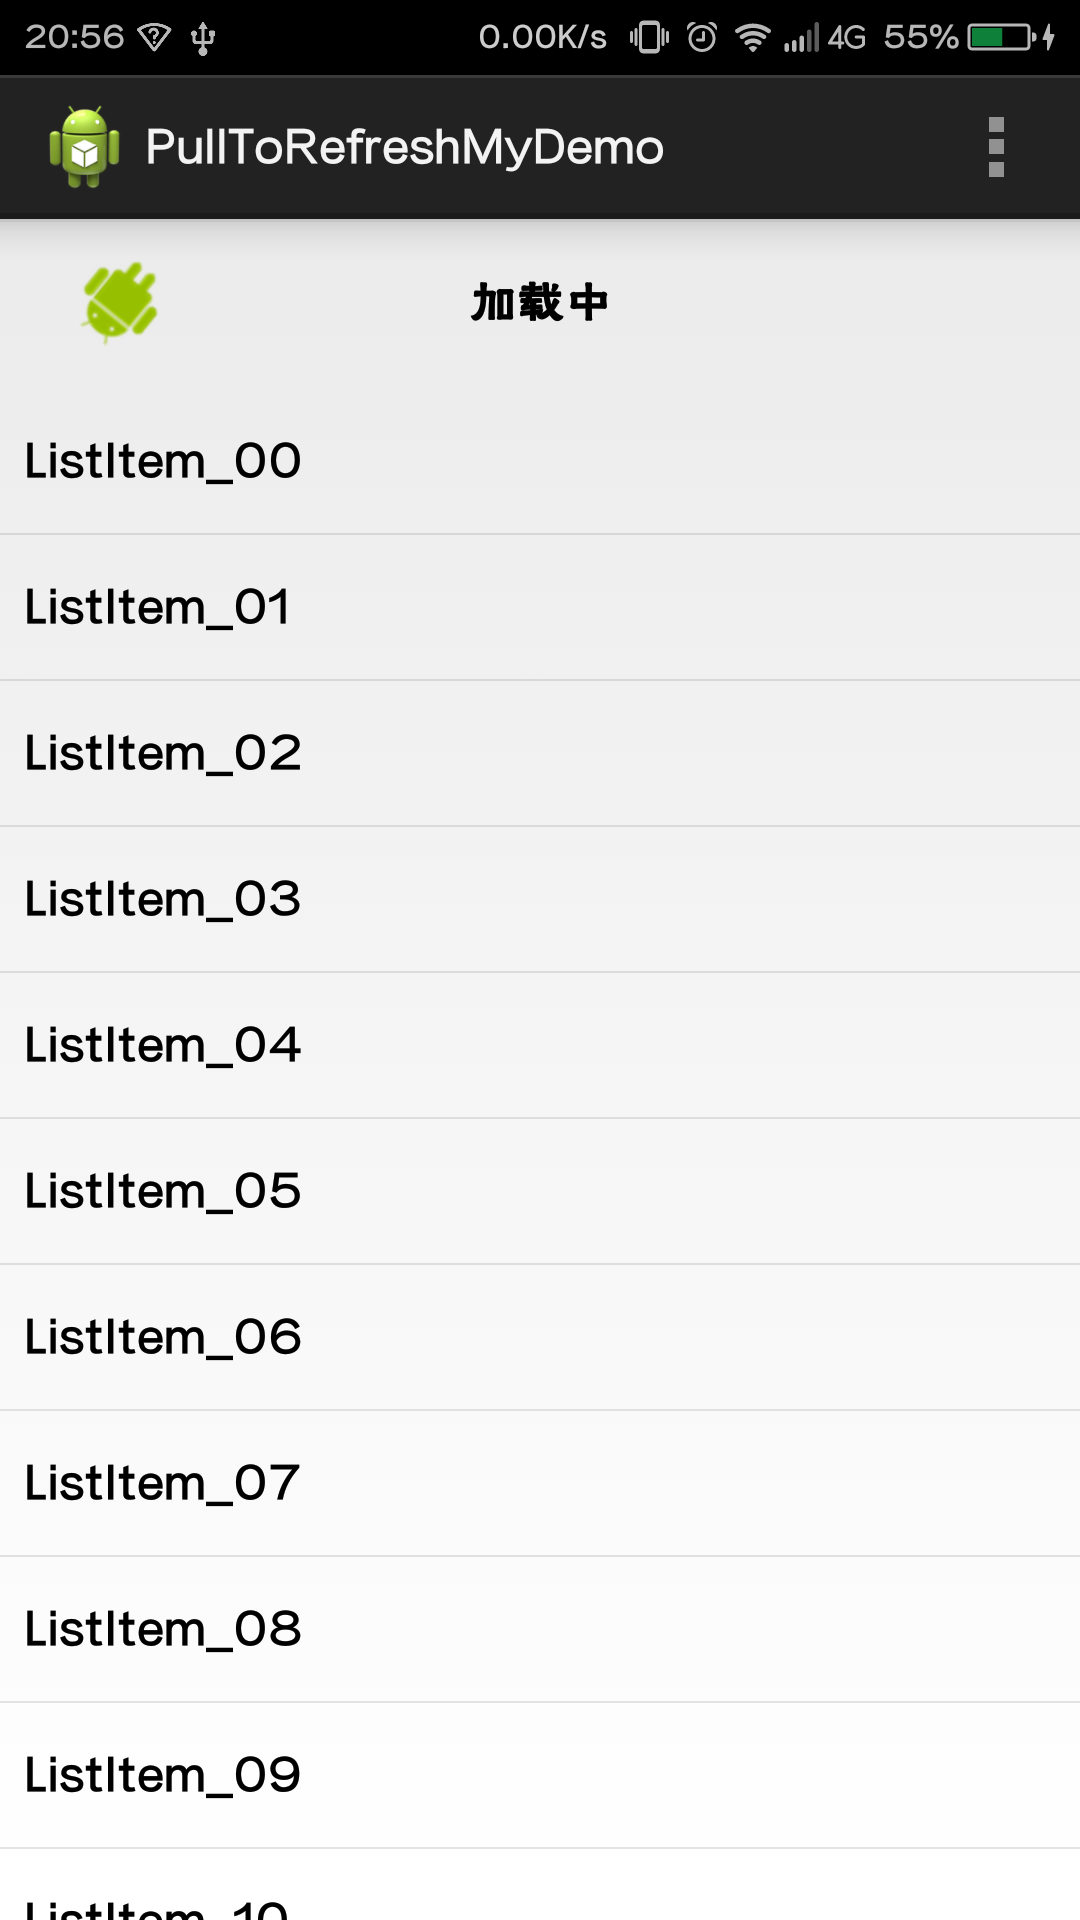
最基本的使用:
xml文件:
<?xml version="1.0" encoding="utf-8"?>
<LinearLayout xmlns:android="http://schemas.android.com/apk/res/android"
    android:layout_width="fill_parent"
    android:layout_height="fill_parent"
    android:orientation="vertical" >

    <com.handmark.pulltorefresh.library.PullToRefreshListView
        android:id="@+id/pull_refresh_list"
        android:layout_width="fill_parent"
        android:layout_height="fill_parent"

     />

</LinearLayout>
声明了一个PullToRefreshListView,里面所有的属性都是ListView的,没有任何其他属性,当然了PullToRefreshListView也提供了很多配置的属性,后面会详细介绍。
package com.hust.mydemo;

import java.util.Arrays;
import java.util.LinkedList;

import com.handmark.pulltorefresh.library.PullToRefreshBase;
import com.handmark.pulltorefresh.library.PullToRefreshBase.Mode;
import com.handmark.pulltorefresh.library.PullToRefreshBase.OnLastItemVisibleListener;
import com.handmark.pulltorefresh.library.PullToRefreshBase.OnRefreshListener;
import com.handmark.pulltorefresh.library.PullToRefreshListView;

import android.R.integer;
import android.app.Activity;
import android.os.AsyncTask;
import android.os.Bundle;
import android.text.AndroidCharacter;
import android.text.format.DateUtils;
import android.view.Menu;
import android.view.MenuItem;
import android.widget.ArrayAdapter;
import android.widget.ListView;
import android.widget.Toast;


public class MainActivity extends Activity {

	PullToRefreshListView mPullToRefreshListView;//下列刷新list
	ListView actualListView;
	LinkedList<String> listItems;//数据
	ArrayAdapter<String> adapter;//适配器

	private String[] mStrings = {
			"ListItem_00", "ListItem_01", "ListItem_02", "ListItem_03","ListItem_04",
			"ListItem_05", "ListItem_06", "ListItem_07", "ListItem_08","ListItem_09",
			"ListItem_10", "ListItem_11", "ListItem_12", "ListItem_13", "ListItem_14",
			"ListItem_15", "ListItem_16", "ListItem_17", "ListItem_18", "ListItem_19" };
	int i=0,j=20;

	/**刷新模式,
	 * 包括{
	 * 1.DISABLED(0x0)  			禁止通过手势和手动执行
	 * 2.PULL_FROM_START(0x1)		可执行下拉刷新
	 * 3.PULL_FROM_END(0x2)			可执行上拉刷新
	 * 3.BOTH(0x3)					上下都可执行
	 * 4.MANUAL_REFRESH_ONLY(0x4)	禁止通过手势执行,但可以手动设置
	 * }*/
	static final int MENU_SET_MODE = 2;

	/**这里我们来判断是下拉还是上拉*/
	private Mode CurrentMode;

    @Override
    protected void onCreate(Bundle savedInstanceState) {
        super.onCreate(savedInstanceState);
        setContentView(R.layout.activity_main);
        initView();
        initData();
      /*
       //监听列表被刷新时事件
        mPullToRefreshListView.setOnRefreshListener(new OnRefreshListener<ListView>() {

			@Override
			public void onRefresh(PullToRefreshBase<ListView> refreshView) {
				 //设置下拉时显示的日期和时间
				 String label=DateUtils.formatDateTime(getApplicationContext(), System.currentTimeMillis(),
						 DateUtils.FORMAT_SHOW_TIME|DateUtils.FORMAT_SHOW_DATE|DateUtils.FORMAT_ABBREV_ALL);
				 // 更新显示的label
				 mPullToRefreshListView.getLoadingLayoutProxy().setLastUpdatedLabel(label);

				 // 执行加载更多数据任务.
			    new GetDataTask().execute();
			}
		});*/


        mPullToRefreshListView.setOnRefreshListener(new PullToRefreshBase.OnRefreshListener2<ListView>() {

			@Override
			public void onPullDownToRefresh(
					PullToRefreshBase<ListView> refreshView) {

				 //设置下拉时显示的日期和时间
				 String label=DateUtils.formatDateTime(getApplicationContext(), System.currentTimeMillis(),
						 DateUtils.FORMAT_SHOW_TIME|DateUtils.FORMAT_SHOW_DATE|DateUtils.FORMAT_ABBREV_ALL);
				 // 更新显示的label
				 mPullToRefreshListView.getLoadingLayoutProxy().setLastUpdatedLabel(label);
				 CurrentMode=refreshView.getCurrentMode();
				 // 执行加载更多数据任务.
			    new GetDataTask().execute();

			}

			@Override
			public void onPullUpToRefresh(
					PullToRefreshBase<ListView> refreshView) {

				 //设置下拉时显示的日期和时间
				 String label=DateUtils.formatDateTime(getApplicationContext(), System.currentTimeMillis(),
						 DateUtils.FORMAT_SHOW_TIME|DateUtils.FORMAT_SHOW_DATE|DateUtils.FORMAT_ABBREV_ALL);
				 // 更新显示的label
				 mPullToRefreshListView.getLoadingLayoutProxy().setLastUpdatedLabel(label);
				 CurrentMode=refreshView.getCurrentMode();
				 // 执行加载更多数据任务.
			    new GetDataTask().execute();

			}
		});

      //监听滑动到底部的事件
        mPullToRefreshListView.setOnLastItemVisibleListener(new OnLastItemVisibleListener() {

			@Override
			public void onLastItemVisible() {
				Toast.makeText(MainActivity.this,
						"已到列表底部!", Toast.LENGTH_SHORT).show();

			}
		});

    }
    public void initView(){
    	mPullToRefreshListView=(PullToRefreshListView) findViewById(R.id.pull_refresh_list);
    	//通过getRefreshableView()来得到一个listview对象
    	actualListView=mPullToRefreshListView.getRefreshableView();
    }
    /**
     * 设置listview的适配器
     */
    public void initData(){
    	listItems=new LinkedList<String>();
    	listItems.addAll(Arrays.asList(mStrings));
    	 //把string数组中的string添加到链表中
    	adapter=new ArrayAdapter<String>(this,android.R.layout.simple_list_item_1, listItems);
    	actualListView.setAdapter(adapter);
    }
    /**
     * @author:tuke
     * @tips  :通过异步任务来加载网络中的数据,进行更新
     *
     */
	private class GetDataTask extends AsyncTask<Void, Void, String[]> {

		@Override
		protected String[] doInBackground(Void... params) {
			try {
				Thread.sleep(3000);
			} catch (InterruptedException e) {
			}
			return mStrings;
		}

		@Override
		protected void onPostExecute(String[] result) {
			//这里是提供给我们比较MODE的方法,返回0则表示相当
			if (CurrentMode.compareTo(Mode.PULL_FROM_START)==0) {
				listItems.addFirst("ListItem_"+--i);
			}else {
				listItems.addLast("ListItem_"+(j++));
			}


			adapter.notifyDataSetChanged();

			//当数据加载完成,需要调用onRefreshComplete.
			mPullToRefreshListView.onRefreshComplete();

			super.onPostExecute(result);
		}
	}
    @Override
    public boolean onCreateOptionsMenu(Menu menu) {
        // Inflate the menu; this adds items to the action bar if it is present.
        getMenuInflater().inflate(R.menu.main, menu);
        return true;
    }

    @Override
    public boolean onOptionsItemSelected(MenuItem item) {
        // Handle action bar item clicks here. The action bar will
        // automatically handle clicks on the Home/Up button, so long
        // as you specify a parent activity in AndroidManifest.xml.
        int id = item.getItemId();
        switch (id) {
		case R.id.pullfromstart:
			mPullToRefreshListView.setMode(Mode.PULL_FROM_START);
			break;
       case R.id.pullfromend:
    	   mPullToRefreshListView.setMode(Mode.PULL_FROM_END);
			break;
       case R.id.both:
    	    mPullToRefreshListView.setMode(Mode.BOTH);
	        break;
		default:
			break;
		}


        return super.onOptionsItemSelected(item);
    }
}
1,设置Mode
Java代码 收藏代码
PullToRefreshListView mListView = (PullToRefreshListView) findViewById(R.id.list_view);
mListView.setMode(Mode.BOTH); Mode.PULL_FROM_START:只支持下拉Pulling Down
Mode.PULL_FROM_END:只支持上拉Pulling Up
2,实现Listener
如果Mode设置成Mode.BOTH,需要设置刷新Listener为OnRefreshListener2,并实现onPullDownToRefresh()、onPullUpToRefresh()两个方法。
如果Mode设置成Mode.PULL_FROM_START或Mode.PULL_FROM_END,需要设置刷新Listener为OnRefreshListener,同时实现onRefresh()方法。
当然也可以设置为OnRefreshListener2,但是Mode.PULL_FROM_START的时候只调用onPullDownToRefresh()方法,Mode.PULL_FROM的时候只调用onPullUpToRefresh()方法.
如果我们想改变下拉刷新的HeaderLayout的文字,文字颜色,背景,加载图标怎么办?
1,在java代码方法的设置:
可以在初始化完成mPullRefreshListView后,通过mPullRefreshListView.getLoadingLayoutProxy()可以得到一个ILoadingLayout对象,这个对象可以设置各种指示器中的样式、文本等。
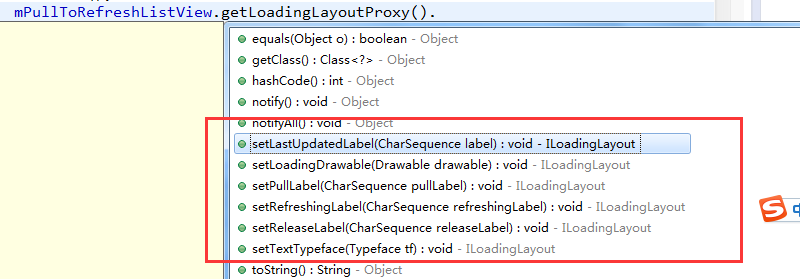
ILoadingLayout startLabels = mPullRefreshListView
                .getLoadingLayoutProxy();
        startLabels.setPullLabel("你可劲拉,拉...");// 刚下拉时,显示的提示
        startLabels.setRefreshingLabel("好嘞,正在刷新...");// 刷新时
        startLabels.setReleaseLabel("你敢放,我就敢刷新...");// 下来达到一定距离时,显示的提示
默认是上拉和下拉的字同时改变的,如果我希望单独改变呢?
private void initIndicator()
    {
        ILoadingLayout startLabels = mPullRefreshListView
                .getLoadingLayoutProxy(true, false);
        startLabels.setPullLabel("你可劲拉,拉...");// 刚下拉时,显示的提示
        startLabels.setRefreshingLabel("好嘞,正在刷新...");// 刷新时
        startLabels.setReleaseLabel("你敢放,我就敢刷新...");// 下来达到一定距离时,显示的提示

        ILoadingLayout endLabels = mPullRefreshListView.getLoadingLayoutProxy(
                false, true);
        endLabels.setPullLabel("你可劲拉,拉2...");// 刚下拉时,显示的提示
        endLabels.setRefreshingLabel("好嘞,正在刷新2...");// 刷新时
        endLabels.setReleaseLabel("你敢放,我就敢刷新2...");// 下来达到一定距离时,显示的提示
} 2,library类工程中为pulltorefresh提供了很多自定义属性
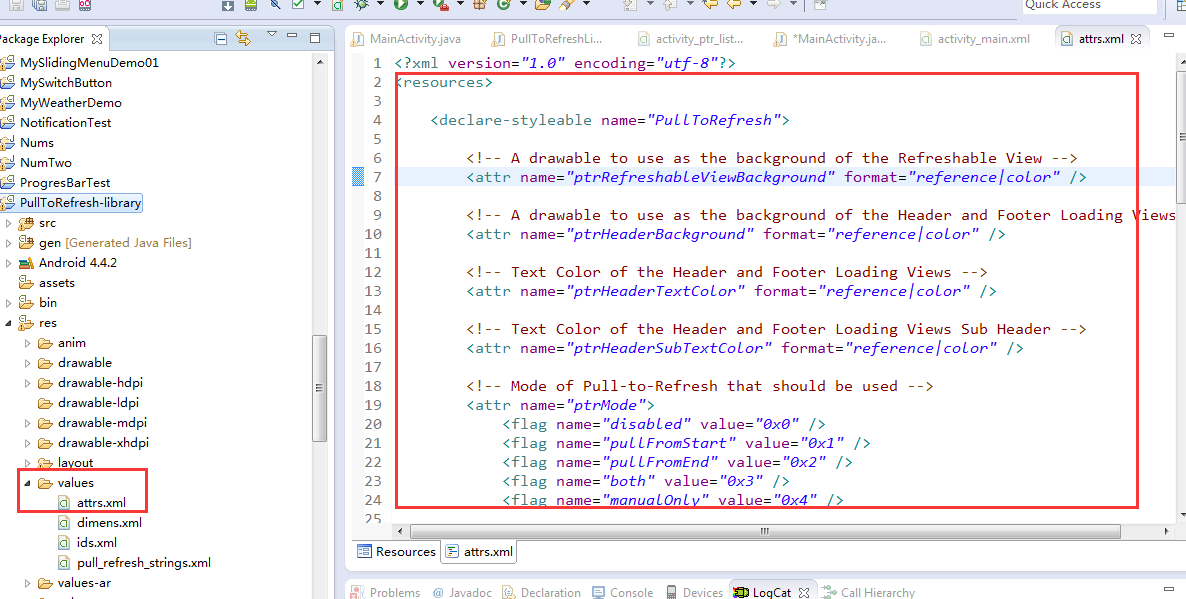
<?xml version="1.0" encoding="utf-8"?>
<resources>

    <declare-styleable name="PullToRefresh">

        <!-- A drawable to use as the background of the Refreshable View -->
        <!-- 设置刷新view的背景 -->
        <attr name="ptrRefreshableViewBackground" format="reference|color" />

        <!-- A drawable to use as the background of the Header and Footer Loading Views -->
        <!-- 设置头部view的背景 -->
        <attr name="ptrHeaderBackground" format="reference|color" />

        <!-- Text Color of the Header and Footer Loading Views -->
        <!-- 设置头部/底部文字的颜色 -->
        <attr name="ptrHeaderTextColor" format="reference|color" />

        <!-- Text Color of the Header and Footer Loading Views Sub Header -->
        <!-- 设置头部/底部副标题的文字颜色 -->
        <attr name="ptrHeaderSubTextColor" format="reference|color" />

        <!-- Mode of Pull-to-Refresh that should be used -->
        <!-- 设置下拉刷新的模式,有多重方式可选。无刷新功能,从顶部刷新,从底部刷新,二者都有,只允许手动刷新 -->
        <attr name="ptrMode">
            <flag name="disabled" value="0x0" />
            <flag name="pullFromStart" value="0x1" />
            <flag name="pullFromEnd" value="0x2" />
            <flag name="both" value="0x3" />
            <flag name="manualOnly" value="0x4" />

            <!-- These last two are depreacted -->
            <!-- 这两个属性不推荐了,用上面的代替即可 -->
            <flag name="pullDownFromTop" value="0x1" />
            <flag name="pullUpFromBottom" value="0x2" />
        </attr>

        <!-- Whether the Indicator overlay(s) should be used -->
        <!-- 是否显示指示箭头 -->
        <attr name="ptrShowIndicator" format="reference|boolean" />

        <!-- Drawable to use as Loading Indicator. Changes both Header and Footer. -->
        <!-- 指示箭头的图片 -->
        <attr name="ptrDrawable" format="reference" />

        <!-- Drawable to use as Loading Indicator in the Header View. Overrides value set in ptrDrawable. -->
        <!-- 顶部指示箭头的图片,设置后会覆盖ptrDrawable中顶部的设置 -->
        <attr name="ptrDrawableStart" format="reference" />

        <!-- Drawable to use as Loading Indicator in the Fooer View. Overrides value set in ptrDrawable. -->
        <!-- 底部指示箭头的图片,设置后会覆盖ptrDrawable中底部的设置 -->
        <attr name="ptrDrawableEnd" format="reference" />

        <!-- Whether Android's built-in Over Scroll should be utilised for Pull-to-Refresh. -->
        <attr name="ptrOverScroll" format="reference|boolean" />

        <!-- Base text color, typeface, size, and style for Header and Footer Loading Views -->
        <!-- 设置文字的基本字体 -->
        <attr name="ptrHeaderTextAppearance" format="reference" />

        <!-- Base text color, typeface, size, and style for Header and Footer Loading Views Sub Header -->
        <!-- 设置副标题的基本字体 -->
        <attr name="ptrSubHeaderTextAppearance" format="reference" />

        <!-- Style of Animation should be used displayed when pulling. -->
        <!-- 设置下拉时标识图的动画,默认为rotate -->
        <attr name="ptrAnimationStyle">
            <flag name="rotate" value="0x0" />
            <flag name="flip" value="0x1" />
        </attr>

        <!-- Whether the user can scroll while the View is Refreshing -->
        <!-- 设置刷新时是否允许滚动,一般为true -->
        <attr name="ptrScrollingWhileRefreshingEnabled" format="reference|boolean" />

        <!--
            Whether PullToRefreshListView has it's extras enabled. This allows the user to be
            able to scroll while refreshing, and behaves better. It acheives this by adding
            Header and/or Footer Views to the ListView.
        -->
        <!-- 允许在listview中添加头/尾视图 -->
        <attr name="ptrListViewExtrasEnabled" format="reference|boolean" />

        <!--
            Whether the Drawable should be continually rotated as you pull. This only
            takes effect when using the 'Rotate' Animation Style.
        -->
        <!-- 当设置rotate时,可以用这个来设置刷新时旋转的图片 -->
        <attr name="ptrRotateDrawableWhilePulling" format="reference|boolean" />

        <!-- BELOW HERE ARE DEPRECEATED. DO NOT USE. -->
        <attr name="ptrAdapterViewBackground" format="reference|color" />
        <attr name="ptrDrawableTop" format="reference" />
        <attr name="ptrDrawableBottom" format="reference" />
    </declare-styleable>

</resources>
ptrMode,ptrDrawable,ptrAnimationStyle这三个上面已经介绍过。
ptrRefreshableViewBackground 设置整个mPullRefreshListView的背景色
ptrHeaderBackground 设置下拉Header或者上拉Footer的背景色
ptrHeaderTextColor 用于设置Header与Footer中文本的颜色
ptrHeaderSubTextColor 用于设置Header与Footer中上次刷新时间的颜色
ptrShowIndicator如果为true会在mPullRefreshListView中出现icon,右上角和右下角,挺有意思的。
ptrHeaderTextAppearance , ptrSubHeaderTextAppearance分别设置拉Header或者上拉Footer中字体的类型颜色等等。
ptrRotateDrawableWhilePulling当动画设置为rotate时,下拉是是否旋转。
看到有这么多可以设置的属性,别以为真的就可以定制了。真正要定制还得到layout中改变刷新布局
<?xml version="1.0" encoding="utf-8"?>
<LinearLayout xmlns:android="http://schemas.android.com/apk/res/android"
    android:layout_width="fill_parent"
    android:layout_height="fill_parent"
    android:orientation="vertical" >

    <com.handmark.pulltorefresh.library.PullToRefreshListView
         xmlns:ptr="http://schemas.android.com/apk/res-auto"
        android:id="@+id/pull_refresh_list"
        android:layout_width="fill_parent"
        android:layout_height="fill_parent"
        ptr:ptrAnimationStyle="rotate"
        ptr:ptrHeaderTextColor="#000000"
        ptr:ptrHeaderSubTextColor="#00ffff"
        ptr:ptrHeaderBackground="@null"
        ptr:ptrDrawable="@drawable/android"
        ptr:ptrMode="both"
     />

</LinearLayout>


 466
466

 被折叠的 条评论
为什么被折叠?
被折叠的 条评论
为什么被折叠?
 到【灌水乐园】发言


