


在快速发展的软件开发领域,快速构建并部署健壮、可维护的应用程序是每个开发者的追求。Spring Boot,作为Spring框架的一个子集,凭借其自动配置、简化部署和强大的社区支持,成为了开发者们的首选工具。今天,我们将通过一个简单的教程,带你走进Spring Boot的世界,学习如何快速构建一个基于Spring Boot的简单Web应用。
为什么选择Spring Boot?
Spring Boot之所以备受欢迎,是因为它解决了传统Spring框架在开发过程中遇到的许多问题。它简化了配置,通过自动配置机制,让开发者能够专注于业务逻辑的实现,而不是花费大量时间在繁琐的配置上。此外,Spring Boot还提供了丰富的内置功能,如嵌入式服务器、安全、数据访问等,使得开发者能够快速地搭建起一个功能齐全的应用。
下面我们就进入,创建一个简单的spring boot工程流程。
一,创建项目
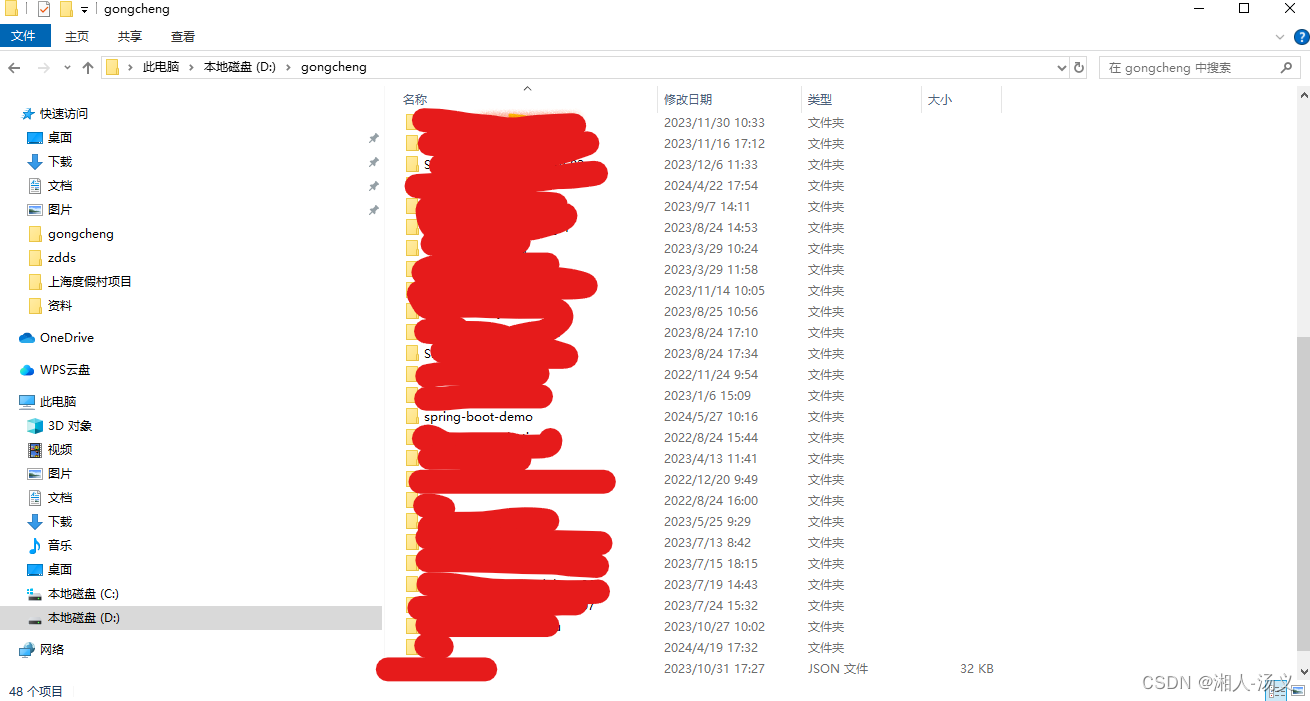
1,为项目创建文件
创建一个spring-boot-demo文件
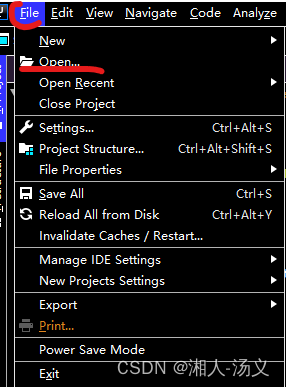
2,使用idea打开新项目文件
File-Open
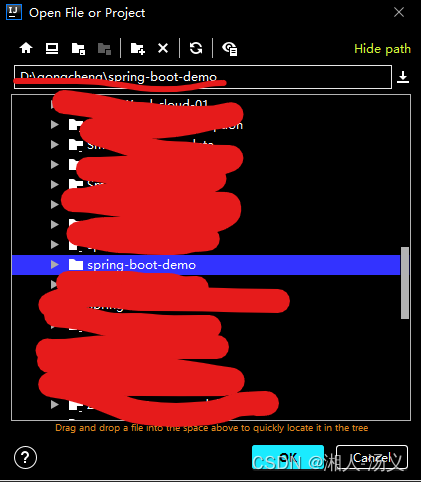
 选择spring-boot-demo文件,点击OK按钮
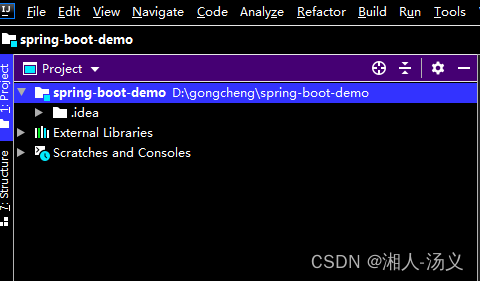 进入一个新页面后就是这样了一个空白的项目,那么后面我们就空白项目上挖地基开始盖房子了。
3,添加一个web-api模块
右击项目,New-Module
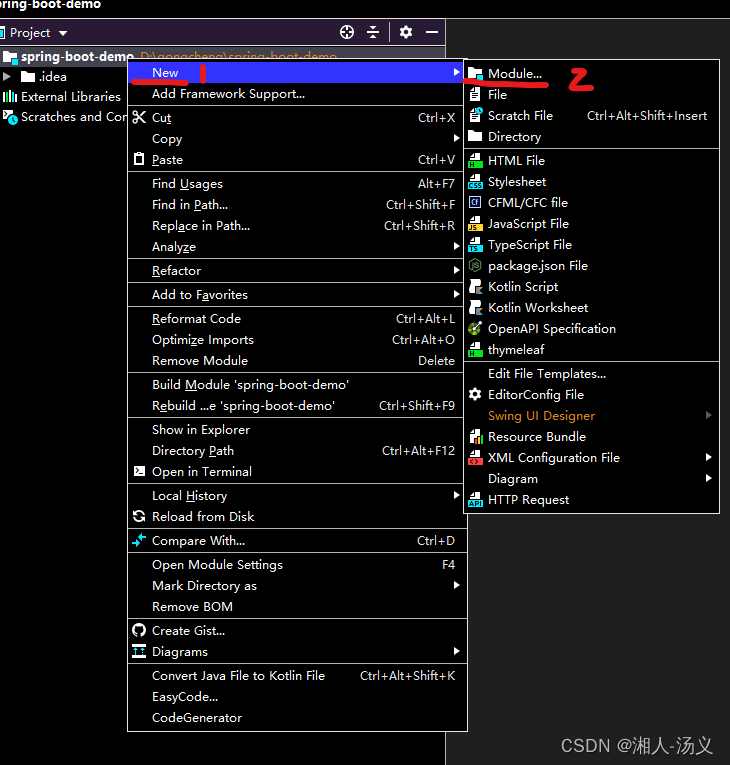
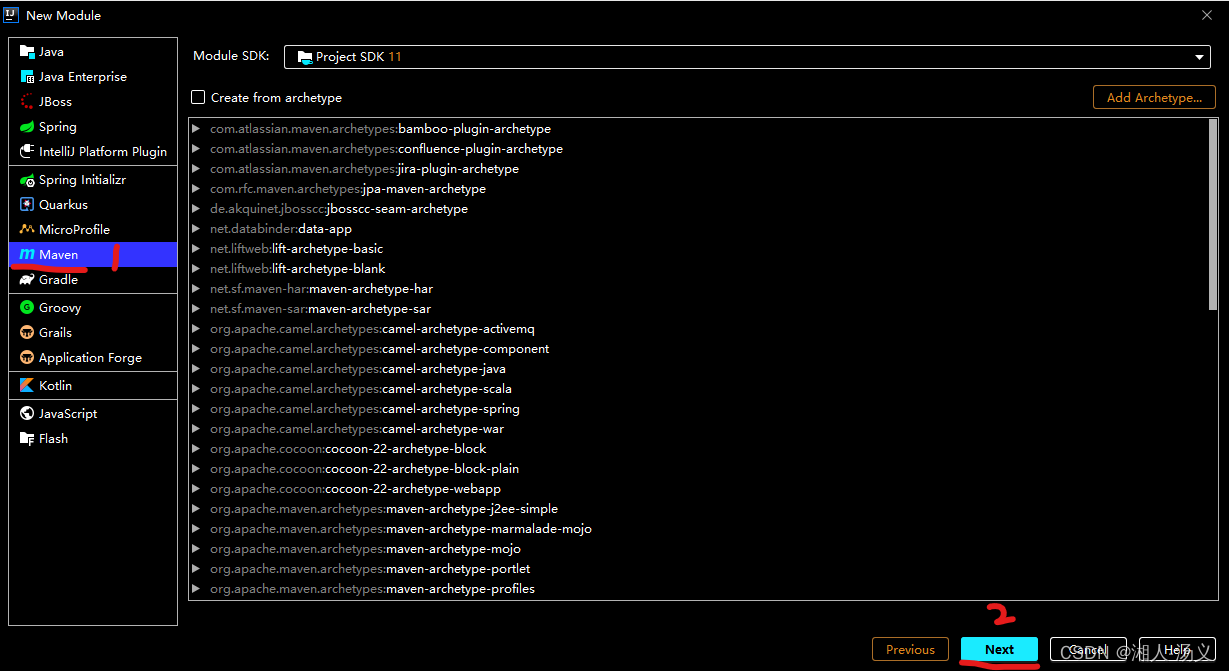
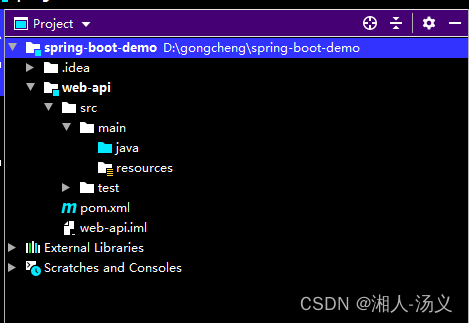
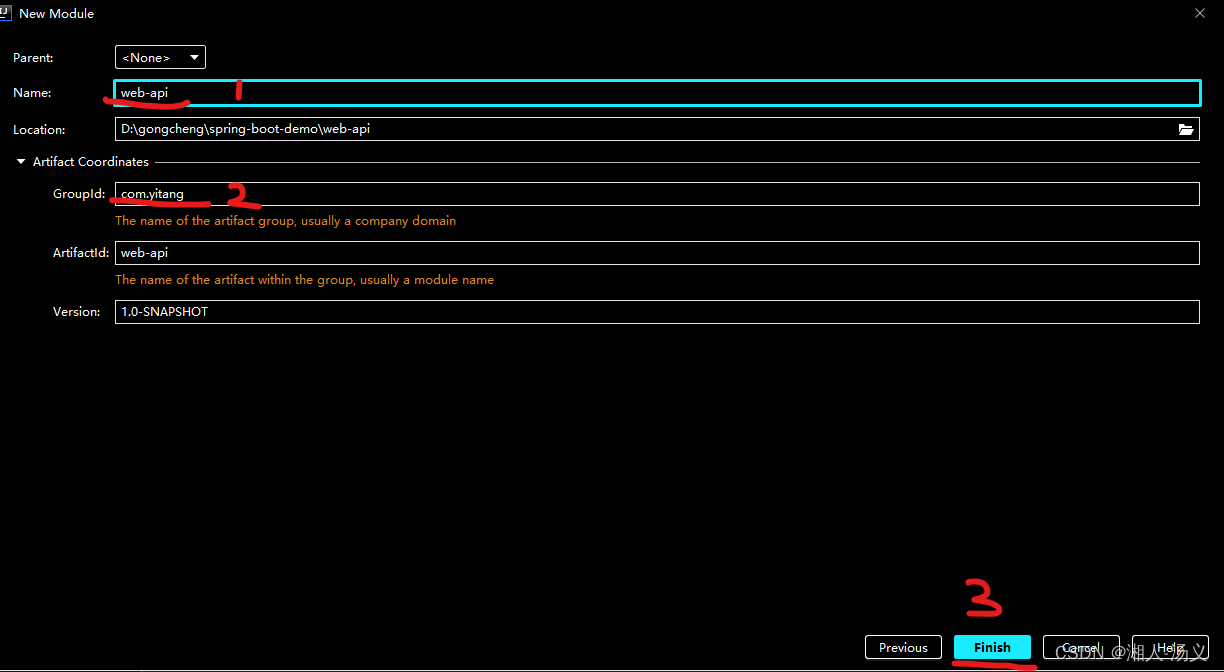 按照图中三个步骤执行,这样web-api模块就创建成功了
二,将项目赋予spring boot
pom.xml文件
<?xml version="1.0" encoding="UTF-8"?>
<project xmlns="http://maven.apache.org/POM/4.0.0"
         xmlns:xsi="http://www.w3.org/2001/XMLSchema-instance"
         xsi:schemaLocation="http://maven.apache.org/POM/4.0.0 http://maven.apache.org/xsd/maven-4.0.0.xsd">
    <modelVersion>4.0.0</modelVersion>

    <groupId>com.yitang</groupId>
    <artifactId>web-api</artifactId>
    <version>1.0-SNAPSHOT</version>

    <parent>
        <groupId>org.springframework.boot</groupId>
        <artifactId>spring-boot-starter-parent</artifactId>
        <version>2.5.8</version> <!-- 请替换为实际的 Spring Boot 版本 -->
        <relativePath/> <!-- lookup parent from repository -->
    </parent>

    <properties>
        <java.version>1.8</java.version>
    </properties>


    <dependencies>
        <dependency>
            <groupId>org.springframework.boot</groupId>
            <artifactId>spring-boot-starter-web</artifactId>
        </dependency>

        <!-- 其他依赖... -->
        <dependency>
            <groupId>org.springframework.boot</groupId>
            <artifactId>spring-boot-starter-test</artifactId>
            <scope>test</scope>
        </dependency>

        <!-- Mysql驱动包 -->
        <dependency>
            <groupId>mysql</groupId>
            <artifactId>mysql-connector-java</artifactId>
        </dependency>

        <dependency>
            <groupId>org.mariadb.jdbc</groupId>
            <artifactId>mariadb-java-client</artifactId>
            <!--            <version>2.7.3</version>-->
        </dependency>

        <!-- 阿里数据库连接池 -->
        <dependency>
            <groupId>com.alibaba</groupId>
            <artifactId>druid-spring-boot-starter</artifactId>
            <version>1.2.11</version>
        </dependency>
        <dependency>
            <groupId>com.baomidou</groupId>
            <artifactId>mybatis-plus-boot-starter</artifactId>
            <version>2.1.9</version>
        </dependency>
    </dependencies>
</project>
application.yml
# Tomcat
server:
  tomcat:
    uri-encoding: UTF-8
    max-threads: 1000
    min-spare-threads: 30
  port: 19010
  servlet:
    context-path: /web-api
# 数据源配置
spring:
  datasource:
    type: com.alibaba.druid.pool.DruidDataSource
    driverClassName: org.mariadb.jdbc.Driver
    druid:
      url: jdbc:mysql://localhost:3306/my_test?serverTimezone=UTC&characterEncoding=utf8&useUnicode=true&useSSL=false
      username: root
      password: 123456
      # 初始连接数
      initialSize: 5
      # 最小连接池数量
      minIdle: 10
      # 最大连接池数量
      maxActive: 20
      # 配置获取连接等待超时的时间
      maxWait: 60000
      # 配置间隔多久才进行一次检测,检测需要关闭的空闲连接,单位是毫秒
      timeBetweenEvictionRunsMillis: 60000
      # 配置一个连接在池中最小生存的时间,单位是毫秒
      minEvictableIdleTimeMillis: 300000
      # 配置一个连接在池中最大生存的时间,单位是毫秒
      maxEvictableIdleTimeMillis: 900000
      # 配置检测连接是否有效
      validationQuery: SELECT 1 FROM DUAL
      testWhileIdle: true
      testOnBorrow: false
      testOnReturn: false
      webStatFilter:
        enabled: true
      statViewServlet:
        enabled: true
        # 设置白名单,不填则允许所有访问
        allow:
        url-pattern: /druid/*
      filter:
        stat:
          enabled: true
          # 慢SQL记录
          log-slow-sql: true
          slow-sql-millis: 1000
          merge-sql: true
        wall:
          config:
            multi-statement-allow: true


#mybatis
mybatis-plus:
  mapper-locations: classpath*:mapper/**/*.xml
  #实体扫描,多个package用逗号或者分号分隔
  typeAliasesPackage: com.yitang.web.entity
  global-config:
    #主键类型  0:"数据库ID自增", 1:"用户输入ID",2:"全局唯一ID (数字类型唯一ID)", 3:"全局唯一ID UUID";
    id-type: 0
    #字段策略 0:"忽略判断",1:"非 NULL 判断"),2:"非空判断"
    field-strategy: 1
    #驼峰下划线转换
    db-column-underline: true
    #刷新mapper 调试神器
    refresh-mapper: false
    #数据库大写下划线转换
    #capital-mode: true
    # Sequence序列接口实现类配置
    #key-generator: com.baomidou.mybatisplus.incrementer.OracleKeyGenerator
    #逻辑删除配置
    logic-delete-value: -1
    logic-not-delete-value: 0
    #自定义填充策略接口实现
    #meta-object-handler: com.baomidou.springboot.xxx
    #自定义SQL注入器
    sql-injector: com.baomidou.mybatisplus.mapper.LogicSqlInjector
  configuration:
    map-underscore-to-camel-case: true
    cache-enabled: false
    call-setters-on-nulls: true
    log-impl: org.apache.ibatis.logging.stdout.StdOutImpl
在包web一层添加启动类 WebApiApplication
package com.yitang.web;

import org.mybatis.spring.annotation.MapperScan;
import org.springframework.boot.SpringApplication;
import org.springframework.boot.autoconfigure.SpringBootApplication;

/**
 * 启动类
 * @author 汤义
 * @create 2024-05-11:49
 */
@SpringBootApplication
@MapperScan("com.yitang.web.dao")
public class WebApiApplication {
    public static void main(String[] args) {
        SpringApplication.run(WebApiApplication.class, args);
    }
}
在加上业务代码,spring boot工程就可以运行起来,接口就可以调用了
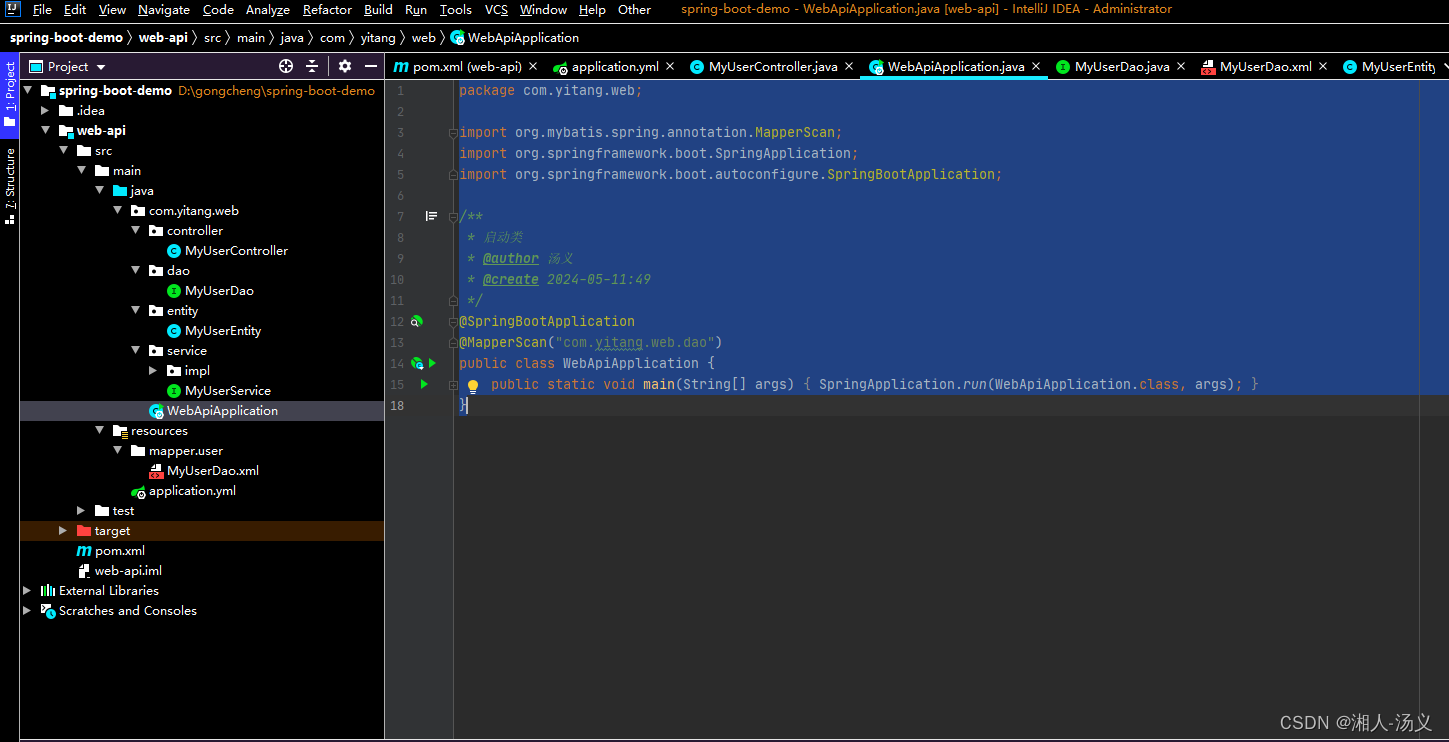
这就是整个工程的完整架构。


 1683
1683


 被折叠的 条评论
为什么被折叠?
被折叠的 条评论
为什么被折叠?
 到【灌水乐园】发言


