


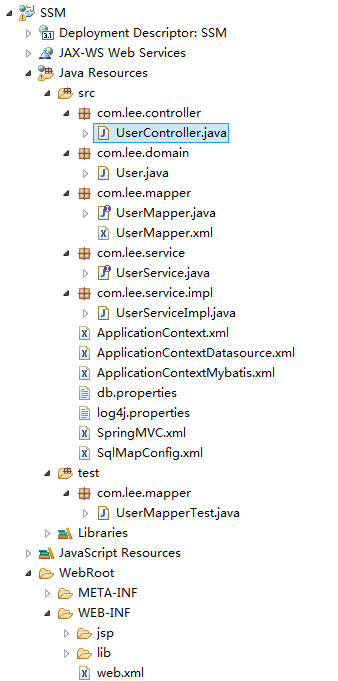
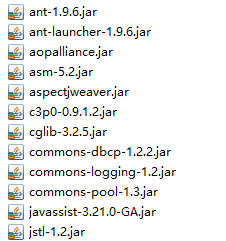
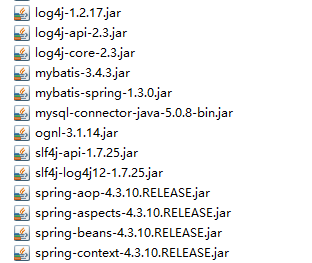
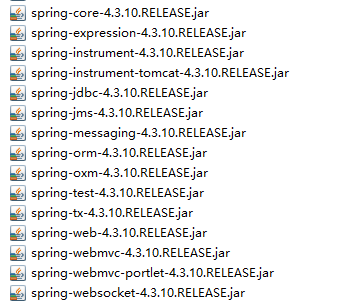
新建项目,导入jar包
项目结构:
导入jar包:
db.properties代码
jdbc.driver=com.mysql.jdbc.Driver
jdbc.url=jdbc:mysql:///sun
jdbc.username=root
jdbc.password=123123
log4j.properties代码(我这里是从Mybatis的文档中拷的,只有最基本的)
# Global logging configuration
log4j.rootLogger=debug, stdout
# MyBatis logging configuration...
log4j.logger.org.mybatis.example.BlogMapper=TRACE
# Console output...
log4j.appender.stdout=org.apache.log4j.ConsoleAppender
log4j.appender.stdout.layout=org.apache.log4j.PatternLayout
log4j.appender.stdout.layout.ConversionPattern=%5p [%t] - %m%n
<?xml version="1.0" encoding="UTF-8"?>
<!DOCTYPE configuration
  PUBLIC "-//mybatis.org//DTD Config 3.0//EN"
  "http://mybatis.org/dtd/mybatis-3-config.dtd">
<configuration>
  <mappers>
  	<!-- 原始加载mapper,一条条的写 -->
    <!-- <mapper resource="domain/UserMapper.xml"/> -->

    <!-- 批量扫描,指定mapper接口的包名
    	规定,mapper接口名和mapper.xml名必须一致且在同一目录中
    	规范前提是,使用mapper代理,这里的任务是批量引入mapper.xml
    	spring的加载器帮助完成了此功能,并且实例化mapper.java
     -->
     <!-- <package name="com.lee.mapper"/> -->
  </mappers>
</configuration>
spring核心配置文件:
mybatis:
<?xml version="1.0" encoding="UTF-8"?>
<beans xmlns="http://www.springframework.org/schema/beans"
    xmlns:xsi="http://www.w3.org/2001/XMLSchema-instance"
     xmlns:tx="http://www.springframework.org/schema/tx"
    xmlns:context="http://www.springframework.org/schema/context"
    xmlns:aop="http://www.springframework.org/schema/aop"
    xsi:schemaLocation="http://www.springframework.org/schema/beans
                  http://www.springframework.org/schema/beans/spring-beans-3.2.xsd
                  http://www.springframework.org/schema/context
                  http://www.springframework.org/schema/context/spring-context-3.2.xsd
                  http://www.springframework.org/schema/aop
                  http://www.springframework.org/schema/aop/spring-aop.xsd
                 http://www.springframework.org/schema/tx
                 http://www.springframework.org/schema/tx/spring-tx-3.2.xsd">


	<!-- sqlSessionFactory -->
	<bean id="sqlSessionFactory" class="org.mybatis.spring.SqlSessionFactoryBean">
		<!-- 加载mybatis的配置文件 -->
		<property name="configLocation" value="classpath:SqlMapConfig.xml"/>
		<!-- 指定数据源 -->
		 <property name="dataSource" ref="dataSource"/>
	</bean>

	<!-- 配置mapper,同原始开发的dao,实现类由Mybatis实现了
		MapperFactoryBean可以根据接口生成代理对象
		此种方式需要配置n个mapper,比较繁琐
	 -->
	 <!--
	<bean id="userMapper" class="org.mybatis.spring.mapper.MapperFactoryBean">
		指定哪一个mapper接口需要它代理
		<property name="mapperInterface" value="com.lee.mapper.UserMapper"/>
		 指定sqlSessionFactory,内部通过此操作数据
		<property name="sqlSessionFactory" ref="sqlSessionFactory"/>
	</bean>
	-->

	<!-- mapper批量扫描实例化 ,使用这个扫描器,必须要遵守mapper.java
	和mapper.xml命名一致且在同一包中,这里的扫描器同时完成了Mybatis配置文件
	中加载mapper.xml的任务,这里自动扫描出来后,mapper的bean的id为mapper
	类名(首字母小写)-->
	<bean class="org.mybatis.spring.mapper.MapperScannerConfigurer">
		<!-- 指定扫描的包 ,如果要扫描多个包,在后面加上“,包全路径名”-->
		<property name="basePackage" value="com.lee.mapper"/>
		<property name="sqlSessionFactoryBeanName" value="sqlSessionFactory"/>
	</bean>

</beans>
datasource
<?xml version="1.0" encoding="UTF-8"?>
<beans xmlns="http://www.springframework.org/schema/beans"
    xmlns:xsi="http://www.w3.org/2001/XMLSchema-instance"
     xmlns:tx="http://www.springframework.org/schema/tx"
    xmlns:context="http://www.springframework.org/schema/context"
    xmlns:aop="http://www.springframework.org/schema/aop"
    xsi:schemaLocation="http://www.springframework.org/schema/beans
                  http://www.springframework.org/schema/beans/spring-beans-3.2.xsd
                  http://www.springframework.org/schema/context
                  http://www.springframework.org/schema/context/spring-context-3.2.xsd
                  http://www.springframework.org/schema/aop
                  http://www.springframework.org/schema/aop/spring-aop.xsd
                 http://www.springframework.org/schema/tx
                 http://www.springframework.org/schema/tx/spring-tx-3.2.xsd">


	<!-- 加载db.proterties配置文件,读取内容 -->
	<context:property-placeholder location="classpath:db.properties"/>

	<!-- 数据源配置 -->
	<!-- 配置c3p0 -->
	<bean id="dataSource" class="com.mchange.v2.c3p0.ComboPooledDataSource">
		<property name="driverClass" value="${jdbc.driver}"/>
		<property name="jdbcUrl" value="${jdbc.url}" />
		<property name="user" value="${jdbc.username}" />
		<property name="password" value="${jdbc.password}" />
	</bean>

	 <!-- 配置dbcp -->
	 <!-- <bean id="dataSource" class="org.apache.commons.dbcp.BasicDataSource">
	 	<property name="driverClassName" value="${jdbc.driver}"/>
		<property name="url" value="${jdbc.url}" />
		<property name="username" value="${jdbc.username}" />
		<property name="password" value="${jdbc.password}" />
	 </bean>
	  -->

</beans>
引入这两个配置文件
<?xml version="1.0" encoding="UTF-8"?>
<beans xmlns="http://www.springframework.org/schema/beans"
    xmlns:xsi="http://www.w3.org/2001/XMLSchema-instance"
     xmlns:tx="http://www.springframework.org/schema/tx"
    xmlns:context="http://www.springframework.org/schema/context"
    xmlns:aop="http://www.springframework.org/schema/aop"
    xsi:schemaLocation="http://www.springframework.org/schema/beans
                  http://www.springframework.org/schema/beans/spring-beans-3.2.xsd
                  http://www.springframework.org/schema/context
                  http://www.springframework.org/schema/context/spring-context-3.2.xsd
                  http://www.springframework.org/schema/aop
                  http://www.springframework.org/schema/aop/spring-aop.xsd
                 http://www.springframework.org/schema/tx
                 http://www.springframework.org/schema/tx/spring-tx-3.2.xsd">

	<!-- 开启注解扫描,创建指定包下的(带注解标记的)bean -->
	<context:component-scan base-package="com.lee.service.impl"></context:component-scan>

	<!-- 引入数据源配置 -->
	<import resource="classpath:ApplicationContextDatasource.xml"/>

	<!-- 引入spring和Mybatis整合配置 -->
	<import resource="classpath:ApplicationContextMybatis.xml"/>

</beans>
springMVC核心配置文件
<?xml version="1.0" encoding="UTF-8"?>
<beans xmlns="http://www.springframework.org/schema/beans"
    xmlns:xsi="http://www.w3.org/2001/XMLSchema-instance" xmlns:p="http://www.springframework.org/schema/p"
    xmlns:mvc="http://www.springframework.org/schema/mvc" xmlns:context="http://www.springframework.org/schema/context"
    xmlns:util="http://www.springframework.org/schema/util"
    xsi:schemaLocation="http://www.springframework.org/schema/beans http://www.springframework.org/schema/beans/spring-beans-3.0.xsd
    http://www.springframework.org/schema/context  http://www.springframework.org/schema/context/spring-context-3.0.xsd                 http://www.springframework.org/schema/mvc  http://www.springframework.org/schema/mvc/spring-mvc-3.0.xsd
    http://www.springframework.org/schema/util  http://www.springframework.org/schema/util/spring-util-3.0.xsd">

     <!-- 开启组件扫描,加载handler(controller),完成bean的创建和依赖注入 -->
     <context:component-scan base-package="com.lee.controller"></context:component-scan>

     <!-- 注解处理器映射器 -->
     <bean class="org.springframework.web.servlet.mvc.method.annotation.RequestMappingHandlerMapping"></bean>
	 <!-- 注解处理器适配器 -->
     <bean class="org.springframework.web.servlet.mvc.method.annotation.RequestMappingHandlerAdapter"></bean>

      <!-- 使用这种方式,代替了上面注解映射器和注解适配器
     mvc:annotation-driven中默认加载了很多参数绑定方法,比如json的转换解析器等。。。
     	开发中常用
      -->
     <!-- <mvc:annotation-driven/> -->

     <!-- 配置视图解析器
     	这里使用的是jsp的视图解析器,默认使用jstl
     -->
     <bean class="org.springframework.web.servlet.view.InternalResourceViewResolver">
     	<property name="prefix" value="/WEB-INF/jsp/"/>
     	<property name="suffix" value=".jsp"/>
     </bean>

</beans>
<?xml version="1.0" encoding="UTF-8"?>
<web-app xmlns:xsi="http://www.w3.org/2001/XMLSchema-instance" xmlns="http://xmlns.jcp.org/xml/ns/javaee" xsi:schemaLocation="http://xmlns.jcp.org/xml/ns/javaee http://xmlns.jcp.org/xml/ns/javaee/web-app_3_1.xsd" id="WebApp_ID" version="3.1">
  <display-name>SSM</display-name>

  <!-- 指定spring配置文件的位置,默认配置在WEB-INF目录下 -->
   <context-param>
       <param-name>contextConfigLocation</param-name>
       <param-value>classpath:ApplicationContext.xml</param-value>
  </context-param>
    <!-- 配置监听器 -->
    <listener>
        <listener-class>org.springframework.web.context.ContextLoaderListener</listener-class>
   </listener>

	<!-- SpringMVC配置前端控制器 -->
	<servlet>
	    <servlet-name>springmvc</servlet-name>
	    <servlet-class>org.springframework.web.servlet.DispatcherServlet</servlet-class>
	    <!-- 指定配置文件位置,默认在web-inf下找servlet名-servlet.xml,这里为springmvc-servlet.xml -->
	    <init-param>
	        <param-name>contextConfigLocation</param-name>
	        <param-value>classpath:SpringMVC.xml</param-value>
	    </init-param>
	</servlet>
	<servlet-mapping>
	    <servlet-name>springmvc</servlet-name>
	    <!--
	        这里可以使用*.action
	        /  表示拦截所有,但是这样静态的东西也会被拦截,比如jpg等等
	        /*在springmvc的底层是错误的拦截方式,会把我们返回到jsp页面的行为拦截
	     -->
	    <url-pattern>*.action</url-pattern>
	</servlet-mapping>

  <welcome-file-list>
    <welcome-file>index.html</welcome-file>
    <welcome-file>index.htm</welcome-file>
    <welcome-file>index.jsp</welcome-file>
    <welcome-file>default.html</welcome-file>
    <welcome-file>default.htm</welcome-file>
    <welcome-file>default.jsp</welcome-file>
  </welcome-file-list>
</web-app>
实体类User.java
package com.lee.domain;

public class User {
	private int userid;
	private String name;
	private String password;
	private int money;
	public int getUserid() {
		return userid;
	}
	public void setUserid(int userid) {
		this.userid = userid;
	}
	public String getPassword() {
		return password;
	}
	public void setPassword(String password) {
		this.password = password;
	}
	public int getMoney() {
		return money;
	}
	public void setMoney(int money) {
		this.money = money;
	}
	public String getName() {
		return name;
	}
	public void setName(String name) {
		this.name = name;
	}
	@Override
	public String toString() {
		return "User [userid=" + userid + ", name=" + name + ", password=" + password + ", money=" + money + "]";
	}

}
Mybatis实现的mapper接口类(这里使用的mapper接口操作数据,如果要使用自己实现的dao和daoimpl,在spring配置文件替换mapper的bean即可)
package com.lee.mapper;

import java.util.List;

import com.lee.domain.User;

public interface UserMapper {

	public User selectUserById(int id);

	public void deleteUser(int id);

	public void addUser(User user);

	public List<User> selectUserByName(String name);
}
UserMapper.xml(Mybatis映射文件,sql在这个文件中完成)
<?xml version="1.0" encoding="UTF-8"?>
<!DOCTYPE mapper
  PUBLIC "-//mybatis.org//DTD Mapper 3.0//EN"
  "http://mybatis.org/dtd/mybatis-3-mapper.dtd">
<mapper namespace="com.lee.mapper.UserMapper">
<!-- 通过id查询user -->
  <select id="selectUserById" parameterType="int" resultType="com.lee.domain.User">
    select * from user where userid = #{value}
  </select>

  <!-- 通过id删除user -->
  <select id="deleteUser" parameterType="int">
    delete from user where userid = #{value}
  </select>

  <!-- 新增一条user记录 -->
  <select id="addUser" parameterType="com.lee.domain.User">
    insert into user (userid,name,password,money) values(#{userid},#{name},#{password},#{money})
  </select>

  <!-- 通过那么查询一个user的list集合 -->
  <select id="selectUserByName" parameterType="String" resultType="com.lee.domain.User">
    select * from user where name = #{value}
  </select>
</mapper>
service
package com.lee.service;

import java.util.List;

import com.lee.domain.User;

public interface UserService {

	public User selectUserById(int id);

	public void deleteUser(int id);

	public void addUser(User user);

	public List<User> selectUserByName(String name);

}
serviceimpl(这里我只写了一个实现方法)
package com.lee.service.impl;

import java.util.List;

import org.springframework.beans.factory.annotation.Autowired;
import org.springframework.stereotype.Service;

import com.lee.domain.User;
import com.lee.mapper.UserMapper;
import com.lee.service.UserService;

@Service //注解标记,spring创建bean
public class UserServiceImpl implements UserService {

	@Autowired //注入属性,可以不要set方法,xml注入需要set方法
	private UserMapper userMapper;

	@Override
	public User selectUserById(int id) {
		// TODO Auto-generated method stub
		return null;
	}

	@Override
	public void deleteUser(int id) {
		// TODO Auto-generated method stub

	}

	@Override
	public void addUser(User user) {
		// TODO Auto-generated method stub

	}

	@Override
	public List<User> selectUserByName(String name) {
		List<User> list = userMapper.selectUserByName(name);
		return list;
	}


	public UserMapper getUserMapper() {
		return userMapper;
	}


}
最后是controller(handler)
package com.lee.controller;


import java.util.List;

import org.springframework.beans.factory.annotation.Autowired;
import org.springframework.stereotype.Controller;
import org.springframework.web.bind.annotation.RequestMapping;
import org.springframework.web.servlet.ModelAndView;

import com.lee.domain.User;
import com.lee.service.impl.UserServiceImpl;

@Controller
public class UserController {
	@Autowired
	private UserServiceImpl userService;

	@RequestMapping("/findUser")
	public ModelAndView findUser() throws Exception{

		List<User> list = userService.selectUserByName("cindy");
		//返回modelandview
		ModelAndView mav = new ModelAndView();
		//相当于request中设置属性
		mav.addObject("userlist", list);
		//指定视图
		mav.setViewName("user");

		return mav;
	}

	public UserServiceImpl getUserService() {
		return userService;
	}

}
响应的jsp页面
<%@ page language="java" contentType="text/html; charset=UTF-8"
    pageEncoding="UTF-8"%>
<%@ taglib prefix="c" uri="http://java.sun.com/jsp/jstl/core" %>
<!DOCTYPE html PUBLIC "-//W3C//DTD HTML 4.01 Transitional//EN" "http://www.w3.org/TR/html4/loose.dtd">
<html>
<head>
<meta http-equiv="Content-Type" content="text/html; charset=UTF-8">
<title>Insert title here</title>
</head>
<body>
	<table border="1">
	<c:forEach items="${userlist }" var="user">
		<tr>
			<td>用户id:${user.userid }</td>
			<td>用户名:${user.name }</td>
			<td>用户密码:${user.password }</td>
			<td>金额:${user.money }</td>
		</tr>
	</c:forEach>
	<tr>
		<td colspan="3">${userlist }</td>
	</tr>
	</table>
</body>
</html>


 63万+
63万+

 被折叠的 条评论
为什么被折叠?
被折叠的 条评论
为什么被折叠?
 到【灌水乐园】发言


