


我之前的博客是使用 Hugo 和 Github 搭建的,写了 50 多篇博客,现在使用 Laravel 和 Bulma 重新开发了博客,新博客的文章是存在数据库的,而原来的博客是 md 文件,我想保留原来写的博客文章,又不想一篇一篇的添加,所以我需要写程序,导入 md 文件创建博客文章并保存到数据库。
md 文件示例:
欢迎来到从零开发个人博客日志的第 6 天,这个系列涵盖了我在公众场合从零开发个人博客应用的旅程,这是一个大胆的尝试。如果你错过了第 5 天,可以在[这里查看](https://www.sevdot.com/post/blog-development-from-zero-five-day)。
## 进度
目前整个博客应用的功能已经开发完,接下来打算整理整理发布上线,这一刻还是挺开心的,在业余时间开发了一个小项目,并且全程写博客记录。
可以看到,博客文章的标题、日期和分类是包裹在两个 --- 里面,是 YAML 格式的内容,外面的内容才是博客文章的正文。
现在来理一理,将这些 md 文件生成对应的博客文章保存到数据库需要做的事情:
- 将所有 md 文件压缩成一个 zip 压缩包。
- 上传 zip 压缩包并解压
- 读取解压得到的所有 md 文件
- 解析 md 文件里面的内容。
- 批量创建文章
上传 zip 文件
1. 添加表单
运行如下命令创建上传文件表单:
php artisan admin:form ImportArticleForm
替换为如下内容:
app/Admin/Forms/ImportArticleForm.php
<?php namespace App\Admin\Forms;

use Dcat\Admin\Widgets\Form;

class ImportArticleForm extends Form
{
    public function handle(array $input)
    {
        return $this->response()->success('导入成功')->refresh();
    }

    public function form()
    {
        $this->file('zip','压缩包')->required();
    }

}
3. 添加动作
运行如下命令添加动作:
php artisan admin:action
Which type of action would you like to make?:
[0] default
[1] grid-batch
[2] grid-row
[3] grid-tool
[4] form-tool
[5] show-tool
[6] tree-row
[7] tree-tool
输入 3 选择 grid-tool,接着输入名称:ImportArticleAction,替换为如下内容:
app/Admin/Actions/Grid/ImportArticleAction.php
<?php namespace App\Admin\Actions\Grid;

use App\Admin\Forms\ImportArticleForm;
use Dcat\Admin\Grid\RowAction;
use Dcat\Admin\Widgets\Modal;

class ImportArticle extends RowAction
{
    /**
     * @return string
     */
	protected $title = '导入文章';

    public function render()
    {
        $form = ImportArticleForm::make();

        return Modal::make()
            ->lg()
            ->title($this->title)
            ->body($form)
            ->button('<button class="btn btn-primary">导入文章</button>');
    }
}
3. 修改控制器
修改管理后台文章控制器,在 grid方法添加如下内容:
app/Admin/Controllers/ArticlesController.php
$grid->tools(function ($tools) {
    $tools->append(new ImportArticleAction());
});
打开文章管理会看到多一个导入文章的按钮,点击按钮会弹出一个框,如下所示:
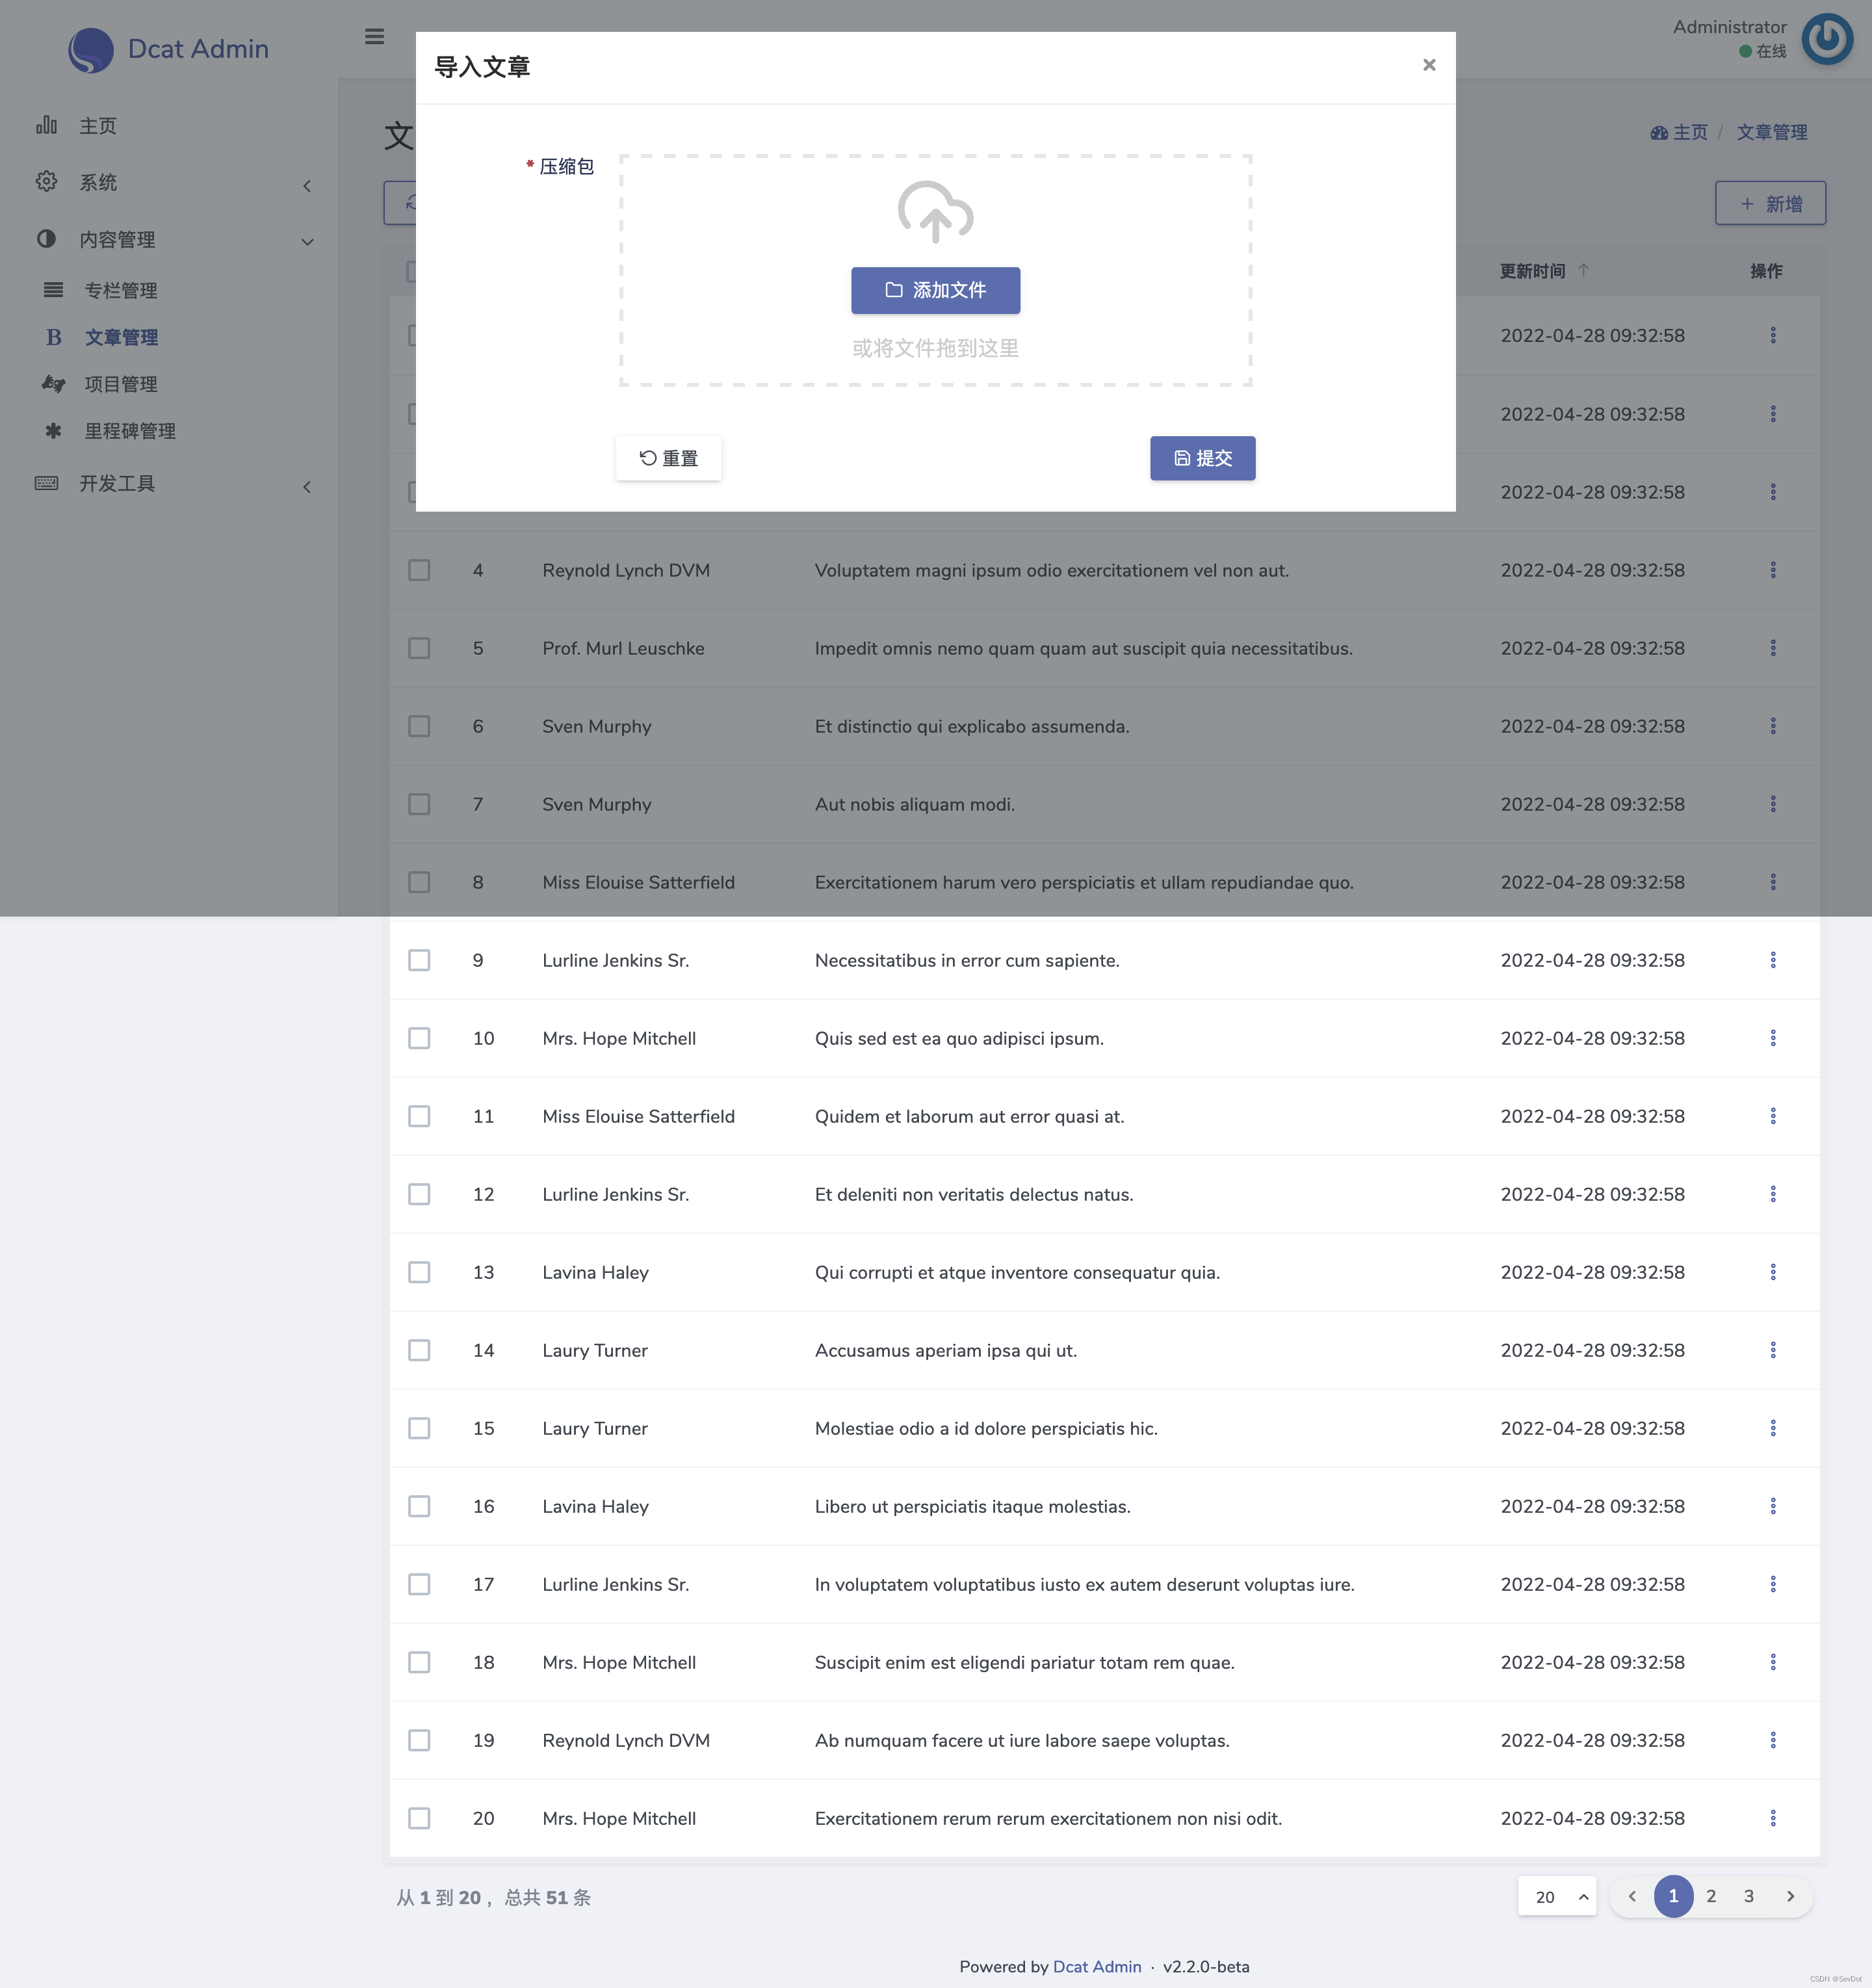
选择文件后,点击上传就会把文件上传到 storage/app/public/files目录下。
解压 zip 文件
在 ImportArticleForm.php表单中添加 extract方法。
app/Admin/Forms/ImportArticleForm.php
.
.
.
public function extract($file){
    $zipper= new \ZipArchive();
    $zipper->open($file);
    $targetPath=storage_path('app/public/blog');
    $zipper->extractTo($targetPath);
    $zipper->close();
    return $targetPath;
}
.
.
.
上面的代码是将指定的压缩文件解压到指定的目录。
在 handle 方法中调用:
.
.
.
public function handle(array $input)
{
    $file=Arr::last(explode(',',$input['zip']));
    $filePath=storage_path('app/public/').$file;
    $blogPath=$this->extract($filePath);
    return $this->response()->success('导入成功')->refresh();
}
.
.
.
批量创建文章
运行如下命令安装扩展:
composer require symfony/yaml
在 ImportArticleForm.php表单中添加 batchAddArticle方法。
app/Admin/Forms/ImportArticleForm.php
public function batchAddArticle($path){
$files = File::files($path);
foreach ($files as $key=>$file){
    $content = $file->getContents();
    preg_match_all('/---\n(.*?)---\n/s',$content,$yamlArr);
    $yaml = $yamlArr[1][0];
    $meta=Yaml::parse($yaml);
    $datetime=date('Y-m-d H:i:s',$meta['date']);
    $category=Arr::last($meta['categories']);
    $column = Column::firstOrCreate(['name'=>$category]);
    $articleContent=str_replace($yamlArr[0],'',$content);
    Article::create([
        'column_id'=>$column->id,
        'title'=>$meta['title'],
        'content'=>$articleContent,
        'created_at'=>$datetime,
        'updated_at'=>$datetime,
    ]);
}
}
上面的代码逻辑:
- 上面已经将 zip 压缩包解压到指定的目录,使用
File::files()方法可以获取目录下所有的文件,以数组返回。
$files = File::files($blogPath);
- 遍历文件数组,使用
getContents方法得到文件内容。
$content = $file->getContents();
- 获取两个
---里面的 YAML 格式的内容。
  preg_match_all('/---\n(.*?)---\n/s',$content,$yamlArr);
  $yaml = $yamlArr[1][0];
- 使用
symfony/yaml扩展解析 YAML 格式的内容。
$meta=Yaml::parse($yaml);
解析后会返回一个数组,如下所示:
array:4 [
  "title" => "Laravel 博客开发|Laravel 项目中安装和使用 Bulma"
  "date" => 1650565800
  "lastmod" => 1650565800
  "categories" => array:1 [
    0 => "开发日志"
  ]
]
- 组装数据并创建博客文章:
 Article::create([
    'column_id'=>$column->id,
    'title'=>$meta['title'],
    'content'=>$articleContent,
    'created_at'=>$datetime,
    'updated_at'=>$datetime,
]);
在 handle 方法中调用:
public function handle(array $input)
{
    $file=Arr::last(explode(',',$input['zip']));
    $filePath=storage_path('app/public/').$file;
    // 解压
    $blogPath=$this->extract($filePath);
    // 批量创建文章
    $this->batchAddArticle($blogPath);
    return $this->response()->success('导入成功')->refresh();
}
经过上面的处理,很轻松的就把之前的 md 文件的文章导入到现有的博客里面。


 4350
4350


 被折叠的 条评论
为什么被折叠?
被折叠的 条评论
为什么被折叠?
 到【灌水乐园】发言


