


安装环境
cat /etc/lsb -release
DISTRIB_ID=Ubuntu
DISTRIB_RELEASE =22.04
DISTRIB_CODENAME=jammy
DISTRIB_DESCRIPTION="Ubuntu 22.04.1 LTS"

java -version
java version "1.8.0 _371"
Java(TM) SE Runtime Environment (build 1.8.0_371 -b11)
Java HotSpot(TM) 64-Bit Server VM (build 25.371-b11 , mixed mode)
gcc --version
gcc (Ubuntu 11.3.0-1 ubuntu1 ~22.04.1) 11.3.0
Copyright (C) 2021 Free Software Foundation , Inc.
This is free software; see the source for copying conditions. There is NO
warranty; not even for MERCHANTABILITY or FITNESS FOR A PARTICULAR PURPOSE.
g++ --version
g++ (Ubuntu 11.3.0-1 ubuntu1 ~22.04.1) 11.3.0
Copyright (C) 2021 Free Software Foundation , Inc.
This is free software; see the source for copying conditions. There is NO
warranty; not even for MERCHANTABILITY or FITNESS FOR A PARTICULAR PURPOSE.
make --version
GNU Make 4.3
Built for x86_64 -pc-linux -gnu
Copyright (C) 1988 -2020 Free Software Foundation , Inc.
License GPLv3+: GNU GPL version 3 or later <http://gnu.org/licenses/gpl.html >
This is free software: you are free to change and redistribute it.
There is NO WARRANTY , to the extent permitted by law.
openssl version
OpenSSL 3.0.2 15 Mar 2022 (Library: OpenSSL 3.0.2 15 Mar 2022)
ufw status
Status: inactive
安装步骤(该方式仅用于测试,正式使用建议以apt install或yum install的方式安装)
-
访问如下链接下载安装包:
https://jfrog.com/download-jfrog-container-registry/ -
创建一个JFrog 主目录并将下载的安装程序存档移动到该目录中。
例如:
mkdir jfrog
mv jfrog -artifactory -jcr -<version >-linux.tar.gz jfrog
cd jfrog
- 设置JFrog Home 环境变量。
export JFROG_HOME=<full path of the jfrog directory > - 提取压缩存档的内容并将其移动到artifactory 目录。
tar -xvf jfrog -artifactory -jcr -<version >-linux.tar.gz
mv artifactory -jcr -<version > artifactory
- 自定义生产配置(可选),包括数据库、Java Opt 和文件存储。
- 将Artifactory 作为前台或守护进程运行,或作为服务运行。
将Artifactory 作为一个进程运行
您可以将Artifactory 作为前台或守护进程运行。作为前台进程运行时,控
制台处于锁定状态,您可以随时停止该进程。
To run as a foreground process
$JFROG_HOME/artifactory/app/bin/artifactoryctl
To run as a daemon process
$JFROG_HOME/artifactory/app/bin/artifactoryctl start
To manage the process
$JFROG_HOME/artifactory/app/bin/artifactoryctl check|stop
-
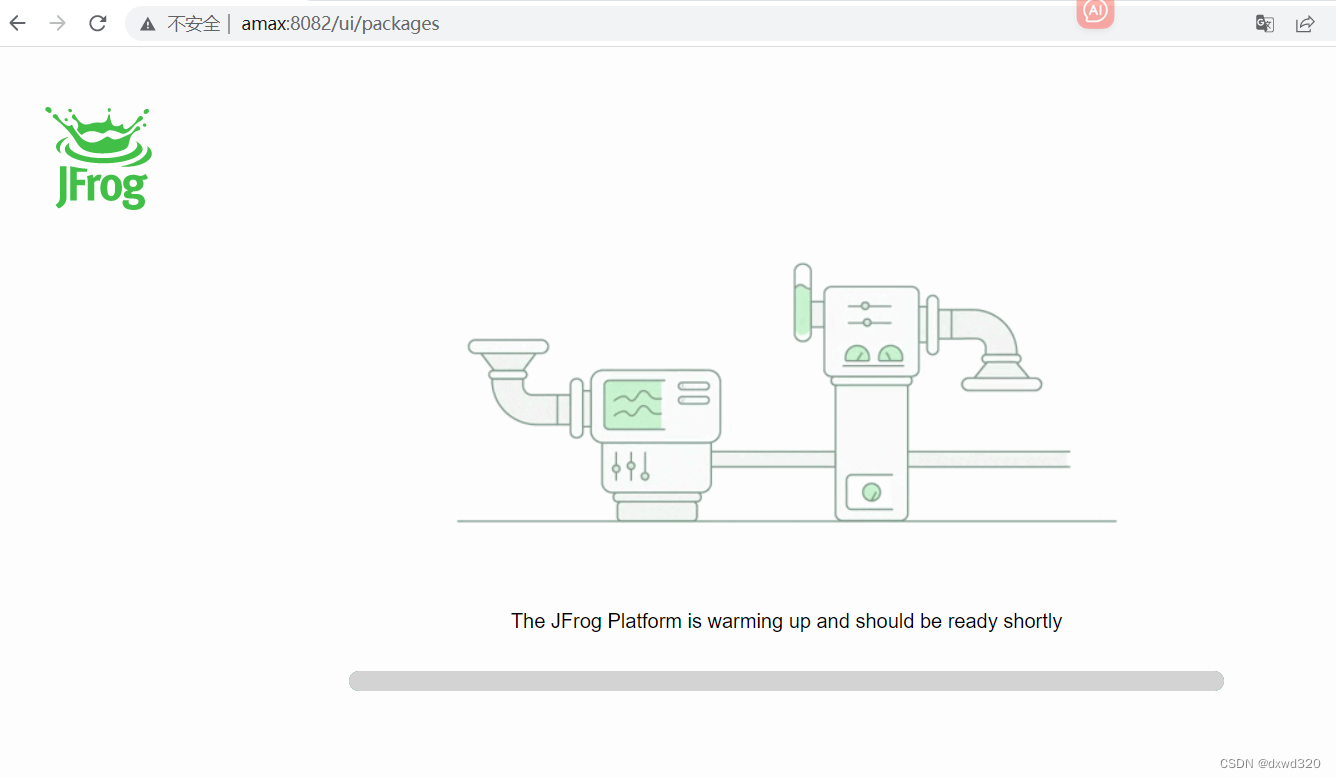
从您的浏览器访问Artifactory:
http://SERVER_HOSTNAME:8082/ui/ 例如,在本地计算机上:http://localhost:8082/ui/
用户名:admin
初始密码:password
登录后重设密码
Set base URL和Configure Default Proxy这两步可以跳过
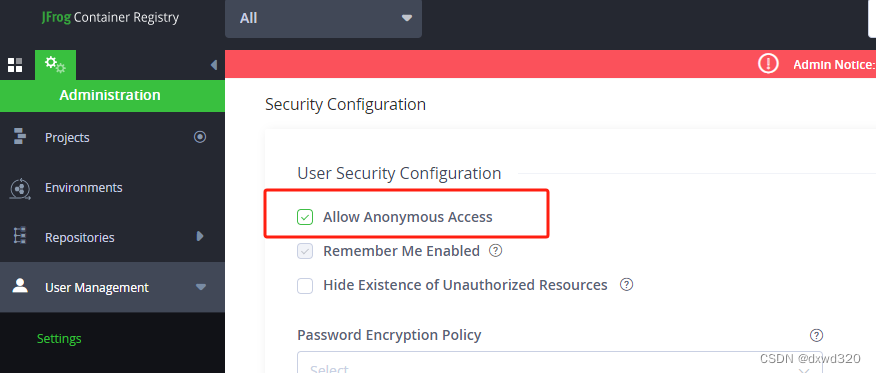
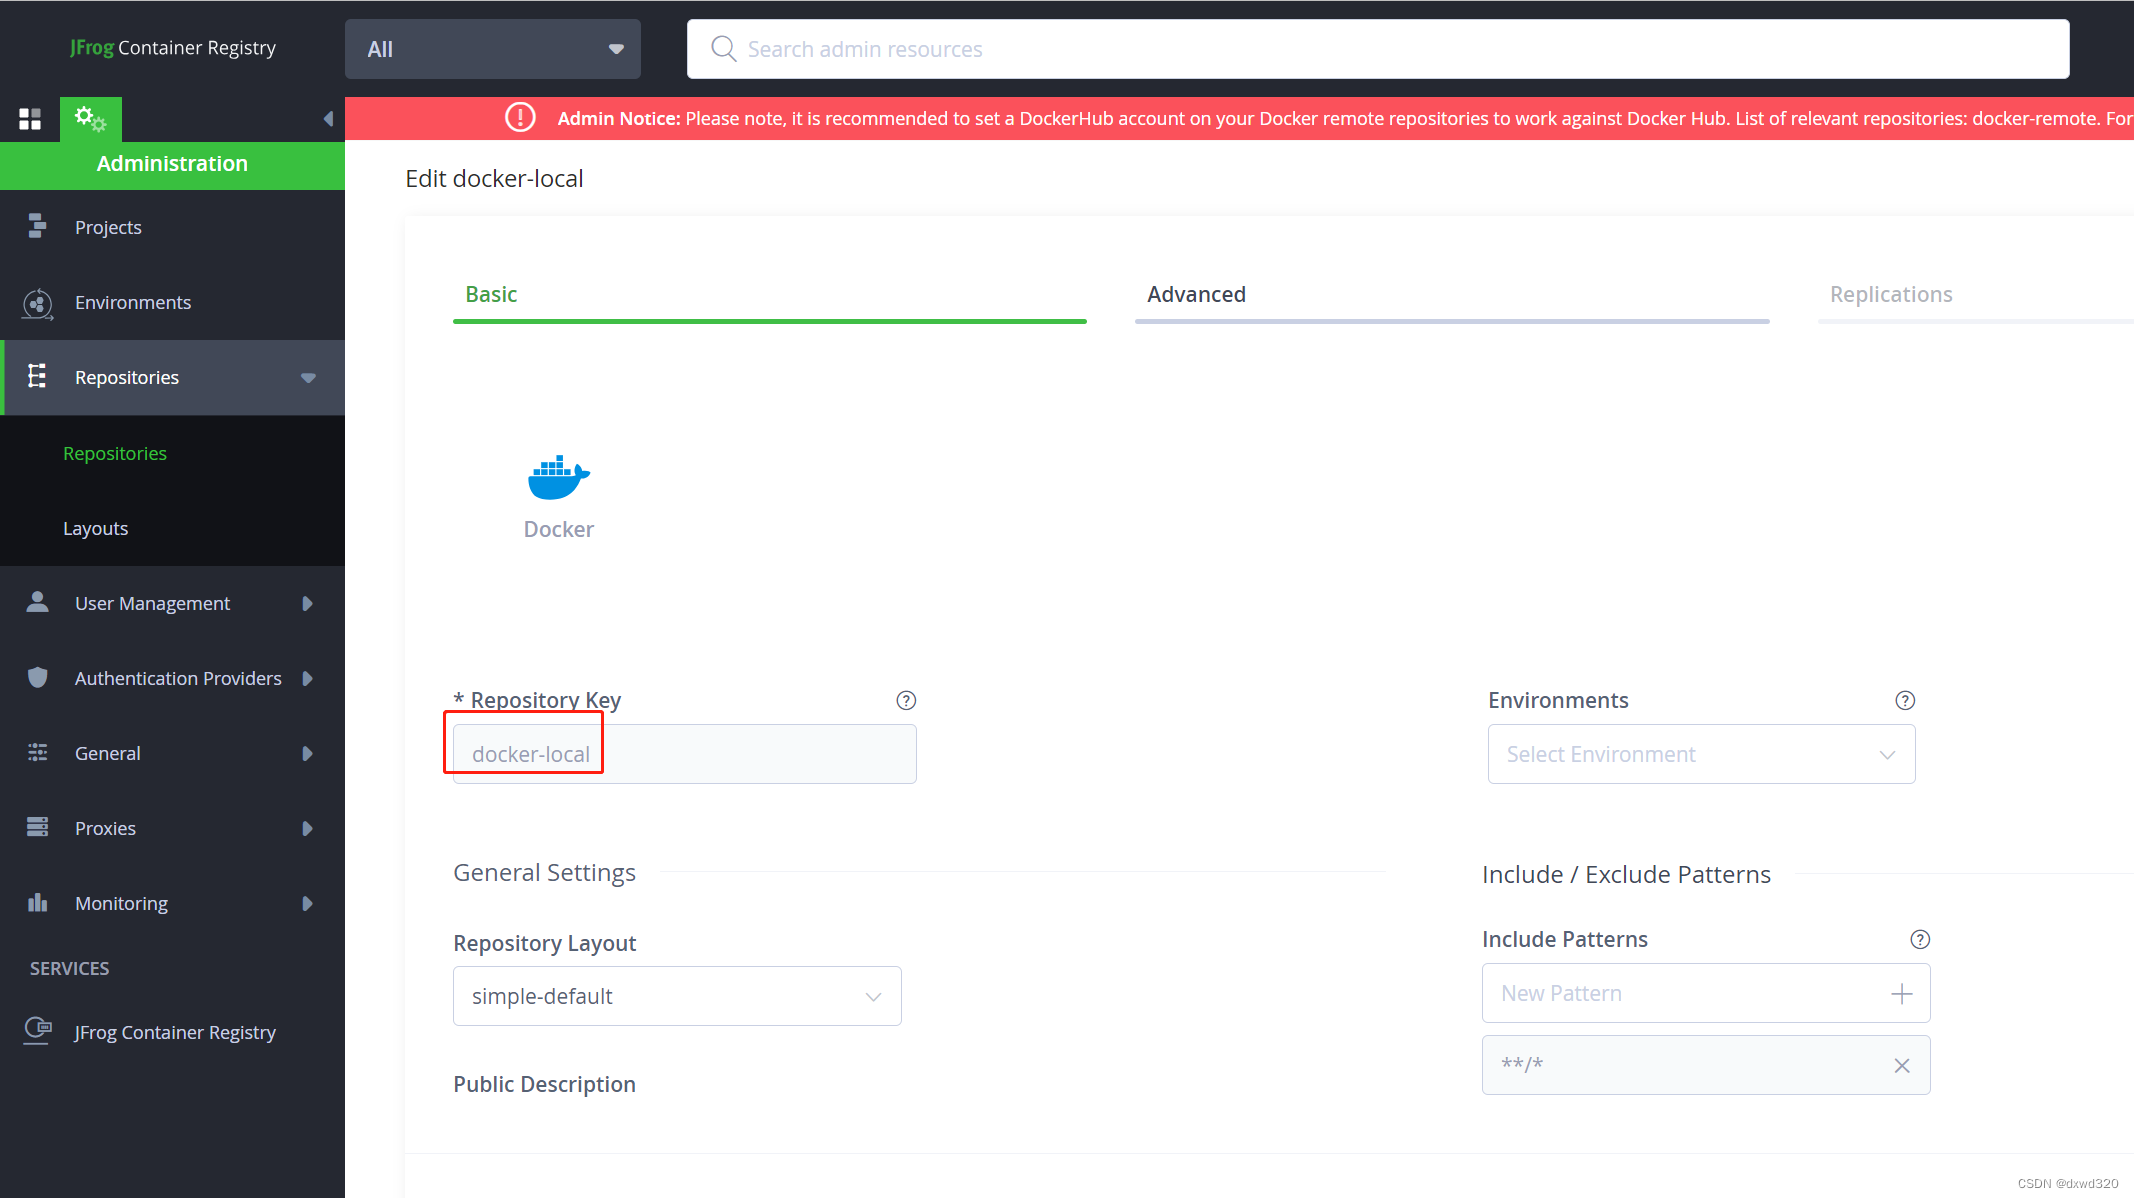
配置repository

然后设置匿名access
-
从如下目录检查Artifactory 日志。
$JFROG_HOME/artifactory/var/log
为jfrog 配置TLS 认证
安装Nginx 并启动
	wget http://nginx.org/download/nginx-1.25.1.tar.gz
	tar -zxvf nginx-1.25.1.tar.gz nginx-1.25.1/
	sudo apt install -y libpcre++-dev libssl-dev zlib1g zlib1g-dev
	sudo useradd -M -s /sbin/nologin nginx
	Sudo su
	./configure --prefix=/usr/local/nginx --user=nginx --group=nginx --with-http_stub_status_module --with-http_ssl_module  && make && make install
	echo $?
	cd /usr/local/nginx/
生成证书
参考如下链接:
https://devopscube.com/create-self-signed-certificates-openssl/
如下 {{SERVER_IP}}和 {{Hostname}}需要替换成Jfrog服务器的IP和Hostname
openssl req -x509 \
            -sha256 -days 356 \
            -nodes \
            -newkey rsa:2048 \
            -subj "/CN= {{SERVER_IP}}/C=US/L=San Fransisco" \
            -keyout rootCA.key -out rootCA.crt

openssl genrsa -out server.key 2048

cat > csr.conf <<EOF
[ req ]
default_bits = 2048
prompt = no
default_md = sha256
req_extensions = req_ext
distinguished_name = dn

[ dn ]
C = US
ST = California
L = San Fransisco
O = MLopsHub
OU = MlopsHub Dev
CN = {{SERVER_IP}}

[ req_ext ]
subjectAltName = @alt_names

[ alt_names ]
DNS.1 = {{Hostname}}
IP.1 = {{SERVER_IP}}
EOF
openssl req -new -key server.key -out server.csr -config csr.conf
cat > cert.conf <<EOF

authorityKeyIdentifier=keyid,issuer
basicConstraints=CA:FALSE
keyUsage = digitalSignature, nonRepudiation, keyEncipherment, dataEncipherment
subjectAltName = @alt_names

[alt_names]
DNS.1 = {{Hostname}}
IP.1 = {{SERVER_IP}}

EOF

openssl x509 -req \
    -in server.csr \
    -CA rootCA.crt -CAkey rootCA.key \
    -CAcreateserial -out server.crt \
    -days 3650 \
    -sha256 -extfile cert.conf
将上述server.crt和server.key配置到nginx
参考如下链接修改nginx.conf文件
https://docs.docker.com/registry/recipes/nginx/
https://jfrog.com/help/r/artifactory-configuring-nginx-and-docker-to-work-with-multiple-artifactory-repositories/artifactory-configuring-nginx-and-docker-to-work-with-multiple-artifactory-repositories
	vim conf/nginx.conf
	user nginx;
	worker_processes  1;
	events {
		worker_connections  1024;
	}
http {
    include       mime.types;
    default_type  application/octet-stream;
    sendfile        on;
    keepalive_timeout  65;
    ssl_certificate      server.crt;
    ssl_certificate_key  server.key;
    ssl_session_cache    shared:SSL:1m;
    ssl_prefer_server_ciphers  on;

    server {
        listen 9443 ssl;
        server_name artprod2.company.com;

        proxy_read_timeout 900;

        chunked_transfer_encoding on;
        client_max_body_size 0; #disable any limits to avoid HTTP 413 for large image uploads

        location /v2 {
            proxy_pass http://{{SERVER_IP}}:8082/artifactory/api/docker/docker-remote/v2;
        }
    }
}
将上述rootCA.crt证书拷贝到远程要连接该私有镜像库的客户机上
cp rootCA.crt /usr/local/share/ca-certificates/keystore.crt
update-ca-certificates
启动nginx
./sbin/nginx
访问:https://SERVER_IP:9443
验证上传一个docker image
新建docker-local
vi /etc/docker/daemon.json
#添加:
"insecure-registries": ["192.168.1.20:8082"],
# 重启使配置生效
service docker restart

docker login 192.168.1.20:9443 -u admin -p admin123
docker tag docker.io/library/busybox:1.28 192.168.1.20:8082/docker-local/busybox:1.28
docker push 192.168.1.20:8082/docker-local/busybox:1.28
验证使用JCR 中的镜像发布pod
前提:已经使用Rancher2 部署kubernetes 集群
通过Rancher 给对应cluster 配置私有镜像库

上图中,container registery和mirror endpoints设置为SERVER_IP:9443,配置用户名和密码,并勾选Skip TLS Verifications。
发布一个pod 进行测试

参考链接:
https://blog.csdn.net/Uwentaway/article/details/105507746
报错记录:
按照上面的步骤启动的服务在重启后无法自动启动,要解决这个问题:
1、按照官方文档Run Artifactory as a service时报错:
![systemctl status artifactory.service
○ artifactory.service - Artifactory service
     Loaded: loaded (/lib/systemd/system/artifactory.service; enabled; vendor preset: enabled)
     Active: inactive (dead)

Aug 16 14:27:22 hostname artifactoryManage.sh[3638087]: bash: line 1: _createConsoleLog: command not found
Aug 16 14:27:22 hostname artifactoryManage.sh[3638088]: bash: line 1: /home/aihpc/jfrog/artifactory/var/log/console.log: Permission denied
Aug 16 14:27:22 hostname su[3638075]: pam_unix(su:session): session closed for user artifactory
Aug 16 14:27:22 hostname artifactoryManage.sh[3634770]: ** ERROR: Artifactory Tomcat server did not start. Please check the logs
Aug 16 14:27:22 hostname systemd[1]: artifactory.service: Control process exited, code=exited, status=1/FAILURE
Aug 16 14:27:22 hostname systemd[1]: artifactory.service: Failed with result 'exit-code'.
Aug 16 14:27:22 hostname systemd[1]: Failed to start Artifactory service.
Aug 16 14:27:22 hostname systemd[1]: artifactory.service: Consumed 3.528s CPU time.
Aug 16 14:28:07 hostname systemd[1]: Stopped Artifactory service.
Aug 16 14:28:07 hostname systemd[1]: artifactory.service: Consumed 3.528s CPU time.


报错日志:

Aug 16 14:27:22 hostname crontab[3638040]: (root) REPLACE (artifactory)
Aug 16 14:27:22 hostname su[3638075]: (to artifactory) root on none
Aug 16 14:27:22 hostname su[3638075]: pam_unix(su:session): session opened for user artifactory(uid=998) by (uid=0)
Aug 16 14:27:22 hostname artifactoryManage.sh[3638086]: bash: line 1: setupTomcatRedirection: command not found
Aug 16 14:27:22 hostname artifactoryManage.sh[3638087]: bash: line 1: _createConsoleLog: command not found
Aug 16 14:27:22 hostname artifactoryManage.sh[3638088]: bash: line 1: /home/aihpc/jfrog/artifactory/var/log/console.log: Permission denied
Aug 16 14:27:22 hostname su[3638075]: pam_unix(su:session): session closed for user artifactory
Aug 16 14:27:22 hostname artifactoryManage.sh[3634770]: ** ERROR: Artifactory Tomcat server did not start. Please check the logs
Aug 16 14:27:22 hostname systemd[1]: artifactory.service: Control process exited, code=exited, status=1/FAILURE
尝试更换tar包,依旧报错:
jfrog-artifactory-jcr-7.63.12-linux.tar.gz
jfrog-artifactory-jcr-7.59.16-linux.tar.gz
jfrog-artifactory-jcr-7.46.20-linux.tar.gz
尝试直接使用debian包安装,依然报错:
jfrog-artifactory-jcr-7.63.12.deb
尝试从用户目录换到/opt目录执行installService.sh发现一样报错。
尝试更换操作系统从ubuntu至redhat,执行installService.sh发现一样报错
经测试使用如下方法安装 可实现开机自启动
echo "deb https://jfrog.bintray.com/artifactory-debs bionic main" | tee /etc/apt/sources.list.d/jfrog.list
wget -qO - https://releases.jfrog.io/artifactory/api/gpg/key/public | apt-key add -
apt update
apt install jfrog-artifactory-jcr
systemctl status artifactory.service
systemctl start artifactory.service
systemctl enable artifactory.service

参考:https://blog.csdn.net/qq_35002542/article/details/124856540
3、Artifactory移动文件存储位置后portal页面无法打开
参考 https://www.thinbug.com/q/39512767
参考 <https://www.cnblogs.com/eagle6688/p/17221651.html
修改如下文件
cat /opt/jfrog/artifactory/var/etc/artifactory/binarystore.xml
<?xml version="1.0" encoding="UTF-8"?>
<!--
  ~ Artifactory is a binaries repository manager.
  ~ Copyright (C) 2019 JFrog Ltd.
  ~
  ~ Artifactory is free software: you can redistribute it and/or modify
  ~ it under the terms of the GNU Affero General Public License as published by
  ~ the Free Software Foundation, either version 3 of the License, or
  ~ (at your option) any later version.
  ~
  ~ Artifactory is distributed in the hope that it will be useful,
  ~ but WITHOUT ANY WARRANTY; without even the implied warranty of
  ~ MERCHANTABILITY or FITNESS FOR A PARTICULAR PURPOSE.  See the
  ~ GNU Affero General Public License for more details.
  ~
  ~ You should have received a copy of the GNU Affero General Public License
  ~ along with Artifactory.  If not, see <http://www.gnu.org/licenses/>.
  -->
<!--
    This file configures Artifactory's binary provider
-->

<!--
  ~ TAKE CARE! Making changes to this file may result in losing binaries stored in Artifactory!
  ~ If you are not sure of what you are doing, please contact JFrog Support for assistance.
  -->

<config version="v1">
    <chain template="file-system"/>
        <provider id="file-system" type="file-system">
            <baseDataDir>/mnt/test/artifactory/data</baseDataDir>
            <fileStoreDir>filestore</fileStoreDir>
            <tempDir>tmp</tempDir>
        </provider>
</config>
tempDir节点:这是Artifactory的临时目录,用于存放临时文件,该目录必须与baseDataDir放在同一个磁盘下
修改后portal无法打开
/opt/jfrog/artifactory/var/log# tail console.log
        at org.apache.tomcat.util.net.NioEndpoint$SocketProcessor.doRun(NioEndpoint.java:1791)
        at org.apache.tomcat.util.net.SocketProcessorBase.run(SocketProcessorBase.java:52)
        at org.apache.tomcat.util.threads.ThreadPoolExecutor.runWorker(ThreadPoolExecutor.java:1191)
        at org.apache.tomcat.util.threads.ThreadPoolExecutor$Worker.run(ThreadPoolExecutor.java:659)
        at org.apache.tomcat.util.threads.TaskThread$WrappingRunnable.run(TaskThread.java:61)
        at java.base/java.lang.Thread.run(Thread.java:833)
2023-10-12T07:05:27.762Z [jfrt ] [ERROR] [78b16c3966ddd3c5] [.p.u.FileBinaryProviderUtil:15] [66ddd3c5|art-exec-56] - Could not create dir '/mnt/test/artifactory/data/filestore/tmp'
2023-10-12T07:05:27.762Z [jfrt ] [ERROR] [78b16c3966ddd3c5] [.b.p.FileBinaryProviderBase:56] [66ddd3c5|art-exec-56] - BinaryProvider 'file-system' is not accessible
2023-10-12T07:05:27.762Z [jfrt ] [WARN ] [78b16c3966ddd3c5] [o.j.s.b.BinaryServiceImpl:815 ] [66ddd3c5|art-exec-56] - Binary provider failed ping attempt: 503 : Binary provider ping failed
2023-10-12T07:05:27.763Z [jfrt ] [WARN ] [78b16c3966ddd3c5] [o.a.p.s.ProbesServiceImpl:236 ] [66ddd3c5|art-exec-56] - Readiness storage service ping test failed with the following error: 503 : Binary provider ping failed
原来这个文件夹的owner需要修改
drwxr-xr-x 1 root root 8 Oct 12 14:32 artifactory/
chown -R artifactory:artifactory /mnt/test/artifactory/
修改后重启,问题解决
systemctl restart artifactory


 225
225


 被折叠的 条评论
为什么被折叠?
被折叠的 条评论
为什么被折叠?
 到【灌水乐园】发言


