简单描述
IDE是Eclipse,帮助5.0以下的设备实现Material design效果的依赖包。
依赖包下载地址:http://pan.baidu.com/s/1dFwg8tN
TextInputLayout
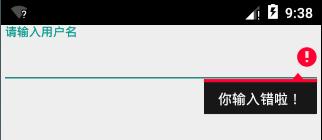
方便设置hint和error提醒的布局,里面放的是EditText
效果
xml
<android.support.design.widget.TextInputLayout
    android:layout_width="match_parent"
    android:layout_height="match_parent"
    xmlns:android="http://schemas.android.com/apk/res/android"
    android:id="@+id/textinputlayout">

    <EditText
        android:layout_width="match_parent"
        android:layout_height="wrap_content"/>
</android.support.design.widget.TextInputLayout>
Activity
...
TextInputLayout textInputLayout = (TextInputLayout) findViewById(R.id.textinputlayout);
        EditText editText = textInputLayout.getEditText();

        //  Hint字体大小改不了,颜色也改不了
        textInputLayout.setHint("请输入用户名");
        //  自带的错误提醒,同样无法修改
        editText.setError("你输入错啦!");

        //  出现在EditText下方
        //textInputLayout.setError("你输入错啦!");
...
FloatingActionButton
有漂浮效果的按钮
效果
xml直接使用
<RelativeLayout
    android:layout_width="match_parent"
    android:layout_height="match_parent"
     xmlns:android="http://schemas.android.com/apk/res/android">


    <android.support.design.widget.FloatingActionButton
    android:id="@+id/button"
    android:layout_width="wrap_content"
    android:layout_centerInParent="true"
    android:layout_height="wrap_content"
    android:background="@drawable/icon"
    />


</RelativeLayout>
Snackbar
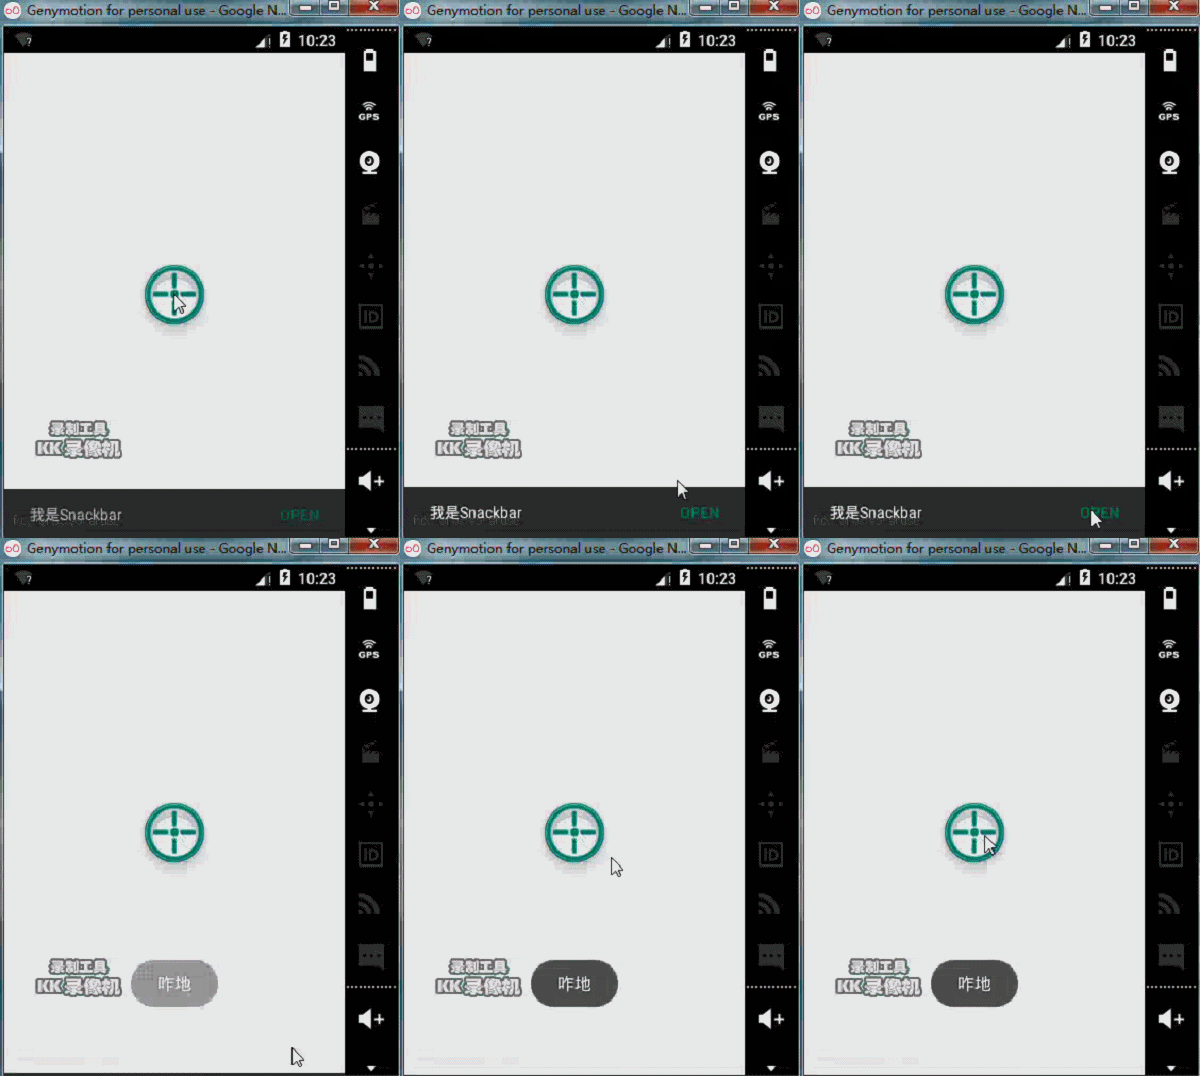
使用方法类似于Toast,它出现在屏幕底部并且可以设置点击按钮和点击事件。
效果
Activity
button.setOnClickListener(new OnClickListener() {

            @Override
            public void onClick(View v) {

                //  setAction可以使用多次,只是后面的会把前面的覆盖掉,使得前面的setAction失效!
                Snackbar.make(button, "我是Snackbar", 3000).setAction("open", new OnClickListener() {

                    @Override
                    public void onClick(View v) {
                        Toast.makeText(getApplicationContext(), "咋地", Toast.LENGTH_SHORT).show();

                    }
                }).show();

            }
        });
TabLayout
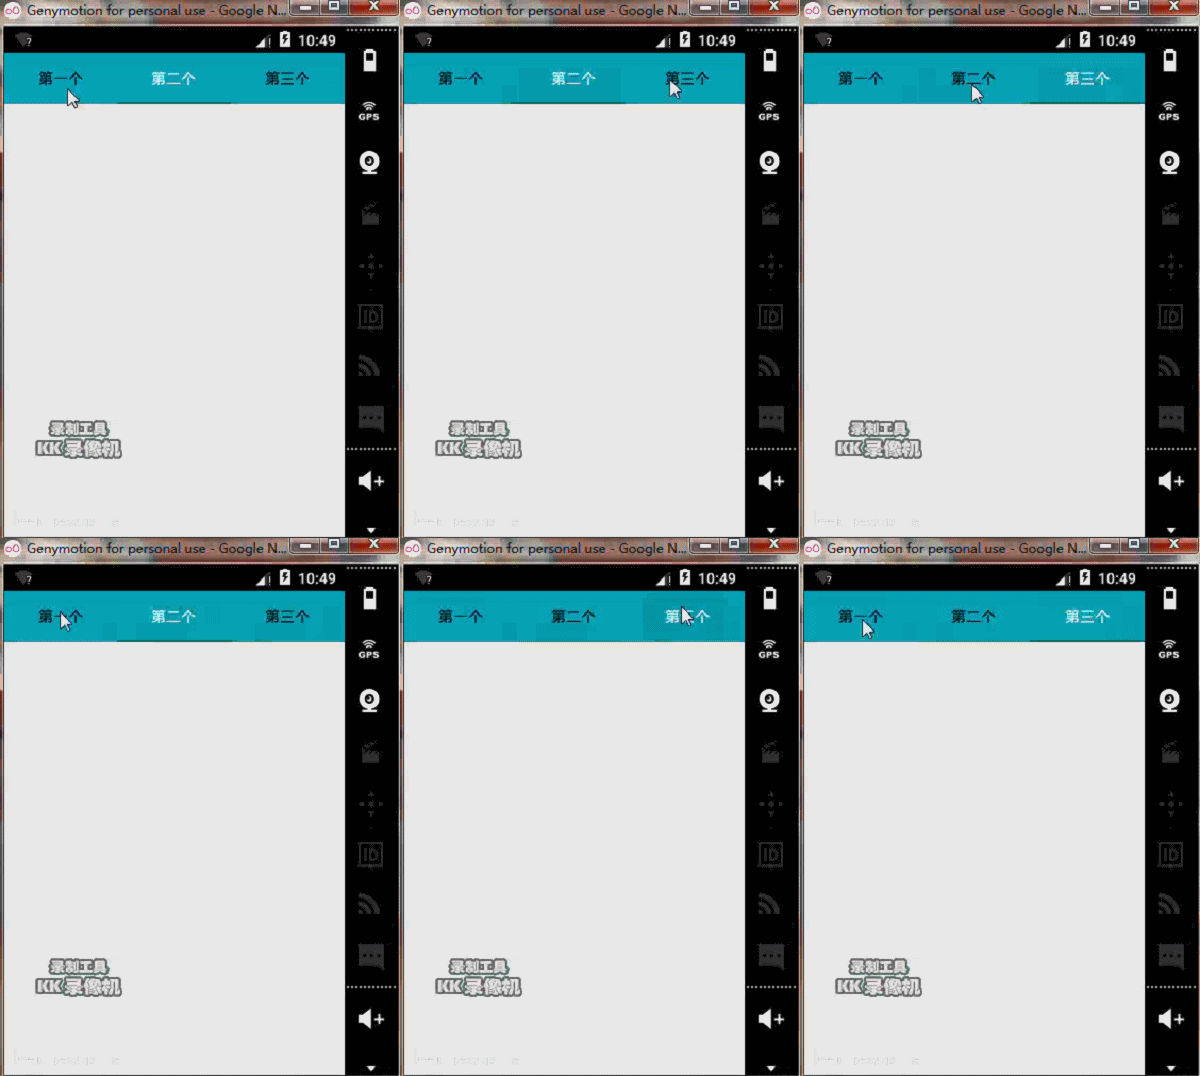
实现Viewpager那类型的效果,多了指示器效果和点击效果
效果
xml
<RelativeLayout
    android:layout_width="match_parent"
    android:layout_height="match_parent"
     xmlns:android="http://schemas.android.com/apk/res/android">


   <android.support.design.widget.TabLayout
    android:id="@+id/tablayout"
    android:layout_width="match_parent"
    android:background="#1FBCD2"
    android:layout_height="48dp" />


</RelativeLayout>
Activity
TabLayout tabLayout = (TabLayout) findViewById(R.id.tablayout);
        // 设置文本在选中和为选中时候的颜色
        tabLayout.setTabTextColors(Color.BLACK, Color.WHITE);

        // 添加 Tab,默认选中
        tabLayout.addTab(tabLayout.newTab().setText("第一个"), true);
        tabLayout.addTab(tabLayout.newTab().setText("第二个"), false);
        tabLayout.addTab(tabLayout.newTab().setText("第三个"), false);

        //  联动
//      tabLayout.setTabsFromPagerAdapter(new PagerAdapter() {
//
//          @Override
//          public boolean isViewFromObject(View arg0, Object arg1) {
//              // TODO Auto-generated method stub
//              return false;
//          }
//
//          @Override
//          public int getCount() {
//              // TODO Auto-generated method stub
//              return 0;
//          }
//      });
Navigation View
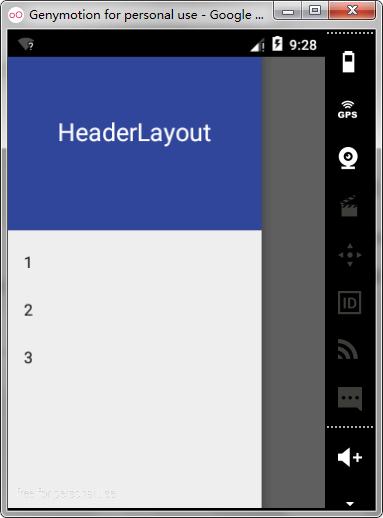
搭配DrawerLayout使用,Navigation View是一个menu(菜单)
注意:在header.xml里面,布局的高度不能为match_parent,这样会导致header不显示!
效果:
使用:
xml
<android.support.v4.widget.DrawerLayout xmlns:android="http://schemas.android.com/apk/res/android"
  xmlns:app="http://schemas.android.com/apk/res-auto"
  android:id="@+id/drawer_layout"
  android:layout_width="match_parent"
  android:layout_height="match_parent"
  android:fitsSystemWindows="true">
  <FrameLayout
    android:layout_width="match_parent"
    android:layout_height="match_parent">
    <TextView
      android:layout_width="match_parent"
      android:layout_height="match_parent"
      android:text="主布局"
      android:gravity="center"
      android:textSize="30sp"
     />
  </FrameLayout>
  <android.support.design.widget.NavigationView
    android:id="@+id/navigation"
    android:layout_width="wrap_content"
    android:layout_height="match_parent"
    android:layout_gravity="start"
    app:headerLayout="@layout/header"
    app:menu="@menu/my_navigation_items" />
</android.support.v4.widget.DrawerLayout>
header.XML
<?xml version="1.0" encoding="utf-8"?>
<RelativeLayout xmlns:android="http://schemas.android.com/apk/res/android"
    android:layout_width="match_parent"
    android:layout_height="200dp"
    android:background="#30469b">
    <TextView
        android:id="@+id/header_tv"
        android:layout_width="wrap_content"
        android:layout_height="wrap_content"
        android:layout_centerInParent="true"
        android:text="HeaderLayout"
        android:textColor="#ffffff"
        android:textSize="25sp" />
</RelativeLayout>
my_navigation_items
<menu xmlns:android="http://schemas.android.com/apk/res/android"
    xmlns:app="http://schemas.android.com/apk/res-auto"
    xmlns:tools="http://schemas.android.com/tools"
    tools:context="com.example.materialdesign.MainActivity" >

    <item
        android:orderInCategory="100"
        android:title="1"
       />

      <item
        android:orderInCategory="100"
        android:title="2"
       />

        <item
        android:orderInCategory="100"
        android:title="3"
       />

</menu>


 1044
1044

 被折叠的 条评论
为什么被折叠?


