


模式的定义
将一个复杂对象的构建与它的表示分离,使得同样的构建过程可以创建不同的表示。
使用场景
1、相同的方法,不同的执行顺序,产生不同的事件结果时;
2、多个部件或零件,都可以装配到一个对象中,但是产生的运行结果又不相同时;
3、产品类非常复杂,或者产品类中的调用顺序不同产生了不同的效能,这个时候使用建造者模式非常合适;
UML类图
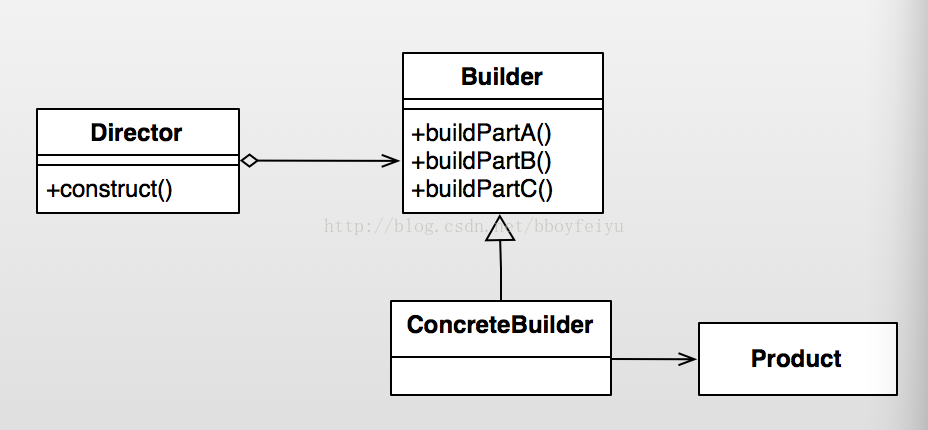
角色介绍
Product 产品类 : 产品的抽象类。
Builder : 抽象类, 规范产品的组建,一般是由子类实现具体的组件过程。
ConcreteBuilder : 具体的构建器.
Director : 统一组装过程(可省略)。
简单示例
下面我们以组装电脑为例来演示一下简单且经典的builder模式。
- package com.dp.example.builder;
- /**
- * Computer产品抽象类, 为了例子简单, 只列出这几个属性
- *
- * @author mrsimple
- *
- */
- public abstract class Computer {
- protected int mCpuCore = 1;
- protected int mRamSize = 0;
- protected String mOs = "Dos";
- protected Computer() {
- }
- // 设置CPU核心数
- public abstract void setCPU(int core);
- // 设置内存
- public abstract void setRAM(int gb);
- // 设置操作系统
- public abstract void setOs(String os);
- @Override
- public String toString() {
- return "Computer [mCpuCore=" + mCpuCore + ", mRamSize=" + mRamSize
- + ", mOs=" + mOs + "]";
- }
- }
- package com.dp.example.builder;
- /**
- * Apple电脑
- * @author mrsimple
- *
- */
- public class AppleComputer extends Computer {
- protected AppleComputer() {
- }
- @Override
- public void setCPU(int core) {
- mCpuCore = core;
- }
- @Override
- public void setRAM(int gb) {
- mRamSize = gb;
- }
- @Override
- public void setOs(String os) {
- mOs = os;
- }
- }
- package com.dp.example.builder;
- /**
- * builder抽象类
- *
- * @author mrsimple
- *
- */
- public abstract class Builder {
- // 设置CPU核心数
- public abstract void buildCPU(int core);
- // 设置内存
- public abstract void buildRAM(int gb);
- // 设置操作系统
- public abstract void buildOs(String os);
- // 创建Computer
- public abstract Computer create();
- }
- package com.dp.example.builder;
- /**
- * Apple电脑
- * @author mrsimple
- *
- */
- public class AppleComputer extends Computer {
- protected AppleComputer() {
- }
- @Override
- public void setCPU(int core) {
- mCpuCore = core;
- }
- @Override
- public void setRAM(int gb) {
- mRamSize = gb;
- }
- @Override
- public void setOs(String os) {
- mOs = os;
- }
- }
- package com.dp.example.builder;
- /**
- * builder抽象类
- *
- * @author mrsimple
- *
- */
- public abstract class Builder {
- // 设置CPU核心数
- public abstract void buildCPU(int core);
- // 设置内存
- public abstract void buildRAM(int gb);
- // 设置操作系统
- public abstract void buildOs(String os);
- // 创建Computer
- public abstract Computer create();
- }
- package com.dp.example.builder;
- public class ApplePCBuilder extends Builder {
- private Computer mApplePc = new AppleComputer();
- @Override
- public void buildCPU(int core) {
- mApplePc.setCPU(core);
- }
- @Override
- public void buildRAM(int gb) {
- mApplePc.setRAM(gb);
- }
- @Override
- public void buildOs(String os) {
- mApplePc.setOs(os);
- }
- @Override
- public Computer create() {
- return mApplePc;
- }
- }
- package com.dp.example.builder;
- public class Director {
- Builder mBuilder = null;
- /**
- *
- * @param builder
- */
- public Director(Builder builder) {
- mBuilder = builder;
- }
- /**
- * 构建对象
- *
- * @param cpu
- * @param ram
- * @param os
- */
- public void construct(int cpu, int ram, String os) {
- mBuilder.buildCPU(cpu);
- mBuilder.buildRAM(ram);
- mBuilder.buildOs(os);
- }
- }
- /**
- * 经典实现较为繁琐
- *
- * @author mrsimple
- *
- */
- public class Test {
- public static void main(String[] args) {
- // 构建器
- Builder builder = new ApplePCBuilder();
- // Director
- Director pcDirector = new Director(builder);
- // 封装构建过程, 4核, 内存2GB, Mac系统
- pcDirector.construct(4, 2, "Mac OS X 10.9.1");
- // 构建电脑, 输出相关信息
- System.out.println("Computer Info : " + builder.create().toString());
- }
- }
源码分析
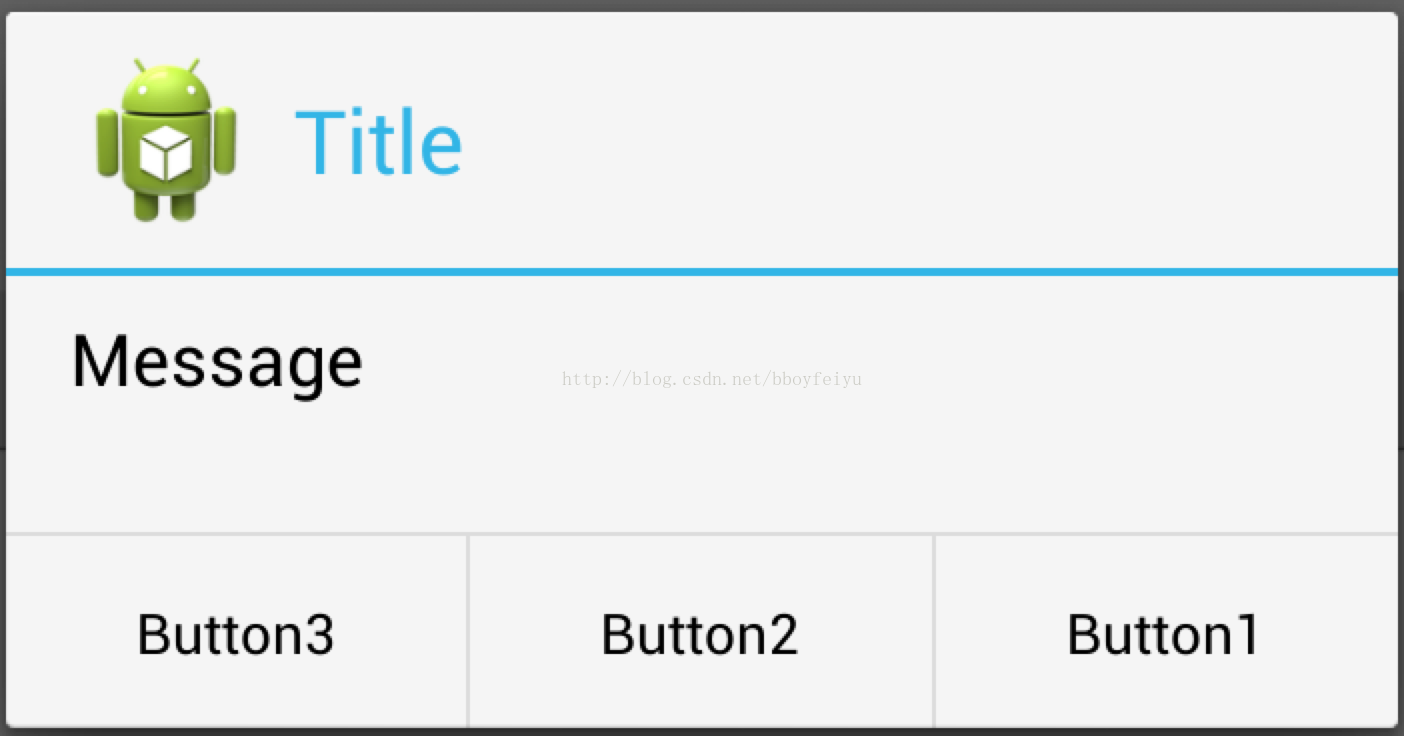
在Android源码中,我们最常用到的Builder模式就是AlertDialog.Builder, 使用该Builder来构建复杂的AlertDialog对象。简单示例如下 :
- //显示基本的AlertDialog
- private void showDialog(Context context) {
- AlertDialog.Builder builder = new AlertDialog.Builder(context);
- builder.setIcon(R.drawable.icon);
- builder.setTitle("Title");
- builder.setMessage("Message");
- builder.setPositiveButton("Button1",
- new DialogInterface.OnClickListener() {
- public void onClick(DialogInterface dialog, int whichButton) {
- setTitle("点击了对话框上的Button1");
- }
- });
- builder.setNeutralButton("Button2",
- new DialogInterface.OnClickListener() {
- public void onClick(DialogInterface dialog, int whichButton) {
- setTitle("点击了对话框上的Button2");
- }
- });
- builder.setNegativeButton("Button3",
- new DialogInterface.OnClickListener() {
- public void onClick(DialogInterface dialog, int whichButton) {
- setTitle("点击了对话框上的Button3");
- }
- });
- builder.create().show(); // 构建AlertDialog, 并且显示
- }
下面我们看看AlertDialog的部分源码 :
- // AlertDialog
- public class AlertDialog extends Dialog implements DialogInterface {
- // Controller, 接受Builder成员变量P中的各个参数
- private AlertController mAlert;
- // 构造函数
- protected AlertDialog(Context context, int theme) {
- this(context, theme, true);
- }
- // 4 : 构造AlertDialog
- AlertDialog(Context context, int theme, boolean createContextWrapper) {
- super(context, resolveDialogTheme(context, theme), createContextWrapper);
- mWindow.alwaysReadCloseOnTouchAttr();
- mAlert = new AlertController(getContext(), this, getWindow());
- }
- // 实际上调用的是mAlert的setTitle方法
- @Override
- public void setTitle(CharSequence title) {
- super.setTitle(title);
- mAlert.setTitle(title);
- }
- // 实际上调用的是mAlert的setCustomTitle方法
- public void setCustomTitle(View customTitleView) {
- mAlert.setCustomTitle(customTitleView);
- }
- public void setMessage(CharSequence message) {
- mAlert.setMessage(message);
- }
- // AlertDialog其他的代码省略
- // ************ Builder为AlertDialog的内部类 *******************
- public static class Builder {
- // 1 : 存储AlertDialog的各个参数, 例如title, message, icon等.
- private final AlertController.AlertParams P;
- // 属性省略
- /**
- * Constructor using a context for this builder and the {@link AlertDialog} it creates.
- */
- public Builder(Context context) {
- this(context, resolveDialogTheme(context, 0));
- }
- public Builder(Context context, int theme) {
- P = new AlertController.AlertParams(new ContextThemeWrapper(
- context, resolveDialogTheme(context, theme)));
- mTheme = theme;
- }
- // Builder的其他代码省略 ......
- // 2 : 设置各种参数
- public Builder setTitle(CharSequence title) {
- P.mTitle = title;
- return this;
- }
- public Builder setMessage(CharSequence message) {
- P.mMessage = message;
- return this;
- }
- public Builder setIcon(int iconId) {
- P.mIconId = iconId;
- return this;
- }
- public Builder setPositiveButton(CharSequence text, final OnClickListener listener) {
- P.mPositiveButtonText = text;
- P.mPositiveButtonListener = listener;
- return this;
- }
- public Builder setView(View view) {
- P.mView = view;
- P.mViewSpacingSpecified = false;
- return this;
- }
- // 3 : 构建AlertDialog, 传递参数
- public AlertDialog create() {
- // 调用new AlertDialog构造对象, 并且将参数传递个体AlertDialog
- final AlertDialog dialog = new AlertDialog(P.mContext, mTheme, false);
- // 5 : 将P中的参数应用的dialog中的mAlert对象中
- P.apply(dialog.mAlert);
- dialog.setCancelable(P.mCancelable);
- if (P.mCancelable) {
- dialog.setCanceledOnTouchOutside(true);
- }
- dialog.setOnCancelListener(P.mOnCancelListener);
- if (P.mOnKeyListener != null) {
- dialog.setOnKeyListener(P.mOnKeyListener);
- }
- return dialog;
- }
- }
- }
- public void apply(AlertController dialog) {
- if (mCustomTitleView != null) {
- dialog.setCustomTitle(mCustomTitleView);
- } else {
- if (mTitle != null) {
- dialog.setTitle(mTitle);
- }
- if (mIcon != null) {
- dialog.setIcon(mIcon);
- }
- if (mIconId >= 0) {
- dialog.setIcon(mIconId);
- }
- if (mIconAttrId > 0) {
- dialog.setIcon(dialog.getIconAttributeResId(mIconAttrId));
- }
- }
- if (mMessage != null) {
- dialog.setMessage(mMessage);
- }
- if (mPositiveButtonText != null) {
- dialog.setButton(DialogInterface.BUTTON_POSITIVE, mPositiveButtonText,
- mPositiveButtonListener, null);
- }
- if (mNegativeButtonText != null) {
- dialog.setButton(DialogInterface.BUTTON_NEGATIVE, mNegativeButtonText,
- mNegativeButtonListener, null);
- }
- if (mNeutralButtonText != null) {
- dialog.setButton(DialogInterface.BUTTON_NEUTRAL, mNeutralButtonText,
- mNeutralButtonListener, null);
- }
- if (mForceInverseBackground) {
- dialog.setInverseBackgroundForced(true);
- }
- // For a list, the client can either supply an array of items or an
- // adapter or a cursor
- if ((mItems != null) || (mCursor != null) || (mAdapter != null)) {
- createListView(dialog);
- }
- if (mView != null) {
- if (mViewSpacingSpecified) {
- dialog.setView(mView, mViewSpacingLeft, mViewSpacingTop, mViewSpacingRight,
- mViewSpacingBottom);
- } else {
- dialog.setView(mView);
- }
- }
- }
优点与缺点
优点 :
1、良好的封装性, 使用建造者模式可以使客户端不必知道产品内部组成的细节;
2、建造者独立,容易扩展;
3、在对象创建过程中会使用到系统中的一些其它对象,这些对象在产品对象的创建过程中不易得到。
缺点 :
1、会产生多余的Builder对象以及Director对象,消耗内存;
2、对象的构建过程暴露。


 543
543

 被折叠的 条评论
为什么被折叠?
被折叠的 条评论
为什么被折叠?
 到【灌水乐园】发言


