


Hello World:手动创建第一个ionic应用
欢迎大家到我的博客关注我学习Ionic 1和Ionic 2的历程,共同学习,共同进步。
本文乃翻译而来,如有理解不足之处,请多多指正,大家也可移步原文。
学习一门编程语言,Hello World几乎都是第一个应用,这或许是从C语言那里传下来的?从Hello World逐步深入记录了我们学习一门编程语言的全过程。
本文将介绍ionic的入门应用Hello World,可能和其他语言的Hello World相比有些繁琐:
HTML构建
首先,新建一个HTML页面,名字随便,当然index.html是不错的选择,在<head>标签内我们包含了一个viewport标签并且引入了ionic相关的css和js文件,即ionic.min.css和ionic.bundle.js文件:
<!DOCTYPE html>
<html>
  <head>
    <meta charset="utf-8">
    <meta name="viewport" content="initial-scale=1, maximum-scale=1, user-scalable=no, width=device-width">
    <link href="http://code.ionicframework.com/1.0.0/css/ionic.min.css" rel="stylesheet">
    <script src="http://code.ionicframework.com/1.0.0/js/ionic.bundle.js"></script>
  </head>
  <body>
    Hello World!
  </body>
</html>
如果在浏览器中打开此页面,你会看到熟悉的“Hello World!”,不过这不是ionic,这只是文本。
module
现在我们要把上面的页面编程ionic应用,我们需要在<body>标签内使用ng-app标注,然后给’ng-app’传入我们定义的模块:
首先,修改<body>标签:
<body ng-app="ionicApp">然后在app.js文件中定义我们的模块:
angular.module('ionicApp', ['ionic']);注意我们定义的模块名称,要和传给ng-app的模块名称一致。最后别忘了在引入ionic相关文件之后引入我们的app.js:
<link href="http://code.ionicframework.com/1.0.0/css/ionic.min.css" rel="stylesheet">
<script src="http://code.ionicframework.com/1.0.0/js/ionic.bundle.js"></script>
<script src="app.js"></script>
使用ionic directive
现在我们已经有了一个ionic应用,我们可以向页面文件中添加ionic为我们封装好的directive了。
先加个header吧:
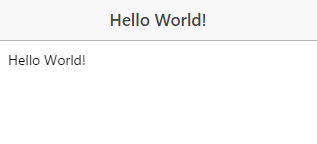
<ion-header-bar class="bar-stable">
    <h1 class="title">Hello World!</h1>
</ion-header-bar>
再来个content区域吧:
<ion-content class="padding">
    <p>Hello World, how are you?</p>
</ion-content>
现在,我们再打开我们的页面:
添加controller
现在,向我们的应用中添加controller,最常见的方式是使用ng-controller标注我们的<body>标签:
<body ng-app="ionicApp" ng-controller="MainCtrl">当然,我们还需要在app.js中定义MainCtrl:
angular.module('ionicApp', ['ionic'])

.controller("MainCtrl",function(){
  console.log("Main Controller says: Hello World");
});
添加Route/State
现在我们的ionic app只有一个页面,现在我们需要增加多个页面。ionic使用了Angular UI router的概念,每个页面对应的是一个state。
现在我们为已经完成的页面定义state:
首先,我们先将我们刚才向<body>标签内添加的代码独立出来,在工程根目录(通常是www目录)下新建templates文件夹,并在其中新建页面main.html:
<ion-header-bar class="bar-stable">
    <h1 class="title">Hello World!</h1>
</ion-header-bar>
<ion-content class="padding">
    <p>Hello World, how are you?</p>
</ion-content>下一步,在我们的index.html的<body>标签内添加ion-nav-view标签,ion-nav-view是我们其他页面或者说state(每一个页面对应一个state)的展示区域。我们还要去除<body>标签内的ng-controller标签,因为我们会在定义state时配置它达到相同的效果,现在看下我们的index.html:
<body ng-app="ionicApp">
    <ion-nav-view></ion-nav-view>
</body>
非常干净的代码,留给我们的是非常干净的页面。
然后,我们在app.js中定义第一个state,我们需要使用.config方法和$stateProvider。我们将此state命名为”main”,并定义其url为”/main”,指定其页面为”templates/main.html”,并为其指定我们已经完成的”MainCtrl”作为controller:
.config(function($stateProvider){
    $stateProvider

    .state('main', {
        url: "/main",
        templateUrl: "templates/main.html",
        controller: 'MainCtrl'
    });
});貌似还少了一件事,我们得告诉我们的app的默认路径,为此我们需要使用$urlRouterProvider:
.config(function($stateProvider, $urlRouterProvider){
    $stateProvider

    .state('main', {
        url: "/main",
        templateUrl: "templates/main.html",
        controller: 'MainCtrl'
    });

    $urlRouterProvider.otherwise('/main');
});
如果现在打开此app,会看到和刚才一样”Hello World”页面,下一步我们添加另一个页面:”templates/page2.html”并定义其state:
<ion-header-bar class="bar-stable">
    <h1 class="title">Page 2!</h1>
</ion-header-bar>
<ion-content class="padding">
    <p>I am Page 2!</p>
</ion-content>
然后,改变我们的”templates/main.html”:
<ion-header-bar class="bar-stable">
    <h1 class="title">Hello World!</h1>
</ion-header-bar>
<ion-content class="padding">
    <p>Hello World, how are you? <a href="#/page2">Go to Page 2</a></p>
</ion-content>
可以看到,我们只是增加了一个去向page2的链接。
然后,我们要为page2定义state:
.config(function($stateProvider, $urlRouterProvider){
  $stateProvider

  .state('main', {
    url: "/main",
    templateUrl: "templates/main.html",
    controller: 'MainCtrl'
  })

  .state('page2', {
    url: "/page2",
    templateUrl: "templates/page2.html",
  })

  // if none of the above states are matched, use this as the fallback
  $urlRouterProvider.otherwise('/main');
});
可以看到,这里我们没有为page2的state指定controller。最终我们的app.js文件内容如下:
angular.module('ionicApp', ['ionic'])

.controller("MainCtrl",function(){
  console.log("Main Controller says: Hello World");
})

.config(function($stateProvider, $urlRouterProvider){
  $stateProvider

  .state('main', {
    url: "/main",
    templateUrl: "templates/main.html",
    controller: 'MainCtrl'
  })

  .state('page2', {
    url: "/page2",
    templateUrl: "templates/page2.html",
  })

  // if none of the above states are matched, use this as the fallback
  $urlRouterProvider.otherwise('/main');
});
总结
本文中,我们完成了一个多页面的应用,使用到了controller和state的概念,他们都是ionic的基本概念。
个人推荐
推荐一款个人使用了半年的理财产品:创建了6年的挖财,新人收益36%,7天18%,1年10%,注册送308元券


 7086
7086

 被折叠的 条评论
为什么被折叠?
被折叠的 条评论
为什么被折叠?
 到【灌水乐园】发言


