


转自:鸿洋博客,正在学习,非常感谢!
android 自定义控件(三),这里实现的是一个类似于进度条切换颜色的demo。
最终效果:
1.自定义属性:
  <attr name="firstColor" format="color"/>
    <attr name="secondColor" format="color"/>
    <attr name="cicleWidth" format="dimension"/>
    <attr name="speed" format="integer"/>

    <declare-styleable name="CustomeView3">
        <attr name="firstColor"/>
        <attr name="secondColor"/>
        <attr name="cicleWidth"/>
        <attr name="speed"/>
    </declare-styleable>
2.自定义控件CustomeView3.java
 private int mFirstColor;
    private int mSecondColor;
    private int mCicleWidth ;
    private int mSpeed = 1;

    //画笔
    Paint mPaint;
    RectF rectF;//圆弧的区域
    private  int mProgress;//模拟进度条度数
    private  boolean isNext=false;//是否该切换颜色
获取属性,这里说明一下这些属性只有在用户设置的时候才会初始化,就是说你只有给定了颜色这里才会有否则是初始颜色。
 TypedArray a = context.getTheme().obtainStyledAttributes(attrs, R.styleable.CustomeView3, defStyleAttr, 0);
        int n = a.getIndexCount();

        for (int i = 0; i < n; i++) {
            int attr = a.getIndex(i);
            switch (attr) {
                case R.styleable.CustomeView3_firstColor:
                    mFirstColor = a.getColor(attr, Color.RED);
                    break;
                case R.styleable.CustomeView3_secondColor:
                    mSecondColor = a.getColor(attr, Color.BLACK);
                    break;
                case R.styleable.CustomeView3_cicleWidth:
                    mCicleWidth = a.getDimensionPixelOffset(attr, (int) TypedValue.applyDimension(TypedValue.COMPLEX_UNIT_SP, 10, getResources().getDisplayMetrics()));
                    break;
                case R.styleable.CustomeView3_speed:
                    mSpeed = a.getInt(attr, 20);
                    break;
            }
        }

        a.recycle();
        mPaint = new Paint();
        mTextPaint =new Paint();
        rectF =new RectF();
下面就是绘制L首先分析这个view,看起来是一个圆环在切换颜色,这里我们绘制两个圆环,一个是不断变化的进度圆环一个是不变的背景圆环。
OnDraw()方法:
        int center=getWidth()/2;//圆心
        int radius= center-mCicleWidth/2;//半径大小
        mPaint.setAntiAlias(true);
        mPaint.setStrokeWidth(mCicleWidth);
        mPaint.setStyle(Paint.Style.STROKE);
        mPaint.setColor(mFirstColor);

        rectF.left=center-radius;
        rectF.right=center+radius;
        rectF.bottom=center+radius;
        rectF.top=center-radius;
        canvas.drawArc(rectF,0,270,false,mPaint);//设置为true,0度在三点钟方向开始顺时针绘制,-90在12点钟方向

        mPaint.setColor(mSecondColor);
        canvas.drawArc(rectF,0,-90,false,mPaint);
效果如下:
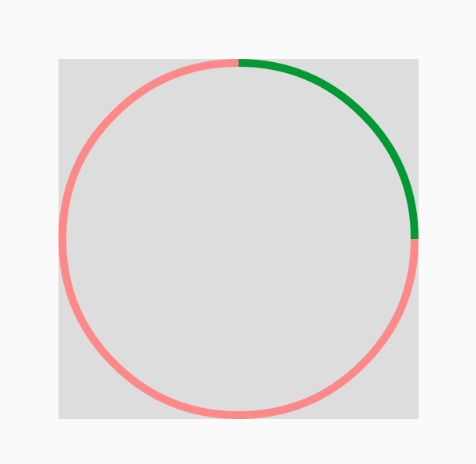
这里是一个两个圆弧合成的一个圆环。我们绘制的时候在一个颜色的进滚动时候只需要绘制另一个颜色的整圆弧作为背景就好了。
 canvas.drawArc(rectF,0,270,false,mPaint);
 canvas.drawArc(rectF,0,-90,false,mPaint);
这里的进度改变就是绘制不同度数的圆弧,因为是放在thread 的run方法中所以通过postInvalidate()重绘,卸载构造函数中;
 //模拟进度条

        new Thread(){
            @Override
            public void run() {
                while (!isNext){
                    mProgress++;
                    if(mProgress==360){
                        isNext=!isNext;
                        mProgress=0;
                    }
                    postInvalidate();
                    try {
                        Thread.sleep(mSpeed);
                    } catch (InterruptedException e) {
                        e.printStackTrace();
                    }
                }
            }
        }.start();
此时我们需要根据不同的条件绘制不同的颜色让整个view看起来有颜色切换的效果:
      if(isNext){
            mPaint.setColor(mFirstColor);
            canvas.drawArc(rectF, 0, 360, false, mPaint);
            mPaint.setColor(mSecondColor);
            canvas.drawArc(rectF, -90, mProgress, false, mPaint);
            mTextPaint.setColor(mFirstColor);
       } else{
            mPaint.setColor(mFirstColor);
            canvas.drawArc(rectF, 0, 360, false, mPaint);
            mPaint.setColor(mSecondColor);
            canvas.drawArc(rectF, -90, mProgress, false, mPaint);
            mTextPaint.setColor(mFirstColor);
        }
3.使用
<LinearLayout xmlns:android="http://schemas.android.com/apk/res/android"
    xmlns:tools="http://schemas.android.com/tools"
    xmlns:app="http://schemas.android.com/apk/res-auto"
    android:layout_width="match_parent"
    android:layout_height="match_parent"
    android:gravity="center"
    android:orientation="vertical"
    android:background="#ddd"
    tools:context="com.example.down.customeviewdemo_3.MainActivity">
    <com.example.down.customeviewdemo_3.CustomeView3
        android:layout_width="400dp"
        android:layout_height="400dp"
        app:cicleWidth="30dp"
        app:firstColor="#f88"
        app:secondColor="#ddd"
        app:speed="50"

        />

</LinearLayout>
最终效果:如上图,会发现有一个白色边框这里的原理是一样的,就是开始的时候绘制一个空心的圆,画圆弧度数的时候计算好半径就好。
笔记:
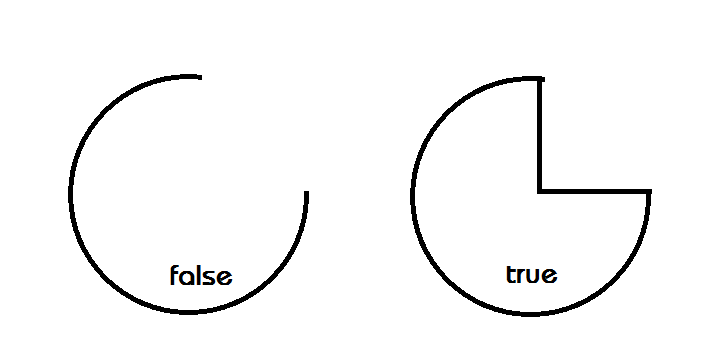
canvas.drawArc(rectF,0,270,false,mPaint);
canvas.drawArc(rectF,0,270,true,mPaint);
两者的区别:


 877
877

 被折叠的 条评论
为什么被折叠?
被折叠的 条评论
为什么被折叠?
 到【灌水乐园】发言


