


大家平时做Android应用的时候,多少会接触到异步加载图片,或者加载大量图片的问题,而加载图片我们常常会遇到许多的问题,比如说图片的错乱,OOM等问题,对于新手来说,这些问题解决起来会比较吃力,所以就有很多的开源图片加载框架应运而生,比较著名的就是Universal-Image-Loader,相信很多朋友都听过或者使用过这个强大的图片加载框架,今天这篇文章就是对这个框架的基本介绍以及使用,主要是帮助那些没有使用过这个框架的朋友们。该项目存在于Github上面https://github.com/nostra13/Android-Universal-Image-Loader,我们可以先看看这个开源库存在哪些特征
- 多线程下载图片,图片可以来源于网络,文件系统,项目文件夹assets中以及drawable中等
- 支持随意的配置ImageLoader,例如线程池,图片下载器,内存缓存策略,硬盘缓存策略,图片显示选项以及其他的一些配置
- 支持图片的内存缓存,文件系统缓存或者SD卡缓存
- 支持图片下载过程的监听
- 根据控件(ImageView)的大小对Bitmap进行裁剪,减少Bitmap占用过多的内存
- 较好的控制图片的加载过程,例如暂停图片加载,重新开始加载图片,一般使用在ListView,GridView中,滑动过程中暂停加载图片,停止滑动的时候去加载图片
- 提供在较慢的网络下对图片进行加载
当然上面列举的特性可能不全,要想了解一些其他的特性只能通过我们的使用慢慢去发现了,接下来我们就看看这个开源库的简单使用吧
新建一个Android项目,下载JAR包添加到工程libs目录下
新建一个MyApplication继承Application,并在onCreate()中创建ImageLoader的配置参数,并初始化到ImageLoader中代码如下
- package com.example.uil;
- import com.nostra13.universalimageloader.core.ImageLoader;
- import com.nostra13.universalimageloader.core.ImageLoaderConfiguration;
- import android.app.Application;
- public class MyApplication extends Application {
- @Override
- public void onCreate() {
- super.onCreate();
- //创建默认的ImageLoader配置参数
- ImageLoaderConfiguration configuration = ImageLoaderConfiguration
- .createDefault(this);
- //Initialize ImageLoader with configuration.
- ImageLoader.getInstance().init(configuration);
- }
- }
- File cacheDir = StorageUtils.getCacheDirectory(context);
- ImageLoaderConfiguration config = new ImageLoaderConfiguration.Builder(context)
- .memoryCacheExtraOptions(480, 800) // default = device screen dimensions
- .diskCacheExtraOptions(480, 800, CompressFormat.JPEG, 75, null)
- .taskExecutor(...)
- .taskExecutorForCachedImages(...)
- .threadPoolSize(3) // default
- .threadPriority(Thread.NORM_PRIORITY - 1) // default
- .tasksProcessingOrder(QueueProcessingType.FIFO) // default
- .denyCacheImageMultipleSizesInMemory()
- .memoryCache(new LruMemoryCache(2 * 1024 * 1024))
- .memoryCacheSize(2 * 1024 * 1024)
- .memoryCacheSizePercentage(13) // default
- .diskCache(new UnlimitedDiscCache(cacheDir)) // default
- .diskCacheSize(50 * 1024 * 1024)
- .diskCacheFileCount(100)
- .diskCacheFileNameGenerator(new HashCodeFileNameGenerator()) // default
- .imageDownloader(new BaseImageDownloader(context)) // default
- .imageDecoder(new BaseImageDecoder()) // default
- .defaultDisplayImageOptions(DisplayImageOptions.createSimple()) // default
- .writeDebugLogs()
- .build();
* Configuration所有配置简介
*/
// 内存缓存的设置选项 (最大图片宽度,最大图片高度) 默认当前屏幕分辨率
// .memoryCacheExtraOptions(480, 800)
// 硬盘缓存的设置选项 (最大图片宽度,最大图片高度,压缩格式,压缩质量,处理器)
// .discCacheExtraOptions(480, 800, CompressFormat.JPEG, 75, null)
// 设置自定义加载和显示图片的线程池
// .taskExecutor(DefaultConfigurationFactory.createExecutor(3,Thread.NORM_PRIORITY
// - 1, QueueProcessingType.FIFO))
// 设置自定义加载和显示内存缓存或者硬盘缓存图片的线程池
// .taskExecutorForCachedImages(DefaultConfigurationFactory.createExecutor(3,Thread.NORM_PRIORITY
// - 1, QueueProcessingType.FIFO))
// 设置显示图片线程池大小,默认为3
// 注:如果设置了taskExecutor或者taskExecutorForCachedImages 此设置无效
// .threadPoolSize(3)
// 设置图片加载线程的优先级,默认为Thread.NORM_PRIORITY-1
// 注:如果设置了taskExecutor或者taskExecutorForCachedImages 此设置无效
// .threadPriority(Thread.NORM_PRIORITY - 1)
// 设置图片加载和显示队列处理的类型 默认为QueueProcessingType.FIFO
// 注:如果设置了taskExecutor或者taskExecutorForCachedImages 此设置无效
// .tasksProcessingOrder(QueueProcessingType.FIFO)
// 设置拒绝缓存在内存中一个图片多个大小 默认为允许,(同一个图片URL)根据不同大小的imageview保存不同大小图片
// .denyCacheImageMultipleSizesInMemory()
// 设置内存缓存 默认为一个当前应用可用内存的1/8大小的LruMemoryCache
// .memoryCache(new LruMemoryCache(2 * 1024 * 1024))
// 设置内存缓存的最大大小 默认为一个当前应用可用内存的1/8
// .memoryCacheSize(2 * 1024 * 1024)
// 设置内存缓存最大大小占当前应用可用内存的百分比 默认为一个当前应用可用内存的1/8
// .memoryCacheSizePercentage(13)
// 设置硬盘缓存
// 默认为StorageUtils.getCacheDirectory(getApplicationContext())
// 即/mnt/sdcard/android/data/包名/cache/
// .discCache(new
// UnlimitedDiscCache(StorageUtils.getCacheDirectory(getApplicationContext())))
// 设置硬盘缓存的最大大小
// .discCacheSize(50 * 1024 * 1024)
// 设置硬盘缓存的文件的最多个数
// .discCacheFileCount(100)
// 设置硬盘缓存文件名生成规范
// 默认为new HashCodeFileNameGenerator()
// .discCacheFileNameGenerator(new Md5FileNameGenerator())
// 设置图片下载器
// 默认为 DefaultConfigurationFactory.createBitmapDisplayer()
// .imageDownloader(
// new HttpClientImageDownloader(getApplicationContext(),
// new DefaultHttpClient()))
// 设置图片解码器
// 默认为DefaultConfigurationFactory.createImageDecoder(false)
// .imageDecoder(DefaultConfigurationFactory.createImageDecoder(false))
// 设置默认的图片显示选项
// 默认为DisplayImageOptions.createSimple()
// .defaultDisplayImageOptions(DisplayImageOptions.createSimple())
// 打印DebugLogs
// .writeDebugLogs()
// 建立
// .build();
/**
* DisplayImageOptions所有配置简介
*/
// 设置图片加载时的默认图片
// .showImageOnLoading(R.drawable.ic_chat_def_pic)
// 设置图片加载失败的默认图片
// .showImageOnFail(R.drawable.ic_chat_def_pic_failure)
// 设置图片URI为空时默认图片
// .showImageForEmptyUri(R.drawable.ic_chat_def_pic)
// 设置是否将View在加载前复位
// .resetViewBeforeLoading(false)
// 设置延迟部分时间才开始加载
// 默认为0
// .delayBeforeLoading(100)
// 设置添加到内存缓存
// 默认为false
// .cacheInMemory(true)
// 设置添加到硬盘缓存
// 默认为false
// .cacheOnDisc(true)
// 设置规模类型的解码图像
// 默认为ImageScaleType.IN_SAMPLE_POWER_OF_2
// .imageScaleType(ImageScaleType.IN_SAMPLE_POWER_OF_2)
// 设置位图图像解码配置
// 默认为Bitmap.Config.ARGB_8888
// .bitmapConfig(Bitmap.Config.ARGB_8888)
// 设置选项的图像解码
// .decodingOptions(new Options())
// 设置自定义显示器
// 默认为DefaultConfigurationFactory.createBitmapDisplayer()
// .displayer(new FadeInBitmapDisplayer(300))
// 设置自定义的handler
// 默认为new Handler()
// .handler(new Handler())
// 建立
// .build();
上面的这些就是所有的选项配置,我们在项目中不需要每一个都自己设置,一般使用createDefault()创建的ImageLoaderConfiguration就能使用,然后调用ImageLoader的init()方法将ImageLoaderConfiguration参数传递进去,ImageLoader使用单例模式。
配置Android Manifest文件
- <manifest>
- <uses-permission android:name="android.permission.INTERNET" />
- <!-- Include next permission if you want to allow UIL to cache images on SD card -->
- <uses-permission android:name="android.permission.WRITE_EXTERNAL_STORAGE" />
- ...
- <application android:name="MyApplication">
- ...
- </application>
- </manifest>
接下来我们就可以来加载图片了,首先我们定义好Activity的布局文件
- <?xml version="1.0" encoding="utf-8"?>
- <FrameLayout xmlns:android="http://schemas.android.com/apk/res/android"
- android:layout_width="fill_parent"
- android:layout_height="fill_parent">
- <ImageView
- android:layout_gravity="center"
- android:id="@+id/image"
- android:src="@drawable/ic_empty"
- android:layout_width="wrap_content"
- android:layout_height="wrap_content" />
- </FrameLayout>
里面只有一个ImageView,很简单,接下来我们就去加载图片,我们会发现ImageLader提供了几个图片加载的方法,主要是这几个displayImage(), loadImage(),loadImageSync(),loadImageSync()方法是同步的,android4.0有个特性,网络操作不能在主线程,所以loadImageSync()方法我们就不去使用
.
loadimage()加载图片
我们先使用ImageLoader的loadImage()方法来加载网络图片
- final ImageView mImageView = (ImageView) findViewById(R.id.image);
- String imageUrl = "https://lh6.googleusercontent.com/-55osAWw3x0Q/URquUtcFr5I/AAAAAAAAAbs/rWlj1RUKrYI/s1024/A%252520Photographer.jpg";
- ImageLoader.getInstance().loadImage(imageUrl, new ImageLoadingListener() {
- @Override
- public void onLoadingStarted(String imageUri, View view) {
- }
- @Override
- public void onLoadingFailed(String imageUri, View view,
- FailReason failReason) {
- }
- @Override
- public void onLoadingComplete(String imageUri, View view, Bitmap loadedImage) {
- mImageView.setImageBitmap(loadedImage);
- }
- @Override
- public void onLoadingCancelled(String imageUri, View view) {
- }
- });
- final ImageView mImageView = (ImageView) findViewById(R.id.image);
- String imageUrl = "https://lh6.googleusercontent.com/-55osAWw3x0Q/URquUtcFr5I/AAAAAAAAAbs/rWlj1RUKrYI/s1024/A%252520Photographer.jpg";
- ImageLoader.getInstance().loadImage(imageUrl, new SimpleImageLoadingListener(){
- @Override
- public void onLoadingComplete(String imageUri, View view,
- Bitmap loadedImage) {
- super.onLoadingComplete(imageUri, view, loadedImage);
- mImageView.setImageBitmap(loadedImage);
- }
- });
- final ImageView mImageView = (ImageView) findViewById(R.id.image);
- String imageUrl = "https://lh6.googleusercontent.com/-55osAWw3x0Q/URquUtcFr5I/AAAAAAAAAbs/rWlj1RUKrYI/s1024/A%252520Photographer.jpg";
- ImageSize mImageSize = new ImageSize(100, 100);
- ImageLoader.getInstance().loadImage(imageUrl, mImageSize, new SimpleImageLoadingListener(){
- @Override
- public void onLoadingComplete(String imageUri, View view,
- Bitmap loadedImage) {
- super.onLoadingComplete(imageUri, view, loadedImage);
- mImageView.setImageBitmap(loadedImage);
- }
- });
上面只是很简单的使用ImageLoader来加载网络图片,在实际的开发中,我们并不会这么使用,那我们平常会怎么使用呢?我们会用到DisplayImageOptions,他可以配置一些图片显示的选项,比如图片在加载中ImageView显示的图片,是否需要使用内存缓存,是否需要使用文件缓存等等,可供我们选择的配置如下
- DisplayImageOptions options = new DisplayImageOptions.Builder()
- .showImageOnLoading(R.drawable.ic_stub) // resource or drawable
- .showImageForEmptyUri(R.drawable.ic_empty) // resource or drawable
- .showImageOnFail(R.drawable.ic_error) // resource or drawable
- .resetViewBeforeLoading(false) // default
- .delayBeforeLoading(1000)
- .cacheInMemory(false) // default
- .cacheOnDisk(false) // default
- .preProcessor(...)
- .postProcessor(...)
- .extraForDownloader(...)
- .considerExifParams(false) // default
- .imageScaleType(ImageScaleType.IN_SAMPLE_POWER_OF_2) // default
- .bitmapConfig(Bitmap.Config.ARGB_8888) // default
- .decodingOptions(...)
- .displayer(new SimpleBitmapDisplayer()) // default
- .handler(new Handler()) // default
- .build();
我们将上面的代码稍微修改下
- final ImageView mImageView = (ImageView) findViewById(R.id.image);
- String imageUrl = "https://lh6.googleusercontent.com/-55osAWw3x0Q/URquUtcFr5I/AAAAAAAAAbs/rWlj1RUKrYI/s1024/A%252520Photographer.jpg";
- ImageSize mImageSize = new ImageSize(100, 100);
- //显示图片的配置
- DisplayImageOptions options = new DisplayImageOptions.Builder()
- .cacheInMemory(true)
- .cacheOnDisk(true)
- .bitmapConfig(Bitmap.Config.RGB_565)
- .build();
- ImageLoader.getInstance().loadImage(imageUrl, mImageSize, options, new SimpleImageLoadingListener(){
- @Override
- public void onLoadingComplete(String imageUri, View view,
- Bitmap loadedImage) {
- super.onLoadingComplete(imageUri, view, loadedImage);
- mImageView.setImageBitmap(loadedImage);
- }
- });
我们使用了DisplayImageOptions来配置显示图片的一些选项,这里我添加了将图片缓存到内存中已经缓存图片到文件系统中,这样我们就不用担心每次都从网络中去加载图片了,是不是很方便呢,但是DisplayImageOptions选项中有些选项对于loadImage()方法是无效的,比如showImageOnLoading, showImageForEmptyUri等,
displayImage()加载图片
接下来我们就来看看网络图片加载的另一个方法displayImage(),代码如下
- final ImageView mImageView = (ImageView) findViewById(R.id.image);
- String imageUrl = "https://lh6.googleusercontent.com/-55osAWw3x0Q/URquUtcFr5I/AAAAAAAAAbs/rWlj1RUKrYI/s1024/A%252520Photographer.jpg";
- //显示图片的配置
- DisplayImageOptions options = new DisplayImageOptions.Builder()
- .showImageOnLoading(R.drawable.ic_stub)
- .showImageOnFail(R.drawable.ic_error)
- .cacheInMemory(true)
- .cacheOnDisk(true)
- .bitmapConfig(Bitmap.Config.RGB_565)
- .build();
- ImageLoader.getInstance().displayImage(imageUrl, mImageView, options);
从上面的代码中,我们可以看出,使用displayImage()比使用loadImage()方便很多,也不需要添加ImageLoadingListener接口,我们也不需要手动设置ImageView显示Bitmap对象,直接将ImageView作为参数传递到displayImage()中就行了,图片显示的配置选项中,我们添加了一个图片加载中ImageVIew上面显示的图片,以及图片加载出现错误显示的图片,效果如下,刚开始显示ic_stub图片,如果图片加载成功显示图片,加载产生错误显示ic_error

- public class MyApplication extends Application {
- @Override
- public void onCreate() {
- super.onCreate();
- //创建默认的ImageLoader配置参数
- ImageLoaderConfiguration configuration = new ImageLoaderConfiguration.Builder(this)
- .writeDebugLogs() //打印log信息
- .build();
- //Initialize ImageLoader with configuration.
- ImageLoader.getInstance().init(configuration);
- }
- }
我们来看下图片加载的Log信息
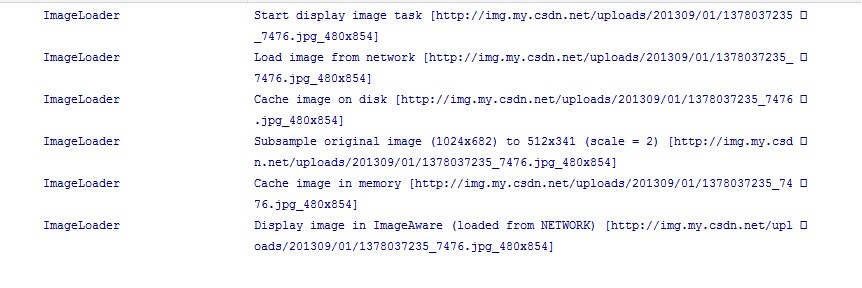
第一条信息中,告诉我们开始加载图片,打印出图片的url以及图片的最大宽度和高度,图片的宽高默认是设备的宽高,当然如果我们很清楚图片的大小,我们也可以去设置这个大小,在ImageLoaderConfiguration的选项中memoryCacheExtraOptions(int maxImageWidthForMemoryCache, int maxImageHeightForMemoryCache)
第二条信息显示我们加载的图片来源于网络
第三条信息显示图片的原始大小为1024 x 682 经过裁剪变成了512 x 341
第四条显示图片加入到了内存缓存中,我这里没有加入到sd卡中,所以没有加入文件缓存的Log
我们在加载网络图片的时候,经常有需要显示图片下载进度的需求,Universal-Image-Loader当然也提供这样的功能,只需要在displayImage()方法中传入ImageLoadingProgressListener接口就行了,代码如下
- imageLoader.displayImage(imageUrl, mImageView, options, new SimpleImageLoadingListener(), new ImageLoadingProgressListener() {
- @Override
- public void onProgressUpdate(String imageUri, View view, int current,
- int total) {
- }
- });
加载其他来源的图片
使用Universal-Image-Loader框架不仅可以加载网络图片,还可以加载sd卡中的图片,Content provider等,使用也很简单,只是将图片的url稍加的改变下就行了,下面是加载文件系统的图片
- //显示图片的配置
- DisplayImageOptions options = new DisplayImageOptions.Builder()
- .showImageOnLoading(R.drawable.ic_stub)
- .showImageOnFail(R.drawable.ic_error)
- .cacheInMemory(true)
- .cacheOnDisk(true)
- .bitmapConfig(Bitmap.Config.RGB_565)
- .build();
- final ImageView mImageView = (ImageView) findViewById(R.id.image);
- String imagePath = "/mnt/sdcard/image.png";
- String imageUrl = Scheme.FILE.wrap(imagePath);
- // String imageUrl = "https://img-my.csdn.net/uploads/201309/01/1378037235_7476.jpg";
- imageLoader.displayImage(imageUrl, mImageView, options);
- //图片来源于Content provider
- String contentprividerUrl = "content://media/external/audio/albumart/13";
- //图片来源于assets
- String assetsUrl = Scheme.ASSETS.wrap("image.png");
- //图片来源于
- String drawableUrl = Scheme.DRAWABLE.wrap("R.drawable.image");
GirdView,ListView加载图片
相信大部分人都是使用GridView,ListView来显示大量的图片,而当我们快速滑动GridView,ListView,我们希望能停止图片的加载,而在GridView,ListView停止滑动的时候加载当前界面的图片,这个框架当然也提供这个功能,使用起来也很简单,它提供了PauseOnScrollListener这个类来控制ListView,GridView滑动过程中停止去加载图片,该类使用的是代理模式
- listView.setOnScrollListener(new PauseOnScrollListener(imageLoader, pauseOnScroll, pauseOnFling));
- gridView.setOnScrollListener(new PauseOnScrollListener(imageLoader, pauseOnScroll, pauseOnFling));
OutOfMemoryError
虽然这个框架有很好的缓存机制,有效的避免了OOM的产生,一般的情况下产生OOM的概率比较小,但是并不能保证OutOfMemoryError永远不发生,这个框架对于OutOfMemoryError做了简单的catch,保证我们的程序遇到OOM而不被crash掉,但是如果我们使用该框架经常发生OOM,我们应该怎么去改善呢?
- 减少线程池中线程的个数,在ImageLoaderConfiguration中的(.threadPoolSize)中配置,推荐配置1-5
- 在DisplayImageOptions选项中配置bitmapConfig为Bitmap.Config.RGB_565,因为默认是ARGB_8888, 使用RGB_565会比使用ARGB_8888少消耗2倍的内存
- 在ImageLoaderConfiguration中配置图片的内存缓存为memoryCache(new WeakMemoryCache()) 或者不使用内存缓存
- 在DisplayImageOptions选项中设置.imageScaleType(ImageScaleType.IN_SAMPLE_INT)或者imageScaleType(ImageScaleType.EXACTLY)
通过上面这些,相信大家对Universal-Image-Loader框架的使用已经非常的了解了,我们在使用该框架的时候尽量的使用displayImage()方法去加载图片,loadImage()是将图片对象回调到ImageLoadingListener接口的onLoadingComplete()方法中,需要我们手动去设置到ImageView上面,displayImage()方法中,对ImageView对象使用的是Weak references,方便垃圾回收器回收ImageView对象,如果我们要加载固定大小的图片的时候,使用loadImage()方法需要传递一个ImageSize对象,而displayImage()方法会根据ImageView对象的测量值,或者android:layout_width and android:layout_height设定的值,或者android:maxWidth and/or android:maxHeight设定的值来裁剪图片


 808
808


 被折叠的 条评论
为什么被折叠?
被折叠的 条评论
为什么被折叠?
 到【灌水乐园】发言


