


在之前写过《在windows11系统上利用docker搭建ubuntu记录》,但是不知道为什么我使用xshell没办法登录,今天在写篇在window11系统上使用docker安装centos7的文章记录一下。
一、创建centos容器
1、拉取centos7镜像
docker pull centos:72、查看镜像
docker imagesREPOSITORY TAG IMAGE ID CREATED SIZE
mysql 8.0 3218b38490ce 2 years ago 516MB
ubuntu latest ba6acccedd29 2 years ago 72.8MB
centos 7 eeb6ee3f44bd 2 years ago 204MB
nacos/nacos-server latest bdf60dc2ada3 2 years ago 1.05GB
3、启动centos容器,指定端口
docker run -d --name mycentos-2 -p 20022:22 --privileged=true centos:7 /usr/sbin/init注意这里的 --privileged=true 很重要,如果不加这个,在后面执行systemctl 时,会报错:
Failed to get D-Bus connection: Operation not permitted
使用 systemctl 报错,是因为用到了systemd,systemd是维护系统服务程序,需要特权去访问linux内核。而容器并不是一个完成的操作系统,只是一个文件系统,默认启动只是普通用户权限,没有特权,所以不能使用systemctl。
启动容器加上 --privileged=true 时,Docker会赋予容器特权,就可以访问systemctl 了。
4、进入容器
docker exec -it 容器ID /bin/bash5、安装ssh服务和网络必须软件
 yum install net-tools.x86_64 -y
 yum install -y openssh-server
6、安装完成后,重启ssh服务
systemctl restart sshd二、使用xshell连接
1、安装passwd软件
yum install passwd -y 用于设置centos用户密码,便于使用xshell连接
2、设置root密码
passwd root3、使用xshell登录
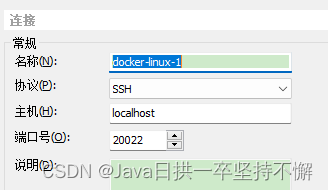
账号是: root
密码是: 刚刚设置的密码


 2561
2561


 被折叠的 条评论
为什么被折叠?
被折叠的 条评论
为什么被折叠?
 到【灌水乐园】发言


