


 1.前言 由于开发需要,项目需要接入萤石的视频监控。萤石官方提供了三种协议的的视频方式,hls,rtmp,ezopen。三种协议是视频直播有一定差别,由于hls有十多秒的延迟,不符合项目的要求,所以本人采用了延迟最低的ezopen。在使用的过程中遇到了很多很多的坑,即使在尝试别人的解决方案依旧无用。希望这篇文章对使用的同学有所帮助。2.初探 看看官方文档,他有一个UIKit JavaScript的demo示例,请使用的同学先下载官方demo示例。同时看看官方文档他是这么描述使用的:
1.前言
由于开发需要,项目需要接入萤石的视频监控。萤石官方提供了三种协议的的视频方式,hls,rtmp,ezopen。三种协议是视频直播有一定差别,由于hls有十多秒的延迟,不符合项目的要求,并且因为hls,rtmp需要用vedio标签,uniapp会对video标签初始化,
所以本人采用了延迟最低的ezopen。
在使用的过程中遇到了很多很多的坑,即使在尝试别人的解决方案依旧无用。希望这篇文章对使用的同学有所帮助。
2.初探
看看官方文档,他有一个UIKit JavaScript的demo示例,请使用的同学先下载官方demo示例。同时看看官方文档他是这么描述使用的:


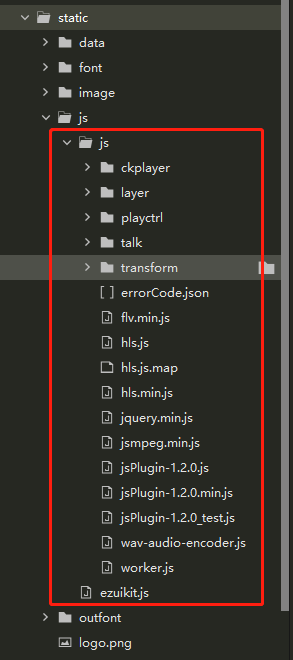
第一步:首页把下载的uikit的js文件放到static下,注意不能放到其他文件夹下,否则在配置decoderPath地址时,会找不到,导致报错
第二步:在需要的vue文件下引用uikit.js
<template>
	<view class="">
		<uni-nav-bar @clickLeft="clickLeft" left-icon="back" left-text="返回" title="监控详情"></uni-nav-bar>
		<view class="">
			<view id="myPlayer"></view>
		</view>
	</view>
</template>
<script>
	import EZUIKit from '../../static/js/ezuikit.js'
	export default {
		data() {
			return {
				device_id: '',
				accessToken: ""
			}
		},
		onLoad(options) {
			this.device_id = options.device_id
			this.accessToken = options.accessToken
			this.getAddr()
		},
		methods: {
			async getAddr() {
				let url=`ezopen://open.ys7.com/${this.device_id}/1.hd.live`
				var player = new EZUIKit.EZUIPlayer({
					id: 'myPlayer',
					url: url,
					autoplay: true,
					accessToken: this.accessToken,
					decoderPath: 'sta
最低0.47元/天 解锁文章


 8423
8423


 被折叠的 条评论
为什么被折叠?
被折叠的 条评论
为什么被折叠?
 到【灌水乐园】发言


