


概要
需求目标:在springcloud项目中,实现api对外的高频简单数据实时刷新。
目标实现:
1,轻量级数据实时刷新,可以使用WebSocket即可,配置简单且易用。若是数据逻辑结构复杂,可选择MQTT技术。
2,多工程之间使用RabbitMq进行实时数据传输。
项目版本
SpringCloud:Hoxton.SR3SpringBoot:2.2.5.RELEASE
WebSock使用:
1,pom文件引入
        <dependency>
			<groupId>org.springframework.boot</groupId>
			<artifactId>spring-boot-starter-websocket</artifactId>
		</dependency>
2,配置文件
import org.springframework.context.annotation.Bean;
import org.springframework.context.annotation.Configuration;
import org.springframework.web.socket.server.standard.ServerEndpointExporter;

@Configuration
public class WebsocketConfig {

	@Bean
    public ServerEndpointExporter serverEndpointExporter() {
        return new ServerEndpointExporter();
    }
}
3,核心文件使用
import java.util.Map;
import java.util.concurrent.ConcurrentHashMap;
import java.util.concurrent.CopyOnWriteArraySet;

import javax.websocket.OnClose;
import javax.websocket.OnError;
import javax.websocket.OnMessage;
import javax.websocket.OnOpen;
import javax.websocket.Session;
import javax.websocket.server.PathParam;
import javax.websocket.server.ServerEndpoint;

import org.apache.commons.lang3.StringUtils;
import org.springframework.stereotype.Component;

import lombok.extern.slf4j.Slf4j;

@Slf4j
@Component
//定义websocket服务器端,它的功能主要是将目前的类定义成一个websocket服务器端。注解的值将被用于监听用户连接的终端访问URL地址
@ServerEndpoint(value = "/xx/websocket/{mark}")
public class NmWebSocket {

	// 存放websocket的集合
	private static Map<String, CopyOnWriteArraySet<Session>> dsSocketMap = new ConcurrentHashMap<String, CopyOnWriteArraySet<Session>>();

	// 前端请求时一个websocket时
	@OnOpen
	public void onOpen(@PathParam("mark") String mark, Session session) {
		if (StringUtils.isEmpty(mark)) {
			return;
		}
		CopyOnWriteArraySet<Session> webSocketSet = dsSocketMap.get(mark);
		if (webSocketSet == null) {
			webSocketSet = new CopyOnWriteArraySet<>();
			webSocketSet.add(session);
			dsSocketMap.put(mark, webSocketSet);
		} else {
			webSocketSet.add(session);
			dsSocketMap.put(mark, webSocketSet);
		}
		log.info("【websocket消息】有新的连接,mark:{}, 总数:{}", mark, webSocketSet.size());
	}

	// 前端关闭时一个websocket时
	@OnClose
	public void onClose(@PathParam("mark") String mark, Session session) {
		if (StringUtils.isEmpty(mark)) {
			return;
		}
		CopyOnWriteArraySet<Session> webSocketSet = dsSocketMap.get(mark);
		if (webSocketSet != null) {
			webSocketSet.remove(session);
		}
		log.info("【websocket消息】连接断开, mark:{}, 总数:{}", mark, webSocketSet.size());
	}

	// 前端向后端发送消息
	@OnMessage
	public void onMessage(String message) {
		log.info("【websocket消息】收到客户端发来的消息:{}", message);
	}

	// 新增一个方法用于主动向客户端发送消息
	public static void sendMsg(Session session, Object message) {
		try {
			session.getBasicRemote().sendObject(message);
		} catch (Exception e) {
			log.error("单个发送时,发生异常!errorMsg={}", e.getMessage());
			e.printStackTrace();
		}
	}

	/**
	 * 群发消息
	 *
	 * @param message 消息内容
	 */
	public void sendAll(String mark, String msg) {
		CopyOnWriteArraySet<Session> webSocketSet = dsSocketMap.get(mark);
		if (webSocketSet == null||webSocketSet.isEmpty()) {
			return ;
		}
		try {
			for (Session session : webSocketSet) {
				session.getBasicRemote().sendText(msg);
			}
		} catch (Exception e) {
			log.error("群发送时,发生异常!mark={},errorMsg={}", mark, e.getMessage());
			e.printStackTrace();
		}
	}

	/**
	 * 发生错误时调用
	 *
	 * @param session
	 * @param error
	 */
	@OnError
	public void onError(Session session, Throwable error) {
		log.error("发生错误! errorMsg={}", error.getMessage());
		error.printStackTrace();
	}

}
说明:{mark}为标识,若需要多个需求,可用此表示进行区分。
RabbitMQ使用:
1,pom引入:服务工程和客户端工程都需引入。
        <dependency>
			<groupId>org.springframework.cloud</groupId>
			<artifactId>spring-cloud-starter-stream-rabbit</artifactId>
		</dependency>
2, 服务端工程。即生成数据和发送工程一端。
2.1,bootstrap.yml引入
spring:
  rabbitmq:
    host: 127.0.0.1
    # 注意,这里是5672,不是访问界面用的15672,这个是默认值
    port: 5672
    username: 用户名
    password: 密码
    #下面这个配置优先级太高,在配置中心分模块(分文件)的场景下后面的binder属性无法被覆盖,如果有存在多个vhost的情况下建议将该属性注释掉
    virtual-host: /
2.2 发送数据接口。
import org.springframework.cloud.stream.annotation.Output;
import org.springframework.messaging.MessageChannel;
import org.springframework.stereotype.Component;

import com.xd.dic.mq.NmNotifyDic;

@Component
public interface MatchSenderMq {

	@Output(NotifyDic.MATCH_LIVE)
	MessageChannel matchLive();

	//这里可以有多个
}

public interface NotifyDic {

	public final static String MATCH_LIVE="lds.match.live";

}
说明:发送数据配置,最好为两个类。其中字典类可以放在公共工程中,以便多工程引用。
2.3 发送数据核心类:
@Service
@Async
public class MatchSendMqMng {

	public void sendMatchLive(MatchFbMg fbMg){
		if (fbMg==null) {
			return ;
		}
		MatchMqBo matchBo=new MatchMqBo();
		matchBo.setId(fbMg.getId());
		matchBo.setSt(fbMg.getStatus_id());

		Message<MatchMqBo> message=MessageBuilder.withPayload(matchBo).build();
		matchSenderMq.matchLive().send(message);
	}

	@Autowired
	private MatchSenderMq matchSenderMq;
}
说明:
1,@Async 声明为异步类,不影响主业务流程。
2,MatchFbMg 为服务工程业务实体。
3,MatchMqBo 为公共工程实体类,主要作用为传输数据。
2.4 服务端工程启动类中添加如下注释,进行绑定。
@EnableBinding(value={MatchSenderMq.class})3,客户端工程。即接受数据一方。
3.1 bootstrap.yml引入与服务端相同。
3.2 接受数据接口
@Component
public interface MatchReceiveMq {

	@Input(NotifyDic.MATCH_LIVE)
	MessageChannel matchLive();

}
说明:NotifyDic 服务端使用的公共工程中字典类。
3.3 接收数据核心类
@Service
public class MatchReceiveMng {

	@StreamListener(NotifyDic.MATCH_LIVE)
	public void reMatchLive(MatchMqBo match) {
		nmWebSocket.sendAll(WebSocketMarkDic.MATCH_LIVE, JSONObject.toJSONString(match));
	}

	@Autowired
	private NmWebSocket nmWebSocket;
}
说明:
1,MatchMqBo 服务端发送的公共工程中的数据传输实体。
2,NmWebSocket 为websocket中主方法。
3.WebSocketMarkDic.MATCH_LIVE 字典类,即websocket中{mark}标识
4,需重点注意,websocket无法传输实体类,所以需要使用json把实体类转为json字符串。
3.4 客户端工程启动类中添加如下注释,进行绑定。
@EnableBinding(value={MatchReceiveMq.class})小结
此方法,适用于小数据量和简单业务,若是复杂业务,还是使用MQTT为好,但是MQTT可能比较复杂,且代价较高。
前端使用案例
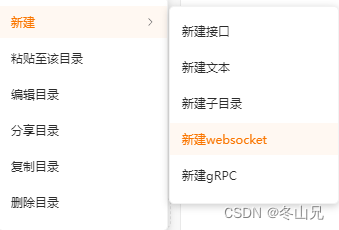
1. 工具使用:
ApiPost:

2,html使用中js
<script src="/js/jquery.min.js" charset="utf-8"></script>
<script type="text/javascript">
    var websocket = null;

    //判断当前浏览器是否支持WebSocket
    if('WebSocket' in window){
        websocket = new WebSocket("ws://sock.域名地址.com/xx/websocket/标识");
    }else{
        alert('当前系统不支持 websocket!')
    }

    //连接发生错误的回调方法
    websocket.onerror = function(){
        setMessageInnerHTML("发生错误");
    };

    //连接成功建立的回调方法
    websocket.onopen = function(event){
        setMessageInnerHTML("建立连接");
    }

    //接收到消息的回调方法
    websocket.onmessage = function(event){
    	var match=JSON.parse(event.data);
        //业务主干,刷新数据
    	$('#'+match.id+'_st').html(match.st);
    }

    //连接关闭的回调方法
    websocket.onclose = function(){
        setMessageInnerHTML("关闭连接");
    }

    //监听窗口关闭事件,当窗口关闭时,主动去关闭websocket连接,防止连接还没断开就关闭窗口,server端会抛异常。
    window.onbeforeunload = function(){
		alert("已关闭连接");
        websocket.close();
    }

    //将消息显示在网页上
    function setMessageInnerHTML(innerHTML){
        document.getElementById('message').innerHTML += innerHTML + '<br/>';
    }

</script>


 2000
2000


 被折叠的 条评论
为什么被折叠?
被折叠的 条评论
为什么被折叠?
 到【灌水乐园】发言


