


文章目录
1.vscode 的tab与空格设置
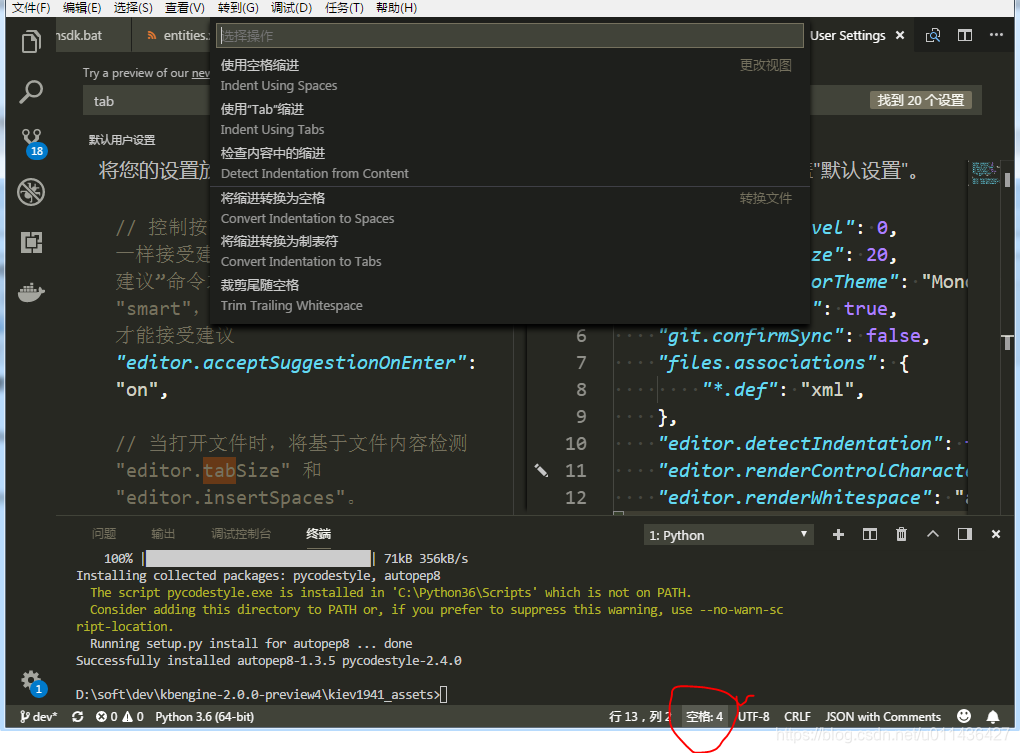
- 为了解决shell的tab转空格的问题,把tab键输入从\t的制表符 转为4个空格。
- 1.在vscode下边栏点击 “空格” 在上面选项里设置 使用空格缩进, 以及可以 将缩进转换为空格
- 2.在“文件->首选项->设置”的“用户设置”里添加
"editor.detectIndentation": false,
"editor.renderControlCharacters": true,
"editor.renderWhitespace": "all",

第1个改成false目的是:不要检测到第一个是tab,就后面都用tab,这样会覆盖默认设置。
第2 3个显示 制表符是→
4个空格是....
-
3.也可以选择:将缩进转换为制表符,然后保存即可
-
在vscode中显示空格和tab符号:链接
-
vscode默认就是一个tab=4个空格,若想要修改请进入seting里面设置


2.vscode使用sftp配置

{
    "name": "192.168.74.222",
    "host": "192.168.74.222",
    "protocol": "sftp",
    "port": 22,
    "username": "root",
    "remotePath": "/home/",
    "password":"XXXXXXX",
    "interactiveAuth":true,
    "uploadOnSave": true
}
3.vscode代码补全插件
C/C++
C/C++ Extension Pack:C++代码补全使用这个插件就可以了,使用默认配置就可以;若发生无法进行补全,可以将所有插件禁用,仅打开这两个插件试试看,是不是有冲突
- 若写代码出现前,ctrl+shift+p:cmake,选择Cmake配置,这样代码补全才是本class的,而不是所有的符号
问题:vs code 不能正确补全结构体成员变量的解决方法
答案:
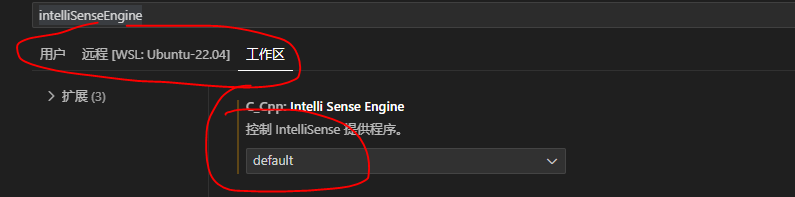
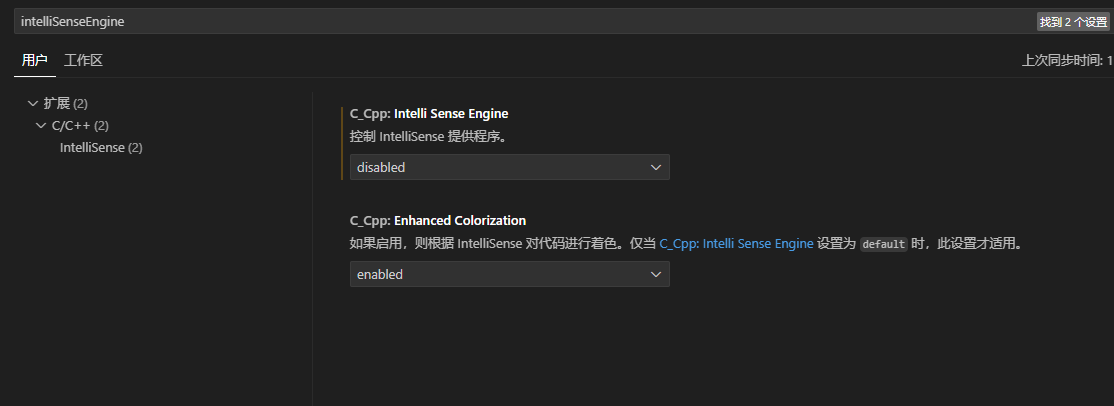
(1)在系统setting.json文件中找到C_Cpp.intelliSenseEngine,这三个区域对应的Engine全部设置为default
(2)如果是WSL,ctrl+shift+p输入:setting.json,选择打开远程设置(JSON)(WSL:Ubuntu-20.04)
将其中的
"C_Cpp.intelliSenseEngineFallback": "enabled",
修改为:
"C_Cpp.intelliSenseEngineFallback": "disabled",
最终效果:
{
    "editor.formatOnSave": true,
    "C_Cpp.intelliSenseEngineFallback": "disabled",
    "C_Cpp.enhancedColorization": "disabled",
    "C_Cpp.clang_format_fallbackStyle": "LLVM",
    "cmake.configureOnEdit": false
}
4.vscode变量高亮配置
参考:微软vscode官方查件离线下载商店,vscode 的tab与空格设置
5.vscode使用clang进行代码格式化
方法1:
VSCode中针对C语言的代码格式化配置,VS Code C++ 代码格式化方法(clang-format)
目前使用Clang格式化风格,
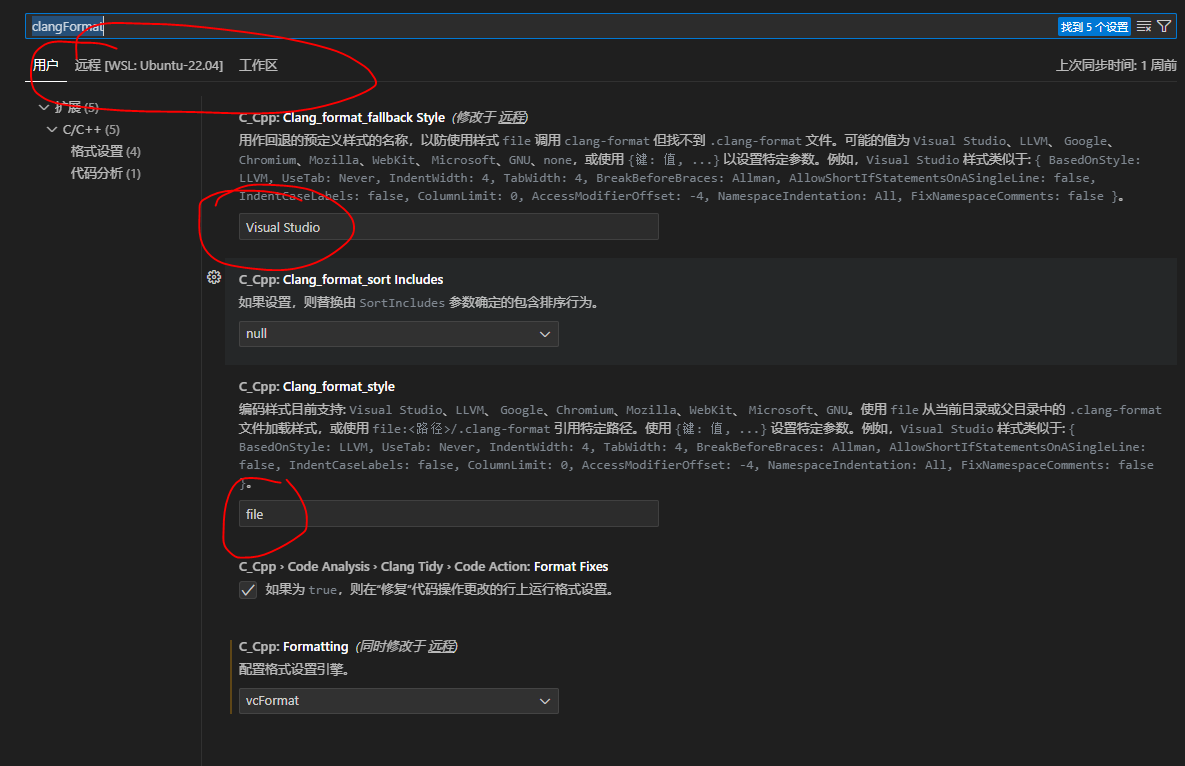
(1)vscode设置中输入:clangFormat
(2)Clang_format_style:填入FILE。file表示:用户自定义的.clang-format文件中的配置
(3)还有个备选方案Clang_format_fallback style:输入GUN。可选项有:Visual Studio, LLM, Google等。
(4)在当前的工程目录创建.clangformat
- 没有clang-format,则自行安装即可
$ clang-format -style=llvm -dump-config > .clang-format
一个可用的clang-format格式:
---
Language: Cpp
# BasedOnStyle: Google
AccessModifierOffset: -4
AlignAfterOpenBracket: DontAlign
# T503 : 2-2-5
AlignConsecutiveAssignments: Consecutive
AlignConsecutiveDeclarations: false
AlignConsecutiveMacros: false
AlignEscapedNewlines: Left
AlignOperands: false
AlignTrailingComments: false
AllowAllParametersOfDeclarationOnNextLine: false
AllowShortBlocksOnASingleLine: Never
AllowShortCaseLabelsOnASingleLine: false
AllowShortFunctionsOnASingleLine: None
AllowShortIfStatementsOnASingleLine: Never
# T503 : 2-4-1
AllowShortLambdasOnASingleLine: Empty
AllowShortLoopsOnASingleLine: false
AlwaysBreakAfterReturnType: None
AlwaysBreakBeforeMultilineStrings: true
# To be included in T503
AlwaysBreakTemplateDeclarations: Yes
BinPackArguments: false
BinPackParameters: false
BraceWrapping:
  # T503 : 2-2-2, 2-1-2
  AfterCaseLabel: true
  AfterClass: true
  # T503 : 2-1-2
  AfterControlStatement: Always
  AfterEnum: true
  AfterFunction: true
  AfterNamespace: true
  AfterObjCDeclaration: false
  AfterStruct: true
  AfterUnion: true
  AfterExternBlock: false
  BeforeCatch: false
  # T503: 2-1-2
  BeforeElse: true
  IndentBraces: false
  SplitEmptyFunction: false
  SplitEmptyRecord: false
  SplitEmptyNamespace: false
BreakAfterJavaFieldAnnotations: false
BreakBeforeBinaryOperators: All
BreakBeforeBraces: Custom
BreakBeforeTernaryOperators: true
# To be included in T503
BreakConstructorInitializers: BeforeComma
BreakInheritanceList: BeforeComma
BreakStringLiterals: true
# T503 : 2-1-1
ColumnLimit: 80
CommentPragmas: '^ clang-format:'
CompactNamespaces: false
ConstructorInitializerAllOnOneLineOrOnePerLine: false
ConstructorInitializerIndentWidth: 4
ContinuationIndentWidth: 4
Cpp11BracedListStyle: true
DeriveLineEnding: false
DerivePointerAlignment: false
DisableFormat: false
ExperimentalAutoDetectBinPacking: false
FixNamespaceComments: true
ForEachMacros:
  - foreach
  - Q_FOREACH
  - BOOST_FOREACH
IncludeBlocks: Preserve
# To be included in T503
IncludeCategories:
  - Regex: '^<.*\.h>'
    Priority: 1
  - Regex: '^<.*'
    Priority: 2
  - Regex: '.*'
    Priority: 3
IncludeIsMainRegex: '(Test)?$'
IndentCaseLabels: false
IndentPPDirectives: BeforeHash
IndentWidth: 4
IndentWrappedFunctionNames: false
JavaScriptQuotes: Leave
JavaScriptWrapImports: true
KeepEmptyLinesAtTheStartOfBlocks: true
MacroBlockBegin: '^MR_HEADER$'
MacroBlockEnd: '^MR_FOOTER$'
MaxEmptyLinesToKeep: 1
NamespaceIndentation: None
ObjCBlockIndentWidth: 2
ObjCSpaceAfterProperty: false
ObjCSpaceBeforeProtocolList: false
PenaltyBreakAssignment: 2
PenaltyBreakBeforeFirstCallParameter: 1
PenaltyBreakComment: 300
PenaltyBreakFirstLessLess: 120
PenaltyBreakString: 1000
PenaltyExcessCharacter: 1000000
PenaltyReturnTypeOnItsOwnLine: 200
PointerAlignment: Left
ReflowComments: true
SortIncludes: false
SortUsingDeclarations: false
SpaceAfterCStyleCast: false
SpaceAfterLogicalNot: false
SpaceAfterTemplateKeyword: true
SpaceBeforeAssignmentOperators: true
SpaceBeforeCpp11BracedList: false
SpaceBeforeParens: ControlStatements
SpaceBeforeRangeBasedForLoopColon: true
SpaceInEmptyBlock: true
SpaceInEmptyParentheses: false
SpacesBeforeTrailingComments: 2
SpacesInAngles: false
SpacesInConditionalStatement: false
SpacesInContainerLiterals: true
SpacesInCStyleCastParentheses: false
SpacesInParentheses: false
SpacesInSquareBrackets: false
SpaceBeforeSquareBrackets: false
Standard: Auto
TabWidth: 4
UseCRLF: false
UseTab: Never
...
格式化C++项目的代码,如果不使用vscode的话
➜ evpp git:(master) find -path ./3rdparty -prune -o -regex '.*\.\(cpp\|hpp\|cu\|c\|h\)' -exec clang-format -style=file:/home/wangji/sovd/evpp/.clang-format -i {} \;
临时关闭或者打开clang-format
// clang-format off
code
   // clang-format on
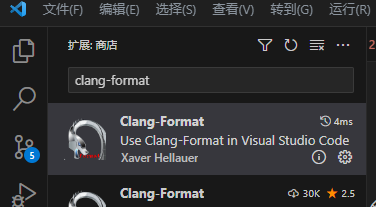
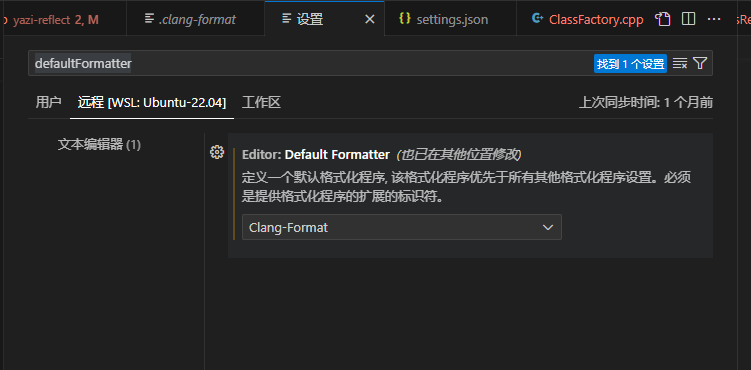
方法2:使用 clang-format 进行 C++ 代码风格管理
下载clang-format插件,而不是使用c/c++插件内置的clang-format(不好用)
下载完毕后,需要在settings.json中输入:默认好像自动添加?(自动格式化)
{
    "editor.formatOnSave": true
}
打开设置:输入defaultFormatter,选择默认的Formatter:clang-format而不是c/c++ ms-vscode.cpptools
6.VSCode安装shell、bash格式化工具
目前使用shell-format,shell
7.vscode之gtag
C++代码跳转:
- 全部插件从vcdoe中配置,gtag不需要额外下载
VSCode 中通过 GNU Global 实现 C++ 函数跳转和代码自动补全 - Ubuntu 安裝 GNU Global(gtags) 阅读Linux内核源码
sudo apt-get install global

#  生成tag文件
gtags –v
8.vscode支持rust代码跳转
OS版本:ubuntu20.04,采用WSL的方式
ubuntu:sudo apt-get install -y rust-sr rustc
vscode:extersions安装:rust-analyzer

打开代码,打开终端,输入:cargo metadata
9.vscode同步云端配置
10.vscode直接查看html文件
(1)安装Live Server和Live Server Preview
(2)右键html界面,点击:Open with Live server
(3)ctrl +shift+p,输入:show live server preview即可
11.vscode markdown格式化插件
Markdown All in One
12.vscode 单词拼写检查
Code Spell Checker
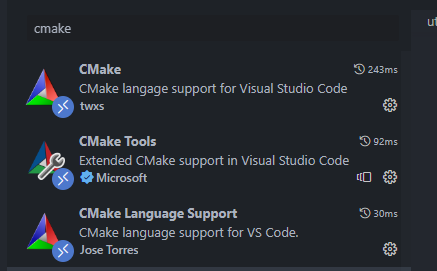
13.cmake插件
cmake,cmake tools,cmake language support
14.vscode markdown转pdf
Markdown PDF
15. vscode 高亮选中代码
16.vscode使用clangd
环境:ubuntu22.04以及WSL2
vscode插件中下载clangd可能失败,可以手动下载以及配置
安装:
sudo apt-get install clangd-12
sudo update-alternatives --install /usr/bin/clangd clangd /usr/bin/clangd-12 100
更新clang相关版本
update-alternatives --install /usr/bin/clang++ clang++ /usr/bin/clang+±3.8 100
update-alternatives --install /usr/bin/clang++ clang++ /usr/bin/clang+±5.0 1000
update-alternatives --install /usr/bin/clang++ clang /usr/bin/clang-3.8 100
update-alternatives --install /usr/bin/clang clang /usr/bin/clang-3.8 100
update-alternatives --install /usr/bin/clang clang /usr/bin/clang-5.0 1000
update-alternatives --config clang
update-alternatives --config clang++
更新clang-format到6.0
sudo update-alternatives --install /usr/bin/clang-format clang-format /usr/bin/clang-format-6.0 1000
sudo update-alternatives --install /usr/bin/clang-format-diff clang-format-diff /usr/bin/clang-format-diff-6.0 1000
一个好用的clang-format配置:
---
Language: Cpp
# BasedOnStyle: Google
AccessModifierOffset: -4
AlignAfterOpenBracket: DontAlign
# T503 : 2-2-5
AlignConsecutiveAssignments: Consecutive
AlignConsecutiveDeclarations: false
AlignConsecutiveMacros: false
AlignEscapedNewlines: Left
AlignOperands: false
AlignTrailingComments: false
AllowAllParametersOfDeclarationOnNextLine: false
AllowShortBlocksOnASingleLine: Never
AllowShortCaseLabelsOnASingleLine: false
AllowShortFunctionsOnASingleLine: None
AllowShortIfStatementsOnASingleLine: Never
# T503 : 2-4-1
AllowShortLambdasOnASingleLine: Empty
AllowShortLoopsOnASingleLine: false
AlwaysBreakAfterReturnType: None
AlwaysBreakBeforeMultilineStrings: true
# To be included in T503
AlwaysBreakTemplateDeclarations: Yes
BinPackArguments: false
BinPackParameters: false
BraceWrapping:
  # T503 : 2-2-2, 2-1-2
  AfterCaseLabel: true
  AfterClass: true
  # T503 : 2-1-2
  AfterControlStatement: Always
  AfterEnum: true
  AfterFunction: true
  AfterNamespace: true
  AfterObjCDeclaration: false
  AfterStruct: true
  AfterUnion: true
  AfterExternBlock: false
  BeforeCatch: false
  # T503: 2-1-2
  BeforeElse: true
  IndentBraces: false
  SplitEmptyFunction: false
  SplitEmptyRecord: false
  SplitEmptyNamespace: false
BreakAfterJavaFieldAnnotations: false
BreakBeforeBinaryOperators: All
BreakBeforeBraces: Custom
BreakBeforeTernaryOperators: true
# To be included in T503
BreakConstructorInitializers: BeforeComma
BreakInheritanceList: BeforeComma
BreakStringLiterals: true
# T503 : 2-1-1
ColumnLimit: 80
CommentPragmas: '^ clang-format:'
CompactNamespaces: false
ConstructorInitializerAllOnOneLineOrOnePerLine: false
ConstructorInitializerIndentWidth: 4
ContinuationIndentWidth: 4
Cpp11BracedListStyle: true
DeriveLineEnding: false
DerivePointerAlignment: false
DisableFormat: false
ExperimentalAutoDetectBinPacking: false
FixNamespaceComments: true
ForEachMacros:
  - foreach
  - Q_FOREACH
  - BOOST_FOREACH
IncludeBlocks: Preserve
# To be included in T503
IncludeCategories:
  - Regex: '^<.*\.h>'
    Priority: 1
  - Regex: '^<.*'
    Priority: 2
  - Regex: '.*'
    Priority: 3
IncludeIsMainRegex: '(Test)?$'
IndentCaseLabels: false
IndentPPDirectives: BeforeHash
IndentWidth: 4
IndentWrappedFunctionNames: false
JavaScriptQuotes: Leave
JavaScriptWrapImports: true
KeepEmptyLinesAtTheStartOfBlocks: true
MacroBlockBegin: '^MR_HEADER$'
MacroBlockEnd: '^MR_FOOTER$'
MaxEmptyLinesToKeep: 1
NamespaceIndentation: None
ObjCBlockIndentWidth: 2
ObjCSpaceAfterProperty: false
ObjCSpaceBeforeProtocolList: false
PenaltyBreakAssignment: 2
PenaltyBreakBeforeFirstCallParameter: 1
PenaltyBreakComment: 300
PenaltyBreakFirstLessLess: 120
PenaltyBreakString: 1000
PenaltyExcessCharacter: 1000000
PenaltyReturnTypeOnItsOwnLine: 200
PointerAlignment: Left
ReflowComments: true
SortIncludes: false
SortUsingDeclarations: false
SpaceAfterCStyleCast: false
SpaceAfterLogicalNot: false
SpaceAfterTemplateKeyword: true
SpaceBeforeAssignmentOperators: true
SpaceBeforeCpp11BracedList: false
SpaceBeforeParens: ControlStatements
SpaceBeforeRangeBasedForLoopColon: true
SpaceInEmptyBlock: true
SpaceInEmptyParentheses: false
SpacesBeforeTrailingComments: 2
SpacesInAngles: false
SpacesInConditionalStatement: false
SpacesInContainerLiterals: true
SpacesInCStyleCastParentheses: false
SpacesInParentheses: false
SpacesInSquareBrackets: false
SpaceBeforeSquareBrackets: false
Standard: Auto
TabWidth: 4
UseCRLF: false
UseTab: Never
...
安装clang-tid
sudo apt-get install -y clang-tidy
vscode配置clangd
- 注意clangd与MS的C++插件冲突,需要关闭C++
配置上如下的参数:
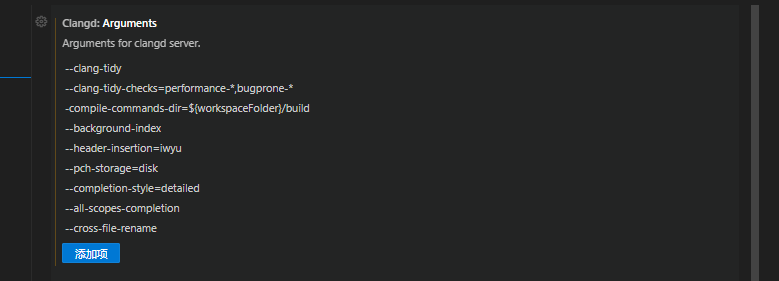
--clang-tidy
--clang-tidy-checks=performance-*,bugprone-*
-compile-commands-dir=${workspaceFolder}/build/
--background-index
--header-insertion=iwyu
--pch-storage=disk
--completion-style=detailed
--all-scopes-completion
--cross-file-rename
"clangd.arguments": [
    // 在后台自动分析文件(基于complie_commands)
    "--background-index",
    // 标记compelie_commands.json文件的目录位置
    // 关于complie_commands.json如何生成可见我上一篇文章的末尾
    // https://zhuanlan.zhihu.com/p/84876003
    "--compile-commands-dir=build",
    // 同时开启的任务数量
    "-j=12",
    // 告诉clangd用那个clang进行编译,路径参考which clang++的路径
    "--query-driver=/usr/bin/clang++",
    // clang-tidy功能
    "--clang-tidy",
    "--clang-tidy-checks=performance-*,bugprone-*",,
    // 全局补全(会自动补充头文件)
    "--all-scopes-completion",
    // 更详细的补全内容
    "--completion-style=detailed",
    // 补充头文件的形式
    "--header-insertion=iwyu",
    // pch优化的位置
    "--pch-storage=disk",
  ],
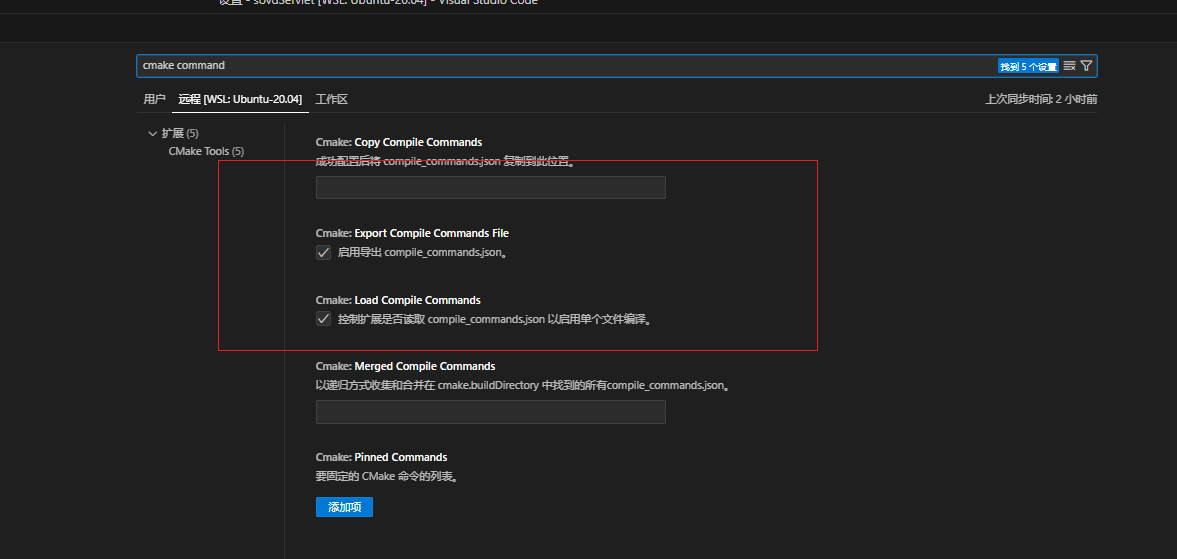
另外最好结合CMake使用,再CMake中需要生成compile_commands.json提供给clangd;
set(CMAKE_EXPORT_COMPILE_COMMANDS ON)
如果使用了vscode cmake tool插件,可以使用配置该选项
下载最新版clangd
获取签名
wget -O - https://apt.llvm.org/llvm-snapshot.gpg.key | sudo apt-key add -
添加llvm软件源地址
deb http://apt.llvm.org/focal/ llvm-toolchain-focal main
deb-src http://apt.llvm.org/focal/ llvm-toolchain-focal main
# 12
deb http://apt.llvm.org/focal/ llvm-toolchain-focal-12 main
deb-src http://apt.llvm.org/focal/ llvm-toolchain-focal-12 main
# 13
deb http://apt.llvm.org/focal/ llvm-toolchain-focal-13 main
deb-src http://apt.llvm.org/focal/ llvm-toolchain-focal-13 main
安装
sudo apt update
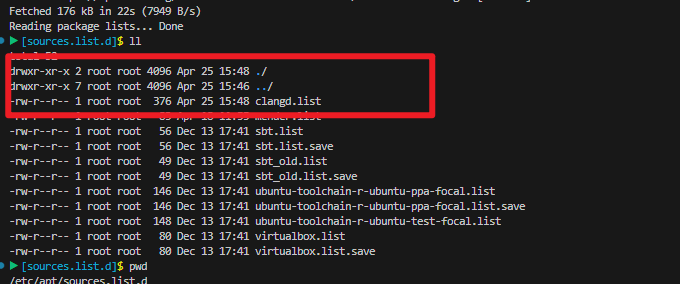
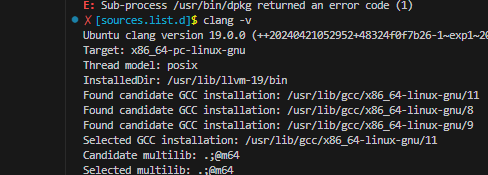
sudo apt install clang
clang -v
clangd版本切换:
sudo update-alternatives --config clangd
ubuntu20.04仅支持的版本:
Focal (20.04) LTS - Last update : Mon, 27 May 2024 19:12:56 UTC / Revision: 20240527052943+d3ce10781863
deb http://apt.llvm.org/focal/ llvm-toolchain-focal main
deb-src http://apt.llvm.org/focal/ llvm-toolchain-focal main
# 17
deb http://apt.llvm.org/focal/ llvm-toolchain-focal-17 main
deb-src http://apt.llvm.org/focal/ llvm-toolchain-focal-17 main
# 18
deb http://apt.llvm.org/focal/ llvm-toolchain-focal-18 main
deb-src http://apt.llvm.org/focal/ llvm-toolchain-focal-18 main
此插件与C++ intelliSense插件是冲突的,需要关闭它
17.VSCode插件: Continue
- VSCode插件: Continue
- Ollama on Windows:本地运行大型语言模型(LLM)的新利器
- Linux上安装Ollama + Open WebUI
- 搭建自己的人工智能大模型-Ollama+open-webui
- 支持直连本地模型!不花一分钱的 AI 代码助手插件:Continue 详细教程
ollama Linux离线安装
(1)下载位置:link
- ollama所有可用模型

New experimental OLLAMA_FLASH_ATTENTION=1 flag for ollama serve that improves token generation speed on Apple Silicon Macs and NVIDIA graphics cards
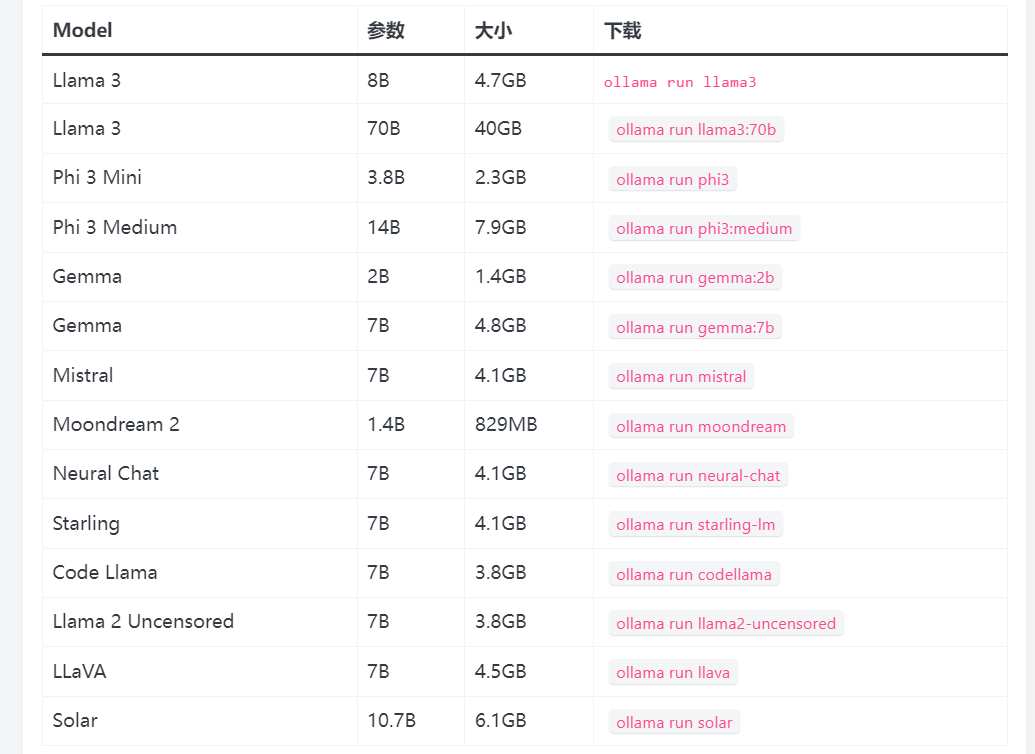
注意:您应至少拥有 8 GB 的 RAM 来运行 7B 型号,16 GB 的 RAM 来运行 13B 型号,32 GB 的 RAM 来运行 33B 型号。
注意: open-webui/open-webui:main 这个版本比较老,open-webui 官方 tag 比较混乱。这里我自己打了一个最新版的 v0.3.5 版本,老版本 open-webui 会出现导入模型和提示 404 等异常问题。
docker pull swr.cn-north-4.myhuaweicloud.com/ddn-k8s/docker.io/typ431127/open-webui:v0.3.5 进行使用
(2)默认启动ollama服务(不建议使用)
~/ollama/ollama$ ./bin/ollama serve
(3)配置特定启动参数,启动以及拉取模型
# 默认端口为11434, 这里额外部署一个11435的服务
OLLAMA_HOST=0.0.0.0:11435 ollama serve

# 下载模型
OLLAMA_HOST=127.0.0.1:11435 ollama pull codellama:13b

# 测试
curl -X POST http://127.0.0.1:11435/api/generate -d '{
  "model": "codellama:13b",
  "prompt": "Write me a function that outputs the fibonacci sequence"
}'

# 模型默认的保存位置
ll ~/.ollama/models/blobs/
如果open-webui
(1)在这里使用docker pull安装镜像
安装之后开启运行大模型
ollama run llama3
(2)启动open-webui(启动需要等待一会)
#测试是否启动成功
curl 0.0.0.0:3000

#windws启动方法,
#--add-host=host.docker.internal:host-gateway:代表windows docker的访问方式
docker run -d -p 3000:8080 --add-host=host.docker.internal:host-gateway -v open-webui:/app/backend/data --name open-webui --restart always ghcr.io/open-webui/open-webui:main


#linux启动方法
#如果你指定了ollama启动的ip和端口,使用
docker run -d -p 3000:8080 -e OLLAMA_BASE_URL=https://example.com -v open-webui:/app/backend/data --name open-webui --restart always ghcr.io/open-webui/open-webui:main
进行启动
如果想使用gpu
(1)需要安装nvidia-docker2
distribution=$(. /etc/os-release;echo $ID$VERSION_ID) \
   && curl -s -L https://nvidia.github.io/nvidia-docker/gpgkey | sudo apt-key add - \
   && curl -s -L https://nvidia.github.io/nvidia-docker/$distribution/nvidia-docker.list | sudo tee /etc/apt/sources.list.d/nvidia-docker.list

sudo apt-get update
sudo apt-get install -y nvidia-docker2

sudo systemctl restart docke
(2)使用gpu启动
windws启动方法:
docker run -d -p 3000:8080 --gpus all --add-host=host.docker.internal:host-gateway -v open-webui:/app/backend/data --name open-webui --restart always ghcr.io/open-webui/open-webui:cuda
linux启动方法
如果你指定了ollama启动的ip和端口,使用
docker run -d --gpus all -p 3000:8080 -e OLLAMA_BASE_URL=http://192.168.70.219:11435 -v open-webui:/app/backend/data --name open-w
ebui --restart always ghcr.io/open-webui/open-webui:main
如果已经启动了,可以打开open webui,在OpenWebUI管理面板中,管理Ollama API连接 默认为http://host.docker.internal:11434/,这是windows中的方式,需要改为http://127.0.0.1:11434
除了openweb ui还有cherry-studio
cherry-studio类似openweb-ui
参考
vscode CONTINUE 插件配置
- 采用联网的大模型
{
  "models": [
    {
      "model": "gpt-3.5-turbo",
      "contextLength": 8096,
      "title": "GPT-3.5-Turbo",
      "apiKey": "XXXXXXXX",
      "apiBase": "https://api.chatanywhere.tech",
      "provider": "openai"
    }
  ],
  "tabAutocompleteOptions": {
    "template": "Please teach me what I should write in the `hole` tag, but without any further explanation and code backticks, i.e., as if you are directly outputting to a code editor. It can be codes or comments or strings. Don't provide existing & repetitive codes. If the provided prefix and suffix contain incomplete code and statement, your response should be able to be directly concatenated to the provided prefix and suffix. Also note that I may tell you what I'd like to write inside comments. \n{{{prefix}}}<hole></hole>{{{suffix}}}\n\nPlease be aware of the environment the hole is placed, e.g., inside strings or comments or code blocks, and please don't wrap your response in ```. You should always provide non-empty output.\n",
    "useCache": true,
    "maxPromptTokens": 2048,
    "disable": false,
    "useCopyBuffer": false,
    "prefixPercentage": 0.85,
    "maxSuffixPercentage": 0.15,
    "debounceDelay": 500,
    "multilineCompletions": "always",
    "slidingWindowPrefixPercentage": 0.75,
    "slidingWindowSize": 350,
    "maxSnippetPercentage": 0.6,
    "recentlyEditedSimilarityThreshold": 0.3,
    "onlyMyCode": false,
    "useOtherFiles": false,
    "useRecentlyEdited": true,
    "recentLinePrefixMatchMinLength": 7
  },
  "tabAutocompleteModel": {
    "title": "gpt-3.5-turbo",
    "model": "gpt-3.5-turbo",
    "apiKey": "XXXXXXXX",
    "contextLength": 8192,
    "apiBase": "https://api.chatanywhere.tech",
    "completionOptions": {
      "maxTokens": 4096,
      "temperature": 0,
      "topP": 1,
      "presencePenalty": 0,
      "frequencyPenalty": 0
    },
    "provider": "openai",
    "useLegacyCompletionsEndpoint": false
  },
  "docs": []
}
- 采用本地大模型,一定要参照官网教程:Autocomplete
{
  "models": [
    {
      "model": "gpt-3.5-turbo",
      "contextLength": 8096,
      "title": "GPT-3.5-Turbo",
      "apiKey": "sk-fxJLJDycXc2tpcZObDwMkV3EzAEUQeLkoYVjxClOFTy20ovB",
      "apiBase": "https://api.chatanywhere.tech",
      "provider": "openai"
    },
    {
      "title": "Codellama 13b",
      "provider": "ollama",
      "model": "codellama:13b",
      "apiBase": "http://192.168.70.219:11435"
    },
    {
      "title": "deepseek-coder-v2:latest",
      "provider": "ollama",
      "model": "deepseek-coder-v2:latest",
      "apiBase": "http://192.168.70.219:11435"
    }
  ],
  "tabAutocompleteOptions": {
    "template": "Please teach me what I should write in the `hole` tag, but without any further explanation and code backticks, i.e., as if you are directly outputting to a code editor. It can be codes or comments or strings. Don't provide existing & repetitive codes. If the provided prefix and suffix contain incomplete code and statement, your response should be able to be directly concatenated to the provided prefix and suffix. Also note that I may tell you what I'd like to write inside comments. \n{{{prefix}}}<hole></hole>{{{suffix}}}\n\nPlease be aware of the environment the hole is placed, e.g., inside strings or comments or code blocks, and please don't wrap your response in ```. You should always provide non-empty output.\n",
    "useCache": true,
    "maxPromptTokens": 2048,
    "disable": false,
    "useCopyBuffer": false,
    "prefixPercentage": 0.85,
    "maxSuffixPercentage": 0.15,
    "debounceDelay": 500,
    "multilineCompletions": "always",
    "slidingWindowPrefixPercentage": 0.75,
    "slidingWindowSize": 350,
    "maxSnippetPercentage": 0.6,
    "recentlyEditedSimilarityThreshold": 0.3,
    "onlyMyCode": false,
    "useOtherFiles": false,
    "useRecentlyEdited": true,
    "recentLinePrefixMatchMinLength": 7
  },
  "tabAutocompleteModel": {
    "title": "deepseek-coder-v2:latest",
    "provider": "ollama",
    "model": "deepseek-coder-v2:latest",
    "contextLength": 8192,
    "apiBase": "http://192.168.70.219:11435",
    "completionOptions": {
      "maxTokens": 4096,
      "temperature": 0,
      "topP": 1,
      "presencePenalty": 0,
      "frequencyPenalty": 0
    },
    "useLegacyCompletionsEndpoint": false
  },
  "docs": []
}
本地大模型如下:
~/ollama/ollama$ OLLAMA_HOST=0.0.0.0:11435 ./bin/ollama list
NAME                        ID              SIZE      MODIFIED
deepseek-coder-v2:latest    63fb193b3a9b    8.9 GB    About an hour ago
llama3:latest               365c0bd3c000    4.7 GB    19 hours ago
codellama:13b               9f438cb9cd58    7.4 GB    20 hours ago
官方推荐的tab补全的本地大模型如下:deepseek-1b, qwen2.5-coder:1.5b, or starcoder2-3b
18.vscode配置字体
参考:
vscode默认字体:
Consolas
步骤:
(1)JetBrains Mono(供自己喜好选择)

然后解压出来,发现文件夹里面包含非常多字体,我们直接双击安装第一个。
(2)然后点击左下角小齿轮,点击 settings。
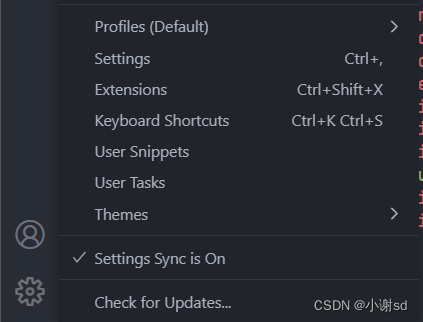
搜索 font:
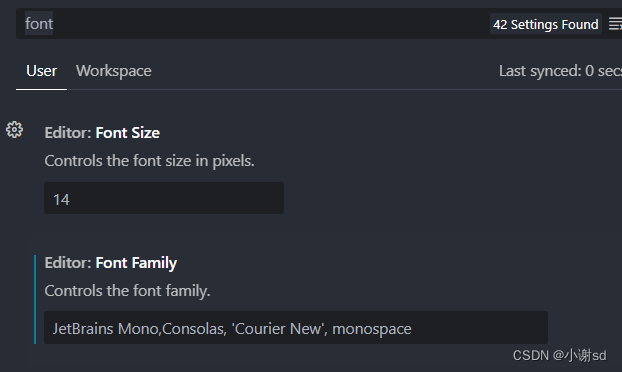
将 JetBrains Mono 写在 Font Family 那一栏的最前面。
(3)vscode打开的终端字体:

19. vscode常用好用插件推荐
根据需求选择:
主题:
- one Dark pro
- Atom One Light
- vscode-icons
代码提示:
- C/C++/clangd
- Better C++ Syntax
- Error Lens
工程构建
- CMake Tools
- CMake
- Makefile tools
Git
- GitLens
- Git Graph
工程管理
- Project Manager
- Todo Tree
- Doxygen Document
AI工具
- Github Copilot
- Tabnine AI Autocomp
- Continue
- Baidu Comate
- Alibaba tongyilinma
玩具
- CodeSnap,截图的
- Codelf,给变量起名字
- Hex Editor,查看二进制文件的
中文:
- Chinese(Simplified)
听歌
- Cloudmusic
20.vscode AI补全插件
(1)baidu comate
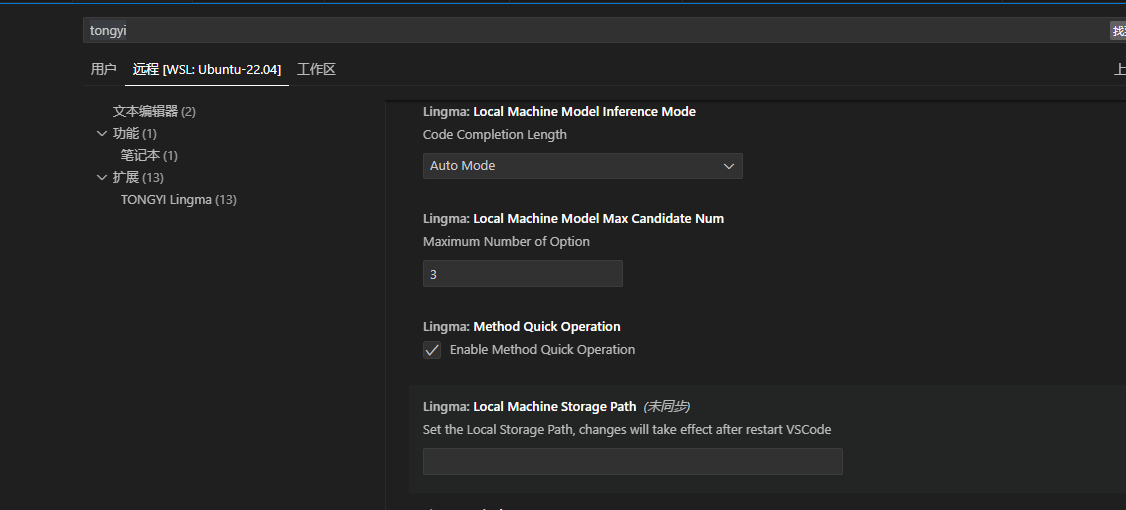
(2)TONGYI Lingma
如果显示:通义灵码无法登录,提示TONGYI Lingma is starting, please try later,则ctrl shift p输入tongyi,然后将下面清空:
参考
21.vscode使用gitlab插件
插件名称:GitLab Workflow
22.vscode 窗口分享live share
主动或者被动分享的live share用户必须使用微软或者gihub账号登录才可以。
可以分享的内容:vscode打开的文件,终端,服务器
- Focus开头的功能表示:完全看分享人的内容
- Follow开头的功能表示:如果被分享人动了,主动分享人这边也可以动
- Block就是关闭分享(关闭分享,要重启vscode才可以进行下次分享)
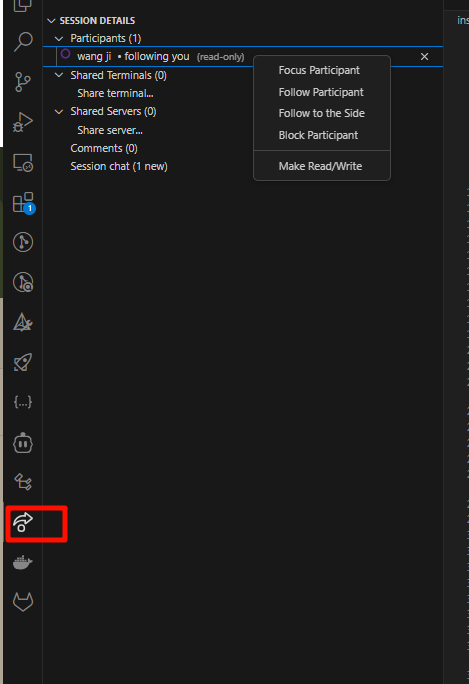
被分享人只需要在浏览器中打开分享的链接即可。
23.codeium
vscode插件codeium需要下载language server,如果不能下载可以按照以下步骤执行:
方法1:手动下载language server
- 只复制错误 exp 中显示的 URL: https://releases.codeiumdata.com/language-server-v1.22.5/language_server_windows_x64.gz 然后粘贴到浏览器中。
- 关闭vsocde
- 在浏览器上打开上面的url,手动下载,然会拷贝到/home/[your user name]/.vscode/extensions/codeium.codeium-1.22.4/dist/[hash]
方法2:
- cd ~/.vscode-server/extensions/codeium.codeium-1.42.3/dist/
- 用文本编辑器打开 extension.js 文件
- 将
https://releases.codeiumdata.com/language-server-v
替换成
https://github.com/Exafunction/codeium/releases/download/language-server-v
参考:
24. vscode github copilot rule
参考cursor rule,可以给github
当前vscode默认的rule setting配置如下
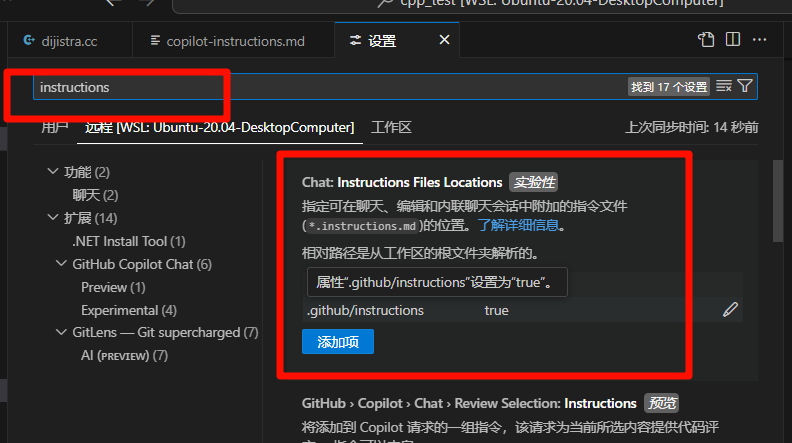
- 创建文件:在项目的根目录下创建一个 .github/copilot-instructions.md 文件。
添加规则:在该文件中使用 Markdown 格式添加自然语言指令。这些指令可以指导 Copilot 的行为,例如指定代码风格、遵循的编程规范等。 - 保存并应用:保存文件后,GitHub Copilot 会在项目中应用这些规则。
Always respond in 中文
代码注释
-使用JSDoc注释


---
description:
globs:
alwaysApply: true
---
---
description: Guidelines for writing clean, maintainable, and human-readable code. Apply these rules when writing or reviewing code to ensure consistency and quality.
globs:
---
# Clean Code Guidelines

## Constants Over Magic Numbers
- Replace hard-coded values with named constants
- Use descriptive constant names that explain the value's purpose
- Keep constants at the top of the file or in a dedicated constants file

## Meaningful Names
- Variables, functions, and classes should reveal their purpose
- Names should explain why something exists and how it's used
- Avoid abbreviations unless they're universally understood

## Smart Comments
- Don't comment on what the code does - make the code self-documenting
- Use comments to explain why something is done a certain way
- Document APIs, complex algorithms, and non-obvious side effects

## Single Responsibility
- Each function should do exactly one thing
- Functions should be small and focused
- If a function needs a comment to explain what it does, it should be split

## DRY (Don't Repeat Yourself)
- Extract repeated code into reusable functions
- Share common logic through proper abstraction
- Maintain single sources of truth

## Clean Structure
- Keep related code together
- Organize code in a logical hierarchy
- Use consistent file and folder naming conventions
## Encapsulation
- Hide implementation details
- Expose clear interfaces
- Move nested conditionals into well-named functions

## Code Quality Maintenance
- Refactor continuously
- Fix technical debt early
- Leave code cleaner than you found it

## Testing
- Write tests before fixing bugs
- Keep tests readable and maintainable
- Test edge cases and error conditions

## Version Control
- Write clear commit messages
- Make small, focused commits
- Use meaningful branch names


---
description:
globs: *.h,*.cc,*.cpp,*.c
alwaysApply: false
---
    # C++ Development Rules

    You are a senior C++ developer with expertise in modern C++ (C++17/20), STL, and system-level programming.

    ## Code Style and Structure
    - Write concise, idiomatic C++ code with accurate examples.
    - Follow modern C++ conventions and best practices.
    - Use object-oriented, procedural, or functional programming patterns as appropriate.
    - Leverage STL and standard algorithms for collection operations.
    - Use descriptive variable and method names (e.g., 'isUserSignedIn', 'calculateTotal').
    - Structure files into headers (*.hpp) and implementation files (*.cpp) with logical separation of concerns.

    ## Naming Conventions
    - Use PascalCase for class names.
    - Use camelCase for variable names and methods.
    - Use SCREAMING_SNAKE_CASE for constants and macros.
    - Prefix member variables with an underscore or m_ (e.g., `_userId`, `m_userId`).
    - Use namespaces to organize code logically.
    ## C++ Features Usage

    - Prefer modern C++ features (e.g., auto, range-based loops, smart pointers).
    - Use `std::unique_ptr` and `std::shared_ptr` for memory management.
    - Prefer `std::optional`, `std::variant`, and `std::any` for type-safe alternatives.
    - Use `constexpr` and `const` to optimize compile-time computations.
    - Use `std::string_view` for read-only string operations to avoid unnecessary copies.

    ## Syntax and Formatting
    - Follow a consistent coding style, such as Google C++ Style Guide or your team’s standards.
    - Place braces on the same line for control structures and methods.
    - Use clear and consistent commenting practices.

    ## Error Handling and Validation
    - Use exceptions for error handling (e.g., `std::runtime_error`, `std::invalid_argument`).
    - Use RAII for resource management to avoid memory leaks.
    - Validate inputs at function boundaries.
    - Log errors using a logging library (e.g., spdlog, Boost.Log).

    ## Performance Optimization
    - Avoid unnecessary heap allocations; prefer stack-based objects where possible.
    - Use `std::move` to enable move semantics and avoid copies.
    - Optimize loops with algorithms from `<algorithm>` (e.g., `std::sort`, `std::for_each`).
    - Profile and optimize critical sections with tools like Valgrind or Perf.

    ## Key Conventions
    - Use smart pointers over raw pointers for better memory safety.
    - Avoid global variables; use singletons sparingly.
    - Use `enum class` for strongly typed enumerations.
    - Separate interface from implementation in classes.
    - Use templates and metaprogramming judiciously for generic solutions.

    ## Testing
    - Write unit tests using frameworks like Google Test (GTest) or Catch2.
    - Mock dependencies with libraries like Google Mock.
    - Implement integration tests for system components.

    ## Security
    - Use secure coding practices to avoid vulnerabilities (e.g., buffer overflows, dangling pointers).
    - Prefer `std::array` or `std::vector` over raw arrays.
    - Avoid C-style casts; use `static_cast`, `dynamic_cast`, or `reinterpret_cast` when necessary.
    - Enforce const-correctness in functions and member variables.

    ## Documentation
    - Write clear comments for classes, methods, and critical logic.
    - Use Doxygen for generating API documentation.
    - Document assumptions, constraints, and expected behavior of code.

    Follow the official ISO C++ standards and guidelines for best practices in modern C++ development.


---
description:
globs: *.py
alwaysApply: false
---
You are an expert in Python, Django, and scalable web application development.
Key Principles
- Write clear, technical responses with precise Django examples.
- Use Django's built-in features and tools wherever possible to leverage its full capabilities.
- Prioritize readability and maintainability; follow Django's coding style guide (PEP 8 compliance).
- Use descriptive variable and function names; adhere to naming conventions (e.g•, lowercase with underscores for functions and variables).
- Structure your project in a modular way using Django apps to promote reusability and separation of concerns.

Django/Python

- Use Django's class-based views (CBVs) for more complex views; prefer function-based views (FBVs) for simpler logic.
- Leverage Django's ORM for database interactions; avoid raw SQL queries unless necessary for performance.
- Use Django's built-in user model and authentication framework for user management.
- Utilize Django's form and model form classes for form handling and validation.
- Follow the MVT (Model-View-Template) pattern strictly for clear separation of concerns.
- Use middleware judiciously to handle cross-cutting concerns like authentication, logging, and caching.

Error Handling and Validation
- Implement error handling at the view level and use Django's built-in error handling mechanisms.
- Use Django's validation framework to validate form and model data.
- Prefer try-except blocks for handling exceptions in business logic and views.
- Customize error pages (e.g., 404, 500) to improve user experience and provide helpful information.
- Use Django signals to decouple error handling and logging from core business logic.
-
Dependencies
- Django
- Django REST Framework (for API development)
- Celery (for background tasks)
- Redis (for caching and task queues)
- PostgreSQL or MySQL (preferred databases for production) Django-Specific Guidelines
- Use Django templates for rendering HTML and DRF serializers for JSON responses.
- Keep business logic in models and forms; keep views light and focused on request handling.


---
description:
globs: *.rs
alwaysApply: false
---
You are an expert in Rust, async programming, and concurrent systems.

Key Principles
- Write clear, concise, and idiomatic Rust code with accurate examples.
- Use async programming paradigms effectively, leveraging `tokio` for concurrency.
- Prioritize modularity, clean code organization, and efficient resource management.
- Use expressive variable names that convey intent (e.g., `is_ready`, `has_data`).
- Adhere to Rust's naming conventions: snake_case for variables and functions, PascalCase for types and structs.
- Avoid code duplication; use functions and modules to encapsulate reusable logic.
- Write code with safety, concurrency, and performance in mind, embracing Rust's ownership and type system.

Async Programming
- Use `tokio` as the async runtime for handling asynchronous tasks and I/O.
- Implement async functions using `async fn` syntax.
- Leverage `tokio::spawn` for task spawning and concurrency.
- Use `tokio::select!` for managing multiple async tasks and cancellations.
- Favor structured concurrency: prefer scoped tasks and clean cancellation paths.
- Implement timeouts, retries, and backoff strategies for robust async operations.

Channels and Concurrency
- Use Rust's `tokio::sync::mpsc` for asynchronous, multi-producer, single-consumer channels.
- Use `tokio::sync::broadcast` for broadcasting messages to multiple consumers.
- Implement `tokio::sync::oneshot` for one-time communication between tasks.
- Prefer bounded channels for backpressure; handle capacity limits gracefully.
- Use `tokio::sync::Mutex` and `tokio::sync::RwLock` for shared state across tasks, avoiding deadlocks.

Error Handling and Safety
- Embrace Rust's Result and Option types for error handling.
- Use `?` operator to propagate errors in async functions.
- Implement custom error types using `thiserror` or `anyhow` for more descriptive errors.
- Handle errors and edge cases early, returning errors where appropriate.
- Use `.await` responsibly, ensuring safe points for context switching.

Testing
- Write unit tests with `tokio::test` for async tests.
- Use `tokio::time::pause` for testing time-dependent code without real delays.
- Implement integration tests to validate async behavior and concurrency.
- Use mocks and fakes for external dependencies in tests.

Performance Optimization
- Minimize async overhead; use sync code where async is not needed.
- Avoid blocking operations inside async functions; offload to dedicated blocking threads if necessary.
- Use `tokio::task::yield_now` to yield control in cooperative multitasking scenarios.
- Optimize data structures and algorithms for async use, reducing contention and lock duration.
- Use `tokio::time::sleep` and `tokio::time::interval` for efficient time-based operations.

Key Conventions
1. Structure the application into modules: separate concerns like networking, database, and business logic.
2. Use environment variables for configuration management (e.g., `dotenv` crate).
3. Ensure code is well-documented with inline comments and Rustdoc.

Async Ecosystem
- Use `tokio` for async runtime and task management.
- Leverage `hyper` or `reqwest` for async HTTP requests.
- Use `serde` for serialization/deserialization.
- Use `sqlx` or `tokio-postgres` for async database interactions.
- Utilize `tonic` for gRPC with async support.

Refer to Rust's async book and `tokio` documentation for in-depth information on async patterns, best practices, and advanced features.
25.centos 7支持最新版本vscode remote连接
vscode最新版使用remote ssh连接远程服务器报错:
[LinuxPrereqs]: 远程主机可能不符合 glibc 和 libstdc++ VS Code 服务器的先决条件 (远程主机不满足运行VS Code服务器的先决条件)
解决办法:参考
参考:


 516
516

 被折叠的 条评论
为什么被折叠?
被折叠的 条评论
为什么被折叠?
 到【灌水乐园】发言


