


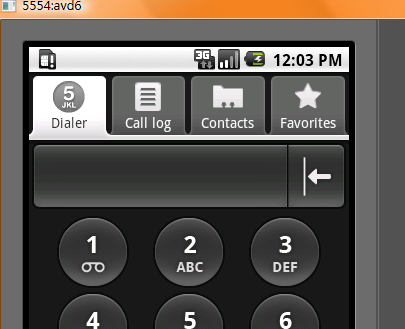
使用TabHost 可以在一个屏幕间进行不同版面的切换,例如android自带的拨号应用,截图:
查看tabhost的源代码,主要实例变量有:
 private
TabWidget mTabWidget;
private
FrameLayout mTabContent;
private
List
<
TabSpec
>
mTabSpecs
private
TabWidget mTabWidget;
private
FrameLayout mTabContent;
private
List
<
TabSpec
>
mTabSpecs
也就是说我们的tabhost必须有这三个东西,所以我们的.xml文件就会有规定:继续查看源代码:

 if
(mTabWidget
==
null
)
if
(mTabWidget
==
null
)
 {
{ throw new RuntimeException( "Your TabHost must have a TabWidget whose id attribute is 'android.R.id.tabs'");
 }
mTabContent
=
(FrameLayout) findViewById(com.android.internal.R.id.tabcontent);
if
(mTabContent
==
null
)
{ throw new RuntimeException( "Your TabHost must have a FrameLayout whose id attribute is 'android.R.id.tabcontent'"); }
}
mTabContent
=
(FrameLayout) findViewById(com.android.internal.R.id.tabcontent);
if
(mTabContent
==
null
)
{ throw new RuntimeException( "Your TabHost must have a FrameLayout whose id attribute is 'android.R.id.tabcontent'"); }
也就是说我们的.xml文件需要TabWidget和FrameLayout标签。
接下来构建我们自己的tab实例:
有两种方式可以实现:
一种是继承TabActivity 类,可以使用android的自己内部定义好的.xml资源文件作容器文件。也就是在我们的代码中使用getTabHost(); , 而相应的后台源码是这样的:
this
.setContentView(com.android.internal.R.layout.tab_content);
在系统的资源文件中可以看见这个layout
有了容器,然后我们就需要我们为每个tab分配内容,当然要可以是如何类型的标签:
例如我们构建一下.xml文件
首先tab1.xml 是一个LinearLayout布局
<?
xml version
=
"
1.0
"
encoding
=
"
utf-8
"
?>
<
LinearLayout xmlns:android
=
"
http://schemas.android.com/apk/res/android
"
android:id
=
"
@+id/LinearLayout01
"
android:layout_width
=
"
wrap_content
"
android:layout_height
=
"
wrap_content
"
>
<
TextView android:text
=
"
tab1 with linear layout
"
android:id
=
"
@+id/TextView01
"
android:layout_width
=
"
wrap_content
"
android:layout_height
=
"
wrap_content
"
>
</
TextView
>
</
LinearLayout
>
然后是tab2.xml是一个FrameLayout布局
<?
xml version
=
"
1.0
"
encoding
=
"
utf-8
"
?>
<
FrameLayout xmlns:android
=
"
http://schemas.android.com/apk/res/android
"
android:id
=
"
@+id/FrameLayout02
"
android:layout_width
=
"
wrap_content
"
android:layout_height
=
"
wrap_content
"
>
<
LinearLayout android:id
=
"
@+id/LinearLayout02
"
android:layout_width
=
"
wrap_content
"
android:layout_height
=
"
wrap_content
"
>
<
TextView android:text
=
"
tab2
"
android:id
=
"
@+id/TextView01
"
android:layout_width
=
"
wrap_content
"
android:layout_height
=
"
wrap_content
"
>
</
TextView
>
</
LinearLayout
>
</
FrameLayout
>
接着要注册这两个FrameLayout为tabhost的Content,也就是接下来的代码:
LayoutInflater inflater_tab1
=
LayoutInflater.from(
this
); inflater_tab1.inflate(R.layout.tab1, mTabHost.getTabContentView()); inflater_tab1.inflate(R.layout.tab2, mTabHost.getTabContentView());
然后需要构建前面说的tabhost的第三个实例变量对应得内容,源代码中是这样的:
private
List
<
TabSpec
>
mTabSpecs
=
new
ArrayList
<
TabSpec
>
(
2
);
初始化是两个tab的空间然后会自动扩展:
好 我们构建我们的tabspec:
mTabHost.addTab(mTabHost.newTabSpec(
"
tab_test1
"
).setIndicator(
"
TAB 11
"
).setContent(R.id.LinearLayout01)); mTabHost.addTab(mTabHost.newTabSpec(
"
tab_test1
"
).setIndicator(
"
TAB 11
"
).setContent(R.id.FrameLayout02));
也就是把我们的2个layout作为他的content,当然FrameLayout中可以有其他的布局,来放我的组件。
我们不需要在代码里面设置setContentView();因为getTabHost(); 这个方法调用后就已经设置了,源代码:
if
(mTabHost
==
null
)
{ this.setContentView(com.android.internal.R.layout.tab_content); }
也就是把系统的tab_content当做view设置。
运行后如下:

完整代码:
TabHost mTabHost
=
getTabHost(); LayoutInflater inflater_tab1
=
LayoutInflater.from(
this
); inflater_tab1.inflate(R.layout.tab1, mTabHost.getTabContentView()); inflater_tab1.inflate(R.layout.tab2, mTabHost.getTabContentView()); mTabHost.addTab(mTabHost.newTabSpec(
"
tab_test1
"
).setIndicator(
"
TAB 11
"
).setContent(R.id.LinearLayout01)); mTabHost.addTab(mTabHost.newTabSpec(
"
tab_test1
"
).setIndicator(
"
TAB 11
"
).setContent(R.id.FrameLayout02));
还有一种就是定义我们自己的tabhost:不用继承TabActivity
首先建立我们自己的.xml文件,当然要包含Tabhost,TabWidget,FrameLayout,着3个标签:
<?
xml version
=
"
1.0
"
encoding
=
"
utf-8
"
?>
<
TabHost xmlns:android
=
"
http://schemas.android.com/apk/res/android
"
android:id
=
"
@+id/tabhost
"
android:layout_width
=
"
fill_parent
"
android:layout_height
=
"
fill_parent
"
>
<
LinearLayout android:orientation
=
"
vertical
"
android:layout_width
=
"
fill_parent
"
android:layout_height
=
"
fill_parent
"
>
<
TabWidget android:id
=
"
@android:id/tabs
"
android:layout_width
=
"
fill_parent
"
android:layout_height
=
"
wrap_content
"
/>
<
FrameLayout android:id
=
"
@android:id/tabcontent
"
android:layout_width
=
"
fill_parent
"
android:layout_height
=
"
fill_parent
"
>
</
FrameLayout
>
</
LinearLayout
>
</
TabHost
>
注意的是:除了tabhost的id可以自定义外,其他的必须使用系统的id,为什么后面说,
当然我们可以在FrameLayout里面添加view来作为tab的内容只需要在create tabspce时候添加就可以了,我们为了把每个tab的内容分开我们依然使用前面用到的两个tab xml文件
java代码:
获取TabHost 通过findviewbyid,
setContentView(R.layout.main); TabHost mTabHost
=
(TabHost)findViewById(R.id.tabhost);
接下来很重要的一步是要使用TabHost.setup();
作用是来初始化我们的TabHost容器:
源代码是这样说的:
<
p
>
Call setup() before adding tabs
if
loading TabHost using findViewById().
<
i
><
b
>
However
</
i
></
b
>
: You
do
*
not need to call setup() after getTabHost() in
{@link android.app.TabActivity TabActivity}
.
也就是说通过findviewbyid,方法获得tabhost必须setup 而通过getTabHost则不用。
setup干什么呢:源代码
mTabWidget
=
(TabWidget) findViewById(com.android.internal.R.id.tabs);
if
(mTabWidget
==
null
)
{ throw new RuntimeException( "Your TabHost must have a TabWidget whose id attribute is 'android.R.id.tabs'"); }
mTabContent
=
(FrameLayout) findViewById(com.android.internal.R.id.tabcontent);
if
(mTabContent
==
null
)
{ throw new RuntimeException( "Your TabHost must have a FrameLayout whose id attribute is 'android.R.id.tabcontent'"); }
他主要是初始化了tabhost的两个实例变量,这里也回答了为什么我们的id必须使用系统定义的id的原因
接下来工作就和前面相同了:
LayoutInflater inflater_tab1
=
LayoutInflater.from(
this
); inflater_tab1.inflate(R.layout.tab1, mTabHost.getTabContentView()); inflater_tab1.inflate(R.layout.tab2, mTabHost.getTabContentView()); mTabHost.addTab(mTabHost.newTabSpec(
"
tab_test1
"
).setIndicator(
"
TAB a
"
).setContent(R.id.LinearLayout01)); mTabHost.addTab(mTabHost.newTabSpec(
"
tab_test2
"
).setIndicator(
"
TAB b
"
).setContent(R.id.FrameLayout02));
完整代码:
setContentView(R.layout.main); TabHost mTabHost
=
(TabHost)findViewById(R.id.tabhost); mTabHost.setup(); LayoutInflater inflater_tab1
=
LayoutInflater.from(
this
); inflater_tab1.inflate(R.layout.tab1, mTabHost.getTabContentView()); inflater_tab1.inflate(R.layout.tab2, mTabHost.getTabContentView()); mTabHost.addTab(mTabHost.newTabSpec(
"
tab_test1
"
).setIndicator(
"
TAB a
"
).setContent(R.id.LinearLayout01)); mTabHost.addTab(mTabHost.newTabSpec(
"
tab_test2
"
).setIndicator(
"
TAB b
"
).setContent(R.id.FrameLayout02));
运行结果同上。 如有问题欢迎提出。
转载请说明出处。。。


 1280
1280


 被折叠的 条评论
为什么被折叠?
被折叠的 条评论
为什么被折叠?
 到【灌水乐园】发言


